eclipse下配置安装ssm图文教程(web版)
eclipse下配置安装ssm图文教程(web版)
一、安装所需jar包
1.1 mybatis安装包
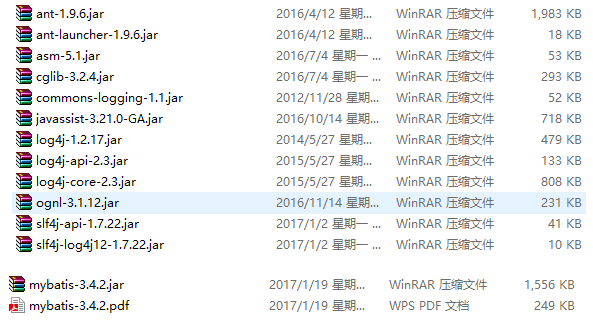
可以进入GitHub的https://github.com/mybatis/mybatis-3/releases下载所需版本,本文版本是mybatis-3.4.2
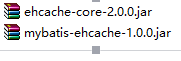
Mybatis实现缓存的jar包:
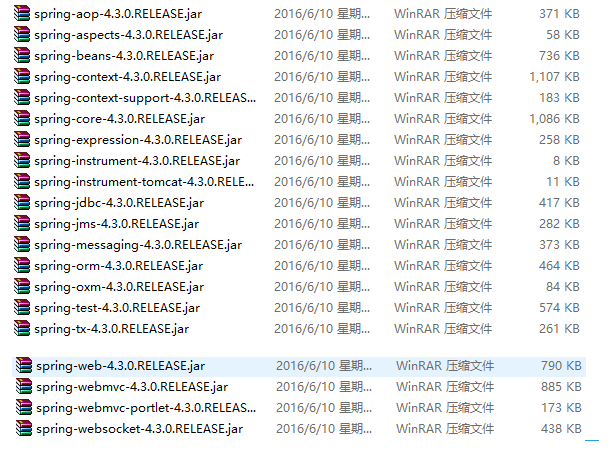
1.2 spring安装包
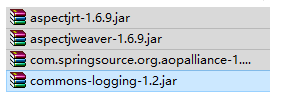
补充:spring配置aop的aspect包
可以进入spring官网的http://projects.spring.io/spring-framework/
下载所需版本,本文版本是spring-framework-4.3.0.RELEASE
1.3 springMVC安装包
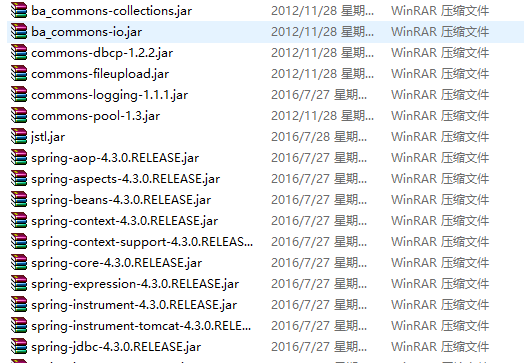
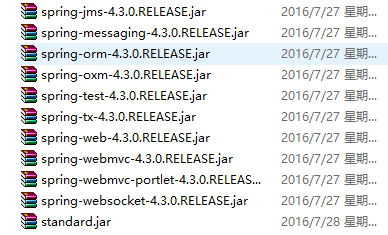
springMVC是以spring应用为基础的,没有官网提供下载,可以百度下载。
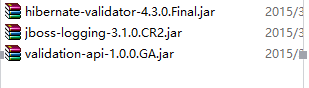
hibernate-validator(springMVC校验所需包)
1.4 ssm的框架间的连接包或扩展包

springMVC实现json交互所需jar包:与下方的jar任选其一

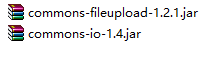
文件上传的jar包:
Mybatis和spring连接,mysql数据库连接的jar包:

特别注意:可能出现相同的包导入多个版本引发冲突,请根据自己的情况保留一个合适的版本
二、安装步骤
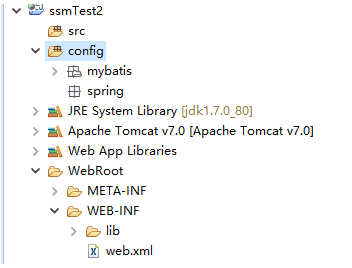
2.1 创建动态web项目
项目结构如下:
2.2 创建并配置mybatis的核心配置文件SqlMapConfig.xml
配置如下:
<?xml version="1.0" encoding="UTF-8" ?>
<!DOCTYPE configuration PUBLIC "-//mybatis.org//DTD Config 3.0//EN"
"http://mybatis.org/dtd/mybatis-3-config.dtd">
<configuration>
<!--全局setting配置,根据需要添加-->
<!-- With this configuration, can now be used anywhere that
a package where MyBatis will search for beans -->
<!-- 配置别名 -->
<typeAliases>
<!-- 批量扫描别名 -->
<package name="com.test.ssm.custom"/>
</typeAliases>
<!-- Register all interfaces in a package as mappers -->
<!-- 配置mapper
由于使用spring和mybatis的整合包进行mapper扫描,这里就不需要配置了。
必须遵循:mapper.xml和mapper接口必须同名且在同一目录下
-->
<!--
<mappers>
<package name="org.mybatis.builder"/>
</mappers> -->
</configuration>
2.3 创建spring的配置spring-*.xml(*包括:dao、service、transaction)的头部信息
配置如下:
<?xml version="1.0" encoding="UTF-8"?>
<beans xmlns="http://www.springframework.org/schema/beans"
xmlns:xsi="http://www.w3.org/2001/XMLSchema-instance"
xmlns:aop="http://www.springframework.org/schema/aop"
xmlns:tx="http://www.springframework.org/schema/tx"
xmlns:context="http://www.springframework.org/schema/context"
xmlns:mvc="http://www.springframework.org/schema/mvc"
xsi:schemaLocation="
http://www.springframework.org/schema/beans
http://www.springframework.org/schema/beans/spring-beans.xsd
http://www.springframework.org/schema/tx
http://www.springframework.org/schema/tx/spring-tx.xsd
http://www.springframework.org/schema/aop
http://www.springframework.org/schema/aop/spring-aop.xsd
http://www.springframework.org/schema/context
http://www.springframework.org/schema/context/spring-context.xsd
http://www.springframework.org/schema/mvc
http://www.springframework.org/schema/mvc/spring-mvc.xsd">
</beans>
2.4 配置spring管理mybatis的dao配置文件spring-dao.xml
配置(不含头部信息)如下:
<!-- 加载指定properties文件 -->
<context:property-placeholder location="classpath:db.properties" />
<!-- 配置数据库连接 -->
<!-- 配置数据源dbcp -->
<bean id="dataSource" class="org.apache.commons.dbcp.BasicDataSource"
destroy-method="close">
<!-- results in a setDriverClassName(String) call -->
<property name="driverClassName" value="${jdbc.driverClassName}" />
<property name="url" value="${jdbc.url}" />
<property name="username" value="${jdbc.username}" />
<property name="password" value="${jdbc.password}" />
</bean>
<!-- 加载指定的properties文件 -->
<context:property-placeholder location="classpath:db.properties"/>
<!-- 配置sqlSessionFactory -->
<bean id="sqlSessionFactory" class="org.mybatis.spring.SqlSessionFactoryBean">
<!-- 数据库连接池 -->
<property name="dataSource" ref="dataSource"/>
<!-- 加载mybatis的全局配置文件 -->
<property name="configLocation" value="classpath:mybatis/SqlMapConfig.xml"/>
</bean>
<!-- mapper扫描器 -->
<bean class="org.mybatis.spring.mapper.MapperScannerConfigurer">
<!-- 扫描包路径,如果需要扫描多个包,中间使用使用半角逗号隔开 -->
<property name="basePackage" value="com.test.ssm.mapper,com.test.ssm.mapper2" />
<!-- 此属性在对应的类中定义存在为String类型,所传入值为String类型 -->
<property name="sqlSessionFactoryBeanName" value="sqlSessionFactory" />
<!-- 下方的引用bean会失败是原因:在org.mybatis.spring.mapper.MapperScannerConfigurer
中的属性sqlSessionFactory类型为org.apache.ibatis.session.SqlSessionFactory,而 依赖的sqlSessionFactory的类型为org.mybatis.spring.SqlSessionFactoryBean,
两者的类型不一致,所有无法依赖 -->
<!-- <property name="sqlSessionFactory" ref="sqlSessionFactory"/> -->
</bean>
补充:db.properties配置如下:
jdbc.driverClassName = com.mysql.jdbc.Driver
jdbc.url = jdbc:mysql://localhost:3306/mybatis?useUnicode=true&characterEncoding=UTF-8
jdbc.username = root
jdbc.password =
2.5 配置spring管理service的service配置文件spring-service.xml
配置(不含头部信息)如下:
<!-- 可以扫描controller、service、... 这里扫描controller,指定serviceImpl的包 -->
<context:component-scan base-package="com.test.ssm.serviceImpl"></context:component-scan>
<!-- 商品管理的Service -->
<!-- <bean id="itemsService" class="com.test.ssm.serviceImpl.ItemsServiceImpl"/> -->
2.6 配置spring管理事务的transaction配置文件spring-transaction.xml
配置(不含头部信息)如下:
<!-- 事务管理器
对mybatis操作数据库事务控制,spring使用JDBC的事务控制
-->
<bean id="transactionManager" class="org.springframework.jdbc.datasource.DataSourceTransactionManager">
<!-- 数据源
dataSource在applicationContext-dao.xml配置了
-->
<property name="dataSource" ref="dataSource"/>
</bean>
<!-- 通知给指定的事务管理器transactionManager -->
<tx:advice id="txAdvice" transaction-manager="transactionManager">
<tx:attributes>
<!-- 传播行为 -->
<tx:method name="save*" propagation="REQUIRED"/>
<tx:method name="delete*" propagation="REQUIRED"/>
<tx:method name="insert*" propagation="REQUIRED"/>
<tx:method name="update*" propagation="REQUIRED"/>
<tx:method name="get*" propagation="SUPPORTS" read-only="true"/>
<tx:method name="select*" propagation="SUPPORTS" read-only="true"/>
</tx:attributes>
</tx:advice>
<!-- aop调用 txAdvice-->
<aop:config>
<aop:advisor advice-ref="txAdvice" pointcut="execution(* com.test.ssm.serviceImpl.*.*(..))"/>
</aop:config>
2.7 创建并配置springMVC的配置文件springMVC.xml
配置如下:
<!-- 可以扫描controller、service、... 这里扫描controller,指定controller的包 -->
<context:component-scan base-package="com.test.ssm.controller" />
<!-- 注解的映射器 -->
<!-- <bean class="org.springframework.web.servlet.mvc.method.annotation.RequestMappingHandlerMapping"/> -->
<!-- 注解的适配器 -->
<!-- <bean class="org.springframework.web.servlet.mvc.method.annotation.RequestMappingHandlerAdapter"/> -->
<!-- 使用mvc:annotation-driven可以代替注解的适配器和注解映射器 mvc:annotation-driven默认加载了很多的参数绑定方法,比如json转换解析器就默认加载了
实际开发时使用下方的mvc:annotation-driven -->
<mvc:annotation-driven></mvc:annotation-driven>
<!-- 视图解析器 (ViewResolver) 解析jsp视图,默认使用jstl标签,classpath下要有jstl的包 -->
<bean class="org.springframework.web.servlet.view.InternalResourceViewResolver">
<!-- 定义视图前缀和后缀 -->
<property name="prefix" value="/WEB-INF/jsp/"/>
<property name="suffix" value=".jsp"/>
</bean>
2.8 配置web容器web.xml
配置如下:
<?xml version="1.0" encoding="UTF-8"?>
<web-app xmlns:xsi="http://www.w3.org/2001/XMLSchema-instance" xmlns="http://java.sun.com/xml/ns/javaee" xsi:schemaLocation="http://java.sun.com/xml/ns/javaee http://java.sun.com/xml/ns/javaee/web-app_3_0.xsd" id="WebApp_ID" version="3.0">
<display-name>ssmTest2</display-name>
<welcome-file-list>
<welcome-file>index.html</welcome-file>
<welcome-file>index.htm</welcome-file>
<welcome-file>index.jsp</welcome-file>
<welcome-file>default.html</welcome-file>
<welcome-file>default.htm</welcome-file>
<welcome-file>default.jsp</welcome-file>
</welcome-file-list>
<!-- 配置前端控制器 -->
<servlet>
<servlet-name>springMVC</servlet-name>
<servlet-class>org.springframework.web.servlet.DispatcherServlet</servlet-class>
<init-param>
<param-name>contextConfigLocation</param-name>
<param-value>classpath:spring/springmvc.xml</param-value>
</init-param>
</servlet>
<!-- 配置前端控制器映射器 -->
<servlet-mapping>
<servlet-name>springMVC</servlet-name>
<url-pattern>*.action</url-pattern>
</servlet-mapping>
<!-- 加载spring容器 -->
<context-param>
<param-name>contextConfigLocation</param-name>
<param-value>classpath:spring/applicationContext-*.xml</param-value>
</context-param>
<listener>
<listener-class>org.springframework.web.context.ContextLoaderListener</listener-class>
</listener>
</web-app>
2.9 配置log4j的properties配置文件
配置如下:
# Global logging configuration
log4j.rootLogger=DEBUG, stdout
# MyBatis logging configuration...
log4j.logger.org.mybatis.example.BlogMapper=TRACE
# Console output...
log4j.appender.stdout=org.apache.log4j.ConsoleAppender
log4j.appender.stdout.layout=org.apache.log4j.PatternLayout
log4j.appender.stdout.layout.ConversionPattern=%5p [%t] - %m%n
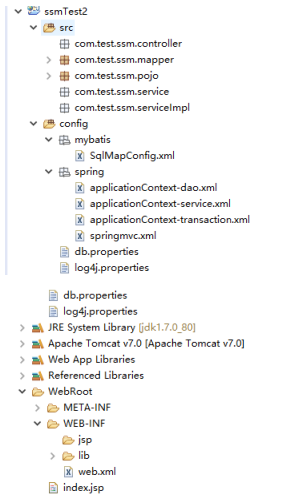
2.10 创建补全项目结构
项目结构如下:
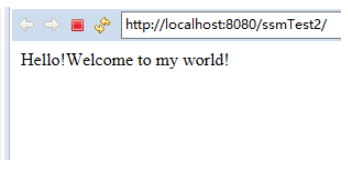
2.11 使用tomcat运行测试
测试类似如下:
三、项目实例测试
3.1 需求分析
根据商品id获取商品信息
3.2 确定动态代理方法和配置文件
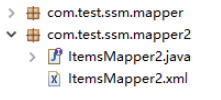
上方的mapper包是通过逆向代码工程生成的
ItemsMapper2.xml配置如下:
<?xml version="1.0" encoding="UTF-8" ?>
<!DOCTYPE mapper PUBLIC "-//mybatis.org//DTD Mapper 3.0//EN" "http://mybatis.org/dtd/mybatis-3-mapper.dtd" >
<mapper namespace="com.test.ssm.mapper2.ItemsMapper2" >
<select id="getItemsById" parameterType="int"
resultType="itemsCustom">
select * from items it where it.id=${value}
</select>
</mapper>
3.3 根据ItemsMapper2.xml的配置文件书写ItemsMapper2的借口方法
方法如下:
package com.test.ssm.mapper.mapper2;
import com.test.ssm.custom.ItemsCustom;
/**
* 商品代理对象类
* @author 龙
* 2017/3/16
*/
public interface ItemsMapper2 {
//根据商品id获取商品信息
public ItemsCustom getItemsById(int id);
}
3.4 ItemsService调用和ItemServiceImplement方法实现
ItemsService调用:
package com.test.ssm.service;
import com.test.ssm.custom.ItemsCustom;
/**
* 商品对象业务接口类
* @author 龙
* 2017/3/16
*/
public interface ItemsService {
//根据商品id获取商品信息
public ItemsCustom getItemsById(int id);
}
ItemServiceImplement方法实现:
package com.test.ssm.serviceImpl;
import org.springframework.beans.factory.annotation.Autowired;
import org.springframework.stereotype.Service;
import com.test.ssm.custom.ItemsCustom;
import com.test.ssm.mapper2.ItemsMapper2;
import com.test.ssm.service.ItemsService;
/**
* 商品对象业务实现类
* @author 龙
* 2017/3/16
*/
@Service("itemsService")
public class ItemsServiceImpl implements ItemsService {
@Autowired
ItemsMapper2 itemsMapper2;
//根据商品id获取商品信息
@Override
public ItemsCustom getItemsById(int id) {
//调用Items代理对象的getItemsById(id)方法
return itemsMapper2.getItemsById(id);
}
}
3.5 前端控制部分ItemsController实现
ItemsController实现:
package com.test.ssm.controller;
import org.springframework.beans.factory.annotation.Autowired;
import org.springframework.stereotype.Controller;
import org.springframework.ui.Model;
import org.springframework.web.bind.annotation.RequestMapping;
import com.test.ssm.custom.ItemsCustom;
import com.test.ssm.service.ItemsService;
/**
* 商品控制类
* @author 龙
* 2017/3/16
*/
@Controller
@RequestMapping("/items")
public class ItemsController {
@Autowired
ItemsService itemsService;
@RequestMapping("/itemsSerach")
public String ItemsCustomSearch(Model model,Integer id){
ItemsCustom itemsCustom = itemsService.getItemsById(id);
model.addAttribute("ItemsCustom",itemsCustom);
return "items/itemsTest";
}
}
3.6 前端显示页面itemsTest.jsp
itemsTest.jsp内容如下:
<%@ page language="java" contentType="text/html; charset=UTF-8"
pageEncoding="UTF-8"%>
<%@ taglib uri="http://java.sun.com/jsp/jstl/core" prefix="c"%>
<%@ taglib uri="http://java.sun.com/jsp/jstl/fmt" prefix="fmt" %>
<!DOCTYPE html PUBLIC "-//W3C//DTD HTML 4.01 Transitional//EN" "http://www.w3.org/TR/html4/loose.dtd">
<html>
<head>
<meta http-equiv="Content-Type" content="text/html; charset=UTF-8">
<title>商品信息测试类</title>
</head>
<body>
<table>
<tr>
<td>商品名称</td>
<td>商品价格</td>
<td>生产日期</td>
<td>商品描述</td>
<td>操作</td>
</tr>
<c:if test="${ItemsCustom != null }">
<tr>
<td><input type="text" name="name" id="itemsName" value="${ItemsCustom.name }"/></td>
<td><input type="text" name="price" id="itemsPrice" value="${ItemsCustom.price }"/></td>
<td><input type="text" name="createtime" id="itemsDate"
value="<fmt:formatDate value='${ItemsCustom.createtime}' pattern='yyyy-MM-dd'/>"/></td>
<td><input type="text" name="detail" id="itemsDetail" value="${ItemsCustom.detail }"/></td>
<td><input type="text" name="pic" id="itemsPic" value="${ItemsCustom.pic }"/></td>
</tr>
</c:if>
</table>
</body>
</html>
3.7 测试成功
测试实例:
http://localhost:8080/ssmTest2/items/itemsSerach.action?id=10527
测试结果:

以上为个人搭建ssm测试实例,如有不足还请赐教!
eclipse下配置安装ssm图文教程(web版)的更多相关文章
- 01.1 Windows环境下JDK安装与环境变量配置详细的图文教程
01.1 Windows环境下JDK安装与环境变量配置详细的图文教程 本节内容:JDK安装与环境变量配置 以下是详细步骤 一.准备工具: 1.JDK JDK 可以到官网下载 http://www.or ...
- 分布式进阶(二)Ubuntu 14.04下安装Dockr图文教程(一)
当前,完全硬件虚拟化技术(KVM.Xen.Hyper-V 等)能在一个物理主机上很好地运行多个互相独立的操作系统,但这也带来一些问题:性能不佳,资源浪费,系统反应迟缓等.有时候对用户来说,完全的硬件虚 ...
- Ubuntu下安装JDK图文教程详解 jdk-java6-30 .bin 的处理方法
Ubuntu下安装JDK图文教程详解 jdk-java6-30 .bin 的处理方法: https://blog.csdn.net/mingjie1212/article/details/485250 ...
- Oracle 11g R2安装手册(图文教程)For Windows
1.Oracle 11g R2安装手册(图文教程)For Windows 1.下载Oracle 11g R2 for Windows版本,下载地址如下 官方网站: http://download.or ...
- VMware安装CentOS 图文教程
VMware安装CentOS 图文教程 VMware 下安装CentOS6.2 取消 Easy install模式(此模式不好,很多软件没有安装) http://jingyan.baidu.com/a ...
- Step by Step 真正从零开始,TensorFlow详细安装入门图文教程!帮你完成那个最难的从0到1
摘要: Step by Step 真正从零开始,TensorFlow详细安装入门图文教程!帮你完成那个最难的从0到1 安装遇到问题请文末留言. 悦动智能公众号:aibbtcom AI这个概念好像突然就 ...
- 在Eclipse下配置算法(第四版)运行环境
第一步:配置Eclipse运行环境 Eclipse运行环境配置过程是很简单的,用过Eclipse进行java开发或学习的同学应该都很熟悉这个过程了. 配置过程: (1)系统环境:Windows7 64 ...
- (转)eclipse下配置tomcat7的几个重要问题,值得一看
转自:http://jingyan.baidu.com/article/ab69b270ccc4792ca7189fd6.html 这段时间开始接触的servlet,今天尝试在eclipse下配置to ...
- MySQL 5.7.20绿色版安装详细图文教程
MySQL 5.7.20绿色版安装详细图文教程 MySQL是一个关系型数据库管理系统,由瑞典MySQL AB公司开发,目前属于Oracle旗下产品.这篇文章主要介绍了MySQL 5.7.20绿色版安装 ...
随机推荐
- ServletConfig、ServletContext属性遍历
可以进行属性遍历: package com.stono.servlet; import java.io.IOException; import java.util.Enumeration; impor ...
- 以Tomcat+Mysql为例,实现Docker多容器连接
Docker提供了多个容器直接访问的方法,最简单的方式是直接使用端口映射-p参数指定映射的端口或者-P映射所有端口,多个容器直接通过网络端口进行访问. 但网络端口映射方式并不是Docker中连接多个容 ...
- puppet来管理文件和软件包
puppet来管理文件和软件包 1 exec的使用,可以运行shell命令 为配置文件添加配置,指示写了关键部分,其他配置省略没写 代码示例如下: [root@pup manifests]# cat ...
- mac bash_profile
# This is the filename where your incoming mail arrives. MAIL=~/mbox MAILCHECK=30 HISTFILE=~/.histor ...
- HDU5873
Football Games Time Limit: 2000/1000 MS (Java/Others) Memory Limit: 65536/65536 K (Java/Others)To ...
- Git学习之路(3)-提交文件到三个区
▓▓▓▓▓▓ 大致介绍 年过的差不多了,开始学习!小白学Git(持续更新) Git有三个工作区域: ◆ 工作区(Working Directory) ◆ 暂存区(Stage) ◆ 版本库(Reposi ...
- 编程练习------C/C++分别实现字符串与整数的转换
C/C++分别实现字符串与整数的转换 前提:不使用 itoa 和 atoi. 方法一.C和C++通用的一种转换手段是: 1.整数转化为字符串:采用加'0',再逆序的办法,整数加'0'就会隐性转化成ch ...
- Import Statements 导入语句
Syntax of an Import Statement 导入语句的语法 An import statement allows clients to tell the engine which mo ...
- PHP 中使用 Composer
在线安装版本: http://www.phpcomposer.com/ 这个是国内的composer网站 thinkphp5自带了composer.phar组件,如果没有安装,则需要进行安装 以下命令 ...
- 《javascript个人理解,个人整理。》
万事开头难. 本人做前端工程师,已几年,没有特别大的,已文字方式去做总结. 前段时间,早已经想好,但是迟迟没有去下笔!好在现在陆陆续续的写下去. 我知道这是一个很大的工程,但是我还是想做下去,不为别的 ...