React-Native 之 GD (十五)搜索模块 及 设置模块
1.搜索模块

GDSearch.js
/**

 * 搜索页面

 */

import React, { Component } from 'react';

import {

    StyleSheet,

    Text,

    View,

    TouchableOpacity,

    Image,

    ListView,

    Dimensions,

    ActivityIndicator,

    Modal, // 模态

    AsyncStorage, // 缓存数据库(数据持久化)

    TextInput, // 输入框组件

} from 'react-native';

// 引入 下拉刷新组件

import {PullList} from 'react-native-pull';

// 导航器

import CustomerComponents, {

    Navigator

} from 'react-native-deprecated-custom-components';

// 获取屏幕宽高

const {width, height} = Dimensions.get('window');

// 监听 键盘函数

const dismissKeyboard = require('dismissKeyboard');

// 引入自定义导航栏组件

import CommunalNavBar from '../main/GDCommunalNavBar';

// 引入 公共cell

import CommunalCell from '../main/GDCommunalCell';

// 引入 详情页 组件

import CommunalDetail from '../main/GDCommunalDetail';

// 引入 空白页组件

import NoDataView from '../main/GDNoDataView';

export default class GDSearch extends Component {

    // 构造

    constructor(props) {

        super(props);

        // 初始状态

        this.state = {

            dataSource: new ListView.DataSource({rowHasChanged:(r1, r2) => r1 !== r2}), // 数据源 优化

            loaded: false, // 用于判断是否显示空白页

            isModal: false, // 用于判断模态的可见性

        };

        // 全局定义一个空数组用于存储列表数据

        this.data = [];

        this.changeText = '';

        // 绑定

        this.loadData = this.loadData.bind(this);

        this.loadMore = this.loadMore.bind(this);

    }

    // 加载最新数据网络请求

    loadData(resolve) {

        if (!this.changeText) return;

        let params = {

            "q" : this.changeText

        };

        HTTPBase.get('http://guangdiu.com/api/getresult.php', params)

            .then((responseData) => {

                // 情况数组(刷新时)

                this.data = [];

                // 拼接数据

                this.data = this.data.concat(responseData.data);

                // 重新渲染

                this.setState({

                    dataSource: this.state.dataSource.cloneWithRows(this.data),

                    loaded:true,

                });

                // 关闭刷新动画

                if (resolve !== undefined){

                    setTimeout(() => {

                        resolve();

                    }, 1000);

                }

                // 存储数组中最后一个元素的id

                let searchLastID = responseData.data[responseData.data.length - 1].id;

                AsyncStorage.setItem('searchLastID', searchLastID.toString());

            })

            .catch((error) => {

            })

    }

    // 加载更多数据的网络请求

    loadMoreData(value) {

        let params = {

            "q" : this.changeText,

            "sinceid" : value

        };

        HTTPBase.get('http://guangdiu.com/api/getresult.php', params)

            .then((responseData) => {

                // 拼接数据

                this.data = this.data.concat(responseData.data);

                this.setState({

                    dataSource: this.state.dataSource.cloneWithRows(this.data),

                    loaded:true,

                });

                // 存储数组中最后一个元素的id

                let searchLastID = responseData.data[responseData.data.length - 1].id;

                AsyncStorage.setItem('searchLastID', searchLastID.toString());

            })

            .catch((error) => {

            })

    }

    // 加载更多数据操作

    loadMore() {

        // 读取id

        AsyncStorage.getItem('searchLastID')

            .then((value) => {

                // 数据加载操作

                this.loadMoreData(value);

            })

    }

    // 返回上一页

    pop() {

        // 回收键盘

        dismissKeyboard();

        this.props.navigator.pop();

    }

    // 返回左边按钮

    renderLeftItem() {

        // 将组件返回出去

        return(

            <TouchableOpacity

                onPress={() => {this.pop()}}

            >

                <View style={{flexDirection:'row', alignItems:'center'}}>

                    <Image source={{uri:'back'}} style={styles.navbarLeftItemStyle} />

                    <Text>返回</Text>

                </View>

            </TouchableOpacity>

        );

    }

    // 返回中间按钮

    renderTitleItem() {

        return(

            <Text style={styles.navbarTitleItemStyle}>搜索全网折扣</Text>

        );

    }

    // ListView尾部

    renderFooter() {

        return (

            <View style={{height: 100}}>

                <ActivityIndicator />

            </View>

        );

    }

    // 根据网络状态决定是否渲染 listView

    renderListView() {

        if(this.state.loaded === false) {

            // 显示空白页

            return(

                <NoDataView />

            );

        }else{

            return(

                <PullList   // 将ListView 改为 PullList

                    // 下拉刷新

                    onPullRelease={(resolve) => this.loadData(resolve)}

                    // 数据源 通过判断dataSource是否有变化,来判断是否要重新渲染

                    dataSource={this.state.dataSource}

                    renderRow={this.renderRow.bind(this)}

                    // 隐藏水平线

                    showsHorizontalScrollIndicator={false}

                    style={styles.listViewStyle}

                    initialListSize={7}  // 默认渲染数据条数

                    // 返回 listView 头部

                    renderHeader={this.renderHeader}

                    // 上拉加载更多

                    onEndReached={this.loadMore}

                    onEndReachedThreshold={60}

                    renderFooter={this.renderFooter}

                />

            );

        }

    }

    // 通过id 跳转详情页

    pushToDetail(value) {

        this.props.navigator.push({

            component:CommunalDetail,

            params: {

                url: 'https://guangdiu.com/api/showdetail.php' + '?' + 'id=' + value

            }

        })

    }

    // 返回每一行cell的样式

    renderRow(rowData) {

        // 使用cell组件

        return(

            <TouchableOpacity

                // 给每一个cell添加点击事件

                onPress={() => this.pushToDetail(rowData.id)}

            >

                <CommunalCell

                    image={rowData.image}

                    title={rowData.title}

                    mall={rowData.mall}  // 平台

                    pubTime={rowData.pubtime}  // 时间

                    fromSite={rowData.fromsite}  // 来源

                />

            </TouchableOpacity>

        );

    }

    render() {

        return (

            <View style={styles.container}>

                {/* 导航栏样式 */}

                <CommunalNavBar

                    leftItem = {() => this.renderLeftItem()}

                    titleItem = {() => this.renderTitleItem()}

                />

                {/* 顶部工具栏 */}

                <View style={styles.toolsViewStyle} >

                    {/* 左边 */}

                    <View style={styles.inputViewStyle} >

                        <Image source={{uri:'search_icon_20x20'}} style={styles.searchImageStyle} />

                        <TextInput

                            style={styles.textInputStyle}

                            keyboardType="default"  // 键盘类型

                            placeholder="请输入搜索商品关键字"  // 提示文字

                            placeholderTextColor='gray' // 设置提示文字颜色

                            autoFocus={true} // 自动获取焦点,弹窗键盘

                            clearButtonMode="while-editing"  // 清除按钮(编辑情况下出现清除按钮)

                            onChangeText={(text) => {this.changeText = text}} // 监听文本改变,将文字返回

                            onEndEditing={() => this.loadData()} // 结束编辑状态

                        />

                    </View>

                    {/* 右边 */}

                    <View style={{marginRight:10}}>

                        <TouchableOpacity

                            onPress={() => this.pop()}

                        >

                            <Text style={{color:'green'}}>取消</Text>

                        </TouchableOpacity>

                    </View>

                </View>

                {/* 根据网络状态决定是否渲染 listview */}

                {this.renderListView()}

            </View>

        );

    }

}

const styles = StyleSheet.create({

    container: {

        flex: 1,

        alignItems: 'center',

    },

    navbarLeftItemStyle: {

        width:20,

        height:20,

        marginLeft:15,

    },

    navbarTitleItemStyle: {

        fontSize:17,

        color:'black',

        marginRight:50

    },

    toolsViewStyle: {

        width:width,

        height:44,

        flexDirection:'row',

        alignItems:'center',

        justifyContent:'space-between',

    },

    inputViewStyle: {

        height:35,

        flexDirection:'row',

        alignItems:'center',

        justifyContent:'center',

        backgroundColor:'rgba(239,239,241,1.0)',

        marginLeft:10,

        borderRadius:5

    },

    searchImageStyle: {

        width:15,

        height:15,

        marginLeft:8

    },

    textInputStyle: {

        width:width * 0.75,

        height:35,

        marginLeft:8

    },

    listViewStyle: {

        width:width,

    },

});
监听 键盘函数
// 监听 键盘函数

const dismissKeyboard = require('dismissKeyboard');

// 返回上一页

pop() {

    // 回收键盘

    dismissKeyboard();

    this.props.navigator.pop();

}
效果图:

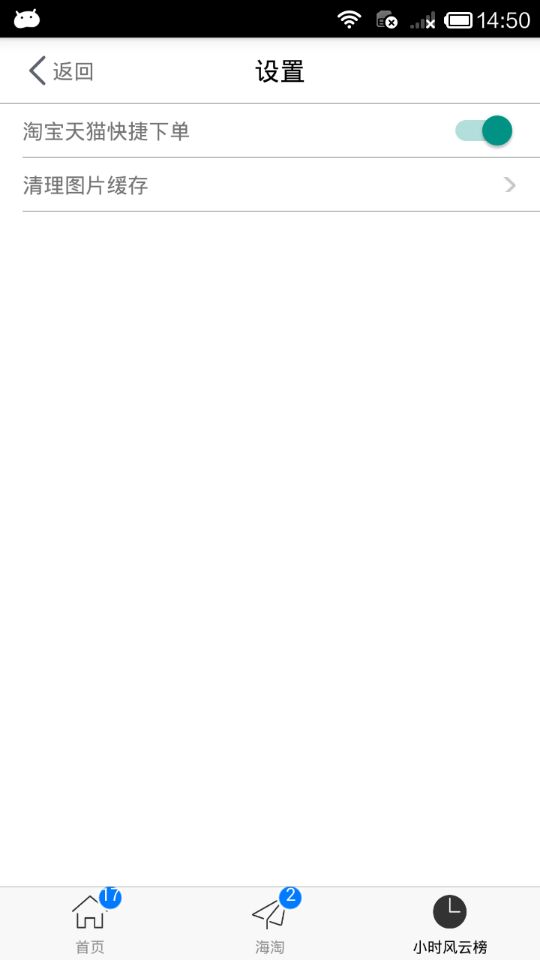
2.设置模块

GDSettings.js
/**

 * 设置页面

 */

import React, { Component } from 'react';

import {

    StyleSheet,

    Text,

    View,

    Image,

    TouchableOpacity,

    ScrollView,

} from 'react-native';

// 引入自定义导航栏组件

import CommunalNavBar from '../main/GDCommunalNavBar';

// 引入 设置页 Cell组件

import SettingsCell from './GDSettingsCell';

export default class GDSettings extends Component {

    // 返回上一页

    pop() {

        this.props.navigator.pop();

    }

    // 返回左边按钮

    renderLeftItem() {

        // 将组件返回出去

        return(

            <TouchableOpacity

                onPress={() => {this.pop()}}

            >

                <View style={{flexDirection:'row', alignItems:'center'}}>

                    <Image source={{uri:'back'}} style={styles.navbarLeftItemStyle} />

                    <Text>返回</Text>

                </View>

            </TouchableOpacity>

        );

    }

    // 返回中间按钮

    renderTitleItem() {

        return(

            <Text style={styles.navbarTitleItemStyle}>设置</Text>

        );

    }

    render() {

        return(

            <View style={styles.container}>

                {/* 导航栏样式 */}

                <CommunalNavBar

                    leftItem = {() => this.renderLeftItem()}

                    titleItem = {() => this.renderTitleItem()}

                />

                {/* 内容 */}

                <ScrollView

                    style={styles.scollViewStyle}

                >

                    {/* 第一个cell */}

                    <SettingsCell

                        leftTitle="淘宝天猫快捷下单"

                        isShowSwitch={true}

                    />

                    {/* 第二个cell */}

                    <SettingsCell

                        leftTitle="清理图片缓存"

                        isShowSwitch={false}

                    />

                </ScrollView>

            </View>

        )

    }

}

const styles = StyleSheet.create({

    container: {

        flex:1

    },

    navbarLeftItemStyle: {

        width:20,

        height:20,

        marginLeft:15,

    },

    navbarTitleItemStyle: {

        fontSize:17,

        color:'black',

        marginRight:50

    },

    scollViewStyle: {

        backgroundColor:'white',

    },

});
GDSettingsCell.js
/**

 * 设置页 Cell

 */

import React, { Component, PropTypes } from 'react';

import {

    StyleSheet,

    View,

    Image,

    Text,

    Switch,

    Platform,

} from 'react-native';

export default class GDSettingsCell extends Component {

    static propTypes = {

        leftTitle:PropTypes.string,

        isShowSwitch:PropTypes.bool,

    };

    // 构造

    constructor(props) {

        super(props);

        // 初始状态

        this.state = {

            isOn:false,

        };

    }

    // 返回需要的组件

    renderRightContent() {

        let component;

        if (this.props.isShowSwitch) {  // 显示 Switch 按钮

            component = <Switch value={this.state.isOn} onValueChange={() => {this.setState({isOn: !this.state.isOn})}} />

        }else {

            component = <Image source={{uri:'icon_cell_rightArrow'}} style={styles.arrowStyle} />

        }

        return(

            component

        )

    }

    render() {

        return(

            <View style={styles.container}>

                {/* 左边 */}

                <View>

                    <Text>{this.props.leftTitle}</Text>

                </View>

                {/* 右边 */}

                <View style={styles.rightViewStyle}>

                    {this.renderRightContent()}

                </View>

            </View>

        )

    }

}

const styles = StyleSheet.create({

    container: {

        flex:1,

        flexDirection:'row',

        height:Platform.OS === 'ios' ? 44 : 36,

        justifyContent:'space-between',

        alignItems:'center',

        borderBottomColor:'gray',

        borderBottomWidth:0.5,

        marginLeft:15,

    },

    rightViewStyle:{

        marginRight:15,

    },

    arrowStyle: {

        width:10,

        height:10,

    }

});
效果图:
.
React-Native 之 GD (十五)搜索模块 及 设置模块的更多相关文章
- STC8H开发(十五): GPIO驱动Ci24R1无线模块
目录 STC8H开发(一): 在Keil5中配置和使用FwLib_STC8封装库(图文详解) STC8H开发(二): 在Linux VSCode中配置和使用FwLib_STC8封装库(图文详解) ST ...
- React Native学习(十)—— 生命周期
本文基于React Native 0.52 Demo上传到Git了,有需要可以看看,写了新内容会上传的.Git地址 https://github.com/gingerJY/React-Native-D ...
- React Native(ios)项目中logo,启动屏设置
由于logo和启动屏尺寸多,react native(ios)中没有命令可以自动生成各种的尺寸,所以可以使用以下办法:在ionic项目中生成(使用命令:ionic resources)后,再粘贴到re ...
- 第四十五节,logging日志模块
用于便捷记录日志且线程安全的模块 单文件日志 basicConfig()模块函数 功能:创建日志文件和写日志模式[有参] 使用方法:模块名称.basicConfig(filename="日志 ...
- React文档(十五)使用propTypes进行类型检查
注意: React.PropTypes 自 React v15.5 起已弃用.请使用 prop-types 库代替. 随着你的应用的开发,你会使用类型检查的方法来捕获很多bug.对于一些应用,你可以使 ...
- python 基础(十五)--time和datatime模块
time模块 time.time():返回当前时间,时间戳 time.clock():返回cpu时间(?),当有time.sleep()时,time.clock()不计时 time.localtime ...
- Python3学习笔记(十五):常用时间模块time和datetime
一.time模块 1.时间戳 time.time() :从1970-01-01到至今的秒数 import time print(time.time()) 1529238004.2784646 2.等待 ...
- react native 添加第三方插件react-native-orientation(横竖屏设置功能 android)
Installation 1.install rnpm Run npm install -g rnpm 2.via rnpm Run rnpm install react-native-orien ...
- 从零开始学习html(十五)css样式设置小技巧——上
一.水平居中设置-行内元素 <!DOCTYPE HTML> <html> <head> <meta charset="utf-8"> ...
随机推荐
- 使用extract-text-webpack-plugin插件后报错
如果你使用的webpack是4+版本,那么尝试运行npm install extract-text-webpack-plugin@next ,即可解决问题 然而最好的解决办法是在webpack4+的版 ...
- java http请求工具整理
处理了http 的get和post的请求,分别支持同步处理,异步处理两种方式下见代码. @Slf4jpublic class HttpUtils { /** * 同步请求http请求 不推荐 * * ...
- Kinect V2入门之数据获取步骤
在Kinect for windows SDK2.0中,获取并处理数据源接口步骤如下: Sensor -> Source -> Reader -> Frame -> Data ...
- linux:输入/输出、重定向、管道
输入.输出: 程序的默认输入设备,叫标准输入. stdin 键盘 0 程序的默认输出设备,叫标准输出. stdout 监视器 1 程序的默认错误输出设备,叫标准错误输出.stde ...
- tornado + nginx + supervisord 环境部署
学习tornado有一周多了,自己按着demo中的例子手动搬代码,收获还是有的,加深了理解.demo: http://demo.pythoner.com/itt2zh/ch8.html 大概明白了它怎 ...
- Gradle Settings 类的学习
# 任务 了解 Settings 类作用于 Gradle 构建的哪个阶段? 了解 Settings 类与 settings.gradle 的关系 了解和使用 inlcude 方法 hook 初始化阶段 ...
- 时间戳转换日期格式 - Vue
日常开发中经常会遇到时间相关的问题,服务端返回的数据都是以时间戳的方式,那么需要将其处理转化为对应的时间格式,具体方式如下: 一.filters 中 formatDate 方法实现 <scrip ...
- 解决solr无法加core
提示缺少配置文件:Error CREATEing SolrCore 'new_core': Unable to create core [new_core] Caused by: Can't find ...
- IDEA显示Run Dashboard窗口
接下来在workspace.xml RunDashBoard节点中添加如下内容:<component name="RunDashboard"> 在代码中加入 <o ...
- Linux系统性能测试工具(五)——磁盘io性能工具之fio
本文介绍关于Linux系统(适用于centos/ubuntu等)的磁盘io性能测试工具-fio.磁盘io性能测试工具包括: fio: dd