springmvc+mybatis+redis实现查询插入操作
最近在学习redis,虽然现在还不是很熟练。不过可以进行简单的框架整合开发。
IDE:我使用的是IDEA。springmvc+spring+mybatis的整合这个我就不多说了,下面我们先进行这块的整合,最后在加入redis。下边这块就直接上代码。
源码:https://gitee.com/smfx1314/springmvcredis.git
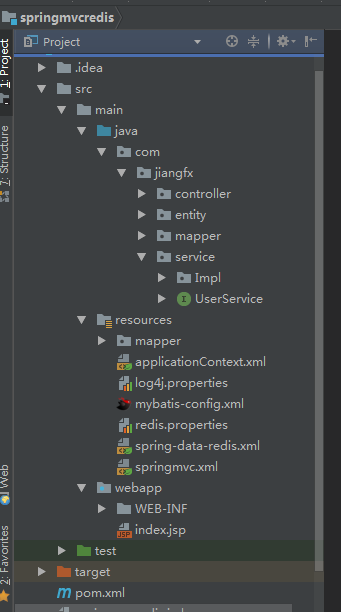
首先看一下我的工程结构:
第一步:在pox.xml中引入jar
<?xml version="1.0" encoding="UTF-8"?>

<project xmlns="http://maven.apache.org/POM/4.0.0" xmlns:xsi="http://www.w3.org/2001/XMLSchema-instance"

  xsi:schemaLocation="http://maven.apache.org/POM/4.0.0 http://maven.apache.org/xsd/maven-4.0.0.xsd">

  <modelVersion>4.0.0</modelVersion>

  <groupId>com.jiangfx</groupId>

  <artifactId>springmvc-redis</artifactId>

  <version>1.0-SNAPSHOT</version>

  <packaging>war</packaging>

  <name>springmvc-redis Maven Webapp</name>

  <!-- FIXME change it to the project's website -->

  <url>http://www.example.com</url>

  <properties>

    <project.build.sourceEncoding>UTF-8</project.build.sourceEncoding>

    <maven.compiler.source>1.7</maven.compiler.source>

    <maven.compiler.target>1.7</maven.compiler.target>

  </properties>

  <dependencies>

    <dependency>

      <groupId>junit</groupId>

      <artifactId>junit</artifactId>

      <version>4.11</version>

      <scope>test</scope>

    </dependency>

    <dependency>

      <groupId>org.springframework</groupId>

      <artifactId>spring-core</artifactId>

      <version>4.3.2.RELEASE</version>

    </dependency>

    <dependency>

      <groupId>org.springframework</groupId>

      <artifactId>spring-aop</artifactId>

      <version>4.3.2.RELEASE</version>

    </dependency>

    <dependency>

      <groupId>org.springframework</groupId>

      <artifactId>spring-aspects</artifactId>

      <version>4.3.2.RELEASE</version>

    </dependency>

    <dependency>

      <groupId>org.springframework</groupId>

      <artifactId>spring-beans</artifactId>

      <version>4.3.2.RELEASE</version>

    </dependency>

    <dependency>

      <groupId>org.springframework</groupId>

      <artifactId>spring-context</artifactId>

      <version>4.3.2.RELEASE</version>

    </dependency>

    <dependency>

      <groupId>org.springframework</groupId>

      <artifactId>spring-expression</artifactId>

      <version>4.3.2.RELEASE</version>

    </dependency>

    <dependency>

      <groupId>org.springframework</groupId>

      <artifactId>spring-jdbc</artifactId>

      <version>4.3.2.RELEASE</version>

    </dependency>

    <dependency>

      <groupId>org.springframework</groupId>

      <artifactId>spring-test</artifactId>

      <version>4.3.2.RELEASE</version>

    </dependency>

    <dependency>

      <groupId>org.springframework</groupId>

      <artifactId>spring-tx</artifactId>

      <version>4.3.2.RELEASE</version>

    </dependency>

    <dependency>

      <groupId>org.springframework</groupId>

      <artifactId>spring-web</artifactId>

      <version>4.3.2.RELEASE</version>

    </dependency>

    <dependency>

      <groupId>org.springframework</groupId>

      <artifactId>spring-webmvc</artifactId>

      <version>4.3.2.RELEASE</version>

    </dependency>

    <dependency>

      <groupId>org.mybatis</groupId>

      <artifactId>mybatis-spring</artifactId>

      <version>1.3.0</version>

    </dependency>

    <!-- https://mvnrepository.com/artifact/org.mybatis/mybatis -->

    <dependency>

      <groupId>org.mybatis</groupId>

      <artifactId>mybatis</artifactId>

      <version>3.4.4</version>

    </dependency>

    <!-- https://mvnrepository.com/artifact/commons-io/commons-io -->

    <dependency>

      <groupId>commons-io</groupId>

      <artifactId>commons-io</artifactId>

      <version>2.4</version>

    </dependency>

    <!-- https://mvnrepository.com/artifact/org.apache.commons/commons-lang3 -->

    <dependency>

      <groupId>org.apache.commons</groupId>

      <artifactId>commons-lang3</artifactId>

      <version>3.4</version>

    </dependency>

    <!-- https://mvnrepository.com/artifact/commons-logging/commons-logging -->

    <dependency>

      <groupId>commons-logging</groupId>

      <artifactId>commons-logging</artifactId>

      <version>1.1.1</version>

    </dependency>

    <!-- https://mvnrepository.com/artifact/org.apache.logging.log4j/log4j-core -->

    <dependency>

      <groupId>org.apache.logging.log4j</groupId>

      <artifactId>log4j-core</artifactId>

      <version>2.9.1</version>

    </dependency>

    <!-- https://mvnrepository.com/artifact/org.slf4j/slf4j-log4j12 -->

    <dependency>

      <groupId>org.slf4j</groupId>

      <artifactId>slf4j-log4j12</artifactId>

      <version>1.7.21</version>

      <scope>test</scope>

    </dependency>

    <!-- https://mvnrepository.com/artifact/aopalliance/aopalliance -->

    <dependency>

      <groupId>aopalliance</groupId>

      <artifactId>aopalliance</artifactId>

      <version>1.0</version>

    </dependency>

    <dependency>

      <groupId>mysql</groupId>

      <artifactId>mysql-connector-java</artifactId>

      <version>5.1.38</version>

    </dependency>

    <dependency>

      <groupId>com.mchange</groupId>

      <artifactId>c3p0</artifactId>

      <version>0.9.5.2</version>

    </dependency>

    <!-- https://mvnrepository.com/artifact/javax.servlet/jstl -->

    <dependency>

      <groupId>javax.servlet</groupId>

      <artifactId>jstl</artifactId>

      <version>1.2</version>

    </dependency>

    <!-- https://mvnrepository.com/artifact/javax.servlet/javax.servlet-api -->

    <dependency>

      <groupId>javax.servlet</groupId>

      <artifactId>javax.servlet-api</artifactId>

      <version>3.1.0</version>

      <scope>provided</scope>

    </dependency>

    <!-- https://mvnrepository.com/artifact/javax.servlet.jsp/javax.servlet.jsp-api -->

    <dependency>

      <groupId>javax.servlet.jsp</groupId>

      <artifactId>javax.servlet.jsp-api</artifactId>

      <version>2.2.1</version>

      <scope>provided</scope>

    </dependency>

    <!-- https://mvnrepository.com/artifact/taglibs/standard -->

    <dependency>

      <groupId>taglibs</groupId>

      <artifactId>standard</artifactId>

      <version>1.1.2</version>

    </dependency>

  </dependencies>

  <build>

    <plugins>

      <plugin>

        <groupId>org.apache.maven.plugins</groupId>

        <artifactId>maven-compiler-plugin</artifactId>

        <version>3.6.1</version>

        <configuration>

          <encoding>utf-8</encoding>

        </configuration>

      </plugin>

    </plugins>

  </build>

</project>
第二步:配置web.xml
<?xml version="1.0" encoding="UTF-8"?>

<web-app xmlns:xsi="http://www.w3.org/2001/XMLSchema-instance"

         xmlns="http://java.sun.com/xml/ns/javaee"

         xsi:schemaLocation="http://java.sun.com/xml/ns/javaee http://java.sun.com/xml/ns/javaee/web-app_3_0.xsd"

         id="WebApp_ID" version="3.0">

  <!-- 配置spring -->

  <context-param>

    <param-name>contextConfigLocation</param-name>

    <param-value>classpath:applicationContext.xml</param-value>

  </context-param>

  <listener>

    <listener-class>org.springframework.web.context.ContextLoaderListener</listener-class>

  </listener>

  <!-- 编码过滤器 -->

  <filter>

    <filter-name>charsetEncodingFilter</filter-name>

    <filter-class>org.springframework.web.filter.CharacterEncodingFilter</filter-class>

    <init-param>

      <param-name>encoding</param-name>

      <param-value>UTF-8</param-value>

    </init-param>

    <init-param>

      <param-name>forceEncoding</param-name>

      <param-value>true</param-value>

    </init-param>

  </filter>

  <filter-mapping>

    <filter-name>charsetEncodingFilter</filter-name>

    <url-pattern>/*</url-pattern>

  </filter-mapping>

  <!-- 配置springmvc -->

  <servlet>

    <servlet-name>springDispatcherServlet</servlet-name>

    <servlet-class>org.springframework.web.servlet.DispatcherServlet</servlet-class>

    <init-param>

      <param-name>contextConfigLocation</param-name>

      <param-value>classpath:springmvc.xml</param-value>

    </init-param>

    <load-on-startup>1</load-on-startup>

  </servlet>

  <servlet-mapping>

    <servlet-name>springDispatcherServlet</servlet-name>

    <url-pattern>/</url-pattern><!-- 拦截所有请求 -->

  </servlet-mapping>

</web-app>
第三步:配置springmvc.xml
<?xml version="1.0" encoding="UTF-8"?>

<beans xmlns="http://www.springframework.org/schema/beans"

       xmlns:xsi="http://www.w3.org/2001/XMLSchema-instance"

       xmlns:context="http://www.springframework.org/schema/context"

       xmlns:mvc="http://www.springframework.org/schema/mvc"

       xsi:schemaLocation="http://www.springframework.org/schema/mvc http://www.springframework.org/schema/mvc/spring-mvc-4.0.xsd

        http://www.springframework.org/schema/beans http://www.springframework.org/schema/beans/spring-beans.xsd

        http://www.springframework.org/schema/context http://www.springframework.org/schema/context/spring-context-4.0.xsd">

    <!-- 配置自动扫描的包  -->

    <context:component-scan base-package="com.jiangfx.controller"/>

    <!-- 配置静态资源文件 -->

    <mvc:default-servlet-handler/>

    <!-- 开启注解模式 -->

    <mvc:annotation-driven/>

    <!-- 配置视图解析器 -->

    <bean class="org.springframework.web.servlet.view.InternalResourceViewResolver">

        <property name="prefix" value="/WEB-INF/jsp"></property><!-- 视图路径 -->

        <property name="suffix" value=".jsp"></property><!-- 视图后缀名 -->

    </bean>

</beans>
第四步:配置applicationContext.xml
<?xml version="1.0" encoding="UTF-8"?>

<beans xmlns="http://www.springframework.org/schema/beans"

       xmlns:xsi="http://www.w3.org/2001/XMLSchema-instance"

       xmlns:context="http://www.springframework.org/schema/context"

       xmlns:tx="http://www.springframework.org/schema/tx"

       xsi:schemaLocation="http://www.springframework.org/schema/beans http://www.springframework.org/schema/beans/spring-beans.xsd

        http://www.springframework.org/schema/context http://www.springframework.org/schema/context/spring-context-4.0.xsd

        http://www.springframework.org/schema/tx http://www.springframework.org/schema/tx/spring-tx-4.0.xsd">

    <!-- 配置扫描的包 -->

    <context:component-scan base-package="com.jiangfx.service"/>

    <!-- 配置数据库 -->

    <!-- 加载配置文件 -->

    <bean id="dataSource" class="com.mchange.v2.c3p0.ComboPooledDataSource">

        <property name="driverClass" value="com.mysql.jdbc.Driver"></property>

        <property name="jdbcUrl" value="jdbc:mysql://localhost:3306/springredis"></property>

        <property name="user" value="root"></property>

        <property name="password" value="1234"></property>

    </bean>

    <!-- 配置sqlSessionFactory, 并将数据源注入 -->

    <bean id="sqlSessionFactory" class="org.mybatis.spring.SqlSessionFactoryBean">

        <!-- 引入数据源 -->

        <property name="dataSource" ref="dataSource"></property>

        <!--载入mybatis配置文件-->

        <property name="configLocation" value="classpath:mybatis-config.xml"/>

        <!--载入配置mapper映射的xml-->

        <property name="mapperLocations" value="classpath:mapper/*.xml"/>

    </bean>

    <!-- 配置映射接口 -->

    <bean class="org.mybatis.spring.mapper.MapperScannerConfigurer">

        <property name="basePackage" value="com.jiangfx.mapper"/>

        <property name="sqlSessionFactoryBeanName" value="sqlSessionFactory"></property>

    </bean>

    <!-- 配置声明式事务 -->

    <bean id="transactionManager" class="org.springframework.jdbc.datasource.DataSourceTransactionManager">

        <property name="dataSource" ref="dataSource"></property>

    </bean>

    <tx:annotation-driven transaction-manager="transactionManager"/>

</beans>
实体类:entity。一定要实现序列化接口,不然redis没法对其操作
package com.jiangfx.entity;

import java.io.Serializable;

/**

 * Created by jiangfeixiang on 2018/4/27

 */

public class User implements Serializable {

    private Integer id;

    private String username;

    public Integer getId() {

        return id;

    }

    public void setId(Integer id) {

        this.id = id;

    }

    public String getUsername() {

        return username;

    }

    public void setUsername(String username) {

        this.username = username;

    }

    @Override

    public String toString() {

        return "User{" +

                "id=" + id +

                ", username='" + username + '\'' +

                '}';

    }

}
第五步:Mapper层
编写UserMapper接口
package com.jiangfx.mapper;

import com.jiangfx.entity.User;

import java.util.List;

/**

 * Created by jiangfeixiang on 2018/4/27

 */

public interface UserMapper {

    /**

     * 查询

     * @return

     */

    List<User> getAll();

    /**

     * 插入

     * @param user

     */

    void insertUser(User user);

}
之后我们编写对应的UserMapper.xml
<?xml version="1.0" encoding="UTF-8" ?>

<!DOCTYPE mapper PUBLIC "-//mybatis.org//DTD Mapper 3.0//EN"

        "http://mybatis.org/dtd/mybatis-3-mapper.dtd">

<mapper namespace="com.jiangfx.mapper.UserMapper">

    <!-- 查询 -->

    <select id="getAll" resultType="User">

        select * from user

    </select>

    <!--插入-->

    <insert id="insertUser" parameterType="User">

        insert into user(id,username) VALUES (#{id},#{username})

    </insert>

</mapper>
第六步:service层
首先是UserService接口
package com.jiangfx.service;

import com.jiangfx.entity.User;

import java.util.List;

/**

 * Created by jiangfeixiang on 2018/4/27

 */

public interface UserService {

    /**

     * 查询

     * @return

     */

    List<User> getAll();

    /**

     * 插入

     */

    void insertUser(User user);

}
然后是对应的实现类
package com.jiangfx.service.Impl;

import com.jiangfx.entity.User;

import com.jiangfx.mapper.UserMapper;

import com.jiangfx.service.UserService;

import org.springframework.beans.factory.annotation.Autowired;

import org.springframework.cache.annotation.CachePut;

import org.springframework.cache.annotation.Cacheable;

import org.springframework.stereotype.Service;

import org.springframework.transaction.annotation.Transactional;

import java.util.List;

/**

 * Created by jiangfeixiang on 2018/4/27

 */

@Service

@Transactional

public class UserServiceImpl implements UserService {

    //注入userMapper

    @Autowired

    private UserMapper userMapper;

    /**

     * 查询所有

     * 使用@Cacheable地很诡异缓存策略,

     * 当缓存中有值,则返回缓存数据,否则则访问数据库

     * value引用缓存管理器,key定义缓存的键

     * @return

     */

    @Override

    // @Cacheable(value = "redisCacheManager",key = "'getAll'")

    public List<User> getAll() {

        List<User> userMapperAll = userMapper.getAll();

        System.out.println("没有走缓存就打印我...........");

        return userMapperAll;

    }

    /**

     * 添加用户

     */

    @Override

    // @CachePut(value = "redisCacheManager",key = "'insertUser'")

    public void insertUser(User user){

        userMapper.insertUser(user);

    }

}
第七部:controller层
UserController
package com.jiangfx.controller;

import com.jiangfx.entity.User;

import com.jiangfx.service.UserService;

import org.springframework.beans.factory.annotation.Autowired;

import org.springframework.stereotype.Controller;

import org.springframework.web.bind.annotation.RequestMapping;

import org.springframework.web.bind.annotation.RequestMethod;

import java.util.List;

/**

 * Created by jiangfeixiang on 2018/4/27

 */

@Controller

public class UserController {

    //注入

    @Autowired

    private UserService userService;

    /**

     * 查询所有用户

     */

    @RequestMapping(value = "/getAll",method = RequestMethod.GET)

    public String getAll(){

        List<User> list = userService.getAll();

        return "list";

    }

    /**

     * 跳转到添加页面

     */

    @RequestMapping(value = "/insertUserPage",method = RequestMethod.GET)

    public String insertUserPage(){

        return "save";

    }

    /**

     * 插入

     */

    @RequestMapping(value = "/insertUser",method = RequestMethod.POST)

    public String insertUser(User user){

        userService.insertUser(user);

        return "redirect:/getAll";

    }

}
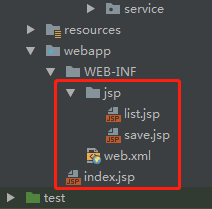
JSP页面很简单,主要是为了测试用,一个欢迎页index.jsp,一个添加用户页save.jsp,一个操作成功跳转对应页面的list.jsp
index.jsp
 <a href="/getAll">查询</a>

    <a href="/insertUserPage">添加</a>
save.jsp
<form action="/insertUser" method="post">

        姓名:<input type="text" name="username">

        <input type="submit" value="提交">

    </form>
list.jsp我就直接一句话,成功。你们看着写。
之后启动测试看看是否成功。当然,如果你安照我的写,那么肯定不会错的。
接下来我们开始配置redis。
首先加入jar包:
      <!-- jedis -->

      <dependency>

          <groupId>redis.clients</groupId>

          <artifactId>jedis</artifactId>

          <version>2.7.3</version>

      </dependency>

      <!-- spring-data-redis -->

      <dependency>

          <groupId>org.springframework.data</groupId>

          <artifactId>spring-data-redis</artifactId>

          <version>1.6.2.RELEASE</version>

      </dependency>
然后:创建一个spring-data-redis.xml专门放置redis的配置,在来一个redis.properties属性文件,放置redis的属性配置。如下:
redis.properties
# Redis Setting

# Redis默认有16个库,序号是0-15,默认是选中的是0号数据库

spring.redis.database=0

# Redis服务器地址

spring.redis.host=(你的地址)

# Redis服务器连接端口,默认是6379

spring.redis.port=6379

# Redis服务器连接密码(默认为空)

spring.redis.password=

# 连接池最大阻塞等待时间(使用负值表示没有限制),根据实际情况修改

spring.redis.pool.maxWaitMillis=-1

# 连接池中的最大空闲连接,根据实际情况修改

spring.redis.pool.maxIdle=8

# 连接池中的最小空闲连接,根据实际情况修改

spring.redis.pool.minIdle=0

# 连接超时时间(毫秒),根据实际情况修改

spring.redis.timeout=2000
spring-data-redis.xml
<?xml version="1.0" encoding="UTF-8"?>
<beans xmlns="http://www.springframework.org/schema/beans"
       xmlns:xsi="http://www.w3.org/2001/XMLSchema-instance" xmlns:cache="http://www.springframework.org/schema/cache"
       xmlns:context="http://www.springframework.org/schema/context"
       xmlns:redis="http://www.springframework.org/schema/redis" xmlns:tx="http://www.springframework.org/schema/tx"
       xsi:schemaLocation="http://www.springframework.org/schema/cache http://www.springframework.org/schema/cache/spring-cache-4.0.xsd
        http://www.springframework.org/schema/beans http://www.springframework.org/schema/beans/spring-beans.xsd
        http://www.springframework.org/schema/context http://www.springframework.org/schema/context/spring-context-4.0.xsd
        http://www.springframework.org/schema/redis http://www.springframework.org/schema/redis/spring-redis-1.0.xsd
        http://www.springframework.org/schema/tx http://www.springframework.org/schema/tx/spring-tx-4.0.xsd">

    <!-- 载入redis.properties,这里要特别注意,如果有多个properties文件,必须用逗号分开,不能写成两个 <context:property-placeholder/> -->
    <context:property-placeholder location="classpath:redis.properties" />

    <!-- 配置JedisPoolConfig连接池-->
    <bean id="poolConfig" class="redis.clients.jedis.JedisPoolConfig">
        <property name="maxIdle" value="${spring.redis.pool.maxIdle}"></property>
        <property name="minIdle" value="${spring.redis.pool.minIdle}"></property>
        <property name="maxWaitMillis" value="${spring.redis.pool.maxWaitMillis}"></property>
    </bean>

    <!-- 配置jedis连接工厂 -->
    <bean id="connectionFactory"
          class="org.springframework.data.redis.connection.jedis.JedisConnectionFactory">
        <property name="poolConfig" ref="poolConfig"></property>
        <property name="hostName" value="${spring.redis.host}"></property>
        <property name="port" value="${spring.redis.port}"></property>
        <!--<property name="password" value="${spring.redis.password}"></property>-->
        <property name="database" value="${spring.redis.database}"></property>
        <property name="timeout" value="${spring.redis.timeout}"></property>
    </bean>

    <!-- 配置RedisTemplate -->
    <bean id="redisTemplate" class="org.springframework.data.redis.core.RedisTemplate">
        <property name="connectionFactory" ref="connectionFactory"></property>

        <!--String-->
        <property name="keySerializer">
            <bean class="org.springframework.data.redis.serializer.StringRedisSerializer"></bean>
        </property>
        <property name="valueSerializer">
            <bean class="org.springframework.data.redis.serializer.JdkSerializationRedisSerializer"></bean>
        </property>
        <!--hash-->
        <property name="hashKeySerializer">
            <bean class="org.springframework.data.redis.serializer.StringRedisSerializer"></bean>
        </property>
        <property name="hashValueSerializer">
            <bean class="org.springframework.data.redis.serializer.StringRedisSerializer"></bean>
        </property>
    </bean>

    <!--
    定义缓存管理器redisCacheManager。
    注意:cache-manager默认值是cacheManager,你的缓存管理器id要是命名是cacheManager,这里可以省略
    -->
    <!--1.使用注解驱动-->
    <cache:annotation-driven cache-manager="redisCacheManager"></cache:annotation-driven>

    <!--2.定义缓存管理器-->
    <bean id="redisCacheManager" class="org.springframework.data.redis.cache.RedisCacheManager">
        <!--通过构造方法注入redisTemplate-->
        <constructor-arg index="0" ref="redisTemplate"></constructor-arg>
        <!--定义超时时间,单位秒-->
        <property name="defaultExpiration" value="5000"></property>
        <!--设置缓存器名称-->
        <property name="cacheNames">
            <list>
                <value>redisCacheManager</value>
            </list>
        </property>
    </bean>
</beans>
在applicationContext中引入redis的配置spring-data-redis.xml,当然你也可以配置在一起。
    <!-- 引入spring-data-redis.xml -->

    <import resource="spring-data-redis.xml"/>
上面已经定义好缓存管理器了,下面我们就可以在serviceImpl中使用注解进行操作。如下:
在getAll查询方法上添加(serviceImpl中注释掉的那点)
@Cacheable(value = "redisCacheManager",key = "'getAll'")
在insertUser添加方法上加入(serviceImpl中注释掉的那点)
@CachePut(value = "redisCacheManager",key = "'insertUser'")
注意:
value的值是你redis配置文件对应的缓存管理器的id值
key = "'insertUser'":是你要缓存到redis中的值,下次spring会直接通过key获取结果。注意key的值中还有个单引号。
@Cacheable:适合查询,有返回值的方法上。因为,每次请求在进入方法之前,spring会先从缓存服务器中查找对应的key,如果有,就直接返回。否则再去查询数据库,在将结果通过key保存到缓存中。
@CachePut:适合添加,修改,void方法上。因为spring不会事先去缓存服务器中查询数据,而是直接执行方法,然后将结果通过key保存到缓存中。这样是防止数据不一致。
以上都写好后可以启动服务器,然后运行。为了明显,我在serviceImpl中查询方法中有个输出,你可以先注释掉缓存注解运行,发现每次都会输入。当你启动注解时,没有输入。说明spring每次回自动到缓存中查找数据。如下:

(下面的测试你们可以不用理会,这个是我在搭建环境的时候测试是否搭建成功。我的逻辑可能不够清晰,有问题可以联系我)
测试
import org.junit.Test;

import org.springframework.context.ApplicationContext;

import org.springframework.context.support.ClassPathXmlApplicationContext;

import org.springframework.data.redis.core.RedisTemplate;

/**

 * Created by jiangfeixiang on 2018/4/26

 */

public class SpringmvcRedisTest {

    private static ApplicationContext applicationContext;

    static{

        applicationContext = new ClassPathXmlApplicationContext("applicationContext.xml");

    }

    @Test

    public void testApplicationContext(){

        System.out.println("11111111111111111"+applicationContext);

    }

    @Test

    public void testRedisConnection(){

        RedisTemplate redisTemplate = (RedisTemplate)applicationContext.getBean("redisTemplate");

        redisTemplate.renameIfAbsent("k2", "k1");//如果key=k2存在,则将key修改为k1。前提是你的redis中得有k2。不然报错。这不你也可以不写。

        System.out.println(redisTemplate); //这里有输出也可以。

    }

}
以上测试这块,你可以不用写。
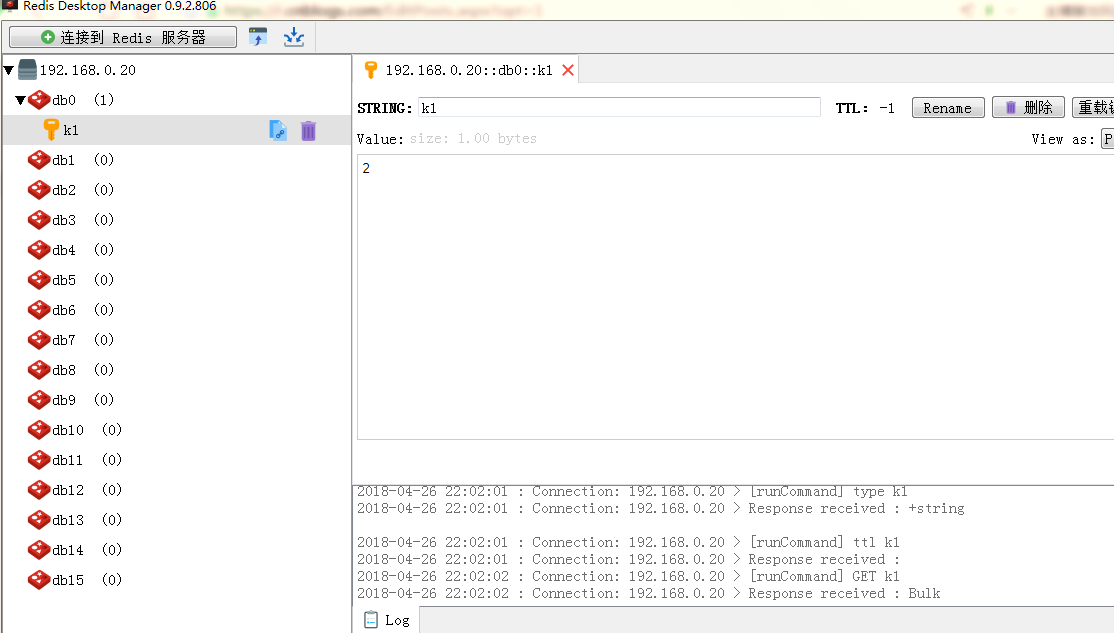
如何查看是否成功?我这里是通过可视化软件:Redis Desktop Manager,你也可以直接在redis-cli客户端查看
以上就是springmvc整合redis的过程,如果有什么问题都可以联系我。
springmvc+mybatis+redis实现查询插入操作的更多相关文章
- 如何玩转最新的项目的搭配springmvc+mybatis+Redis+Nginx+tomcat+mysql
上一次完成nginx+tomcat组合搭配,今天我们就说说,这几个软件在项目中充当的角色: 要想完成这几个软件的组合,我们必须知道和熟悉应用这个框架, 一: Nginx:在项目中大多数作为反向代理服务 ...
- Spring+SpringMVc+Mybatis实现数据库查询
大家好,本篇博客小Y将会给大家带来一篇SSM框架实现数据查询的Demo,使用的数据库是Mysql,Server是TomCat.现在的SSM整合非常流行,因为springmvc的高效和mybatis的灵 ...
- spring+springmvc+mybatis+redis 实现两重数据缓存
<?xml version="1.0" encoding="UTF-8"?> <web-app xmlns:xsi="http:// ...
- spring+springmvc+mybatis+redis实现缓存
先搭建好redis环境 需要的jar如下: jdbc.driverClassName=com.mysql.jdbc.Driver jdbc.url=jdbc:mysql://localhost:330 ...
- java SSM 框架 微信自定义菜单 快递接口 SpringMVC mybatis redis shiro ehcache websocket
A 调用摄像头拍照,自定义裁剪编辑头像,头像图片色度调节B 集成代码生成器 [正反双向](单表.主表.明细表.树形表,快速开发利器)+快速表单构建器 freemaker模版技术 ,0个代码不用写,生成 ...
- springmvc+mybatis+redis的session共享+maven管理
负载均衡搭建:http://www.cnblogs.com/guoyansi19900907/p/8717746.html redis安装:http://www.cnblogs.com/guoyans ...
- Spring+SpringMVC+MyBatis+Redis框架学习笔记
在Java互联网中,以Spring+Spring MVC+MyBatis (SSM) 作为主流框架. SSM+Redis的结构图 在这种框架系统中: Spring IoC 承担了一个资源管理.整合.即 ...
- springmvc+mybatis+redis(转)
最近在学习redis的使用方法,它的本地使用方法比较简单,只需要先启动Redis服务器,然后运行测试代码即可.但是现在我想要在网站上访问数据库的时候采用Redis缓存,问题就出来了.要么是缓存直接失效 ...
- Redis 模糊查询删除操作
创建一条测试 数据 查询 创建:set name xiaoming 查询: get name 1.模糊搜索查询 Redis 模糊搜索 keys * 2.删除指定key : # 删除所有以user开头的 ...
随机推荐
- java将配置信息写在数据库(利用反射)
Demo出处: 1. package com.fpx.pcs.prealert.process.xml.service.impl; public class CainiaoPushMessageSer ...
- webstorm自动换行
1.文件 — — 设置 2. 编辑器 — — 编辑器 — — 在编辑窗口使用软换行(勾选)
- (转)浅谈SQL Server 对于内存的管理
简介 理解SQL Server对于内存的管理是对于SQL Server问题处理和性能调优的基本,本篇文章讲述SQL Server对于内存管理的内存原理. 二级存储(secondary storage) ...
- Angular Material 教程之布局篇
Angular Material 教程之布局篇 (一) : 布局简介https://segmentfault.com/a/1190000007215707 Angular Material 教程之布局 ...
- nginx页面不能正常访问排除方法
nginx页面不能访问 nginx页面不能访问 检查服务端服务是否启动成功 在服务端使用wget和curl测试下返回的是否正常 浏览器wget或者curl等软件访问不了Ngixn页面 1. 检查服务端 ...
- IIS优化整理
IIS 之 在IIS7.IIS7.5中应用程序池最优配置方案 找到Web站点对应的应用程序池,“应用程序池” → 找到对应的“应用程序池” → 右键“高级设置...” 一.一般优化方案 1.基本设置 ...
- leetcode算法总结
算法思想 二分查找 贪心思想 双指针 排序 快速选择 堆排序 桶排序 搜索 BFS DFS Backtracking 分治 动态规划 分割整数 矩阵路径 斐波那契数列 最长递增子序列 最长公共子系列 ...
- poj 1724 ROADS 很水的dfs
题意:给你N个城市和M条路和K块钱,每条路有话费,问你从1走到N的在K块钱内所能走的最短距离是多少 链接:http://poj.org/problem?id=1724 直接dfs搜一遍就是 代码: # ...
- laravel怎么获取到public路径
app_path() app_path函数返回app目录的绝对路径: $path = app_path(); 你还可以使用app_path函数为相对于app目录的给定文件生成绝对路径: $path = ...
- 淘宝TDDL深入浅出
前言 在开始讲解淘宝的 TDDL(Taobao Distribute Data Layer) 技术之前,请允许笔者先吐槽一番.首先要开喷的是淘宝的社区支持做的无比的烂, TaoCode 开源社区上面, ...