iOS GZWaterfall任何形式的瀑布流
概述
详细
首先,将所有的类型展示给大家;
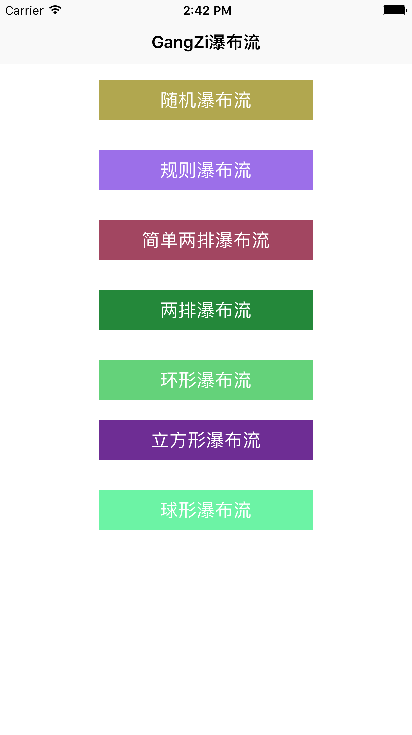
上面图片中展示的样式在Demo中都有实现。
一、项目结构
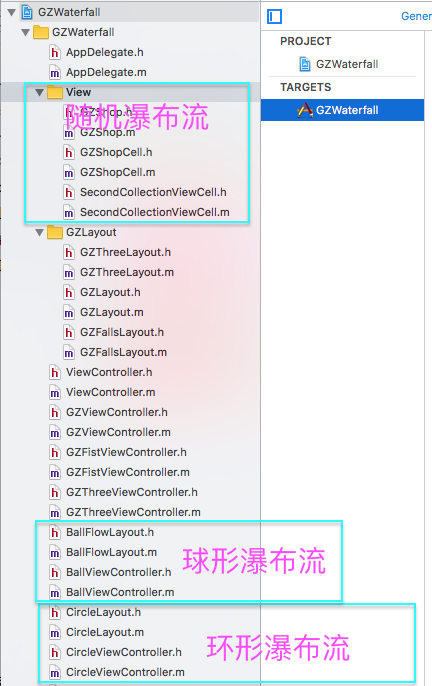
对于我们要实现的各种各样的 collectionView,根据不同的需求设置不同的列数 ,列边距,行边距,collectionView边距
二、程序实现
1、随机瀑布流

#pragma mark - 创建collectionView

- (void)setupCollectionView

{

    GZFallsLayout *fallsLayout = [[GZFallsLayout alloc] init];

    fallsLayout.delegate = self;

    UICollectionView *collectionView = [[UICollectionView alloc] initWithFrame:self.view.bounds collectionViewLayout:fallsLayout];

    [self.view addSubview:collectionView];

    _collectionView = collectionView;

    collectionView.dataSource = self;

    [collectionView registerNib:[UINib nibWithNibName:NSStringFromClass([GZShopCell class]) bundle:nil] forCellWithReuseIdentifier:ID];

}

#pragma mark - 创建上下拉刷新

- (void)setupRefresh

{

    self.collectionView.mj_header = [MJRefreshNormalHeader headerWithRefreshingTarget:self refreshingAction:@selector(loadNewShops)];

    self.collectionView.mj_footer = [MJRefreshAutoNormalFooter footerWithRefreshingTarget:self refreshingAction:@selector(loadMoreShops)];

    self.collectionView.backgroundColor = [UIColor whiteColor];

    [self.collectionView.mj_header beginRefreshing];

}

#pragma mark - 加载下拉数据

- (void)loadNewShops

{

    __weak typeof(self) weakSelf = self;

    dispatch_async(dispatch_get_global_queue(0, 0), ^{

        NSArray *shops = [GZShop mj_objectArrayWithFilename:@"1.plist"];

        [weakSelf.shops removeAllObjects];

        dispatch_async(dispatch_get_main_queue(), ^{

            [weakSelf.collectionView reloadData];

            [weakSelf.shops addObjectsFromArray:shops];

            [weakSelf.collectionView.mj_header endRefreshing];

            [weakSelf.collectionView reloadData];

        });

    });

}

#pragma mark - 加载上拉数据

- (void)loadMoreShops

{

    __weak typeof(self) weakSelf = self;

    dispatch_async(dispatch_get_global_queue(0, 0), ^{

        NSArray *shops = [GZShop mj_objectArrayWithFilename:@"1.plist"];

        [weakSelf.shops addObjectsFromArray:shops];

        dispatch_async(dispatch_get_main_queue(), ^{

            [weakSelf.collectionView.mj_footer endRefreshing];

            [weakSelf.collectionView reloadData];

        });

    });

}

- (NSInteger)numberOfSectionsInCollectionView:(UICollectionView *)collectionView

{

    return 1;

}

- (NSInteger)collectionView:(UICollectionView *)collectionView numberOfItemsInSection:(NSInteger)section

{

    self.collectionView.mj_footer.hidden = self.shops.count == 0;

    return self.shops.count;

}

- (UICollectionViewCell *)collectionView:(UICollectionView *)collectionView cellForItemAtIndexPath:(NSIndexPath *)indexPath

{

    GZShopCell *cell = [collectionView dequeueReusableCellWithReuseIdentifier:ID forIndexPath:indexPath];

    if (self.shops && self.shops.count >= indexPath.item+1) cell.shop = self.shops[indexPath.item];

    return cell;

}

- (CGFloat)columnMarginInFallsLayout:(GZFallsLayout *)fallsLayout

{

    return 5;

}

- (CGFloat)rowMarginInFallsLayout:(GZFallsLayout *)fallsLayout

{

    return 5;

}

- (CGFloat)columnCountInFallsLayout:(GZFallsLayout *)fallsLayout

{

    return 4;

}

- (UIEdgeInsets)edgeInsetsInFallsLayout:(GZFallsLayout *)fallsLayout

{

    return UIEdgeInsetsMake(0, 10, 20, 10);

}

- (NSMutableArray *)shops

{

    if (!_shops) {

        _shops = [NSMutableArray array];

    }

    return _shops;

}

// 计算布局属性

- (UICollectionViewLayoutAttributes *)layoutAttributesForItemAtIndexPath:(NSIndexPath *)indexPath

{

    UICollectionViewLayoutAttributes *attrs = [UICollectionViewLayoutAttributes layoutAttributesForCellWithIndexPath:indexPath];

    // 每个collectionView的宽度

    CGFloat collectionViewW = self.collectionView.frame.size.width;

    // 每个cell的宽度

    CGFloat w = (collectionViewW - self.edgeInsets.left - self.edgeInsets.right -

                 self.columnMargin * (self.columnCount - 1)) / self.columnCount;

    // cell的高度

    NSUInteger randomOfHeight = arc4random() % 100;

    CGFloat h = w * (randomOfHeight >= 50 ? 250 : 320) / 200;

    // cell应该拼接的列数

    NSInteger destColumn = 0;

    // 高度最小的列数高度

    CGFloat minColumnHeight = [self.columnHeights[0] doubleValue];

    // 获取高度最小的列数

    for (NSInteger i = 1; i < self.columnCount; i++) {

        CGFloat columnHeight = [self.columnHeights[i] doubleValue];

        if (minColumnHeight > columnHeight) {

            minColumnHeight = columnHeight;

            destColumn = i;

        }

    }

    // 计算cell的x

    CGFloat x = self.edgeInsets.left + destColumn * (w + self.columnMargin);

    // 计算cell的y

    CGFloat y = minColumnHeight;

    if (y != self.edgeInsets.top) {

        y += self.rowMargin;

    }

    // 随机数,用来随机生成大尺寸cell

    NSUInteger randomOfWhetherDouble = arc4random() % 100;

    // 判断是否放大

    if (destColumn < self.columnCount - 1                               // 放大的列数不能是最后一列(最后一列方法超出屏幕)

        && _noneDoubleTime >= 1                                         // 如果前个cell有放大就不放大,防止连续出现两个放大

        && (randomOfWhetherDouble >= 45 || _noneDoubleTime >= 8)        // 45%几率可能放大,如果累计8次没有放大,那么满足放大条件就放大

        && [self.columnHeights[destColumn] doubleValue] == [self.columnHeights[destColumn + 1] doubleValue] // 当前列的顶部和下一列的顶部要对齐

        && _lastDoubleIndex != destColumn) {             // 最后一次放大的列不等当前列,防止出现连续两列出现放大不美观

        _noneDoubleTime = 0;

        _lastDoubleIndex = destColumn;

        // 重定义当前cell的布局:宽度*2,高度*2

        attrs.frame = CGRectMake(x, y, w * 2 + self.columnMargin, h * 2 + self.rowMargin);

        // 当前cell列的高度就是当前cell的最大Y值

        self.columnHeights[destColumn] = @(CGRectGetMaxY(attrs.frame));

        // 当前cell列下一列的高度也是当前cell的最大Y值,因为cell宽度*2,占两列

        self.columnHeights[destColumn + 1] = @(CGRectGetMaxY(attrs.frame));

    } else {

        // 正常cell的布局

        if (_noneDoubleTime <= 3 || _lastFixIndex == destColumn) {                     // 如果没有放大次数小于3且当前列等于上次矫正的列,就不矫正

            attrs.frame = CGRectMake(x, y, w, h);

        } else if (self.columnHeights.count > destColumn + 1                         // 越界判断

            && y + h - [self.columnHeights[destColumn + 1] doubleValue] < w * 0.1) { // 当前cell填充后和上一列的高度偏差不超过cell最大高度的10%,就和下一列对齐

            attrs.frame = CGRectMake(x, y, w, [self.columnHeights[destColumn + 1] doubleValue] - y);

            _lastFixIndex = destColumn;

        } else if (destColumn >= 1                                                   // 越界判断

                   && y + h - [self.columnHeights[destColumn - 1] doubleValue] < w * 0.1) { // 当前cell填充后和上上列的高度偏差不超过cell最大高度的10%,就和下一列对齐

            attrs.frame = CGRectMake(x, y, w, [self.columnHeights[destColumn - 1] doubleValue] - y);

            _lastFixIndex = destColumn;

        } else {

            attrs.frame = CGRectMake(x, y, w, h);

        }

        // 当前cell列的高度就是当前cell的最大Y值

        self.columnHeights[destColumn] = @(CGRectGetMaxY(attrs.frame));

        _noneDoubleTime += 1;

    }

    // 返回计算获取的布局

    return attrs;

}
2、规则瀑布流
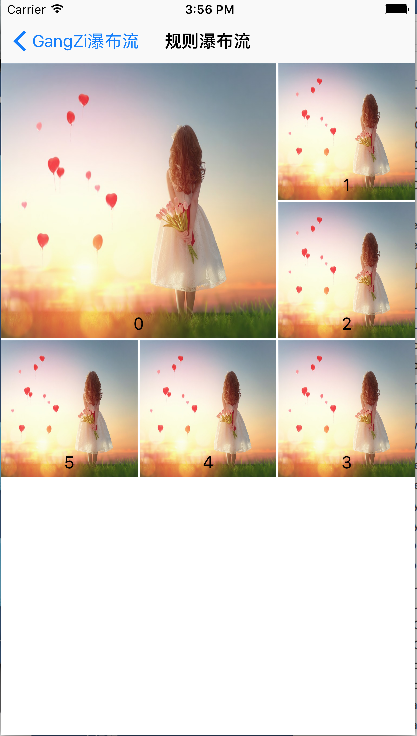
// 计算布局属性

- (UICollectionViewLayoutAttributes *)layoutAttributesForItemAtIndexPath:(NSIndexPath *)indexPath

{

    UICollectionViewLayoutAttributes *attrs = [UICollectionViewLayoutAttributes layoutAttributesForCellWithIndexPath:indexPath];

    if (indexPath.item == 0) {

        attrs.frame = CGRectMake(0, 0, ([UIScreen mainScreen].bounds.size.width - 4)/3*2 +2, ([UIScreen mainScreen].bounds.size.width - 4)/3*2 +2);

    }else if (indexPath.item == 1){

        attrs.frame = CGRectMake(([UIScreen mainScreen].bounds.size.width - 4)/3*2 +4, 0, ([UIScreen mainScreen].bounds.size.width - 4)/3, ([UIScreen mainScreen].bounds.size.width - 4)/3);

    }else if (indexPath.item == 2){

        attrs.frame = CGRectMake(([UIScreen mainScreen].bounds.size.width - 4)/3*2 +4, ([UIScreen mainScreen].bounds.size.width - 4)/3 +2, ([UIScreen mainScreen].bounds.size.width - 4)/3, ([UIScreen mainScreen].bounds.size.width - 4)/3);

    }else if (indexPath.item == 3){

        attrs.frame = CGRectMake(([UIScreen mainScreen].bounds.size.width - 4)/3*2 +4, ([UIScreen mainScreen].bounds.size.width - 4)/3 *2 + 4, ([UIScreen mainScreen].bounds.size.width - 4)/3, ([UIScreen mainScreen].bounds.size.width - 4)/3);

    }else if (indexPath.item == 4){

        attrs.frame = CGRectMake(([UIScreen mainScreen].bounds.size.width - 4)/3 +2, ([UIScreen mainScreen].bounds.size.width - 4)/3 *2 +4, ([UIScreen mainScreen].bounds.size.width - 4)/3, ([UIScreen mainScreen].bounds.size.width - 4)/3);

    }else{

        attrs.frame = CGRectMake(0, ([UIScreen mainScreen].bounds.size.width - 4)/3 *2 +4, ([UIScreen mainScreen].bounds.size.width - 4)/3, ([UIScreen mainScreen].bounds.size.width - 4)/3);

    }

    // 返回计算获取的布局

    return attrs;

}
3、简单两排瀑布流
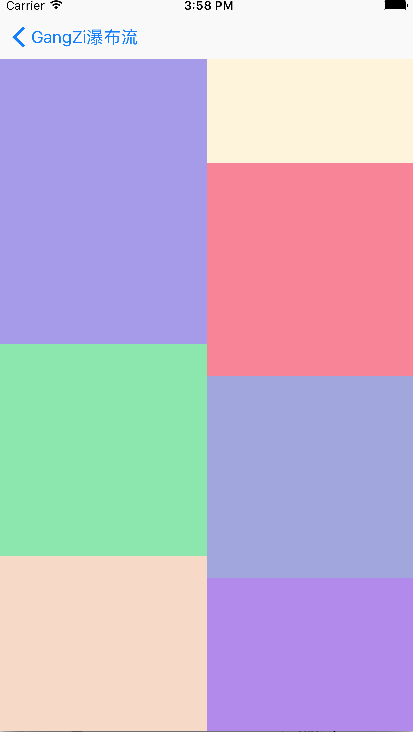
-(CGSize)collectionViewContentSize

{

    //计算整个contentsize的大小

    __block CGFloat height=0;

    [arr enumerateObjectsUsingBlock:^(id  _Nonnull obj, NSUInteger idx, BOOL * _Nonnull stop) {

        if([obj floatValue]>height)

        {

            height=[obj floatValue];

        }

    }];

    return CGSizeMake(self.collectionView.bounds.size.width, height);

}

-(UICollectionViewLayoutAttributes*)layoutAttributesForItemAtIndexPath:(NSIndexPath *)indexPath

{

    //计算每一个item的相关属性

    UICollectionViewLayoutAttributes *attr=[UICollectionViewLayoutAttributes layoutAttributesForCellWithIndexPath:indexPath];

    int index=0;

    if([arr[0] floatValue]<[arr[1] floatValue])

    {

        index=0;

    }

    else

    {

        index=1;

    }

    CGFloat width=self.collectionView.bounds.size.width/2;

    CGFloat height=arc4random()%200+100;

    CGFloat left=index*width;

    CGFloat top=[arr[index] floatValue];

    CGRect frame=CGRectMake(left, top, width, height);

    attr.frame=frame;

    arr[index]=@([arr[index] floatValue]+height);

    return attr;

}
4、两排瀑布流
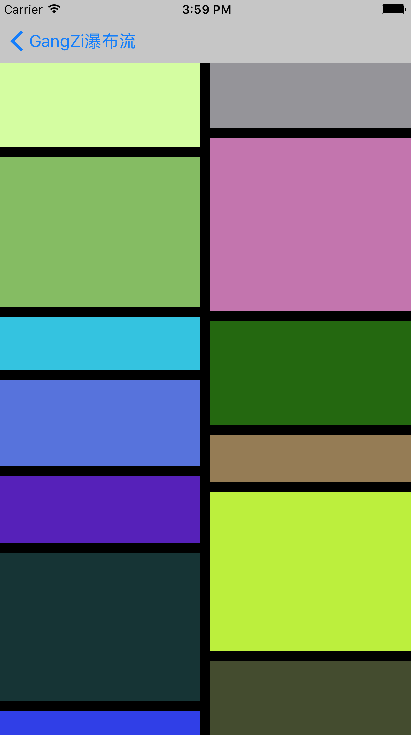
-(void)prepareLayout{

    _attributeArray = [NSMutableArray array];

    [super prepareLayout];

    float WIDTH = ([UIScreen mainScreen].bounds.size.width-self.sectionInset.left-self.sectionInset.right-self.minimumInteritemSpacing)/2;

    CGFloat colHight[2] = {self.sectionInset.top,self.sectionInset.bottom};

    for (int i=0; i<_itemCount; i++) {

        NSIndexPath * index = [NSIndexPath indexPathForItem:i inSection:0];

        UICollectionViewLayoutAttributes * attribute =  [UICollectionViewLayoutAttributes layoutAttributesForCellWithIndexPath:index];

        CGFloat height = arc4random()%150+40;

        int width = 0;

        if (colHight[0]<colHight[1]) {

            colHight[0] = colHight[0]+height+self.minimumLineSpacing;

            width = 0;

        }else{

            colHight[1] = colHight[1]+height+self.minimumLineSpacing;

            width = 1;

        }

        attribute.frame = CGRectMake(self.sectionInset.left+(self.minimumInteritemSpacing+WIDTH)*width, colHight[width]-height-self.minimumLineSpacing, WIDTH, height);

        [_attributeArray addObject:attribute];

    }

    if (colHight[0]>colHight[1]) {

        self.itemSize = CGSizeMake(WIDTH, (colHight[0]-self.sectionInset.top)*2/_itemCount-self.minimumLineSpacing);

    }else{

        self.itemSize = CGSizeMake(WIDTH, (colHight[1]-self.sectionInset.top)*2/_itemCount-self.minimumLineSpacing);

    }

}
5、环形瀑布流
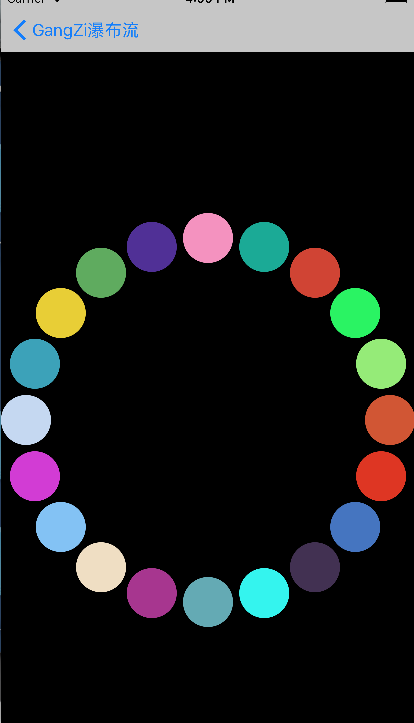
 _itemCount = (int)[self.collectionView numberOfItemsInSection:0];

    _attributeArray = [NSMutableArray array];

    CGFloat radius  =MIN(self.collectionView.frame.size.width, self.collectionView.frame.size.height)/2;

    CGPoint center = CGPointMake(self.collectionView.frame.size.width/2, self.collectionView.frame.size.height/2);

    for (int i=0; i<_itemCount; i++) {

        UICollectionViewLayoutAttributes * attris = [UICollectionViewLayoutAttributes layoutAttributesForCellWithIndexPath:[NSIndexPath indexPathForItem:i inSection:0]];

        attris.size = CGSizeMake(50, 50);

        float x = center.x+cosf(2*M_PI/_itemCount*i)*(radius-25);

        float y = center.y+sinf(2*M_PI/_itemCount*i)*(radius-25);

        attris.center = CGPointMake(x, y);

        [_attributeArray addObject:attris];

    }
6、立方瀑布流
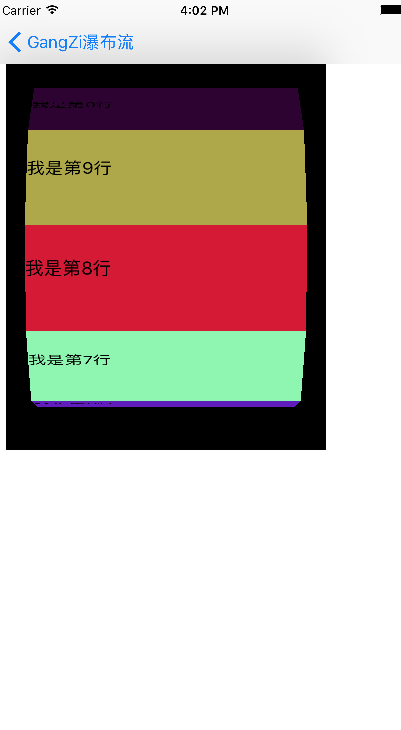
-(UICollectionViewLayoutAttributes *)layoutAttributesForItemAtIndexPath:(NSIndexPath *)indexPath{

    //创建一个item布局属性类

    UICollectionViewLayoutAttributes * atti = [UICollectionViewLayoutAttributes layoutAttributesForCellWithIndexPath:indexPath];

    //获取item的个数

    int itemCounts = (int)[self.collectionView numberOfItemsInSection:0];

    //设置每个item的大小为260*100

    atti.size = CGSizeMake(260, 100);

    atti.center = CGPointMake(self.collectionView.frame.size.width/2, self.collectionView.frame.size.height/2+self.collectionView.contentOffset.y);

    CATransform3D tran3d = CATransform3DIdentity;

    tran3d.m34 = -1/2000.0;

    CGFloat radius = 50/tanf(M_PI*2/itemCounts/2);

//     CGFloat angle = (float)(indexPath.row)/itemCounts*M_PI*2;

    //获取当前的偏移量

    float offset = self.collectionView.contentOffset.y;

    //在角度设置上,添加一个偏移角度

    float angleOffset = offset/self.collectionView.frame.size.height;

    CGFloat angle = (float)(indexPath.row+angleOffset-1)/itemCounts*M_PI*2;

    tran3d = CATransform3DRotate(tran3d, angle, 1.0, 0, 0);

    tran3d = CATransform3DTranslate(tran3d, 0, 0, radius);

    //进行设置

    atti.transform3D = tran3d;

    return atti;

}
7、球形瀑布流
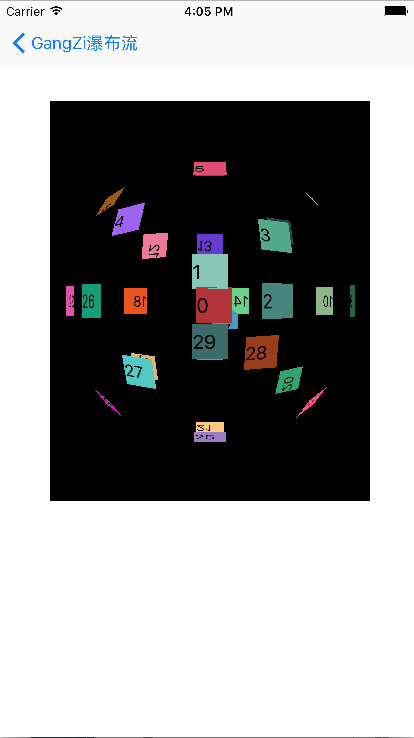
 UICollectionViewLayoutAttributes * atti = [UICollectionViewLayoutAttributes layoutAttributesForCellWithIndexPath:indexPath];

    //获取item的个数

    int itemCounts = (int)[self.collectionView numberOfItemsInSection:0];

    atti.center = CGPointMake(self.collectionView.frame.size.width/2+self.collectionView.contentOffset.x, self.collectionView.frame.size.height/2+self.collectionView.contentOffset.y);

    atti.size = CGSizeMake(30, 30);

    CATransform3D trans3D = CATransform3DIdentity;

    trans3D.m34 = -1/900.0;

    CGFloat radius = 15/tanf(M_PI*2/itemCounts/2);

    //根据偏移量 改变角度

    //添加了一个x的偏移量

    float offsety = self.collectionView.contentOffset.y;

    float offsetx = self.collectionView.contentOffset.x;

    //分别计算偏移的角度

    float angleOffsety = offsety/self.collectionView.frame.size.height;

    float angleOffsetx = offsetx/self.collectionView.frame.size.width;

    CGFloat angle1 = (float)(indexPath.row+angleOffsety-1)/itemCounts*M_PI*2;

    //x,y的默认方向相反

    CGFloat angle2 = (float)(indexPath.row+angleOffsetx-1)/itemCounts*M_PI*2;

    //这里我们进行四个方向的排列

    if (indexPath.row%4==1) {

        trans3D = CATransform3DRotate(trans3D, angle1, 1.0,0, 0);

    }else if(indexPath.row%4==2){

        trans3D = CATransform3DRotate(trans3D, angle2, 0, 1, 0);

    }else if(indexPath.row%4==3){

        trans3D = CATransform3DRotate(trans3D, angle1, 0.5,0.5, 0);

    }else{

        trans3D = CATransform3DRotate(trans3D, angle1, 0.5,-0.5,0);

    }

    trans3D = CATransform3DTranslate(trans3D, 0, 0, radius);

    atti.transform3D = trans3D;
三、运行效果

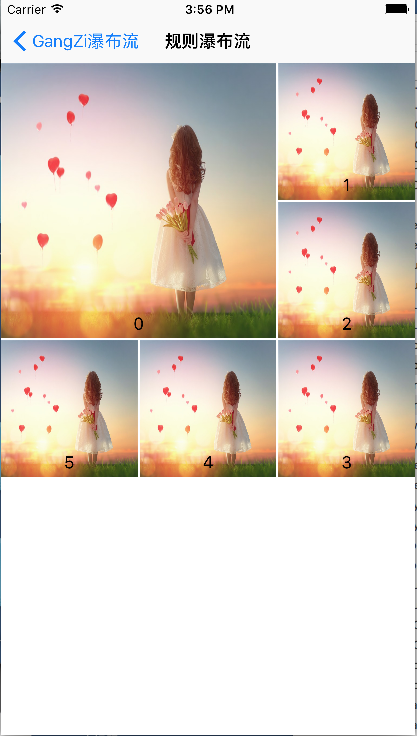
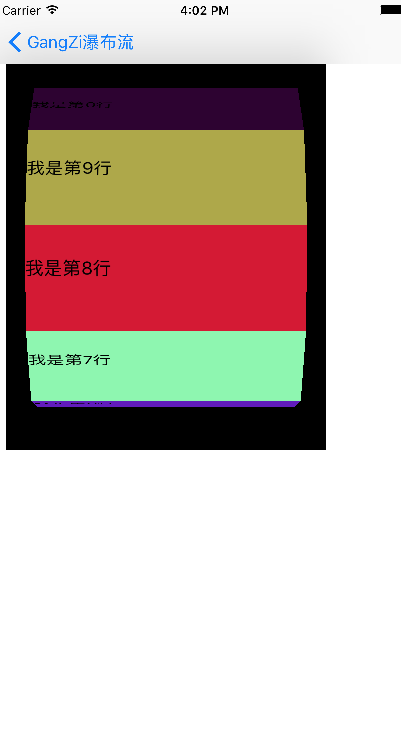
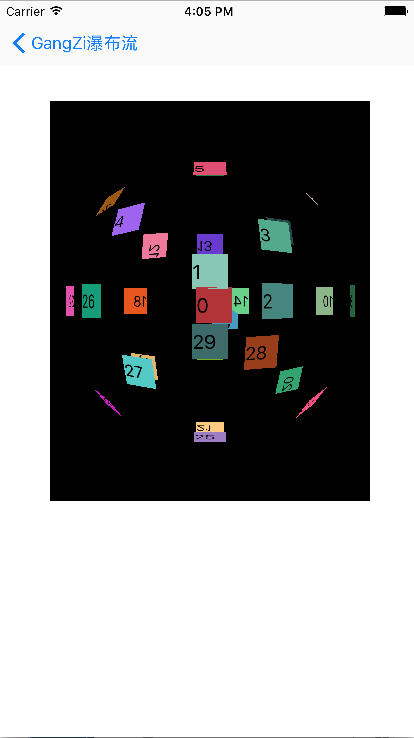
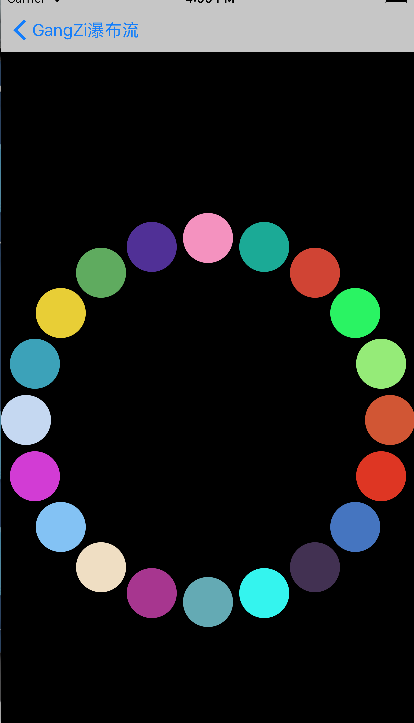
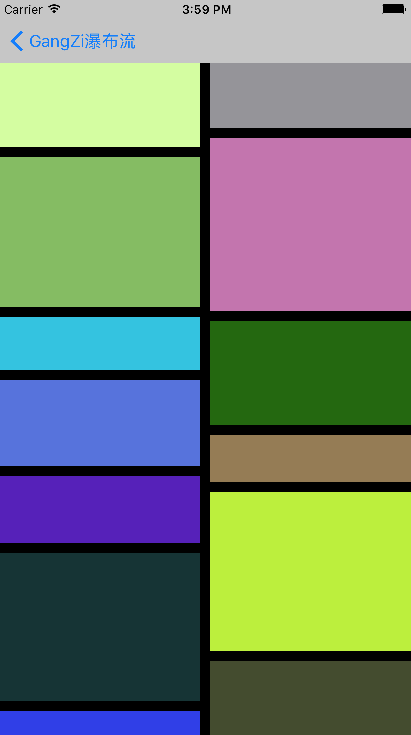
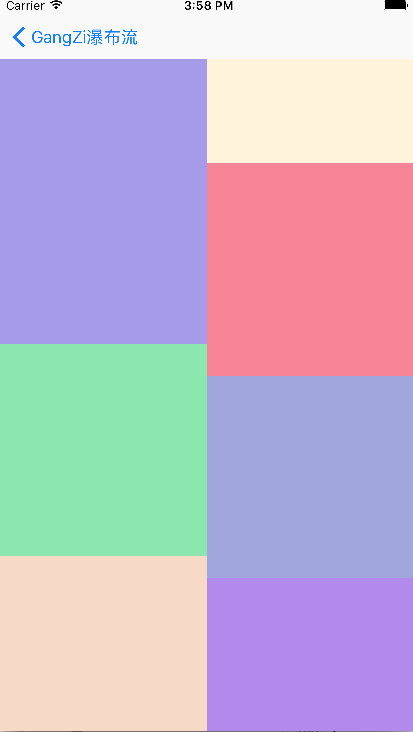
注:本文著作权归作者,由demo大师发表,拒绝转载,转载需要作者授权
iOS GZWaterfall任何形式的瀑布流的更多相关文章
- iOS 两个tableview的 瀑布流
iOS 两个tableview的 瀑布流1. [代码]Objective-C //// DocViewController.m// getrightbutton//// Created ...
- iOS教你轻松打造瀑布流Layout
前言 : 在写这篇文章之前, 先祝贺自己, 属于我的GitHub终于来了. 这也是我的GitHub的第一份代码, 以下文章的代码均可以在Demo clone或下载. 欢迎大家给予意见. 觉得写得不错的 ...
- 移动端三合一瀑布流插件(原生JS)
没有前言,先上DEMO(手机上看效果更佳)和 原码. 瀑布流形式的图片布局方式在手机等移动端设备上运用广泛,比较常见的是下面前两种: 一.等宽等高 这种形式实现起来非常容易,这里就不再多说. 二.等宽 ...
- iOS开发之窥探UICollectionViewController(三) --使用UICollectionView自定义瀑布流
上篇博客的实例是自带的UICollectionViewDelegateFlowLayout布局基础上来做的Demo, 详情请看<iOS开发之窥探UICollectionViewControlle ...
- iOS开发:代码通用性以及其规范 第一篇(附带,自定义UITextView\进度条\双表显示\瀑布流 代码设计思路)
在iOS团队开发中,我见过一些人的代码,也修改过他们的代码.有的人的代码写的非常之规范.通用,几乎不用交流,就可以知道如何修改以及在它基础上扩展延生.有的人的代码写的很垃圾,一眼看过去,简直会怀疑自己 ...
- iOS开发之窥探UICollectionViewController(四) --一款功能强大的自定义瀑布流
在上一篇博客中<iOS开发之窥探UICollectionViewController(三) --使用UICollectionView自定义瀑布流>,自定义瀑布流的列数,Cell的外边距,C ...
- IOS 瀑布流
本篇博客应该算的上CollectionView的高级应用了,从iOS开发之窥探UICollectionViewController(一)到今天的(五),可谓是由浅入深的窥探了一下UICollectio ...
- IOS 瀑布流UICollectionView实现
IOS 瀑布流UICollectionView实现 在实现瀑布流之前先来看看瀑布流的雏形(此方法的雏形 UICollectionView) 对于UICollectionView我们有几点注意事项 它和 ...
- iOS开发笔记15:地图坐标转换那些事、block引用循环/weak–strong dance、UICollectionviewLayout及瀑布流、图层混合
1.地图坐标转换那些事 (1)投影坐标系与地理坐标系 地理坐标系使用三维球面来定义地球上的位置,单位即经纬度.但经纬度无法精确测量距离戒面积,也难以在平面地图戒计算机屏幕上显示数据.通过投影的方式可以 ...
随机推荐
- [转]runOnUiThread 、 Handler 对比(一)
this.runOnUiThread(new Runnable() { @Override public void run() { try { Thread.sleep(1000 * 5); } ...
- java 高并发 订单编号递增(解决方案)
业务描述: 首先从数据中查找最近的一条订单数据,然后将之前的订单号码+1作为新的订单号码,插入到数据库当中.(需求不能改变) 当出现并发操作时,A从数据库中获取最近一条订单的订单号为N,这是A还没有完 ...
- Android中的数据存储(二):文件存储 2017-05-25 08:16 35人阅读 评论(0) 收藏
文件存储 这是本人(菜鸟)学习android数据存储时接触的有关文件存储的知识以及本人自己写的简单地demo,为初学者学习和使用文件存储提供一些帮助.. 如果有需要查看SharedPreference ...
- <摘录>CentOS6.5下添加epel源
0.安装yum优先级插件 yum install yum-priorities 1.epel简介: https://fedoraproject.org/wiki/EPEL/zh-cn rpm -Uvh ...
- MySQL系列:innodb源码分析之内存管理
http://blog.csdn.net/yuanrxdu/article/details/40985363 http://book.2cto.com/201402/40307.html 从MySQL ...
- Webstorm实时编译SASS和LESS
Webstorm自带一个File Watchers功能,设置一下,即可实时编译SASS,LESS等 菜单:File->Settings->左栏Tools下的File Watchers,按右 ...
- Linux_Windows7使用VMare安装Centos6.5并使用Xshell连接Centos
本文章主要是记录虚拟机安装Centos,并在windows使用xshell执行命令的过程,供自己和需要之人学习和使用. 难点主要在于windows和centos网络的设置,实现window连 ...
- 为11gR2 Grid Infrastructure增加新的public网络
在某些环境下,运行11.2版本的RAC数据库的服务器上,连接了多个public网络,那么就会有如下的需求: 给其他的,或者说是新的public网络增加新的VIP地址. 在新的public网络上增加SC ...
- EF6 MVC5译文
Contoso大学的Web应用程序 你在本教程中将建立一个简单的大学网站. 用户可以查看和更新学生信息,当然也包括教师的.下列图表是你将创建的应用程序截屏. 本网站的UI样式来源于内置的模板,所以教程 ...
- Tomcat:基础安装和使用教程
背景 此文记录了 Tomcat 的基本使用方法,主要为了强化记忆. 安装步骤 第一步:下载和安装 Java 下载地址:http://www.oracle.com/technetwork/java/ja ...
