基于nginx搭建yum源服务器
1、首先关闭防护墙或者设置规则通过且关闭selinux
停止firewall
systemctl stop firewalld
禁止firewall开机启动
systemctl disable firewalld
或设置firewall规则
firewall-cmd --permanent --zone=public --add-service=http

firewall-cmd --reload
修改SELINUX=enforce行为SELINUX=disabled
sed -i 's/SELINUX=setenforce 0/SELINUX=disabled/' /etc/sysconfig/selinux
2、nginx-1.14.2版本(编译安装)-自定义安装路径
安装路径:/usr/local/nginx
1.前期准备
安装编译需要的gcc和gcc-c++
yum install -y gcc gcc-c++
安装nginx依赖pcre-devel、openssl-devel、zlib-devel
yum install -y pcre pcre-devel openssl openssl-devel zlib zlib-devel
下载nginx源码包并解压到当前目录
wget http://nginx.org/download/nginx-1.14.2.tar.gz

tar zxvf nginx-1.14..tar.gz
2.nginx编译安装
生成Makefile文件
cd nginx-1.14.

./configure --user=nginx \

--group=nginx \

--prefix=/usr/local/nginx/ \

--with-http_v2_module \

--with-http_ssl_module \

--with-http_sub_module \

--with-http_stub_status_module \

--with-http_gzip_static_module \

--with-pcre
编译源代码并安装
make && make install
3.后期结尾
创建用户
useradd nginx
添加环境变量,创建nginx命令软链接到环境变量
ln -s /usr/local/nginx/sbin/* /usr/local/sbin/
4.配置nginx开启php支持(仅参考)
在server段中开启php支持
找到如下内容,删除注释字符,并将倒数第二行的 /scripts 替换为 $document_root
修改前
#location ~ \.php$ {
# root html;
# fastcgi_pass 127.0.0.1:9000;
# fastcgi_index index.php;
# fastcgi_param SCRIPT_FILENAME /scripts$fastcgi_script_name;
# include fastcgi_params;
#}
修改后
location ~ \.php$ {
root html;
fastcgi_pass 127.0.0.1:9000;
fastcgi_index index.php;
fastcgi_param SCRIPT_FILENAME $document_root$fastcgi_script_name;
include fastcgi_params;
}
该段代码在server中的位置:
server {
listen 80;
server_name localhost;
location / {
root html;
index index.php index.html index.htm;
}
location ~ \.php$ {
root html;
fastcgi_pass 127.0.0.1:9000;
fastcgi_index index.php;
fastcgi_param SCRIPT_FILENAME $document_root$fastcgi_script_name;
include fastcgi_params;
}
}
注意:location ~ \.php$ {}块中root的值和location / {}块中root的值需要一致
3、开启nginx目录浏览
vim /usr/local/nginx/conf/nginx.conf
添加如下内容:
location / {

        root /usr/local/nginx/html/pack/    //指定实际目录绝对路径;

        autoindex on;                       //开启目录浏览功能;

        autoindex_exact_size off;           //关闭详细文件大小统计,让文件大小显示MB,GB单位,默认为b;

        autoindex_localtime on;             //开启以服务器本地时区显示文件修改日期!

}

还有一个问题是这里开启的是全局的目录浏览功能,那么如何实现具体目录浏览功能呢?(仅参考)
2. 只打开网站部分目录浏览功能
只打开http://www.******.com/soft 目录浏览
vi /usr/local/nginx/conf/nginx.conf #编辑配置文件,在server {下面添加以下内容:
location /soft {
autoindex on;
autoindex_exact_size off;
autoindex_localtime on;
}
:wq! #保存,退出
4、创建目录
在web根目录下创建centosplus、extras、updates、os四个目录
mkdir centosplus extras updates os
#这四个目录用来区分类型(仅参考)
for DIR in $(ls); do cd $DIR; mkdir Packages; cd ..; done
#分别在四个目录下创建存储rpm包的目录
5、利用rsync同步至本地
rsync -avz --delete rsync://mirrors.ustc.edu.cn/centos/6/os/x86_64/Packages/ /usr/local/nginx/html/pack/centos/6/os/x86_64/Packages/

rsync -avz --delete rsync://mirrors.ustc.edu.cn/centos/6/extras/x86_64/Packages/ /usr/local/nginx/html/pack/centos/6/extras/x86_64/Packages/

rsync -avz --delete rsync://mirrors.ustc.edu.cn/centos/6/updates/x86_64/Packages/ /usr/local/nginx/html/pack/centos/6/updates/x86_64/Packages/

rsync -avz --delete rsync://mirrors.ustc.edu.cn/centos/6/centosplus/x86_64/Packages/ /usr/local/nginx/html/pack/centos/6/centosplus/x86_64/Packages/
rsync -avz --delete rsync://mirrors.ustc.edu.cn/centos/7/os/x86_64/Packages/ /usr/local/nginx/html/pack/centos/7/os/x86_64/Packages/

rsync -avz --delete rsync://mirrors.ustc.edu.cn/centos/7/extras/x86_64/Packages/ /usr/local/nginx/html/pack/centos/7/extras/x86_64/Packages/

rsync -avz --delete rsync://mirrors.ustc.edu.cn/centos/7/updates/x86_64/Packages/ /usr/local/nginx/html/pack/centos/7/updates/x86_64/Packages/

rsync -avz --delete rsync://mirrors.ustc.edu.cn/centos/7/centosplus/x86_64/Packages/ /usr/local/nginx/html/pack/centos/7/centosplus/x86_64/Packages/
或者同步全部数据(数据量较大不推荐,大小约136G)
rsync -avz --delete rsync://mirrors.ustc.edu.cn/centos/ /usr/local/nginx/html/pack/centos/
提供几个支持rsync同步的网站
mirrors.tuna.tsinghua.edu.cn
mirrors.ustc.edu.cn
mirrors.kernel.org
mirrors.neusoft.edu.cn
6、创建仓库
对三个目录使用createrepo创建仓库(生成repodata目录),供client端检索使用
yum install -y createrepo
createrepo /usr/local/nginx/html/pack/centos//os/x86_64/

createrepo /usr/local/nginx/html/pack/centos//extras/x86_64/

createrepo /usr/local/nginx/html/pack/centos//updates/x86_64/

createrepo /usr/local/nginx/html/pack/centos//centosplus/x86_64/
createrepo /usr/local/nginx/html/pack/centos//os/x86_64/

createrepo /usr/local/nginx/html/pack/centos//extras/x86_64/

createrepo /usr/local/nginx/html/pack/centos//updates/x86_64/

createrepo /usr/local/nginx/html/pack/centos//centosplus/x86_64/
#-o 指定repodata生成的目录
此时yum服务器已经搭建完成
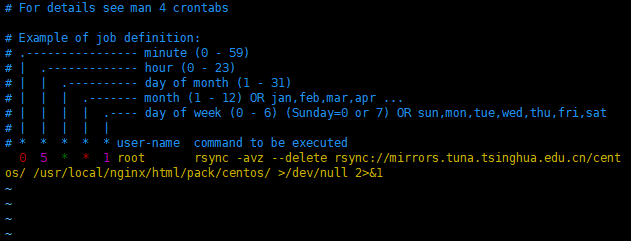
7、创建计划任务
vim /etc/crontab
添加以下内容:
* * root rsync -avz --delete rsync://mirrors.ustc.edu.cn/centos/ /usr/local/nginx/html/pack/centos/ >/dev/null 2>&1 #每周一5点执行同步命令
同步完成后需要更新仓库
createrepo --update /usr/local/nginx/html/pack/centos//os/x86_64/

createrepo --update /usr/local/nginx/html/pack/centos//extras/x86_64/

createrepo --update /usr/local/nginx/html/pack/centos//updates/x86_64/

createrepo --update /usr/local/nginx/html/pack/centos//centosplus/x86_64/

createrepo --update /usr/local/nginx/html/pack/centos//os/x86_64/

createrepo --update /usr/local/nginx/html/pack/centos//extras/x86_64/

createrepo --update /usr/local/nginx/html/pack/centos//updates/x86_64/

createrepo --update /usr/local/nginx/html/pack/centos//centosplus/x86_64/
8、客户端配置
mv /etc/yum.repos.d/CentOS-Base.repo /etc/yum.repos.d/CentOS-Base.repo.bak
cat >> /etc/yum.repos.d/CentOS-Base.repo << eof

[base]

name=CentOS-$releasever - Base

baseurl=http://mirrors.yryun.com/centos/$releasever/os/$basearch/

enabled=

gpgcheck=

#released updates

[updates]

name=CentOS-$releasever - Updates

baseurl=http://mirrors.yryun.com/centos/$releasever/updates/$basearch/

enabled=

gpgcheck=

#additional packages that may be useful

[extras]

name=CentOS-$releasever - Extras

baseurl=http://mirrors.yryun.com/centos/$releasever/extras/$basearch/

enabled=

gpgcheck=

#additional packages that extend functionality of existing packages

[centosplus]

name=CentOS-$releasever - Plus

baseurl=http://mirrors.yryun.com/centos/$releasever/centosplus/$basearch/

enabled=

gpgcheck=

eof
#清除所有缓存
yum clean all
#建立缓存
yum makecache
#查看yum源列表
yum repolist
#当yum服务器内容修改了之后或者修改了yum源文件,客户机需要重新建立缓存
#baseurl指向仓库(repodata)所在的目录
基于nginx搭建yum源服务器的更多相关文章
- 基于http方式搭建YUM源服务器
基于http方式搭建YUM源服务器 (2012-09-21 11:59:14) 转载▼ 标签: yum linux lnmp lamp http 分类: Linux 为了方便公司80多台Linux服务 ...
- CentOS6下基于Nginx搭建mp4/flv流媒体服务器
CentOS6下基于Nginx搭建mp4/flv流媒体服务器(可随意拖动)并支持RTMP/HLS协议(含转码工具) 1.先添加几个RPM下载源 1.1)安装RPMforge的CentOS6源 [roo ...
- FTP搭建YUM源服务器
一.FTP搭建YUM源服务器 1.服务器 挂载centos镜像[root@localhost ~]#yum install vsftpd[root@localhost ~]#systemctl sta ...
- Ubuntu 14.10下基于Nginx搭建mp4/flv流媒体服务器(可随意拖动)并支持RTMP/HLS协议(含转码工具)
Ubuntu 14.10下基于Nginx搭建mp4/flv流媒体服务器(可随意拖动)并支持RTMP/HLS协议(含转码工具) 最近因为项目关系,收朋友之托,想制作秀场网站,但是因为之前一直没有涉及到这 ...
- windows环境下基于nginx搭建rtmp服务器
基于nginx搭建rtmp服务器需要引入rtmp模块,引入之后需重新编译nginx linux环境几个命令行就能实现编译,笔者未尝试,网上有很多教程. windows环境还需要安装一系列的编译环境,例 ...
- 基于nginx搭建简易的基于wcf集群的复杂均衡
很多情况下基于wcf的复杂均衡都首选zookeeper,这样可以拥有更好的控制粒度,但zk对C# 不大友好,实现起来相对来说比较麻烦,实际情况下,如果 你的负载机制粒度很粗糙的话,优先使用nginx就 ...
- 在centos中搭建基于nginx的apt源服务器,整合yum源和apt源在一台服务器
1.首先关闭防护墙或者设置规则通过且关闭selinux 2.nginx-1.14.2版本(编译安装)-自定义安装路径 3.开启nginx目录浏览 以上步骤请参考前文:https://www.cnblo ...
- RedHat7搭建yum源服务器
1.新建目录 # mkdir -p /content/rhel7/x86_64/{isos,dvd}/ 2.上传RedHat安装光盘镜像,上传后的路径为 /content/rhel7/x86_64/i ...
- CentOS6.4下基于Nginx搭建mp4/flv流媒体服务器
我的步骤如下:1. 安装依赖包: yum install glibc.i686#yum –y update#yum -y install gcc glibc glibc-devel make nasm ...
随机推荐
- openlayers4 入门开发系列之风场图篇
前言 openlayers4 官网的 api 文档介绍地址 openlayers4 api,里面详细的介绍 openlayers4 各个类的介绍,还有就是在线例子:openlayers4 官网在线例子 ...
- 一起学Android之Http访问
概述 在Android开发中,一般通过网络进行访问服务器端的信息(存储和检索网络中的数据),如API接口,WebService,网络图片等.今天主要讲解Http访问的常用方法,仅供学习分享使用. 涉及 ...
- SQLsever存储过程分页查询
使用存储过程实现分页查询,SQL语句如下: USE [DatebaseName] --数据库名 GO /****** Object: StoredProcedure [dbo].[Pagination ...
- H5直播避坑指南
本文来自"小时光茶社(Tech Teahouse)"公众号 作者简介: 文赫,2015年加入腾讯,作为前端开发工程师参与过手Q游戏公会,游戏中心,企鹅电竞等项目,具有丰富的移动端开 ...
- 关于:未能加载文件或程序集“ICSharpCode.SharpZipLib”或它的某一个依赖项异常的解决方案
问题: 今天项目迁移忽然又个ICSharpCode.SharpZipLib.dll 程序包丢失了,于是我在网上下载一个这样的包,结果程序运行就提示:未能加载文件或程序集“ICSharpCode.Sha ...
- Oracle11g创建表空间、创建用户、角色授权、导入导出表以及中文字符乱码问题
[转载]原文地址:https://www.cnblogs.com/bjh1117/p/6605037.html 前提:本机已经安装了Oracle11g数据库. 需求:使用PL SQL数据库连接工具操作 ...
- 从壹开始前后端分离【 .NET Core2.0 +Vue2.0 】框架之十二 || 三种跨域方式比较,DTOs(数据传输对象)初探
更新反馈 1.博友@落幕残情童鞋说到了,Nginx反向代理实现跨域,因为我目前还没有使用到,给忽略了,这次记录下,为下次补充.此坑已填 2.提示:跨域的姊妹篇——<三十三║ ⅖ 种方法实现完美跨 ...
- 使用 Moq 测试.NET Core 应用 - Why Moq?
什么是Mock 当对代码进行测试的时候, 我们经常需要用到一些模拟(mock)技术. 绿色的是需要被测试的类, 黄色是它的依赖项, 灰色的无关的类 在一个项目里, 我们经常需要把某一部分程序独立出来以 ...
- .NET Core TDD 前传: 编写易于测试的代码 -- 依赖项
第1篇: 讲述了如何创造"缝". "缝"(seam)是需要知道的概念. 第2篇, 避免在构建对象时写出不易测试的代码. 本文是第3篇, 讲述依赖项和迪米特法则 ...
- 谷歌浏览器的各个版本对应的webdriver(chromedrive)-超级详细
简介 近来看到各个测试群里的小伙伴由于安装的谷歌浏览器版本各不相同,有高有低,这可是难住愁坏了一大批人,所以都在要各种版本的谷歌浏览器相对应的chromedrive,为此找了一个淘宝镜像网址供大家下载 ...