SpringBoot入门之简单配置
今天下载了《JavaEE开发的颠覆者SpringBoot实战》这本书,发现Spring还有好多遗漏的部分,算是又恶补了一下,今天主要是学习下SpringBoot的配置。
一、基本配置
1.定制Banner
(1).在src/main/resource下新建banner.txt
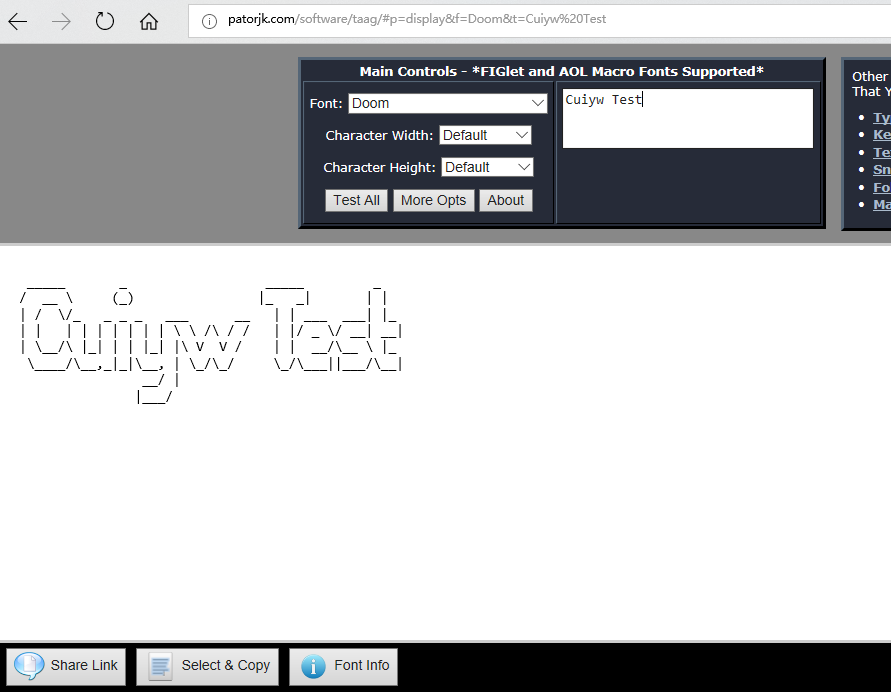
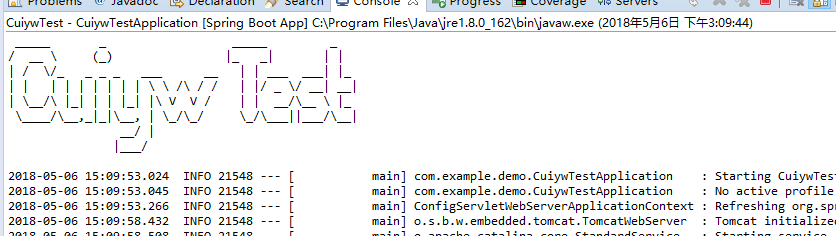
(2).打开http://patorjk.com/software/taag,输入要显示的文字,选择想要的样式,拷贝到banner.txt中,再次启动时就会发现banner已变。
(3)关闭banner
可以修改main,设置设置banner mode为OFF关闭banner。
package com.example.demo;

import org.springframework.boot.Banner;

import org.springframework.boot.SpringApplication;

import org.springframework.boot.autoconfigure.SpringBootApplication;

@SpringBootApplication

public class CuiywTestApplication {

    public static void main(String[] args) {

        //SpringApplication.run(CuiywTestApplication.class, args);

        SpringApplication app=new SpringApplication(CuiywTestApplication.class);

        app.setBannerMode(Banner.Mode.OFF);

        app.run(args);

    }

}
2.springboot配置文件
SpringBoot使用application.properties作为全局的配置文件,对一些默认配置的值进行修改。它不仅支持properties类型的文件还支持yml类型的文件.
server.port=8081

server.servlet.context-path=/cywtest
这里修改了启动的默认端口8080和默认context-path:/。看它启动日志也可以看出来发生了变化.

3.使用xml配置
虽然SpringBoot不提倡使用xml配置,但有时候也还是需要用的,这里我们在src/main/java下创建com.example.cywtest包,在包下创建一个@service HelloService,由于SpringBoot默认扫描的是CuiywTestApplication main方法对应的包以及子包,不会扫到com.example.cywtest包,我们在helloController注入一个该服务,然后启动,发现会报错,找不到该类。
***************************

APPLICATION FAILED TO START

***************************

Description:

Field helloService in com.example.demo.helloController required a bean of type 'com.example.cywtest.HelloService' that could not be found.

Action:

Consider defining a bean of type 'com.example.cywtest.HelloService' in your configuration.
(1).创建application-bean.xml
<?xml version="1.0" encoding="UTF-8"?>

<beans xmlns="http://www.springframework.org/schema/beans"

       xmlns:xsi="http://www.w3.org/2001/XMLSchema-instance"

       xsi:schemaLocation="http://www.springframework.org/schema/beans http://www.springframework.org/schema/beans/spring-beans.xsd">

    <!--

        自定义配置bean

    -->

    <bean id="helloService" class="com.example.cywtest.HelloService">

    </bean>

</beans>
(2).在main方法对应的包下创建配置文件引入bean,以便让SpringBoot能扫描到
package com.example.demo;

import org.springframework.context.annotation.Configuration;

import org.springframework.context.annotation.ImportResource;

@Configuration

@ImportResource(locations = {"application-bean.xml"})

public class ConfigClass {

}
这样再启动就不会报错了。
HelloService:这个类不在CuiywTestApplication对应的包下,SpringBoot默认扫描不到。
package com.example.cywtest;

import org.springframework.stereotype.Service;

@Service

public class HelloService {

      public HelloService(){

            System.out.println("使用XML进行配置的Service");

        }

}
ConfigClass:这里引入了application-bean.xml
package com.example.demo;

import org.springframework.context.annotation.Configuration;

import org.springframework.context.annotation.ImportResource;

@Configuration

@ImportResource(locations = {"application-bean.xml"})

public class ConfigClass {

}
helloController: 这里注入了HelloService.
package com.example.demo;

import org.springframework.beans.factory.annotation.Autowired;

import org.springframework.stereotype.Controller;

import org.springframework.web.bind.annotation.RequestMapping;

import org.springframework.web.bind.annotation.ResponseBody;

import org.springframework.web.bind.annotation.RestController;

import com.example.cywtest.HelloService;

@RestController

//@Controller

//@ResponseBody

@RequestMapping("/sbs")

public class helloController {

    @Autowired

    HelloService helloService;

    @RequestMapping("/hello")

    public String Hello(){

        return "Hello World";

    }

}
这样通过上面的方法引入之后就能让SpringBoot扫描到了,再次启动也不会报错了。

二、外部配置
1.常规属性配置
在SpringBoot中只需在application.properties中定义,使用@Value注入即可。
Test.Name=cuiyw
package com.example.demo;

import org.springframework.beans.factory.annotation.Autowired;

import org.springframework.beans.factory.annotation.Value;

import org.springframework.stereotype.Controller;

import org.springframework.web.bind.annotation.RequestMapping;

import org.springframework.web.bind.annotation.ResponseBody;

import org.springframework.web.bind.annotation.RestController;

import com.example.cywtest.HelloService;

@RestController

//@Controller

//@ResponseBody

@RequestMapping("/sbs")

public class helloController {

    @Autowired

    HelloService helloService;

    @Value("${Test.Name}")

    private String Name;

    @RequestMapping("/hello")

    public String Hello(){

        return "Hello World,"+Name;

    }

}

2.基于properties类型安全的配置
SpringBoot提供了类型安全的配置方式,通过@ConfigurationProperties将Properties属性和一个Bean及其属性关联,从而实现类型安全的配置。
(1).在src/main/resource下建了一个test.properties的属性文件
person.Name=cyw

person.Age=18
(2).在com.example.demo包下创建了PersonSetting的类用来与test属性文件进行关联。
package com.example.demo;

import org.springframework.boot.context.properties.ConfigurationProperties;

import org.springframework.context.annotation.PropertySource;

import org.springframework.stereotype.Component;

@Component

@PropertySource(value = "classpath:/test.properties")

@ConfigurationProperties(prefix="person")

public class PersonSetting {

    private String name;

    private Long age;

    public String getName() {

        return name;

    }

    public void setName(String name) {

        this.name = name;

    }

    public Long getAge() {

        return age;

    }

    public void setAge(Long age) {

        this.age = age;

    }

}
(3).在helloController注入PersonSetting
package com.example.demo;

import org.springframework.beans.factory.annotation.Autowired;

import org.springframework.beans.factory.annotation.Value;

import org.springframework.stereotype.Controller;

import org.springframework.web.bind.annotation.RequestMapping;

import org.springframework.web.bind.annotation.ResponseBody;

import org.springframework.web.bind.annotation.RestController;

import com.example.cywtest.HelloService;

@RestController

//@Controller

//@ResponseBody

@RequestMapping("/sbs")

public class helloController {

    @Autowired

    HelloService helloService;

    @Value("${Test.Name}")

    private String Name;

    @Autowired

    PersonSetting personSetting;

    @RequestMapping("/hello")

    public String Hello(){

        return "Hello World,"+Name+"Person Name:"+personSetting.getName();

    }

}
(4).启动,在浏览器输入http://localhost:8081/cywtest/sbs/hello,可以看到获取到了属性文件中的name值。

三、Profile配置
在开发中可能会部署多个环境,每个环境部署的配置可能不一样.我们可以使用application.properties进行多个环境的配置,通过application-{profile}.properties来控制加载哪个环境的配置,将于环境无关的属性,放置到application.properties文件里面,通过spring.profiles.active=profiles的值,加载不同环境的配置,如果不指定,则默认加载application.properties的配置,不会加载带有profile的配置 。
(1).创建application-dev.properties开发和application-prod.properties生产属性文件,分别指定不同的port和context-path。
server.port=8082

server.servlet.context-path=/devtest
server.port=8083

server.servlet.context-path=/prodtest
(2)在application.properties设置环境 ,这里设置的是dev环境,那启动的端口就是8082.
spring.profiles.active=dev

四、小结
今天算是学了几个简单的配置,其实还有好多配置,比如日志等,这个一篇博客也写不完,在以后的博客中学习。
SpringBoot入门之简单配置的更多相关文章
- springboot 入门二- 读取配置信息一
在上篇入门中简单介绍下springboot启动使用了大量的默认配置,在实际开发过程中,经常需要启动多个服务,那端口如何手动修改呢? 此篇就是简单介绍相关的配置文件信息. Spring Boot允许外部 ...
- 01.springboot入门--启用自动配置注解EnableAutoConfiguration
springboot入门 <parent> <groupId>org.springframework.boot</groupId> <artifactId&g ...
- springboot 入门八-自定义配置信息(编码、拦截器、静态资源等)
若想实际自定义相关配置,只需要继承WebMvcConfigurerAdapter.WebMvcConfigurerAdapter定义些空方法用来重写项目需要用到的WebMvcConfigure实现.具 ...
- SpringBoot入门(简单详细教程)
Spring Boot 简介 简化Spring应用开发的一个框架:整个Spring技术栈的一个大整合:J2EE开发的一站式解决方案: 微服务 martin fowler:微服务:架构风格(服务微化): ...
- SpringBoot入门教程(八)配置logback日志
Logback是由log4j创始人设计的又一个开源日志组件.logback当前分成三个模块:logback-core,logback- classic和logback-access.logback-c ...
- SpringBoot入门之分散配置
springboot默认支持两种格式的配置文件:.properties和.yml.其中.properties是属性文件,也是最常用的一种:.yml是yaml格式的文件,yaml是一种简洁的标记语言.例 ...
- springboot入门之简单demo
项目构建 我们采用maven构建SpringBoot工程,首先创建一个maven工程,对应的pom文件如下: <properties> <java.version>1.8< ...
- springboot 入门三- 读取配置信息二(读取属性文件方式)
在上篇文章中简单介绍自带读取方式.springboot提供多种方式来读取 一.@ConfigurationProperties(value="my") 支持更灵活的绑定及元数据的支 ...
- SpringBoot入门 (三) 日志配置
上一篇博文记录了再springboot项目中读取属性文件中配置的属性,本文学习在springboot项目中记录日志. 日志记录在项目中是很常见的一个功能了,对排查问题有很大帮助,也可以做分类分析及统计 ...
随机推荐
- [C]simple code of count input lines,words,chars
This is a simple C program which can count input lines, words and chars. But the number of words are ...
- Java-IO之CharArrayWriter(字符数组输出流)
CharArrayWriter用于写数据,数据单位是字符. (1) 通过CharArrayWriter()创建的CharArrayWriter对应的字符数组大小是32. (2) 通过CharArray ...
- Android最佳实践之SystemBar状态栏全版本适配方案
前言 自从MD设计规范出来后,关于系统状态栏的适配越受到关注,因为MD在5.0以后把系统状态栏的颜色改为可由开发者配置的,而在5.0之前则无法指定状态栏的颜色,所以这篇就说说使用Toolbar对系统状 ...
- cocos2dx 3.3 + QT5.3制作游戏编辑器
欢迎转载,但请注明本blog地址,谢谢_(:зゝ∠)_ http://www.cnblogs.com/marisa/p/4141862.html 主要参考: http://blog.csdn.net/ ...
- CUDA学习,第一个kernel函数及代码讲解
前一篇CUDA学习,我们已经完成了编程环境的配置,现在我们继续深入去了解CUDA编程.本博文分为三个部分,第一部分给出一个代码示例,第二部分对代码进行讲解,第三部分根据这个例子介绍如何部署和发起一个k ...
- 产品打包工具的制作,ant,编译源码,打jar包,打tag,打war包,备份release版本等
1. 在进行打包工具的制作前,需要准备的软件有: svnant-1.3.1 作用是让ant和svn相关联 apache-ant-1.9.7 需要设置ant_home,path,我的配置是: ANT_ ...
- iOS中 数据持久化 UI高级_17
数据持久化的本质就是把数据由内写到本地(硬盘中),在iOS指将数据写到沙盒文件夹下: 沙盒机制:指的就是采用沙盒文件夹的形式管理应用程序的本地文件,而且沙盒文件夹的名字是随机分配的,采用十六进制方法命 ...
- 海量数据挖掘MMDS week2: 局部敏感哈希Locality-Sensitive Hashing, LSH
http://blog.csdn.net/pipisorry/article/details/48858661 海量数据挖掘Mining Massive Datasets(MMDs) -Jure Le ...
- Android开发之初识MVP模式
各位亲爱的小伙伴,有没有想我啊,我胡汉wing又回来了. 很长一段时间没有更新博客..原因是..从离职回到学校以后,一直在享受最后的学生时光(打游戏).. 游戏固然很爽,但是觉得实在很荒废,于是半夜诈 ...
- MySQL学习笔记_9_MySQL高级操作(上)
MySQL高级操作(上) 一.MySQL表复制 create table t2 like t1; #复制表结构,t2可以学习到t1所有的表结构 insert into t2 ...