构建第一个Spring Boot2.0应用之application.properties和application.yml(八)
本节学习在项目中配置文件配置的方式,一种是通过applicaiton.properties,一种是通过application.yml方式。
一、环境:
IDE:IntelliJ IDEA 2017.1.1
JDK:1.8.0_161
Maven:3.3.9
springboot:2.0.2.RELEASE
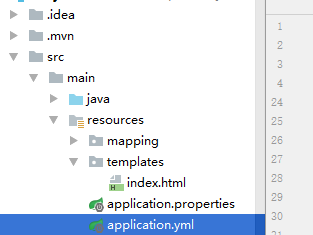
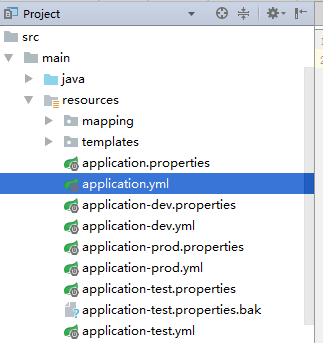
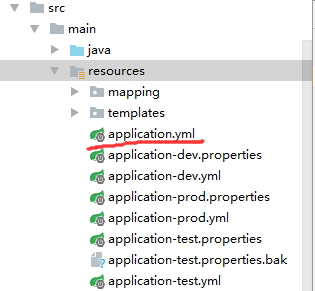
二、文件位置
三、application.properties
常见的properties文件配置格式,如下
server.port=8888

# 数据库访问配置

spring.datasource.type=com.alibaba.druid.pool.DruidDataSource

spring.datasource.driver-class-name=com.mysql.jdbc.Driver

spring.datasource.url=jdbc:mysql://localhost:3306/test?useUnicode=true&characterEncoding=gbk&zeroDateTimeBehavior=convertToNull&useSSL=false

spring.datasource.username=root

spring.datasource.password=mysql

# 下面为连接池的补充设置,应用到上面所有数据源中

spring.datasource.initialSize=5

spring.datasource.minIdle=5

spring.datasource.maxActive=20

# 配置获取连接等待超时的时间

spring.datasource.maxWait=60000

# 配置间隔多久才进行一次检测,检测需要关闭的空闲连接,单位是毫秒

spring.datasource.timeBetweenEvictionRunsMillis=60000

# 配置一个连接在池中最小生存的时间,单位是毫秒

spring.datasource.minEvictableIdleTimeMillis=300000

spring.datasource.validationQuery=SELECT 1 FROM DUAL

spring.datasource.testWhileIdle=true

spring.datasource.testOnBorrow=false

spring.datasource.testOnReturn=false

# 配置监控统计拦截的filters,去掉后监控界面sql无法统计,'wall'用于防火墙

spring.datasource.filters=stat,wall,log4j

spring.datasource.logSlowSql=true

#设置热部署

#开启热部署

spring.devtools.restart.enabled=true

#重启范围

spring.devtools.restart.additional-paths=src/main/java

#thymeleaf配置

spring.thymeleaf.prefix=classpath:/templates/

spring.thymeleaf.suffix=.html

spring.thymeleaf.mode=HTML5

#防止Invalid bound statement (not found)

mybatis.mapper-locations= classpath:mapping/*.xml
四.yml文件配置
yml文件的好处,天然的树状结构,一目了然,结构如下
server:

  port: 8888 #端口

spring:

  datasource: #数据源配置

    type: com.alibaba.druid.pool.DruidDataSource

    driver-class-name: com.mysql.jdbc.Driver

    url: jdbc:mysql://localhost:3306/test?useUnicode=true&characterEncoding=gbk&zeroDateTimeBehavior=convertToNull&useSSL=false

    username: root

    password: mysql

    initialSize: 5 #连接池配置

    minIdle: 5

    maxActive: 20

    maxWait: 60000  #连接等待超时时间

    timeBetweenEvictionRunsMillis: 60000 #配置隔多久进行一次检测(检测可以关闭的空闲连接)

    minEvictableIdleTimeMillis: 300000 #配置连接在池中的最小生存时间

    validationQuery: SELECT 1 FROM DUAL

    testWhileIdle: true

    testOnBorrow: false

    testOnReturn: false

    poolPreparedStatements: true # 打开PSCache,并且指定每个连接上PSCache的大小

    maxPoolPreparedStatementPerConnectionSize: 20

    filters:  stat,wall,log4j # 配置监控统计拦截的filters,去掉后监控界面sql无法统计,'wall'用于防火墙

    logSlowSql: true

  devtools: #设置热部署

    restart:

      enabled: true #开启热部署

      additional-paths: src/main/java #重启范围

  thymeleaf: #thymeleaf

    prefix: classpath:/templates

    suffix: .html

    mode: HTML5

    encoding: UTF-8

    servlet:

      content-type: text/html

    cache: false

  resources:

    chain:

      strategy:

        content:

          enabled: true

          paths: /**

mybatis: #Invalid bound statement (not found)

  mapper-locations: classpath:mapping/*.xml
yml格式在编写过程中有几点需要注意:
- 大小写敏感
- 使用缩进表示层级关系
- 缩进时不允许使用Tab键,只允许使用空格
- 缩进的空格数目不重要,只要相同层级的元素左侧对齐即可
- 每个散列项冒号和值之间至少有一个空格,如 enabled: true
五、多环境配置应用配置
在实际项目应用中,开发、测试、生产几个环境中的配置是不一样的,为了区分不同环境配置,方便修改部署,可以在项目中针对不同环境配置不同的参数,在系统部署时根据具体情况快速选择加载的相应的配置。
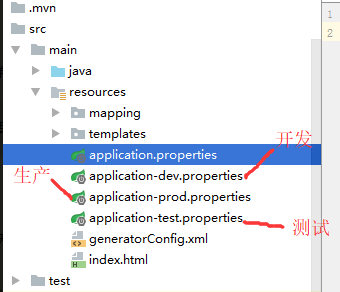
1.application.properties多环境配置
在项目中,分别针对开发、生产及测试添加application-dev.properties、application-prod.properties、application-test.properties三个配置文件,如下图。各properties文件内容同上application.properties,分别设置开发、生产、测试配置文件中的端口8887、8888、8889,
修改application.properties内容为
## 开发/测试/生产环境分别对应dev/test/prod,可以自由定义

spring.profiles.active=dev
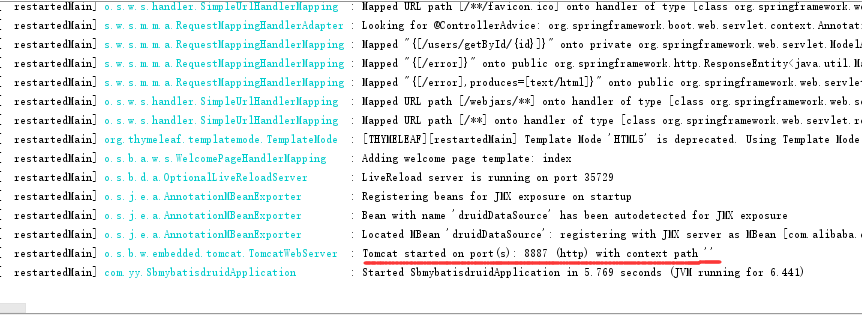
此处配置激活配置开发配置文件,启动项目,可以看到项目访问端口为开发端口8887。
可以测试,修改application.properites内容为pring.profiles.active=prod或者pring.profiles.active=test,分别启动,则可以看到项目端口变为8888、8889。
通过上面配置,可以针对不同环境在各自的配置文件中设置相应的配置参数,在项目部署时只要在主application.properites中简单的修改激活哪一个文件即可,而不用修改具体的文件内容。
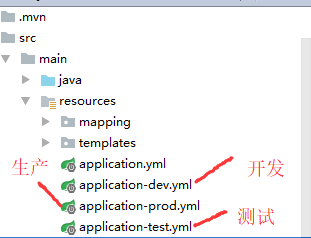
1.application.yml多环境配置
yml配置文件设置与properties配置文件设置类似,分别添加application-dev.yml、application-prod.yml、application-test.yml,修改文件中的项目启动端口为8890、8891、8892。
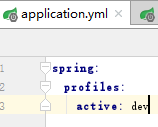
主配置文件application.yml内容为
spring:

  profiles:

    active: dev
启动项目,查日志
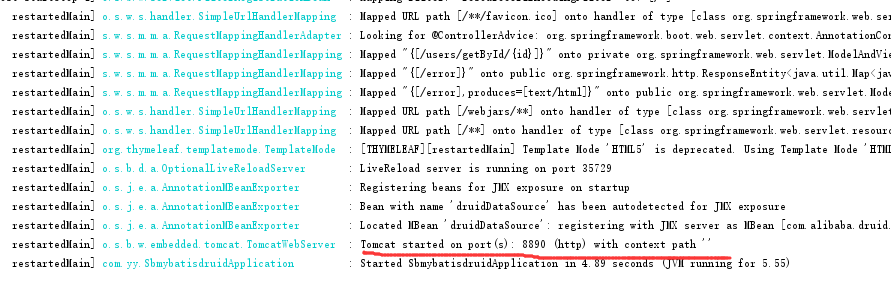
同上,修改application.yml,启动prod、test,启动端口相应的变为8891、8892
六、yml与properties混用
在一个项目中如果即配置了properties也配置了yml,则优先使用properties。
在上面示例中继续测试,在项目中通过properties、yml同时配置了开发、生产及测试。
各文件配置内容见上。
设置application.properties 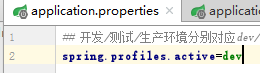 设置application.yml
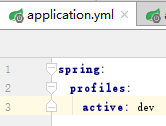
启动项目,查看日志

项目使用开发配置文档中配置的端口8887。即项目默认使用application.properties,激活application-dev.properties。
另一种情况,其他不变,在上面配置文件列表中删除application.properties,项目启动会自动使用application.yml作为主配置。
application.yml文件内容不变,如下
即激活开发配置文件。在配置文件列表中有application-dev.properties(端口8887),application-dev.yml(端口8890),项目启动激活哪一个呢?
启动项目,查看日志如下
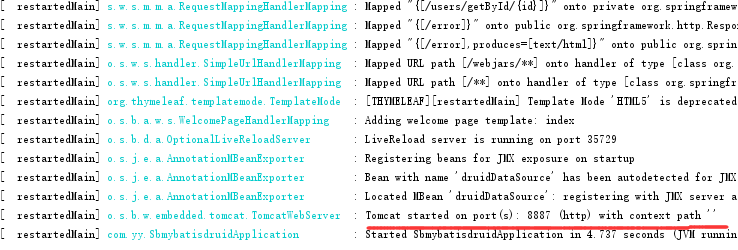
有日志可以看出,激活的是application-dev.properties。由此看出,在多个配置文件中,如果同时存在.properties、.yml配置文件,项目优先使用.properties文件内容作为项目配置参数。
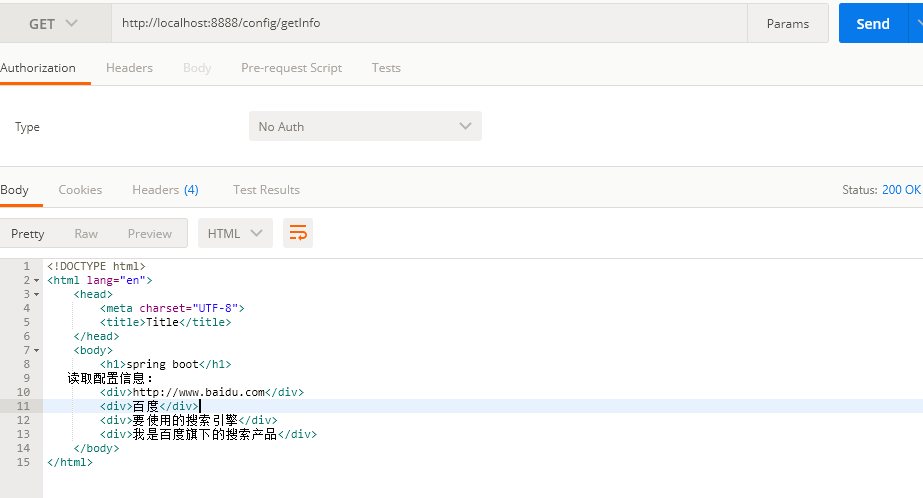
七. 在项目中如何读取和使用配置文件(.properties或yml)中的配置信息?
自定义配置文件myconfig.properties,要读取的配置文件中的信息如下
#自定义配置信息

test.info.url=http://www.baidu.com

test.info.title=百度

test.info.description=要使用的搜索引擎

test.info.other=我是百度旗下的搜索产品
结果展示页面
templates/config.html
<!DOCTYPE html>

<html lang="en" xmlns:th="http://www.w3.org/1999/xhtml">

<head>

    <meta charset="UTF-8">

    <title>Title</title>

</head>

<body>

<h1>spring boot</h1>

   读取配置信息:<div th:text="${url}">地址</div>

<div th:text="${title}">标题</div>

<div th:text="${description}">描述</div>

<div th:text="${other}">其他</div>

</body>

</html>
1.@ConfigurationProperties方式
自定义配置类:PropertiesConfig.java
package com.yy.entity;

import org.springframework.boot.context.properties.ConfigurationProperties;

import org.springframework.context.annotation.PropertySource;

import org.springframework.stereotype.Component;

/**

 * Created by Administrator on 2018-06-08.

 */

@Component

@ConfigurationProperties(prefix = "test.info")

//默认读取application.properties

//@PropertySource(value="application.properties")

@PropertySource(value="myconfig.properties")

public class PropertiesConfig {

    public  String url;

    public String title;

    public String description;

    public String other;

    public String getUrl() {

        return url;

    }

    public void setUrl(String url) {

        this.url = url;

    }

    public String getTitle() {

        return title;

    }

    public void setTitle(String title) {

        this.title = title;

    }

    public String getDescription() {

        return description;

    }

    public void setDescription(String description) {

        this.description = description;

    }

    public String getOther() {

        return other;

    }

    public void setOther(String other) {

        this.other = other;

    }

}
自定义ConfigContoller.java,读取配置信息
package com.yy.controller;

import com.mysql.fabric.xmlrpc.Client;

import com.yy.entity.PropertiesConfig;

import org.springframework.beans.factory.annotation.Autowired;

import org.springframework.stereotype.Controller;

import org.springframework.web.bind.annotation.RequestMapping;

import org.springframework.web.servlet.ModelAndView;

import java.util.HashMap;

import java.util.Map;

import java.util.Properties;

import java.util.zip.InflaterInputStream;

/**

 * Created by Administrator on 2018-06-08.

 */

@Controller

@RequestMapping("/config")

public class ConfigContoller {

    @Autowired

    private PropertiesConfig propertiesConfig;

    @RequestMapping("/getInfo")

    private  ModelAndView getConfigInfo()

    {

        ModelAndView mv=new ModelAndView("/config");

        Map<String,Object> map=new HashMap<String,Object>();

        mv.addObject("url",propertiesConfig.getUrl());

        mv.addObject("title",propertiesConfig.getTitle());

        mv.addObject("description",propertiesConfig.getDescription());

        mv.addObject("other",propertiesConfig.getOther());

        return mv;

    }

}
运行结果
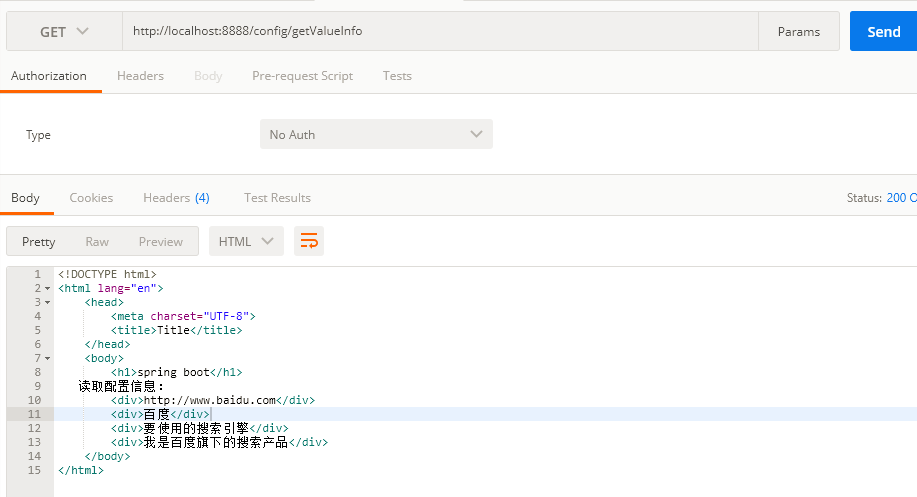
(2)使用@Value注解方式
其他同上,重新编写一个controller,如下
@Controller

@RequestMapping("/config")

public class ConfigContoller1 {

    @Value("${test.info.url}")

    private String url;

    @Value("${test.info.title}")

    private String title;

    @Value("${test.info.description}")

    private String description;

    @Value("${test.info.other}")

    private String other;

    @RequestMapping("/getValueInfo")

    private  ModelAndView getConfigInfo()

    {

        ModelAndView mv=new ModelAndView("/config");

        mv.addObject("url",url);

        mv.addObject("title",title);

        mv.addObject("description",description);

        mv.addObject("other",other);

        return mv;

    }

}
测试结果
(3)使用Environment
package com.yy.controller;

import org.springframework.beans.factory.annotation.Autowired;

import org.springframework.beans.factory.annotation.Value;

import org.springframework.context.annotation.PropertySource;

import org.springframework.core.env.Environment;

import org.springframework.stereotype.Controller;

import org.springframework.web.bind.annotation.RequestMapping;

import org.springframework.web.servlet.ModelAndView;

import java.util.HashMap;

import java.util.Map;

/**

 * Created by Administrator on 2018-06-08.

 */

@Controller

@RequestMapping("/config")

public class ConfigContoller2 {

    @Autowired

    private Environment evn;

    @RequestMapping("/getEnvInfo")

    private  ModelAndView getConfigInfo()

    {

        ModelAndView mv=new ModelAndView("/config");

        mv.addObject("url",evn.getProperty("test.info.url"));

        mv.addObject("title",evn.getProperty("test.info.title"));

        mv.addObject("description",evn.getProperty("test.info.description"));

        mv.addObject("other",evn.getProperty("test.info.other"));

        return mv;

    }

}
启动项目,查看测试结果

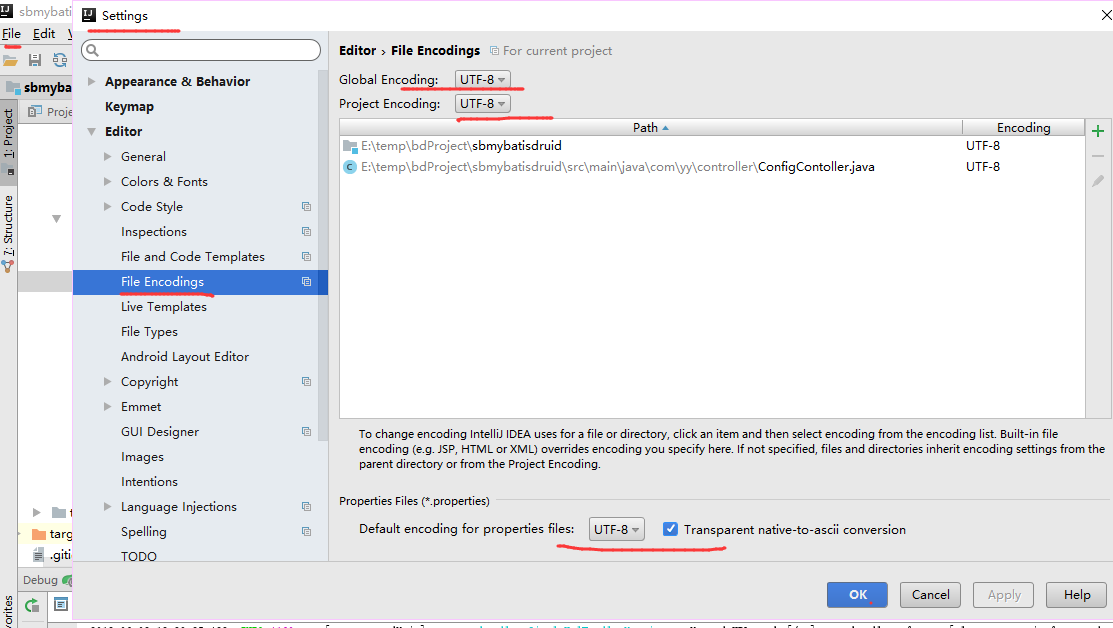
八.关于读取配置参数properties中文乱码
构建第一个Spring Boot2.0应用之application.properties和application.yml(八)的更多相关文章
- 构建第一个Spring Boot2.0应用之项目创建(一)
1.开发环境 IDE: JAVA环境: Tomcat: 2.使用Idea生成spring boot项目 以下是使用Idea生成基本的spring boot的步骤. (1)创建工程第一步 (2)创建工 ...
- 构建第一个Spring Boot2.0应用之集成mybatis(六)
一.环境: IDE:IntelliJ IDEA 2017.1.1 JDK:1.8.0_161 Maven:3.3.9 springboot:2.0.2.RELEASE 二.步骤 方式一:利用配置文件配 ...
- 构建第一个Spring Boot2.0应用之集成mybatis、Druid(七)
一.环境: IDE:IntelliJ IDEA 2017.1.1 JDK:1.8.0_161 Maven:3.3.9 springboot:2.0.2.RELEASE 二.说明: 本文综合之 ...
- 构建第一个Spring Boot2.0应用之集成dubbo上---环境搭建(九)
一.环境: Windows: IDE:IntelliJ IDEA 2017.1.1 JDK:1.8.0_161 Maven:3.3.9 springboot:2.0.2.RELEASE Linux(C ...
- 构建第一个spring boot2.0应用之项目启动运行的几种方式(二)
方法一. 配置Run/Debug Configuration 选择Main Class为项目 Application启动类(入口main方法) (2).进行项目目录,即包含pom.xml的目录下,启 ...
- 构建第一个Spring Boot2.0应用之Controller(三)
Controller控制器主要是接收浏览器请求.下面说一说@Controller注解和@RestController的区别: (1)@Controller类中的方法可以直接通过返回String跳转到j ...
- 构建第一个Spring Boot2.0应用之RequestMapping(四)
在学习controller的时候,测试了在RequestMapping中,value参数中配置集合,实现不同的URL访问同一方法. 本章继续学习和测试RequestMapping的其他特性. 一.Pa ...
- 快速搭建spring boot2.0 项目
快速搭建spring boot2.0+mybatis+thymeleaf 项目 使用工具STS 3.9.7(eclipse) 首先创建一个spring boot2.0项目(具体创建方法就不写了) 然后 ...
- spring boot2.0(一 ) 基础环境搭建
1.基础配置 开发环境:window jdk版本:1.8(spring boot2.0最低要求1.8) 开发工具:eclipse 构建方式:maven3 2.POM配置文件 <project x ...
随机推荐
- layui table中使用checkbox
第一步: 1. <div class="layui-form"> <table class="layui-hide" lay-filter=& ...
- KINECT2通过ROS在线跑ORBSLAM2
source ~/.bashrc export ROS_PACKAGE_PATH=${ROS_PACKAGE_PATH}:/home/user/ORB_SLAM2/Examples/ROS 上面这个一 ...
- Tomcat之NIO 启动与应用分析
概述 从入门Web开始一直在使用Tomcat,随着对网络相关的知识的进一步了解,觉得越有必有去阅读一下常用的开源服务器的整个工作流程,以及使用场景,对比几款服务器的优劣势.最终根据合适的业务场景进行优 ...
- .net core 深入了解配置文件加载过程
前言 配置文件中程序运行中,担当着不可或缺的角色:通常情况下,使用 visual studio 进行创建项目过程中,项目配置文件会自动生成在项目根目录下,如 appsettings.json, ...
- (转)System.Web.Mvc.UrlHelper的学习与使用
转载自http://www.cnblogs.com/longgel/archive/2010/02/06/1664884.html 上一次学习了HtmlHelper帮助类,这次我们学习一下UrlHel ...
- Android OpenGLES2.0(十七)——球形天空盒VR效果实现
在3D游戏中通常都会用到天空盒,在3D引擎中也一般会存在天空盒组件,让开发者可以直接使用.那么天空盒是什么?天空盒又是如何实现的呢?本篇博客主要介绍如何在Android中利用OpenGLES绘制一个天 ...
- Object类、常用API
Object类.常用API Object类.常用API Object类.常用API Object类.常用API Object类.常用API Object类.常用API
- CF447B DZY Loves Strings 贪心
DZY loves collecting special strings which only contain lowercase letters. For each lowercase letter ...
- Java基础笔记(十一)—— 字符串与数组
字符串的声明与初始化主要两种:String s1=new String("abc"); 或 String s2="abc"; String ...
- centos7安装golang环境
1.下载golang安装包 wget https://dl.google.com/go/go1.12.5.linux-amd64.tar.gz 2.解压至/usr/local文件夹 tar -C /u ...