《Tensorflow从入门到精通》
第一
开发环境搭建
1. tensorflow的环境搭建
windows下安装cpu版tensorflow:
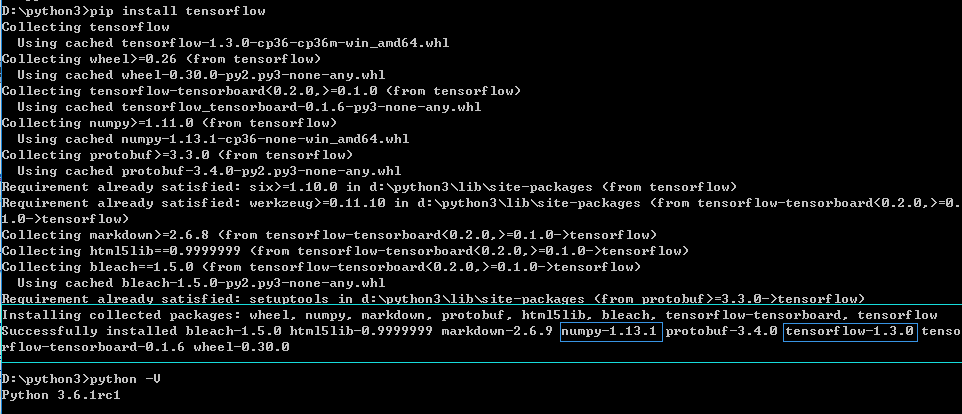
pip install tensorflow
在ubuntu上安装gpu版tensorflow:
a. 在硬件上装上英伟达独立显卡
例如:买来的nvidia geforce gtx 1070 公版显卡,发现显卡体积太大,机箱容纳不下显卡; 显卡要求最小功率为500W,台式机电源额定功率为250W;显卡上有SLI接口用于多个独显集成;
首先解决机箱问题,需要使用独立显卡外接排线,将显卡装在机箱外面,若500W电源只为显卡供电且没有接主板,则需要将电源上的主板连接口的绿线和任意黑线短接。
其次解决电源功率太小问题,买一个600W额定功率的大电源,同时使用250W的原装电源和600W的外加电源,250W的电源用于主板,硬盘,cpu的供电;600W电源用于独立显卡的供电
b. 更新显卡驱动
c. 安装gpu版tensorflow
注意:最好是使用virtualenv安装python环境,步骤如下:
首先,安装一个最基本的python环境,基本的python环境中已经安装了pip;如果没有安装pip,mac下可使用sudo easy_install pip来安装pip;
其次,安装virtualenv:例如下面的例子:
cd ~/Project
mkdir tensorflow_project
cd tensorflow_project
virtualenv --no-site-packages tensorflow_env
cd tensorflow_env
source ./bin/activate
最后,在该virtualenv环境下安装tensorflow:使用命令pip install tensorflow即可;
2. 第一个tensorflow程序(tensorflow基本写法)
# coding: UTF-8

import tensorflow as tf

# 定义常量
one = tf.constant(1)

# 定义变量
state = tf.Variable(0, name='result')

# 定义运算
temp = tf.add(state, one)

# 定义tensor的op操作
op_update = tf.assign(state, temp)
# op_init = tf.initialize_all_variables()
op_init = tf.global_variables_initializer()

# 运行
with tf.Session() as sess:
    sess.run(op_init)
    for i in range(10):
        sess.run(op_update)
        print(sess.run(state))
注意:
a. tensorflow程序中一般包括定义常量,变量,运算; 其次为tensor和op; 最后是在gpu中运行tensor
第二
基本概念与入门
1.基本概念
张量:
例如:tf.constant([1.0, 2.0], name="cons")
计算图:
graph1 = tf.Graph()
with graph1.as_default():
a = tf.Variable(tf.random([2, 3], stddev=1, seed=1))
with tf.Session(graph=graph1) as sess:
init_var = tf.initialize_all_variables()
sess.run(init_var)
会话:
sess = tf.Session()
sess.run(init_var)
sess.close()
with tf.Session() as sess:
sess.run(init_var)
sess= tf.InteractiveSession()
sess.run(init_var)
sess.close()
config = tf.ConfigProto(allow_soft_placement=True, log_device_placement=True)
sess = tf.Session(config)
前向传播算法:
反向传播算法:
监督学习:
深度学习:
2.神经网络解决分类问题的基本步骤:
首先,提取特征向量作为神经网络的输入
其次,定义神经网络结构
再者,训练神经网络
最后,预测未知的数据
3. 使用前向传播算法的例子:
例如:
#!~/Project/tensorflow_project/tensorflow_env/bin/python
# coding=utf-8

import tensorflow as tf
import numpy as np

#1.提取特征值
x = tf.constant([[0.7, 0.9]])

#2.建立神经网络结构
w1 = tf.Variable(tf.random_normal([2, 3], stddev=1, seed=1))
w2 = tf.Variable(tf.random_normal([3, 1], stddev=1, seed=1))

#3.前向传播算法
a = tf.matmul(x, w1)
y = tf.matmul(a, w2)

#4.反向传播算法

init_var = tf.initialize_all_variables()

with tf.Session() as sess:
        sess.run(init_var)
        print sess.run(y)
4. 使用占位符实现多输入的例子:
例如:
#!~/Project/tensorflow_project/tensorflow_env/bin/python
# coding=utf-8

import tensorflow as tf
import numpy as np

#1.提取特征值
#x = tf.constant([[0.7, 0.9]])
x = tf.placeholder(tf.float32, name="x-input", shape=(3,2))

#2.建立神经网络结构
w1 = tf.Variable(tf.random_normal([2, 3], stddev=1, seed=1))
w2 = tf.Variable(tf.random_normal([3, 1], stddev=1, seed=1))

#3.前向传播算法
a = tf.matmul(x, w1)
y = tf.matmul(a, w2)

#4.反向传播算法

init_var = tf.initialize_all_variables()

with tf.Session() as sess:
        sess.run(init_var)
        print sess.run(y, feed_dict={x:[[0.7, 0.9], [0.1, 0.4], [0.5, 0.8]]})
5. 完整的训练神经网络的例子
注意:训练神经网路的三个步骤
首先,定义神经网络结构及使用前向传播算法输出结果
其次,定义损失函数及选择反向传播算法
最后,在会话上反复运行反向传播算法
例如:
#!~/Project/tensorflow_project/tensorflow_env/bin/python
# coding=utf-8

import tensorflow as tf
import numpy as np
from numpy.random import RandomState

#1.提取特征值
x = tf.placeholder(tf.float32, name="x-input", shape=(None,2))
y_ = tf.placeholder(tf.float32, name="y-input", shape=(None,1))

#2.建立神经网络结构
w1 = tf.Variable(tf.random_normal([2, 3], stddev=1, seed=1))
w2 = tf.Variable(tf.random_normal([3, 1], stddev=1, seed=1))

#3.前向传播算法
a = tf.matmul(x, w1)
y = tf.matmul(a, w2)

#定义测试数据
X = RandomState(1).rand(128, 2)
Y = [[int(x1+x2<1)] for (x1, x2) in X]

#定义损失函数
loss = -tf.reduce_mean(y_ * tf.log(tf.clip_by_value(y, 1e-10, 1.0)))
train_step = tf.train.AdamOptimizer(0.00001).minimize(loss)

init_var = tf.initialize_all_variables()

with tf.Session() as sess:
        sess.run(init_var)
        print sess.run(w1)
        print sess.run(w2)

        #开始训练
        ALL_SIZE = 50000
        BATCH_SIZE = 10
        for i in range(ALL_SIZE):
                start = (i * BATCH_SIZE) % 128
                end = min(start + BATCH_SIZE, 128)

                sess.run(train_step, feed_dict={x: X[start:end], y_: Y[start:end]})
                total_loss = sess.run(loss, feed_dict={x: X, y_: Y})
                print "After", i, "times trainning, lossing rate is ", total_loss
        print(sess.run(w1))
        print(sess.run(w2))
第三
Mnist问题
1.下载数据集
下载地址为
http://yann.lecun.com/exdb/mnist/
下载后的文件分别为:
train-images-idx3-ubyte.gz
train-labels-idx1-ubyte.gz
t10k-images-idx3-ubyte.gz
t10k-labels-idx1-ubyte.gz
例如:编写代码下载mnist数据集,并检验数据集
#!/~/Project/tensorflow_project/tensorflow_env/bin/python
# coding = utf-8

import tensorflow as tf

from tensorflow.examples.tutorials.mnist import input_data

mnist = input_data.read_data_sets("MNIST_data/", one_hot=True)

print mnist.train.num_examples

print mnist.validation.num_examples

print mnist.test.num_examples

print mnist.train.images[0]

print mnist.train.labels[0]

batch_size = 100
xs, ys = mnist.train.next_batch(batch_size)

print xs.shape

print ys.shape

print xs

print ys
注意:
首先,使用input_data下载并读取数据集;
再者,打印数据集的各项信息来验证数据集;
《Tensorflow从入门到精通》的更多相关文章
- 简单物联网:外网访问内网路由器下树莓派Flask服务器
最近做一个小东西,大概过程就是想在教室,宿舍控制实验室的一些设备. 已经在树莓上搭了一个轻量的flask服务器,在实验室的路由器下,任何设备都是可以访问的:但是有一些限制条件,比如我想在宿舍控制我种花 ...
- 利用ssh反向代理以及autossh实现从外网连接内网服务器
前言 最近遇到这样一个问题,我在实验室架设了一台服务器,给师弟或者小伙伴练习Linux用,然后平时在实验室这边直接连接是没有问题的,都是内网嘛.但是回到宿舍问题出来了,使用校园网的童鞋还是能连接上,使 ...
- 外网访问内网Docker容器
外网访问内网Docker容器 本地安装了Docker容器,只能在局域网内访问,怎样从外网也能访问本地Docker容器? 本文将介绍具体的实现步骤. 1. 准备工作 1.1 安装并启动Docker容器 ...
- 外网访问内网SpringBoot
外网访问内网SpringBoot 本地安装了SpringBoot,只能在局域网内访问,怎样从外网也能访问本地SpringBoot? 本文将介绍具体的实现步骤. 1. 准备工作 1.1 安装Java 1 ...
- 外网访问内网Elasticsearch WEB
外网访问内网Elasticsearch WEB 本地安装了Elasticsearch,只能在局域网内访问其WEB,怎样从外网也能访问本地Elasticsearch? 本文将介绍具体的实现步骤. 1. ...
- 怎样从外网访问内网Rails
外网访问内网Rails 本地安装了Rails,只能在局域网内访问,怎样从外网也能访问本地Rails? 本文将介绍具体的实现步骤. 1. 准备工作 1.1 安装并启动Rails 默认安装的Rails端口 ...
- 怎样从外网访问内网Memcached数据库
外网访问内网Memcached数据库 本地安装了Memcached数据库,只能在局域网内访问,怎样从外网也能访问本地Memcached数据库? 本文将介绍具体的实现步骤. 1. 准备工作 1.1 安装 ...
- 怎样从外网访问内网CouchDB数据库
外网访问内网CouchDB数据库 本地安装了CouchDB数据库,只能在局域网内访问,怎样从外网也能访问本地CouchDB数据库? 本文将介绍具体的实现步骤. 1. 准备工作 1.1 安装并启动Cou ...
- 怎样从外网访问内网DB2数据库
外网访问内网DB2数据库 本地安装了DB2数据库,只能在局域网内访问,怎样从外网也能访问本地DB2数据库? 本文将介绍具体的实现步骤. 1. 准备工作 1.1 安装并启动DB2数据库 默认安装的DB2 ...
- 怎样从外网访问内网OpenLDAP数据库
外网访问内网OpenLDAP数据库 本地安装了OpenLDAP数据库,只能在局域网内访问,怎样从外网也能访问本地OpenLDAP数据库? 本文将介绍具体的实现步骤. 1. 准备工作 1.1 安装并启动 ...
随机推荐
- https基础
面试题 https://blog.csdn.net/xihuangwutong/article/list/5? TLS 有三大功能:内容加密,身份认证,数据完整性认证 内容加密是依赖于秘钥协商协议数据 ...
- scipy 安装错误及解决
pip 安装 scipy 时,因为是编译安装,所以如果缺少一些编译库,会报很多错误,以下总结可能缺失的安装包: sudo apt-get install gfortran sudo apt-get i ...
- redis学习(二)——String数据类型
一.概述 字符串类型是Redis中最为基础的数据存储类型,它在Redis中是二进制安全的,这便意味着该类型可以接受任何格式的数据,如JPEG图像数据或Json对象描述信息等.在Redis中字符串类型的 ...
- Vue-插槽学习
<!DOCTYPE html> <html lang="en"> <head> <meta charset="UTF-8&quo ...
- Linux下如何让jar包程序在后台一直执行
Linux下如何让Jar包程序在后台一直执行 shell命令 nohup java -jar xxx.jar & &:让程序后台执行. nohub:让程序控制台输出转移到nohub.o ...
- Spring Boot 2.0(八):Spring Boot 集成 Memcached
Memcached 介绍 Memcached 是一个高性能的分布式内存对象缓存系统,用于动态Web应用以减轻数据库负载.它通过在内存中缓存数据和对象来减少读取数据库的次数,从而提高动态.数据库驱动网站 ...
- .NET 框架 Microsoft .NET Framework (更新至.NET Framework4.8)
https://dotnet.microsoft.com/download/dotnet-framework 产品名称 离线安装包 .NET Framework 4.8 点击下载 .NET Frame ...
- 人生就像一条加速奔向死亡的贪吃蛇【winform版】
群里聊天的时候,一个学妹说她在做贪吃蛇的小作业,于是昨晚(5.20无聊只好撸代码/(ㄒoㄒ)/~~)花了2个小时撸了一个出来,早上又花了些时间完善功能,就有了这个还算比较完善的版本,当然代码结构比较混 ...
- OSGI 环境搭建
第一步,打开eclipse,新建一个plugin工程,如下图所示 第二步,输入工程的名字,并且在Target Platform中选择an OSGI framework中选中standard,如下图所示 ...
- NYOJ-16-矩形嵌套 记忆化搜索
#include<iostream> #include<stdio.h> #include<string.h> #include<algorithm> ...