框架入门经典项目TodoMVC
一、项目介绍
①地址:http://todomvc.com/
②GitHub下载模板
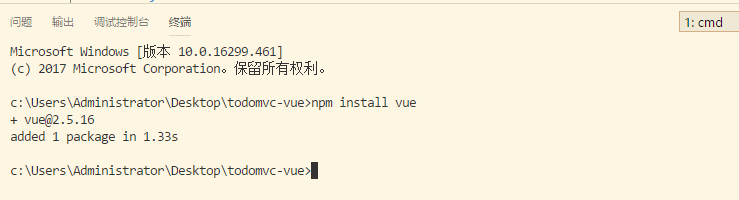
③通过npm下载模板的样式

④通过npm下载Vuejs
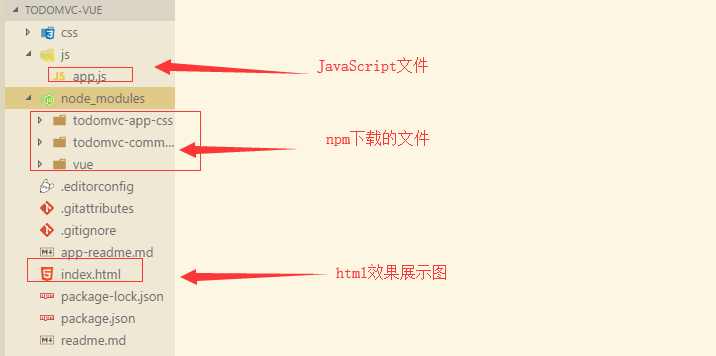
⑤项目文件,主要修改app.js和index.html两个文件
二、使用Vuejs需求实现(主体思路)
①列表渲染
- 有数据的时候展示出来:v-if 的使用
- (function (Vue) {
- let todos=[
- {id:1,title:'睡觉',completed:true},
- {id:2,title:'美食',completed:false},
- {id:3,title:'代码',completed:true}
- ]
- new Vue({
- el:'#todoapp',
- data:{
- todos:todos,
- },
- })(Vue);
- <li v-for="item of todos" v-bind:class='{completed:item.completed}'>
- <div class="view">
- <input class="toggle" type="checkbox" v-model='item.completed'>
- <label>{{item.title}}</label>
- <button class="destroy"></button>
- </div>
- <input class="edit" value="Create a TodoMVC template">
- </li>
- 没有数据的时候隐藏main部分:添加一个不会出现在页面的template模板,并且使用v-if,当todos没有数据的时候,长度为0
- <template v-if='todos.length'>
- <!-- This section should be hidden by default and shown when there are todos -->
- <section class="main"> ..... </section>
- <!-- This footer should hidden by default and shown when there are todos -->
- <footer class="footer"> .... </footer>
- </template>
②添加任务
- 页面初始化获得焦点:自定义指令,注册一个全局自定义指令 `v-focus`,然后在input里直接使用
- // 自定义指令,自动获取焦点
- Vue.directive('focus', {
- inserted: function (el) {
- el.focus();
- }
- });
- <input class="new-todo" placeholder="What needs to be done?" @keyup.enter='addTodo' v-focus>
- 敲回车添加到任务列表:鼠标抬起注册addTodo事件,追加数据
- 不允许有非空数据:为空时,return返回
- 添加完成后清空文本框:令event.target.value= ' '
- <header class="header">
- <h1>todos</h1>
- <input class="new-todo" placeholder="What needs to be done?" @keyup.enter='addTodo'>
- </header>
- methods:{
- // 添加任务
- addTodo(event){
- let todoText=event.target.value.trim();
- if(!todoText.length){
- return
- }
- let id=this.todos[this.todos.length-1].id+1;
- this.todos.push({
- id:id,
- title:todoText,
- completed:false,
- });
- event.target.value='';
- },
③标记所有任务完成或者未完成:点击的时候注册toggleAll事件处理函数
- <input @click='toggleAll' id="toggle-all" class="toggle-all" type="checkbox">
- toggleAll(event){
- let checked=event.target.checked;
- this.todos.forEach(todo => todo.completed=checked);
- },
④任务项
- 切换任务完成状态:v-bind绑定一个class=“{类名:布尔值}”,当布尔值为true,作用这个类名,当布尔值为false,则去除这个类名
- <li v-for="item of todos" v-bind:class='{completed:item.completed}'>
- 删除单个任务项:@click=‘ removeTodo(index,$event) ’ ,传入两个参数,删除的索引index和事件$event(传参以后,正常的event获取不到),然后处理函数利用数组方法splice操作
- <button class="destroy" @click='removeTodo(index,$event)' ></button>
- removeTodo(delIndex,event){
- this.todos.splice(delIndex,1);
- },
- 双击label进入编辑模式:这里使用一个中间变量currentEditing,默认为null,也就是所有的任务项都没有editing样式,editing的样式取决于中间变量是否等价于当前任务项,当双击的时候,手动把中间量等于双击的当前任务项,这样editing样式就为true,也就是起作用了。
- <li v-for="(item,index) of todos" v-bind:class='{completed:item.completed,editing:item===currentEditing}'>
- <label @dblclick="currentEditing=item">{{item.title}}</label>
- data:{
- todos:todos,
- currentEditing:null,
⑤编辑任务项
- 编辑文本框自动获得焦点:局部自定义指令,自动获取焦点‘ editing-focus ’
- <input class="edit" :value='item.title' @blur='saveEdit(item,index,$event)' @keyup.enter='saveEdit(item,index,$event)' @keyup.esc='currentEditing=null' v-editing-focus="item===currentEditing">
- directives:{
- // 局部自定义属性
- editingFocus:{
- update(el,binding){
- if(binding.value){
- el.focus();
- }
- },
- },
- },
- 在编辑文本框敲回车后者失去焦点后,如果为空,则直接删除这个item,如果不为空,保存这个数据,并去除editing样式:saveEdit处理函数,传入参数
- 输入状态按下esc取消编辑:设置默认value属性是item的title,按下esc抬起的时候,令中间变量为null,去除editing样式
- <input class="edit" :value='item.title' @blur='saveEdit(item,index,$event)' @keyup.enter='saveEdit(item,index,$event)' @keyup.esc='currentEditing=null'>
- saveEdit(item,index,event){
- var editText=event.target.value.trim();
- // 如果为空,直接删除这个item
- if(!editText.length){
- return this.todos.splice(index,1);
- }
- // 如果不为空,修改title的值,然后去除eiditing样式
- item.title=editText;
- this.currentEditing=null;
- },
⑥其他(footer部分)
- 显示所有未完成任务数:@click=‘ removeAllDone ’ ,处理事件利用数组方法filter过滤未完成数据,然后重新赋值给数据列表
- <button class="clear-completed" @click='removeAllDone'>Clear completed</button>
- removeAllDone(){
- this.todos=this.todos.filter((item,index)=>{
- return !item.completed;//return true,即item.completed为false
- });
- },
- 清除所有的已完成任务:利用计算属性computed的自定义方法leftCount(参考vue教程--计算属性),还有一种方法就是模板中调用处理函数,处理函数使用for循环来删除,但是删完需要把循环索引i--,但是这种方法没有缓存,每一次使用都要重新调用,推荐使用计算属性,效率更高。
- <span class="todo-count"><strong>{{leftCount}}</strong> item left</span>
- computed:{
- leftCount:function(){
- return this.todos.filter(item => !item.completed).length
- }
- },
- 将数据持久化到localStorage中(待完成):利用watch功能(配置deep,深度监视),计算属性用于需要在模板中绑定输出值,而watch观察者则用于根据需要数据的改变从而定制特殊功能业务
- 路由状态切换:data里添加属性filterState默认为‘all’;计算属性computed增加filtertodos方法,过滤不同状态的路由;同时修改列表渲染为遍历filterTodos;在window里添加路由改变事件onhashchange,并且每次页面进来需要执行一次保持上一次的状态;改变点击时的样式,添加属性selected当为true时作用,即filterState会等于路由的时候,样式生效。
- data:{
- todos:todos,
- currentEditing:null,
- filterState:'all',
- },
- computed:{
- leftCount:function(){
- return this.todos.filter(item => !item.completed).length
- },
- filterTodos:function(){
- switch(this.filterState){
- case 'active':
- return this.todos.filter(item=>!item.completed);
- break;
- case 'completed':
- return this.todos.filter(item=>item.completed);
- break;
- default:
- return this.todos;
- break;
- };
- },
- <li v-for="(item,index) of filterTodos" v-bind:class='{completed:item.completed,editing:item===currentEditing}'>
- // 路由状态切换
- window.onhashchange=function(){
- var hash=window.location.hash.substr(2) || 'all';
- window.app.filterState=hash;
- };
- // 页面第一次进来,保持状态
- window.onhashchange();
- <ul class="filters">
- <li>
- <a :class="{selected:filterState==='all'}" href="#/">All</a>
- </li>
- <li>
- <a :class="{selected:filterState==='active'}" href="#/active">Active</a>
- </li>
- <li>
- <a :class="{selected:filterState==='completed'}" href="#/completed">Completed</a>
- </li>
- </ul>
三、项目完整代码和效果展示
- <!doctype html>
- <html lang="en">
- <head>
- <meta charset="utf-8">
- <meta name="viewport" content="width=device-width, initial-scale=1">
- <title>Template • TodoMVC</title>
- <link rel="stylesheet" href="node_modules/todomvc-common/base.css">
- <link rel="stylesheet" href="node_modules/todomvc-app-css/index.css">
- <!-- CSS overrides - remove if you don't need it -->
- <link rel="stylesheet" href="css/app.css">
- </head>
- <body>
- <!-- id="todoapp"vue管理模块入口 -->
- <section id="todoapp" class="todoapp">
- <header class="header">
- <h1>todos</h1>
- <input class="new-todo" placeholder="What needs to be done?" @keyup.enter='addTodo' v-focus>
- </header>
- <template v-if='todos.length'>
- <!-- This section should be hidden by default and shown when there are todos -->
- <section class="main">
- <!-- @click='toggleAll'点击事件 -->
- <input @click='toggleAll' id="toggle-all" class="toggle-all" type="checkbox" v-bind:checked='toggleState'>
- <label for="toggle-all">Mark all as complete</label>
- <ul class="todo-list">
- <!-- These are here just to show the structure of the list items -->
- <!-- List items should get the class `editing` when editing and `completed` when marked as completed -->
- <!-- vue列表渲染 -->
- <li v-for="(item,index) of filterTodos" v-bind:class='{completed:item.completed,editing:item===currentEditing}'>
- <div class="view">
- <input class="toggle" type="checkbox" v-model='item.completed'>
- <label @dblclick="currentEditing=item">{{item.title}}</label>
- <button class="destroy" @click='removeTodo(index,$event)' ></button>
- </div>
- <input class="edit" :value='item.title' @blur='saveEdit(item,index,$event)' @keyup.enter='saveEdit(item,index,$event)' @keyup.esc='currentEditing=null' v-editing-focus="item===currentEditing">
- </li>
- </ul>
- </section>
- <!-- This footer should hidden by default and shown when there are todos -->
- <footer class="footer">
- <!-- This should be `0 items left` by default -->
- <span class="todo-count"><strong>{{leftCount}}</strong> item left</span>
- <!-- Remove this if you don't implement routing -->
- <ul class="filters">
- <li>
- <a :class="{selected:filterState==='all'}" href="#/">All</a>
- </li>
- <li>
- <a :class="{selected:filterState==='active'}" href="#/active">Active</a>
- </li>
- <li>
- <a :class="{selected:filterState==='completed'}" href="#/completed">Completed</a>
- </li>
- </ul>
- <!-- Hidden if no completed items are left ↓ -->
- <button class="clear-completed" @click='removeAllDone'>Clear completed</button>
- </footer>
- </template>
- </section>
- <footer class="info">
- <p>Double-click to edit a todo</p>
- <!-- Remove the below line ↓ -->
- <p>Template by <a href="http://sindresorhus.com">Sindre Sorhus</a></p>
- <!-- Change this out with your name and url ↓ -->
- <p>Created by <a href="http://todomvc.com">you</a></p>
- <p>Part of <a href="http://todomvc.com">TodoMVC</a></p>
- </footer>
- <!-- Scripts here. Don't remove ↓ -->
- <script src="node_modules/todomvc-common/base.js"></script>
- <script src="node_modules/vue/dist/vue.js"></script>
- <script src="js/app.js"></script>
- </body>
- </html>
index.html
- (function (Vue) {
- // 数据
- let todos=[
- {id:1,title:'睡觉',completed:true},
- {id:2,title:'美食',completed:false},
- {id:3,title:'代码',completed:true}
- ];
- // 全局自定义指令,自动获取焦点
- Vue.directive('focus', {
- inserted: function (el) {
- el.focus();
- }
- });
- // vue实例
- window.app=new Vue({
- el:'#todoapp',
- data:{
- todos:todos,
- currentEditing:null,
- filterState:'all',
- toggleAllstate:true,
- },
- computed:{
- leftCount:function(){
- return this.todos.filter(item => !item.completed).length
- },
- filterTodos:function(){
- switch(this.filterState){
- case 'active':
- return this.todos.filter(item=>!item.completed);
- break;
- case 'completed':
- return this.todos.filter(item=>item.completed);
- break;
- default:
- return this.todos;
- break;
- };
- },
- // 全选的联动效果
- toggleState:function(){
- return this.todos.every(item=>item.completed);
- },
- },
- methods:{
- // 添加任务
- addTodo(event){
- let todoText=event.target.value.trim();
- if(!todoText.length){
- return
- }
- const lastTodo=this.todos[this.todos.length-1];
- const id=lastTodo?lastTodo.id+1:1;
- this.todos.push({
- id:id,
- title:todoText,
- completed:false,
- });
- event.target.value='';
- },
- // 点击全部完成或者未完成
- toggleAll(event){
- let checked=event.target.checked;
- this.todos.forEach(todo => todo.completed=checked);
- },
- // 删除单个任务项
- removeTodo(delIndex,event){
- this.todos.splice(delIndex,1);
- },
- // 显示所有未完成任务数(删除所有已完成)
- removeAllDone(){
- this.todos=this.todos.filter((item,index)=>{
- return !item.completed;//return true,即item.completed为false
- });
- },
- // 保存编辑项
- saveEdit(item,index,event){
- var editText=event.target.value.trim();
- // 如果为空,直接删除这个item
- if(!editText.length){
- return this.todos.splice(index,1);
- }
- // 如果不为空,修改title的值,然后去除eiditing样式
- item.title=editText;
- this.currentEditing=null;
- },
- },
- directives:{
- // 局部自定义属性
- editingFocus:{
- update(el,binding){
- if(binding.value){
- el.focus();
- }
- },
- },
- },
- });
- // 路由状态切换
- window.onhashchange=function(){
- var hash=window.location.hash.substr(2) || 'all';
- window.app.filterState=hash;
- };
- // 页面第一次进来,保持状态
- window.onhashchange();
- })(Vue);
app.js
框架入门经典项目TodoMVC的更多相关文章
- openjpa框架入门_项目框架搭建(二)
Openjpa2.2+Mysql+Maven+Servlet+JSP 首先说明几点,让大家更清楚整体结构: 官方source code 下载:http://openjpa.apache.org/dow ...
- openjpa框架入门_项目 database 启动project 初始化(三)
mysql数据库安装好,这里不多说,现在来执行sql脚本 http://download.csdn.net/detail/shenhonglei1234/6019677 将下载好的脚本后缀名“open ...
- openjpa框架入门_openbooks项目Overview(四)
- 『Scrapy』爬虫框架入门
框架结构 引擎:处于中央位置协调工作的模块 spiders:生成需求url直接处理响应的单元 调度器:生成url队列(包括去重等) 下载器:直接和互联网打交道的单元 管道:持久化存储的单元 框架安装 ...
- Taurus.MVC 微服务框架 入门开发教程:项目集成:2、客户端:ASP.NET Core(C#)项目集成:应用中心。
系列目录: 本系列分为项目集成.项目部署.架构演进三个方向,后续会根据情况调整文章目录. 本系列第一篇:Taurus.MVC V3.0.3 微服务开源框架发布:让.NET 架构在大并发的演进过程更简单 ...
- 【无私分享:从入门到精通ASP.NET MVC】从0开始,一起搭框架、做项目 目录索引
索引 [无私分享:从入门到精通ASP.NET MVC]从0开始,一起搭框架.做项目(1)搭建MVC环境 注册区域 [无私分享:从入门到精通ASP.NET MVC]从0开始,一起搭框架.做项目(2)创建 ...
- ThinkJS框架入门详细教程(二)新手入门项目
一.准备工作 参考前一篇:ThinkJS框架入门详细教程(一)开发环境 安装thinkJS命令 npm install -g think-cli 监测是否安装成功 thinkjs -v 二.创建项目 ...
- SpringMVC框架入门配置 IDEA下搭建Maven项目(zz)
SpringMVC框架入门配置 IDEA下搭建Maven项目 这个不错哦 http://www.cnblogs.com/qixiaoyizhan/p/5819392.html
- Newbe.Claptrap 框架入门,第二步 —— 创建项目
接上一篇 Newbe.Claptrap 框架入门,第一步 -- 开发环境准备 ,我们继续了解如何创建一个 Newbe.Claptrap 项目. Newbe.Claptrap 是一个用于轻松应对并发问题 ...
随机推荐
- HDU校赛 | 2019 Multi-University Training Contest 6
2019 Multi-University Training Contest 6 http://acm.hdu.edu.cn/contests/contest_show.php?cid=853 100 ...
- Implementing Azure AD Single Sign-Out in ASP.NET Core(转载)
Let's start with a scenario. Bob the user has logged in to your ASP.NET Core application through Azu ...
- VS 安装resharper 后 无法进行UnitTest
Vs安装 Resharper后,无法进行单元测试,发现报错提示信息如下: ignored test-case is missing. rebuild the project and try again ...
- ASP.NET SignalR 系列(九)之源码与总结
1.SignalR 1.0与2.0有些不同,以上篇章均只支持2.0+ 2.必须注意客户端调用服务端对象和方法时的大小写问题 3.客户端上的方法不能重名 4.IE7及以下的,需要增加json的分析器,分 ...
- Java之路---Day18(List集合)
2019-11-05-23:03:28 List集合: java.util.List 接口继承自 Collection 接口,是单列集合的一个重要分支,习惯性地会将实现了List 接口的对象称为Lis ...
- vs2017 添加 mysql EF实体数据模型闪退
1.查看vs2017安装路径找到Mysql.Data.dll版本号与MySQL Connector Net版本是否一致 历史版本下载地址 http://mysql.inspire.net.nz/Dow ...
- JavaScript之变量(声明、解析、作用域)
声明(创建) JavaScript 变量 在 JavaScript 中创建变量通常称为"声明"变量. 一.我们使用 var 关键词来声明变量: var carname; 变量声明之 ...
- Active Directory渗透测试典型案例
0x01 前言 我有几个客户在渗透测试之前来找我,说他们的系统安全做得非常好,因为他们的漏洞扫描显示没有严重的漏洞并且已准备好进行安全测试,这使我在15分钟内利用AD中的错误配置获得了域管理员权限. ...
- vm-install 模版创建虚拟机
主要用到的信息有:模版id和存储id 通过存储名字 # xe vm-install template=[template_uuid] new-name-label="name" s ...
- Spark排序方式集锦
一.简介 spark中的排序一般可以使用orderBy或sort算子,可以结合负号.ASC/DESC和col进行简单排序.二次排序等情况 二.代码实现 package big.data.analyse ...