CentOS 7 源码搭建LNMP环境
搭建 LNMP 环境
源码包版本 :
CentOS Linux 7
nginx-1.15.1.tar.gz
mysql-boost-5.7.21.tar.gz
php-7.2.7.tar.gz
准备环境依赖包 :
yum -y install libxml2 libxml2-devel openssl openssl-devel bzip2 bzip2-devel libcurl libcurl-devel libjpeg libjpeg-devel libpng libpng-devel freetype freetype-devel gmp gmp-devel libmcrypt libmcrypt-devel readline readline-devel libxslt libxslt-devel pcre-devel ncurses ncurses-devel bison cmake
安装nginx :
- [root@DaMoWang ~]# useradd -M -s /sbin/nologin nginx # 创建nginx用户
- [root@DaMoWang ~]# tar xf nginx-1.15..tar.gz -C /usr/src/
- [root@DaMoWang ~]# cd /usr/src/nginx-1.15./
- [root@DaMoWang nginx-1.15.]# ./configure \ # 配置 编译 安装
- --prefix=/usr/local/nginx \
- --sbin-path=/usr/sbin/nginx \
- --conf-path=/etc/nginx/nginx.conf \
- --error-log-path=/var/log/nginx/error.log \
- --http-log-path=/var/log/nginx/access.log \
- --pid-path=/var/run/nginx.pid \
- --lock-path=/var/run/nginx.lock \
- --http-client-body-temp-path=/var/tmp/nginx/client \
- --http-proxy-temp-path=/var/tmp/nginx/proxy \
- --http-fastcgi-temp-path=/var/tmp/nginx/fcgi \
- --http-uwsgi-temp-path=/var/tmp/nginx/uwsgi \
- --http-scgi-temp-path=/var/tmp/nginx/scgi \
- --user=nginx \
- --group=nginx \
- --with-pcre \
- --with-http_v2_module \
- --with-http_ssl_module \
- --with-http_realip_module \
- --with-http_addition_module \
- --with-http_sub_module \
- --with-http_dav_module \
- --with-http_flv_module \
- --with-http_mp4_module \
- --with-http_gunzip_module \
- --with-http_gzip_static_module \
- --with-http_random_index_module \
- --with-http_secure_link_module \
- --with-http_stub_status_module \
- --with-http_auth_request_module \
- --with-mail \
- --with-mail_ssl_module \
- --with-file-aio \
- --with-http_v2_module \
- --with-threads \
- --with-stream \
- --with-stream_ssl_module \
- &&make && make install
添加启动脚本:
- [root@DaMoWang nginx-1.15.]# vim /etc/init.d/nginx
- #!/bin/sh
- #
- # nginx - this script starts and stops the nginx daemon
- #
- # chkconfig: -
- # description: Nginx is an HTTP(S) server, HTTP(S) reverse \
- # proxy and IMAP/POP3 proxy server
- # processname: nginx
- # config: /etc/nginx/nginx.conf
- # config: /etc/sysconfig/nginx
- # pidfile: /var/run/nginx.pid
- # Source function library.
- . /etc/rc.d/init.d/functions
- # Source networking configuration.
- . /etc/sysconfig/network
- # Check that networking is up.
- [ "$NETWORKING" = "no" ] && exit
- nginx="/usr/sbin/nginx"
- prog=$(basename $nginx)
- NGINX_CONF_FILE="/etc/nginx/nginx.conf"
- [ -f /etc/sysconfig/nginx ] && . /etc/sysconfig/nginx
- lockfile=/var/lock/subsys/nginx
- start() {
- [ -x $nginx ] || exit
- [ -f $NGINX_CONF_FILE ] || exit
- echo -n $"Starting $prog: "
- daemon $nginx -c $NGINX_CONF_FILE
- retval=$?
- echo
- [ $retval -eq ] && touch $lockfile
- return $retval
- }
- stop() {
- echo -n $"Stopping $prog: "
- killproc $prog -QUIT
- retval=$?
- echo
- [ $retval -eq ] && rm -f $lockfile
- return $retval
- killall - nginx
- }
- restart() {
- configtest || return $?
- stop
- sleep
- start
- }
- reload() {
- configtest || return $?
- echo -n $"Reloading $prog: "
- killproc $nginx -HUP
- RETVAL=$?
- echo
- }
- force_reload() {
- restart
- }
- configtest() {
- $nginx -t -c $NGINX_CONF_FILE
- }
- rh_status() {
- status $prog
- }
- rh_status_q() {
- rh_status >/dev/null >&
- }
- case "$1" in
- start)
- rh_status_q && exit
- $
- ;;
- stop)
- rh_status_q || exit
- $
- ;;
- restart|configtest)
- $
- ;;
- reload)
- rh_status_q || exit
- $
- ;;
- force-reload)
- force_reload
- ;;
- status)
- rh_status
- ;;
- condrestart|try-restart)
- rh_status_q || exit
- ;;
- *)
- echo $"Usage: $0 {start|stop|status|restart|condrestart|try-restart|reload|force-reload|configtest}"
- exit
- esac
- [root@DaMoWang nginx-1.15.]# chmod +x /etc/init.d/nginx
- [root@DaMoWang nginx-1.15.]# chkconfig --add nginx
- [root@DaMoWang nginx-1.15.]# vim /etc/nginx/nginx.conf # 编辑nginx配置文件 , 关联php
user nginx;- worker_processes ;
- events {
- worker_connections ;
- }
- http {
- include /etc/nginx/mime.types;
- default_type application/octet-stream;
- log_format main '$remote_addr - $remote_user [$time_local] "$request" '
- '$status $body_bytes_sent "$http_referer" '
- '"$http_user_agent" "$http_x_forwarded_for"';
- access_log /var/log/nginx/access.log main;
- server {
- listen ;
- server_name 192.168.94.111;
- location / {
- root /var/www/html;
- index index.php index.html index.htm;
- }
- error_page /50x.html;
- location = /50x.html {
- root /var/www/html;
- }
- location ~ \.php$ {
- root /var/www/html;
- fastcgi_pass 192.168.94.111:;
- fastcgi_index index.php;
- fastcgi_param SCRIPT_FILENAME /var/www/html/$fastcgi_script_name;
- include fastcgi_params;
- }
- }
- sendfile on;
- #tcp_nopush on;
- keepalive_timeout ;
- #gzip on;
- include /etc/nginx/conf.d/*.conf;
- }
[root@DaMoWang nginx-1.15.1]# mkdir /var/tmp/nginx/client -p
- [root@DaMoWang nginx-1.15.1]# systemctl start nginx
测试:
安装MySQL :
- [root@DaMoWang ~]# useradd -M -s /sbin/nologin mysql # 创建mysql用户
- [root@DaMoWang ~]# tar xf mysql-boost-5.7..tar.gz -C /usr/src/
- [root@DaMoWang ~]# cd /usr/src/mysql-5.7./
- [root@DaMoWang mysql-5.7.]# cmake \
- -DCMAKE_INSTALL_PREFIX=/usr/local/mysql \
- -DMYSQL_UNIX_ADDR=/usr/local/mysql/mysql.sock \
- -DSYSCONFDIR=/etc \
- -DSYSTEMD_PID_DIR=/usr/local/mysql \
- -DDEFAULT_CHARSET=utf8 \
- -DDEFAULT_COLLATION=utf8_general_ci \
- -DWITH_INNOBASE_STORAGE_ENGINE= \
- -DWITH_ARCHIVE_STORAGE_ENGINE= \
- -DWITH_BLACKHOLE_STORAGE_ENGINE= \
- -DWITH_PERFSCHEMA_STORAGE_ENGINE= \
- -DMYSQL_DATADIR=/usr/local/mysql/data \
- -DWITH_BOOST=boost \
- -DWITH_SYSTEMD= \
- && make -j4 && make install
- [root@DaMoWang mysql-5.7.]# chown -R mysql.mysql /usr/local/mysql/
- [root@DaMoWang mysql-5.7.]# vim /etc/my.cnf
- [client]
- port =
- default-character-set=utf8
- socket = /usr/local/mysql/mysql.sock
- [mysql]
- port =
- default-character-set=utf8
- socket = /usr/local/mysql/mysql.sock
- [mysqld]
- user = mysql
- basedir = /usr/local/mysql
- datadir = /usr/local/mysql/data
- port =
- character_set_server=utf8
- pid-file = /usr/local/mysql/mysqld.pid
- socket = /usr/local/mysql/mysql.sock
- server-id =
- [root@DaMoWang mysql-5.7.]# chown mysql.mysql /etc/my.cnf
- [root@DaMoWang mysql-5.7.]# echo -e 'PATH=/usr/local/mysql/bin:/usr/local/mysql/lib:$PATH' "\nexport PATH" >> /etc/profile
- [root@DaMoWang mysql-5.7.]# source /etc/profile
- [root@DaMoWang mysql-5.7.]# cd /usr/local/mysql/
- [root@DaMoWang mysql]# bin/mysqld \
- > --initialize-insecure \
- > --user=mysql \
- > --basedir=/usr/local/mysql \
- > --datadir=/usr/local/mysql/data/
- [root@DaMoWang mysql]# cp usr/lib/systemd/system/mysqld.service /usr/lib/systemd/system/
- [root@DaMoWang mysql]# systemctl daemon-reload
- [root@DaMoWang mysql]# systemctl start mysqld
安装php :
- [root@DaMoWang ~]# tar xf php-7.2..tar.gz -C /usr/src
- [root@DaMoWang ~]# cd /usr/src/php-7.2./
- [root@DaMoWang php-7.2.]# ./configure \
- --prefix=/usr/local/php \
- --with-config-file-path=/etc \
- --enable-fpm \
- --with-fpm-user=nginx \
- --with-fpm-group=nginx \
- --enable-inline-optimization \
- --disable-debug \
- --disable-rpath \
- --enable-shared \
- --enable-soap \
- --with-libxml-dir \
- --with-xmlrpc \
- --with-openssl \
- --with-mhash \
- --with-pcre-regex \
- --with-sqlite3 \
- --with-zlib \
- --enable-bcmath \
- --with-iconv \
- --with-bz2 \
- --enable-calendar \
- --with-curl \
- --with-cdb \
- --enable-dom \
- --enable-exif \
- --enable-fileinfo \
- --enable-filter \
- --with-pcre-dir \
- --enable-ftp \
- --with-gd \
- --with-openssl-dir \
- --with-jpeg-dir \
- --with-png-dir \
- --with-zlib-dir \
- --with-freetype-dir \
- --enable-gd-jis-conv \
- --with-gettext \
- --with-gmp \
- --with-mhash \
- --enable-json \
- --enable-mbstring \
- --enable-mbregex \
- --enable-mbregex-backtrack \
- --with-libmbfl \
- --with-onig \
- --enable-pdo \
- --with-mysqli=mysqlnd \
- --with-pdo-mysql=mysqlnd \
- --with-zlib-dir \
- --with-pdo-sqlite \
- --with-readline \
- --enable-session \
- --enable-shmop \
- --enable-simplexml \
- --enable-sockets \
- --enable-sysvmsg \
- --enable-sysvsem \
- --enable-sysvshm \
- --enable-wddx \
- --with-libxml-dir \
- --with-xsl \
- --enable-zip \
- --enable-mysqlnd-compression-support \
- --with-pear \
- --enable-opcache \
- && make -j4 && make install
- [root@DaMoWang php-7.2.]# ln -s /usr/local/php/bin/* /usr/local/bin/
- [root@DaMoWang php-7.2.7]# php -v
- PHP 7.2.7 (cli) (built: Aug 3 2018 01:03:35) ( NTS )
- Copyright (c) 1997-2018 The PHP Group
- Zend Engine v3.2.0, Copyright (c) 1998-2018 Zend Technologies
- [root@DaMoWang php-7.2.7]# cp php.ini-production /etc/php.ini
- [root@DaMoWang php-7.2.7]# cp /usr/local/php/etc/php-fpm.conf.default /usr/local/php/etc/php-fpm.conf
- [root@DaMoWang php-7.2.7]# cp /usr/local/php/etc/php-fpm.d/www.conf.default /usr/local/php/etc/php-fpm.d/www.conf
- [root@DaMoWang php-7.2.7]# cp sapi/fpm/init.d.php-fpm /etc/init.d/php-fpm
- [root@DaMoWang php-7.2.7]# chmod +x /etc/init.d/php-fpm
- [root@DaMoWang php-7.2.7]# chkconfig --add php-fpm
- [root@DaMoWang php-7.2.7]# vim /usr/local/php/etc/php-fpm.d/www.conf
- # 把listen = 127.0.0.0:9000 修改为 listen = 192.168.94.111:9000
- [root@DaMoWang php-7.2.7]# systemctl start php-fpm
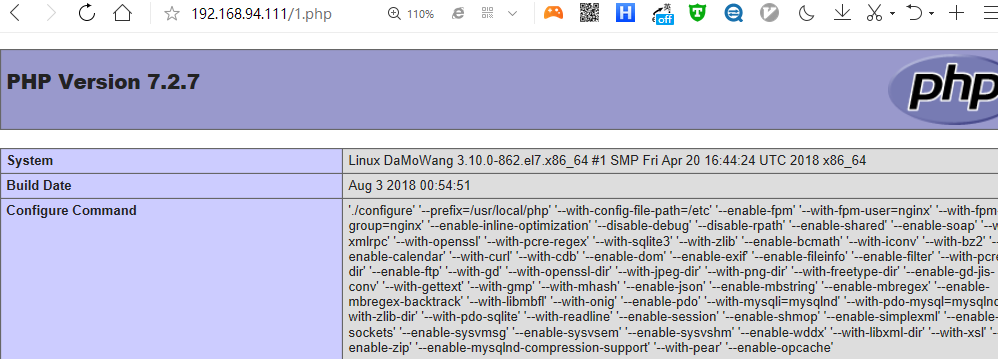
编写测试页面 :
- [root@DaMoWang ~]# vim /var/www/html/.php
- <?php phpinfo(); ?>
测试 :
- [root@DaMoWang ~]# vim /var/www/html/.php
- <?php
- $link=mysqli_connect('192.168.94.111','damowang','');
- if($link) echo "<h1>Success!!</h1>";
- else echo "Fail!!";
- ?>
授权MySQL用户 :
- [root@DaMoWang ~]# mysql -uroot -p
- Enter password:
- mysql> grant all on *.* to 'damowang'@'%' identified by ''
测试 :

CentOS 7 源码搭建LNMP环境的更多相关文章
- 在CENTOS上源码搭建LNMP环境
前言 1.操作前提: CentOS Linux release 7.5.1804: sudo用户(需要root权限): 2.需要安装的组件: nginx稳定版:nginx-1.14.0: MariaD ...
- 用源码搭建LNMP环境+部署WordPress
首先要做的是就是关闭Centos7.4的防火墙及selinux #systemctl stop firewalld #systemctl disable firewalld #sed -ri 's/^ ...
- 源码搭建LNMP
源码安装LNMP 作者:尹正杰 版权声明:原创作品,谢绝转载!否则将追究法律责任. 欢迎加入:高级运维工程师之路 598432640 前言:非常简单的一个平台LNMP,在生产实际环 ...
- Centos 7 下yum搭建lnmp环境(yum安装方式)
我们都知道linux下安装软件主要有三种方式: 1.源码编译安装,即下载软件源代码,利用gcc g++ make 等编译工具进行编译安装: 此方式的优点:可以指定软件版本,可选择性好:编译时可以手动指 ...
- CentOS 6.5 下源码搭建LAMP环境
参考网站: http://wenku.baidu.com/link?url=Cvkqss2E9mnxXOZigMWPaCfqwsBxnm0sZ4aKE2oLAgQ888XxeC0DWOChxVqiHz ...
- 源码搭建lnmp平台
lnmp平台是指利用linux操作系统,nginx服务器,mysql数据库和php语言搭建高性能web服务器,负载均衡器和邮件代理服务器. 原理图:‘
- CentOS 下源码安装LAMP环境
一.简介 什么是LAMP LAMP是一种Web网络应用和开发环境,是Linux, Apache, MySQL, Php/Perl的缩写,每一个字母代表了一个组件,每个组件就其本身而言都是在它所代 ...
- 终于完成了 源码 编译lnmp环境
经过了大概一个星期的努力,终于按照海生的编译流程将lnmp环境源码安装出来了 nginx 和php 主要参考 http://hessian.cn/p/1273.html mysql 主要参考 http ...
- ubuntu 源码安装 lnmp 环境
准备篇 下载软件包 1.下载nginx http://nginx.org/download/nginx-1.2.0.tar.gz 2.下载pcre (支持nginx伪静态) ftp://ftp.cs ...
随机推荐
- mac使用minikube
brew install kubectl 需要加代理! minikube start --vm-driver=xhyve --docker-env HTTP_PROXY=http://your-htt ...
- flume的安装部署
系统环境:centos7.5 64位系统 1.下载安装包 官网下载离线安装包:apache-flume-1.8.0-bin.tar.gz 也可以使用linux命令下载: wget -c http:/ ...
- 解决vscode无法提示golang的问题
https://github.com/Microsoft/vscode-go/wiki/Go-with-VS-Code-FAQ-and-Troubleshooting Q: Auto-completi ...
- python一个简单的打包例子
最近写了一些工具,想到分享给同事时好麻烦,并且自己每次用也是需要打开pycharm这些工具,感觉很麻烦,因此想到打包,网上有些例子,照做后又摸索很久方成,索性记录一下,以备不时之需. 主要参考:htt ...
- Java8学习笔记目录
Java8学习笔记(一)--Lambda表达式 Java8学习笔记(二)--三个预定义函数接口 Java8学习笔记(三)--方法引入 Java8学习笔记(四)--接口增强 Java8学习笔记(五)-- ...
- 微信小程序-bug-调用wx.login()无响应的原因和解决方案
想必,最近有些小程序开发者,在调用wx.login()的时候,在部分IOS上无响应的情况: 补充一点:在测试模式,调试模式,都是OK的,一上正式环境就GG了,百思不得其解啊! 响应结果如下: 在suc ...
- Golang 笔记 1 基础、基本数据类型
一.Go语言基础 1. 基础 Go语言中的标识符必须以字母(Unicode字母,PHP/JS可以用中文作为变量名)下划线开头.大写字母跟小写字母是不同的:Hello和hello是两个不同的名字. G ...
- redis出现错误:NOAUTH Authentication required.
出现认证问题,应该是设置了认证密码,输入密码既可以啦 注意密码是字符串形式! 127.0.0.1:6379> auth "yourpassword" 127.0.0.1:63 ...
- Telerik UI for ASP.NET AJAX控件汉化方法
Telerik UI for ASP.NET AJAX控件功能十分强大,但原版是英文界面的,不方便一些用户使用. 和.NET的其他控件一样,可以通过资源文件来制作多语言版本. 下面看看安装完成后原始的 ...
- Ubuntu 16.04 Java8 安装
添加ppa apt-get update apt install software-properties-common add-apt-repository ppa:webupd8team/java ...