重新整理 .net core 实践篇—————静态中间件[二十一]
前言
简单整理一下静态中间件。
正文
我们使用静态文件调用:
app.UseStaticFiles();
那么这个默认会将我们根目录下的wwwroot作为静态目录。
这个就比较值得注意的,可能刚开始学.net core 的小伙伴,会直接把脚本写在更目录script这样是访问不到的。
当然了,你可以配置参数。可以给UseStaticFiles传递参数。不过建议不要这么干,因为这是一种默认的约定。
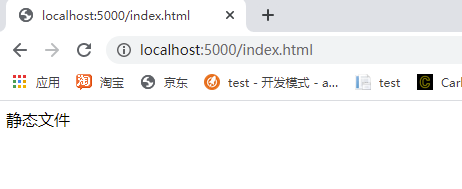
在wwwroot下建立一个index.html,那么访问http://localhost/index.html
<!DOCTYPE html>

<html>

<head>

    <meta charset="utf-8" />

    <title></title>

</head>

<body>

    静态文件

</body>

</html>
效果:
如果还有一些其他目录需要注册的话,那么可以这样:
app.UseStaticFiles(new StaticFileOptions

{

	RequestPath="/files",

	FileProvider = new PhysicalFileProvider(Path.Combine(Directory.GetCurrentDirectory(),"files"))

});
在根目录建立files:

然后呢,访问就是http://localhost:5000/files/index.html
接下来介绍一下UseDefaultFiles,这个是设置默认的文件。
这个不是说404,然后跳转到这个文件这里哈。
直接看下它的中间件间吧。
DefaultFilesMiddleware:
public Task Invoke(HttpContext context)

{

	if (context.GetEndpoint() == null &&

		Helpers.IsGetOrHeadMethod(context.Request.Method)

		&& Helpers.TryMatchPath(context, _matchUrl, forDirectory: true, subpath: out var subpath))

	{

		var dirContents = _fileProvider.GetDirectoryContents(subpath.Value);

		if (dirContents.Exists)

		{

			// Check if any of our default files exist.

			for (int matchIndex = 0; matchIndex < _options.DefaultFileNames.Count; matchIndex++)

			{

				string defaultFile = _options.DefaultFileNames[matchIndex];

				var file = _fileProvider.GetFileInfo(subpath.Value + defaultFile);

				// TryMatchPath will make sure subpath always ends with a "/" by adding it if needed.

				if (file.Exists)

				{

					// If the path matches a directory but does not end in a slash, redirect to add the slash.

					// This prevents relative links from breaking.

					if (!Helpers.PathEndsInSlash(context.Request.Path))

					{

						context.Response.StatusCode = StatusCodes.Status301MovedPermanently;

						var request = context.Request;

						var redirect = UriHelper.BuildAbsolute(request.Scheme, request.Host, request.PathBase, request.Path + "/", request.QueryString);

						context.Response.Headers[HeaderNames.Location] = redirect;

						return Task.CompletedTask;

					}

					// Match found, re-write the url. A later middleware will actually serve the file.

					context.Request.Path = new PathString(context.Request.Path.Value + defaultFile);

					break;

				}

			}

		}

	}

	return _next(context);

}
里面做的事情其实很简单,将请求转换为文件路径。分为末尾是/和末尾不是/的。
比如http://localhost/a/,那么转换为wwwroot/a/路径。然后判断context.Request.Path末尾是否是/,如果是那么给文件路径加上index.html或者其他默认文件。如果判断存在的话,那么返回文件。
比如http://localhost/a,那么转换为wwwroot/a/路径。然后判断context.Request.Path末尾是不是/,如果是那么给文件路径加上index.html或者其他默认文件。如果判断存在的话,那么给路径加上/,然后返回301重新请求。
默认的在DefaultFilesOptions:
/// <summary>

/// Options for selecting default file names.

/// </summary>

public class DefaultFilesOptions : SharedOptionsBase

{

	/// <summary>

	/// Configuration for the DefaultFilesMiddleware.

	/// </summary>

	public DefaultFilesOptions()

		: this(new SharedOptions())

	{

	}

	/// <summary>

	/// Configuration for the DefaultFilesMiddleware.

	/// </summary>

	/// <param name="sharedOptions"></param>

	public DefaultFilesOptions(SharedOptions sharedOptions)

		: base(sharedOptions)

	{

		// Prioritized list

		DefaultFileNames = new List<string>

		{

			"default.htm",

			"default.html",

			"index.htm",

			"index.html",

		};

	}

	/// <summary>

	/// An ordered list of file names to select by default. List length and ordering may affect performance.

	/// </summary>

	public IList<string> DefaultFileNames { get; set; }

}
有上面这几个默认的,以此按照顺序,当然你也可以传进去修改,看下参数就好。
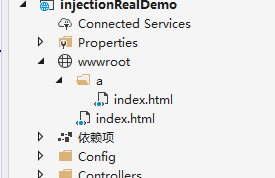
a目录建立了一个index.html:
<!DOCTYPE html>

<html>

<head>

    <meta charset="utf-8" />

    <title></title>

</head>

<body>

    这是a下面的index.html

</body>

</html>
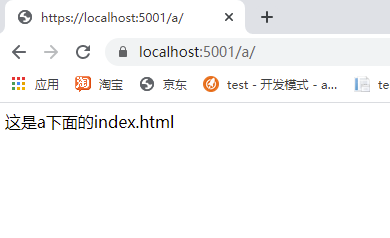
那么访问http://localhost:5000/a 就好。
效果:
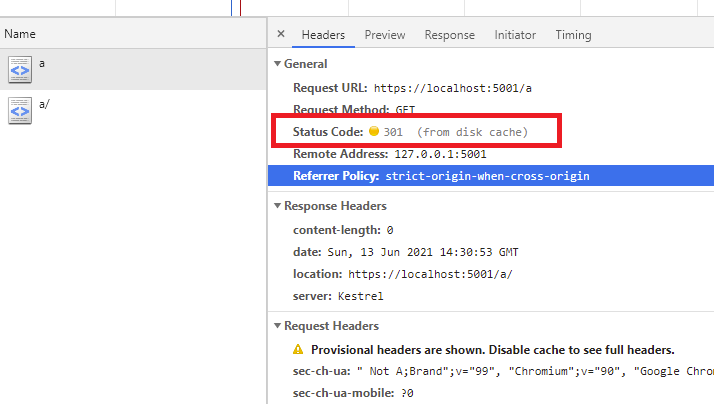
经过了一次301哈。
那么介绍一下目录预览:
增加服务:
services.AddDirectoryBrowser();
增加中间件:
app.UseDirectoryBrowser();
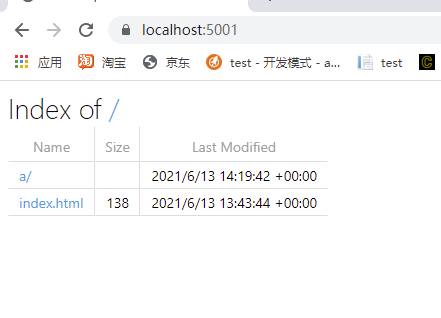
这样就可以了。
如果我们前后端像这种不完全分离的情况有一个问题。
比如说,现在一般3大框架,vue和 angular,react这种的话。你会发现一个问题,那就是他们有自己的路由。
这个时候可能就会和我们的路由冲突。
比如说http://localhost/pay 需要访问的是index.html。因为index.html有自己的路由,显示pay页面。
那么配置路由的时候应该加一条。
app.MapWhen(context =>

{

	return !context.Request.Path.Value.StartsWith("/api");

}, builder =>

{

	var option = new RewriteOptions();

	option.AddRewrite(".*","/index.html",true);

	app.UseRewriter(option);

	app.UseStaticFiles();

});
就是如果不是/api开头的,统一定位到index.html,然后再经过UseStaticFiles处理,就直接到了index.html。
RewriteOptions这些转换在细节篇中介绍。当然你也可以直接去给HttpContext body注入index.html流,然后返回,但是这样用不到一些其他特性,就不介绍了。
结
下一节 文件系统。
重新整理 .net core 实践篇—————静态中间件[二十一]的更多相关文章
- 重新整理 .net core 实践篇—————异常中间件[二十]
前言 简单介绍一下异常中间件的使用. 正文 if (env.IsDevelopment()) { app.UseDeveloperExceptionPage(); } 这样写入中间件哈,那么在env环 ...
- 重新整理 .net core 实践篇——— 权限中间件源码阅读[四十六]
前言 前面介绍了认证中间件,下面看一下授权中间件. 正文 app.UseAuthorization(); 授权中间件是这个,前面我们提及到认证中间件并不会让整个中间件停止. 认证中间件就两个作用,我们 ...
- 重新整理 .net core 实践篇—————领域事件[二十九]
前文 前面整理了仓储层,工作单元模式,同时简单介绍了一下mediator. 那么就mediator在看下领域事件启到了什么作用吧. 正文 这里先注册一下MediatR服务: // 注册中间者:Medi ...
- 重新整理 .net core 实践篇——— UseEndpoints中间件[四十八]
前言 前文已经提及到了endponint 是怎么匹配到的,也就是说在UseRouting 之后的中间件都能获取到endpoint了,如果能够匹配到的话,那么UseEndpoints又做了什么呢?它是如 ...
- 重新整理 .net core 实践篇—————Mediator实践[二十八]
前言 简单整理一下Mediator. 正文 Mediator 名字是中介者的意思. 那么它和中介者模式有什么关系呢?前面整理设计模式的时候,并没有去介绍具体的中介者模式的代码实现. 如下: https ...
- 重新整理 .net core 实践篇————配置应用[一]
前言 本来想整理到<<重新整理.net core 计1400篇>>里面去,但是后来一想,整理 .net core 实践篇 是偏于实践,故而分开. 因为是重新整理,那么就从配置开 ...
- 重新整理 .net core 实践篇————依赖注入应用[二]
前言 这里介绍一下.net core的依赖注入框架,其中其代码原理在我的另一个整理<<重新整理 1400篇>>中已经写了,故而专门整理应用这一块. 以下只是个人整理,如有问题, ...
- 重新整理 .net core 实践篇—————中间件[十九]
前言 简单介绍一下.net core的中间件. 正文 官方文档已经给出了中间件的概念图: 和其密切相关的是下面这两个东西: IApplicationBuilder 和 RequestDelegate( ...
- 重新整理 .net core 实践篇—————HttpClientFactory[三十二]
前言 简单整理一下HttpClientFactory . 正文 这个HttpFactory 主要有下面的功能: 管理内部HttpMessageHandler 的生命周期,灵活应对资源问题和DNS刷新问 ...
随机推荐
- 推荐算法-聚类-K-MEANS
对于大型的推荐系统,直接上协同过滤或者矩阵分解的话可能存在计算复杂度过高的问题,这个时候可以考虑用聚类做处理,其实聚类本身在机器学习中也常用,属于是非监督学习的应用,我们有的只是一组组数据,最终我们要 ...
- Arduino+DS18b20+OLED Display
DS18b20获取到温度数值保存到变量中,然后和天气图标还有滚动字幕一起发送到OLED 屏幕上显示 需要用到的库均可在Arduino库管理器下载. 电路图: 图中屏幕接线已在代码中写出,温度传感器da ...
- MySQL查看及杀掉链接方法大全
前言: 在数据库运维过程中,我们时常会关注数据库的链接情况,比如总共有多少链接.有多少活跃链接.有没有执行时间过长的链接等.数据库的各种异常也能通过链接情况间接反应出来,特别是数据库出现死锁或严重卡顿 ...
- select执行顺序
先from 找到表on过滤 找到两张表有对应关系的记录按join的方式添加外部行where 过滤group by分组having 过滤select 从having 过滤出来的字段中选择需要的字段dis ...
- Can’t update table ‘xxx’ in stored function/trigger because it is already used by statement which invoked this stored function/trigger
MySQL: Solution for ERROR 1442 (HY000): Can't update table 'xxx' in stored function/trigger because ...
- memcache 和 redis 的区别
1)Redis中,并不是所有的数据都一直存储在内存中的,这是和Memcache相比一个最大的区别.2)Redis在很多方面具备数据库的特征,或者说就是一个数据库系统,而Memcache只是简单的K/V ...
- 26.Set
1.Set集合 1.1Set集合概述和特点[应用] 可以去除重复 存取顺序不一致 没有带索引的方法,所以不能使用普通for循环遍历,也不能通过索引来获取,删除Set集合里面的元素 1.2Set集合的使 ...
- Centos7 安装 htop
此安装方法是目前位置我了解到的最简介.最快速的安装方法.本人亲验: 系统版本: CentOS Linux release 7.3.1611 (Core) 安装步骤: yum -y instal ...
- ./g1.sh q w e r 5个参数 bash命令 获取 命令实际的参数 shell文件名称$0 第一个参数$1第2个参数$2 最后一个参数$#;参数个数$#个;所有的参数列出来$* 返回值$? 正确0 失败1
# ./g1.sh q w e r t./g1.sh q w e r5个参数number is q w e r t[root@localhost get]# cat g1.sh#!/bin/bash# ...
- 凯撒密码Caesar
//@132屋里上课群 #include<stdio.h>#include<stdlib.h>//颜色using namespace std;int jiami();int j ...
