LaTeX排版设置图表的位置 Positioning images and tables
Positioning images and tables
LATEX is an editing tool that takes care of the format so you only have to worry about the contents of your document. Nevertheless, sometimes a better control of floating elements is necessary. This article explains how to position images and tables in a LATEX document.
Contents |
Introduction
The default alignment for images and tables is set to left
Lorem ipsum dolor sit amet, consectetuer adipiscing elit.

Etiam lobortis facilisis sem. Nullam nec mi et neque pharetra

sollicitudin.


\includegraphics[width=0.5\textwidth]{lion-logo}


Praesent imperdiet mi nec

ante. Donec ullamcorper, felis non sodales commodo, lectus velit

ultrices augue, a dignissim nibh lectus placerat pede.

 Vivamus nunc nunc, molestie ut, ultricies

vel, semper in, velit. Ut porttitor.

This is a simple example, for a description of this and other ways to include images in your LATEX file see the article Inserting Images.
Positioning images
Basic positioning
To change the default alignment of a image from left or right an easy manner is to add
\usepackage[export]{adjustbox}
to the preamble of your file and then use an additional option in your image importing statement
Lorem ipsum dolor sit amet, consectetuer adipiscing elit.

Etiam lobortis facilisis sem. Nullam nec mi et neque

pharetra sollicitudin.


\includegraphics[width=0.5\textwidth, right]{lion-logo}


Praesent imperdiet mi necante. Donec ullamcorper, felis

non sodales commodo, lectus velit ultrices augue,

a dignissim nibh lectus placerat pede. Vivamus nunc nunc,

molestie ut, ultriciesvel, semper in, velit. Ut porttitor.
The package adjustbox enables an additional option in the \includegraphics command, in the example the picture is aligned to right. The available values are: left, right, center, outer and inner, the last two are intended for two-sided documents.
The figure environment
The figure environment (see Inserting Images) is intended to provide automatic positioning.
Praesent in sapien. Lorem ipsum dolor sit amet, consectetuer adipiscing

elit. Duis fringilla tristique neque. Sed interdum libero ut metus.

Pellentesque placerat. Nam rutrum augue a leo. Morbi sed elit sit amet

ante lobortis sollicitudin.


\begin{figure}[h]

\includegraphics[width=0.5\textwidth, inner]{lion-logo}

\caption{Caption}

\label{fig:figure2}

\end{figure}
This environment uses a positioning parameter passed inside brackets, it can take the next values:
| Parameter | Position |
|---|---|
| h | Place the float here, i.e., approximately at the same point it occurs in the source text (however, not exactly at the spot) |
| t | Position at the top of the page. |
| b | Position at the bottom of the page. |
| p | Put on a special page for floats only. |
| ! | Override internal parameters LaTeX uses for determining "good" float positions. |
| H | Places the float at precisely the location in the LATEX code. Requires the float package. This is somewhat equivalent to h!. |
You can put more than one value in the parameter, for instance, if you write [ht] LATEX will try to position the figure here, but if it's not possible (the space may be insufficient) then the figure will appear at the topof the page. It is recommended to use more than one positioning parameter to prevent unexpected results.
Multiple images in one figure
It is possible to insert several images in one figure, each one with its own reference and label
Praesent in sapien. Lorem ipsum dolor sit amet, consectetuer

adipiscing elit. Duis fringilla tristique neque...


\begin{figure}[h]


\begin{subfigure}{0.5\textwidth}

\includegraphics[width=0.9\linewidth, height=5cm]{lion-logo}

\caption{Caption1}

\label{fig:subim1}

\end{subfigure}

\begin{subfigure}{0.5\textwidth}

\includegraphics[width=0.9\linewidth, height=5cm]{mesh}

\caption{Caption 2}

\label{fig:subim2}

\end{subfigure}


\caption{Caption for this figure with two images}

\label{fig:image2}

\end{figure}


Praesent blandit blandit mauris. Praesent

lectus tellus, aliquet aliquam, luctus a, egestas a, turpis. Mauris

lacinia loremsit amet ipsum. Nunc quis urna dictum turpis accumsan

semper.
First, you must import the package subcaption by adding to the preamble
\usepackage{subcaption}
then you can use the environment \subfigure that takes one parameter, the width of the figure. This environment must be used inside a figure environment, captions and labels can be set to each subfigure.
Note:The \subfigure</cont> command doesn't work with Beamer nor Beamerposter
Wrapping text around a figure
The package wrapfig provides a useful feature, text can be floated around the images.
Praesent in sapien. Lorem ipsum dolor sit amet, consectetuer

adipiscing elit. Duis fringilla tristique neque. Sed interdum

libero ut metus. Pellentesque placerat.


\begin{wrapfigure}{l}{0.25\textwidth}

\includegraphics[width=0.9\linewidth]{lion-logo}

\caption{Caption1}

\label{fig:subim1}

\end{wrapfigure}


Praesent in sapien. Lorem ipsum dolor sit amet, consectetuer

adipiscing elit. Duis fringilla tristique neque. Sed interdum
First import the package wrapfig by adding
\usepackage{wrapfig}
to the preamble.
After that you can use the environment <code>wrapfig, it takes two parameters that are passed inside braces: the alignement that can be l, r, c, i or o; this letters stand for left, right, centre, inner and outer (the last two intended for two-sided documents). The second parameter is the width of the figure, in the example is 0.25 the width of the text. See the reference guide for a list of possible length units.
Positioning tables
Options for table positioning are similar to those available for figures
Basic positioning
Default position of the tabular environment is centre.
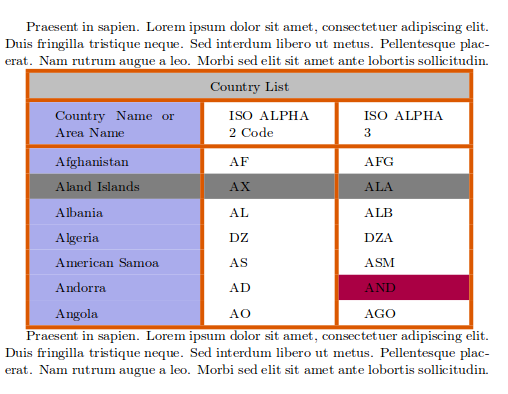
Praesent in sapien. Lorem ipsum dolor sit amet, consectetuer adipiscing elit. Duis fringilla tristique neque. Sed interdum libero ut metus. Pellentesque placerat. Nam rutrum augue a leo. Morbi sed elit sit amet ante lobortis sollicitudin.


\arrayrulecolor[HTML]{DB5800}

\begin{tabular}{ |s|p{2cm}|p{2cm}|  }

\hline

\rowcolor{lightgray} \multicolumn{3}{|c|}{Country List} \\

\hline

Country Name     or Area Name& ISO ALPHA 2 Code &ISO ALPHA 3 \\

\hline

Afghanistan & AF &AFG \\

\rowcolor{gray}

Aland Islands & AX  & ALA \\

Albania    &AL & ALB \\

Algeria   &DZ & DZA \\

American Samoa & AS & ASM \\

Andorra & AD & \cellcolor[HTML]{AA0044} AND \\

Angola & AO & AGO \\

\hline

\end{tabular}


Praesent in sapien. Lorem ipsum dolor sit amet, consectetuer adipiscing

elit. Duis fringilla tristique neque. Sed interdum libero ut metus.

Pellentesque placerat. Nam rutrum augue a leo. Morbi sed elit sit

amet ante lobortis sollicitudin.
To learn about how to create tables see the Tables article.
The table environment
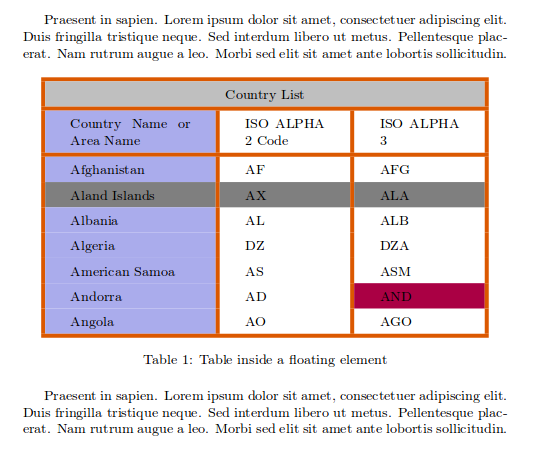
The table environment is intended to automatically position tables so they fit nicely in the flow of your document.
Praesent in sapien. Lorem ipsum dolor sit amet, consectetuer

adipiscing elit. Duis fringilla tristique neque. Sed interdum

libero ut metus. Pellentesque placerat. Nam rutrum augue a leo.

Morbi sed elit sit amet ante lobortis sollicitudin.


\begin{table}[ht]

\arrayrulecolor[HTML]{DB5800}

\centering

\begin{tabular}{ |s|p{2cm}|p{2cm}|  }

\hline

\rowcolor{lightgray} \multicolumn{3}{|c|}{Country List} \\

\hline

Country Name     or Area Name& ISO ALPHA 2 Code &ISO ALPHA 3 \\

\hline

Afghanistan & AF &AFG \\

\rowcolor{gray}

Aland Islands & AX  & ALA \\

Albania    &AL & ALB \\

Algeria   &DZ & DZA \\

American Samoa & AS & ASM \\

Andorra & AD & \cellcolor[HTML]{AA0044} AND \\

Angola & AO & AGO \\

\hline

\end{tabular}

\caption{Table inside a floating element}

\label{table:ta}

\end{table}


Praesent in sapien. Lorem ipsum dolor sit amet, consectetuer

adipiscing elit. Duis fringilla tristique neque. Sed interdum

libero ut metus. Pellentesque placerat. Nam rutrum augue a leo.

Morbi sed elit sit amet ante lobortis sollicitudin.
A position parameter, inside brackets, can be passed to the table environment. This parameter can take the next values:
| Parameter | Position |
|---|---|
| h | Place the float here, i.e., approximately at the same point it occurs in the source text (however, not exactly at the spot) |
| t | Position at the top of the page. |
| b | Position at the bottom of the page. |
| p | Put on a special page for floats only. |
| ! | Override internal parameters LaTeX uses for determining "good" float positions. |
| H | Places the float at precisely the location in the LATEX code. Requires the float package. This is somewhat equivalent to h!. |
You can set more than one value in the parameter, for instance, if you write [ht] LATEX will try to position the table here, but if it's not possible (the space may be insufficient) then the table will appear at the top of the page. It is recommended to use more than one positioning parameter to prevent unexpected results.
Notice also the command \centering. This changes the alignment of the table within its container to centreinstead of the default left.
Wrapping text around a table
If your table don't take all available space and you want to put text next or before it, is possible with the package wraptable.
Praesent in sapien. Lorem ipsum dolor sit amet, consectetuer

adipiscing elit. Duis fringilla tristique neque. Sed interdum

libero ut metus. Pellentesque placerat. Nam rutrum augue a leo.

Morbi sed elit sit amet ante lobortis sollicitudin.


\begin{wraptable}{r}{8cm}

\arrayrulecolor[HTML]{DB5800}

\centering

\begin{tabular}{ |s|p{2cm}|  }

\hline

\rowcolor{lightgray} \multicolumn{2}{|c|}{Country List} \\

\hline

Country Name     or Area Name& ISO ALPHA 2 Code \\

\hline

Afghanistan & AF \\

\rowcolor{gray}

Aland Islands & AX \\

Albania    &AL  \\

Algeria   &DZ \\

American Samoa & AS \\

Andorra & \cellcolor[HTML]{AA0044} AD   \\

Angola & AO \\

\hline

\end{tabular}

\caption{Table inside a floating element}

\label{table:ta}

\end{wraptable}


Praesent in sapien. Lorem ipsum dolor sit amet, consectetuer

adipiscing elit. Duis fringilla tristique neque. Sed interdum

libero ut metus. Pellentesque placerat. Nam rutrum augue a leo.

Morbi sed elit sit amet ante lobortis sollicitudin...
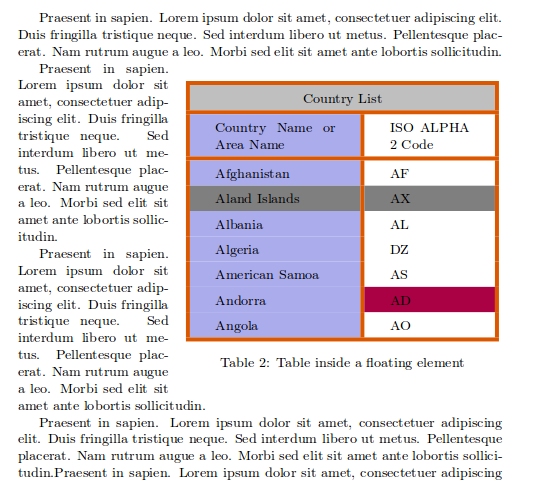
First, import the package
\usepackage{wraptable}
then you can use the environment wraptable which takes two parameters: The first one is the alignment that can be l, r, c, i or o for left, right, centre, inner and outer respectively. The second one is the width of the table container, keep in mind that this latter parameter must be the same as the width of the table, otherwise things may not be properly aligned.
Reference guide
LATEX units and lengths
| Abbreviation | Definition |
|---|---|
| pt | A point, is the default length unit. About 0.3515mm |
| mm | a millimetre |
| cm | a centimetre |
| in | an inch |
| ex | the height of an x in the current font |
| em | the width of an m in the current font |
| \columnsep | distance between columns |
| \columnwidth | width of the column |
| \linewidth | width of the line in the current environment |
| \paperwidth | width of the page |
| \paperheight | height of the page |
| \textwidth | width of the text |
| \textheight | height of the text |
| \unitleght | units of length in the picture environment. |
from: https://www.sharelatex.com/learn/Positioning_images_and_tables
LaTeX排版设置图表的位置 Positioning images and tables的更多相关文章
- Windows下LATEX排版论文攻略—CTeX、JabRef使用介绍
Windows下LATEX排版论文攻略—CTeX.JabRef使用介绍 一.工具介绍 TeX是一个很好排版工具,在学术界十分流行,特别是数学.物理学和计算机科学界. CTeX是TeX中的一个版本,指的 ...
- Latex排版全解
Latex排版全解 LATEX(英语发音:/ˈleɪtɛk/ LAY-tek或英语发音:/ˈlɑːtɛk/ LAH-tek,音译“拉泰赫”),是一种基于TEX的排版系统,由美国电脑学家莱斯利•兰伯特在 ...
- 【LaTeX排版】LaTeX纸排版<两>
1.文件夹的生成 直接使用命令\tableofcontents就可以. 其默认格式例如以下: 我们会发现.这种格式不一定是我们所期望的. 比方说,我们也希望章标题与页码之间也有点连线,而且也希 ...
- 【LaTeX排版】LaTeX论文排版<二>
1.目录的生成 直接使用命令\tableofcontents即可.其默认格式如下: 我们会发现,这样的格式不一定是我们所期望的.比如说,我们也希望章标题与页码之间也有点连线,并且也希望将致谢. ...
- Eclipse的自动排版设置(format)
Java排版: 主要是在文件保存时自动触发排版等规则,省掉反复操作快捷键 Ctrl+Shift+F 的步骤.在 eclipse 中选择 Window-> Preferences- ...
- 设置Toast显示位置
设置Toast显示位置 两个方法可以设置显示位置: 方法一:setGravity(int gravity, int xOffset, int yOffset)三个参数分别表示(起点位置,水平向右位移, ...
- 【分享】LateX排版软件学习教程合集
来源于:http://www.hejizhan.com/html/xueke/416/x416_13.html LATEX2e科技排版指南.pdf 8.3 MB An Example LaTeX ...
- WinForm 设置窗体启动位置在活动屏幕右下角
WinForm 设置窗体启动位置在活动屏幕右下角 在多屏幕环境下, 默认使用鼠标所在的屏幕 1. 设置窗体的 StartPosition 为 FormStartPosition.Manual. 2. ...
- grid - 通过网格线名称设置网格项目位置
使用网格线名称设置网格项目位置和使用网格线号码设置网格项目位置类似. 1.引用网格线名称的时候不应该带方括号 <view class="grid"> <view ...
随机推荐
- python开发学习-day09(队列、多路IO阻塞、堡垒机模块、mysql操作模块)
s12-20160312-day09 *:first-child { margin-top: 0 !important; } body>*:last-child { margin-bottom: ...
- JavaScript与C#互通的DES加解密算法
原文地址:传送门 本文提供了一个能使JavaScript与C#互通的DES加解密算法的实现,在前台页面中用JavaScript版本的DES算法将数据加密之后,传到服务器端,在服务器端可用C#版本的DE ...
- js对小数的操作
1.丢弃小数部分,保留整数部分 js:parseInt(7/2) 2.向上取整,有小数就整数部分加1 js: Math.ceil(7/2) 3,四舍五入. js: Math.round(7/2) 4, ...
- JavaScript快速找出字符串并返回其下标
var box = "this is javascript"; for (var i = -1, arr = []; (i = box.indexOf("s", ...
- Qt中translate、tr关系 与中文问题
原文请看:http://hi.baidu.com/dbzhang800/item/d850488767bdc3cdee083d43 题外话:何时使用 tr ? 在论坛中漂,经常遇到有人遇到tr相关的问 ...
- Coding.net进阶,使用Git管理代码
原文来自:http://conw.net/archives/18/ (我自己的博客,点击链接查看文章最新版本) Git是目前最流行的版本控制系统,这里以GitHub为例,介绍git的基本使用. Git ...
- list容器详解
首先说说STL ( STL的目的是标准化组件,这样就不用重新开发,可以使用现成的组件.STL现在是C++的一部分,因此不用额外安装什么.它被内建在你的编译器之内.因为STL的list是一个简单的容器, ...
- hdu1028 Ignatius and the Princess III(生成函数整理占坑)upd 已咕
先咕着 ---------------2018 5 22---------------------- 题解 生成函数处理整数拆分 code #include<cstdio> #includ ...
- python输入输出入门 A+B
描述 求两个整数之和. 输入 输入数据只包括两个整数A和B. 输出 两个整数的和. 样例输入 1 2 样例输出 3 a=input().split() print(int(a[0])+int(a[1 ...
- [bzoj1021][SHOI2008]Debt 循环的债务 (动态规划)
Description Alice. Bob和Cynthia总是为他们之间混乱的债务而烦恼,终于有一天,他们决定坐下来一起解决这个问题.不过,鉴别钞票的真伪是一件很麻烦的事情,于是他 们决定要在清还债 ...