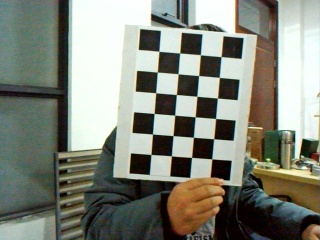
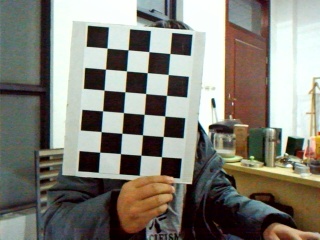
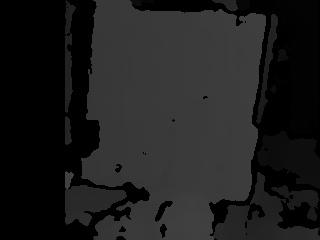
python+openCV实现双目视差图及测距
通过matlab标定得到相机参数放到stereoconfig.py
import numpy as np

import cv2

#双目相机参数

class stereoCameral(object):

    def __init__(self):

        #左相机内参数

        self.cam_matrix_left = np.array([[249.82379, 0., 156.38459], [0., 249.07678, 122.46872], [0., 0., 1.]])

        #右相机内参数

        self.cam_matrix_right = np.array([[242.77875, 0., 153.22330], [0., 242.27426, 117.63536], [0., 0., 1.]])

        #左右相机畸变系数:[k1, k2, p1, p2, k3]

        self.distortion_l = np.array([[-0.02712, -0.03795, -0.00409, 0.00526, 0.00000]])

        self.distortion_r = np.array([[-0.03348, 0.08901, -0.00327, 0.00330, 0.00000]])

        #旋转矩阵

        om = np.array([-0.00320, -0.00163, -0.00069])

        self.R = cv2.Rodrigues(om)[0]  # 使用Rodrigues变换将om变换为R

        #平移矩阵

        self.T = np.array([-90.24602, 3.17981, -19.44558])
视差图及三维坐标
import cv2

import numpy as np

import stereoconfig

def getRectifyTransform(height, width, config):

    #读取矩阵参数

    left_K = config.cam_matrix_left

    right_K = config.cam_matrix_right

    left_distortion = config.distortion_l

    right_distortion = config.distortion_r

    R = config.R

    T = config.T

    #计算校正变换

    if type(height) != "int" or type(width) != "int":

        height = int(height)

        width = int(width)

    R1, R2, P1, P2, Q, roi1, roi2 = cv2.stereoRectify(left_K, left_distortion, right_K, right_distortion,

                                                      (width, height), R, T, alpha=0)

    map1x, map1y = cv2.initUndistortRectifyMap(left_K, left_distortion, R1, P1, (width, height), cv2.CV_32FC1)

    map2x, map2y = cv2.initUndistortRectifyMap(right_K, right_distortion, R2, P2, (width, height), cv2.CV_32FC1)

    return map1x, map1y, map2x, map2y, Q

# 畸变校正和立体校正

def rectifyImage(image1, image2, map1x, map1y, map2x, map2y):

    rectifyed_img1 = cv2.remap(image1, map1x, map1y, cv2.INTER_AREA)

    rectifyed_img2 = cv2.remap(image2, map2x, map2y, cv2.INTER_AREA)

    return rectifyed_img1, rectifyed_img2

#视差计算

def sgbm(imgL, imgR):

    #SGBM参数设置

    blockSize = 8

    img_channels = 3

    stereo = cv2.StereoSGBM_create(minDisparity = 1,

                                   numDisparities = 64,

                                   blockSize = blockSize,

                                   P1 = 8 * img_channels * blockSize * blockSize,

                                   P2 = 32 * img_channels * blockSize * blockSize,

                                   disp12MaxDiff = -1,

                                   preFilterCap = 1,

                                   uniquenessRatio = 10,

                                   speckleWindowSize = 100,

                                   speckleRange = 100,

                                   mode = cv2.STEREO_SGBM_MODE_HH)

    # 计算视差图

    disp = stereo.compute(imgL, imgR)

    disp = np.divide(disp.astype(np.float32), 16.)#除以16得到真实视差图

    return disp

#计算三维坐标,并删除错误点

def threeD(disp, Q):

    # 计算像素点的3D坐标(左相机坐标系下)

    points_3d = cv2.reprojectImageTo3D(disp, Q)

    points_3d = points_3d.reshape(points_3d.shape[0] * points_3d.shape[1], 3)

    X = points_3d[:, 0]

    Y = points_3d[:, 1]

    Z = points_3d[:, 2]

    #选择并删除错误的点

    remove_idx1 = np.where(Z <= 0)

    remove_idx2 = np.where(Z > 15000)

    remove_idx3 = np.where(X > 10000)

    remove_idx4 = np.where(X < -10000)

    remove_idx5 = np.where(Y > 10000)

    remove_idx6 = np.where(Y < -10000)

    remove_idx = np.hstack(

        (remove_idx1[0], remove_idx2[0], remove_idx3[0], remove_idx4[0], remove_idx5[0], remove_idx6[0]))

    points_3d = np.delete(points_3d, remove_idx, 0)

    #计算目标点(这里我选择的是目标区域的中位数,可根据实际情况选取)

    if points_3d.any():

        x = np.median(points_3d[:, 0])

        y = np.median(points_3d[:, 1])

        z = np.median(points_3d[:, 2])

        targetPoint = [x, y, z]

    else:

        targetPoint = [0, 0, -1]#无法识别目标区域

    return targetPoint

imgL = cv2.imread("_left.jpg")

imgR = cv2.imread("_right.jpg")

height, width = imgL.shape[0:2]

# 读取相机内参和外参

config = stereoconfig.stereoCameral()

map1x, map1y, map2x, map2y, Q = getRectifyTransform(height, width, config)

iml_rectified, imr_rectified = rectifyImage(imgL, imgR, map1x, map1y, map2x, map2y)

disp = sgbm(iml_rectified, imr_rectified)

cv2.imshow("disp", disp)

target_point = threeD(disp, Q)#计算目标点的3D坐标(左相机坐标系下)

print(target_point)


python+openCV实现双目视差图及测距的更多相关文章
- OpenCV+OpenGL 双目立体视觉三维重建
0.绪论 这篇文章主要为了研究双目立体视觉的最终目标--三维重建,系统的介绍了三维重建的整体步骤.双目立体视觉的整体流程包括:图像获取,摄像机标定,特征提取(稠密匹配中这一步可以省略),立体匹配,三维 ...
- 搭建基于python +opencv+Beautifulsoup+Neurolab机器学习平台
搭建基于python +opencv+Beautifulsoup+Neurolab机器学习平台 By 子敬叔叔 最近在学习麦好的<机器学习实践指南案例应用解析第二版>,在安装学习环境的时候 ...
- Python+OpenCV图像处理(一)
Python+OpenCV图像处理(一): 读取,写入和展示图片 调用摄像头拍照 调用摄像头录制视频 1. 读取.写入和展示图片 图像读入:cv2.imread() 使用函数cv2.imread() ...
- python opencv show图片,debug技巧
debug的时候可以直接把图片画出来debug. imshow函数就是python opencv的展示图片的函数,第一个是你要起的图片名,第二个是图片本身.waitKey函数是用来展示图片多久的,默认 ...
- linux/ubuntu下最简单好用的python opencv安装教程 ( 解决 imshow, SIFT, SURF, CSRT使用问题)
希望这篇文章能彻底帮你解决python opencv安装和使用中的常见问题. 懒人请直奔这一节, 一条命令安装 opencv 使用python-opencv常用的问题 在linux中使用python版 ...
- python+opencv实现车牌定位
写在前面 HIT大三上学期视听觉信号处理课程中视觉部分的实验三,经过和学长们实验的对比发现每一级实验要求都不一样,因此这里标明了是2019年秋季学期的视觉实验三. 由于时间紧张,代码没有进行任何优化, ...
- python opencv识别蓝牌车牌号 之 取出车牌号 (1/3)
概述 车牌识别是计算机视频图像识别技术在车辆牌照识别中的一种应用,通常来讲如果结合opencv进行车牌识别主要分为四个大步骤,分别为: 图像采集 车牌定位 分割车牌字符 字符识别 当然,如果结合了机器 ...
- Python+opencv打开修图的正确方式get
先逼逼两句: 图像是 Web 应用中除文字外最普遍的媒体格式. 流行的 Web 静态图片有 JPEG.PNG.ICO.BMP 等.动态图片主要是 GIF 格式.为了节省图片传输流量,大型互联网公司还会 ...
- python抓取性感尤物美女图
由于是只用标准库,装了python3运行本代码就能下载到多多的美女图... 写出代码前面部分的时候,我意识到自己的函数设计错了,强忍继续把代码写完. 测试发现速度一般,200K左右的下载速度,也没有很 ...
随机推荐
- 将序列化成json格式后日期(毫秒数)转成日期格式
System.Web.Script.Serialization.JavaScriptSerializer jss = new System.Web.Script.Serialization.JavaS ...
- ‘No module named 'numpy.core._multiarray_umath’ 或者‘no module named numpy’
在import TensorFlow时,如果遇到‘No module named 'numpy.core._multiarray_umath’ 或者‘no module named numpy’,大多 ...
- 关于Thread ThreadPool Parallel 的一些小测试demo
using System; using System.Diagnostics; using System.Runtime.InteropServices; using System.Threading ...
- 基于vs插件的abp代码生成器
工作了这么多年,一直都在小公司摸爬滚打,对于小公司而言,开发人员少,代码风格五花八门.要想用更少的人,更快的速度,开发更规范的代码,那自然离不开代码生成器.之前用过动软的,也用过T4,后面又接触了力软 ...
- PTA(Basic Level)1029.旧键盘
旧键盘上坏了几个键,于是在敲一段文字的时候,对应的字符就不会出现.现在给出应该输入的一段文字.以及实际被输入的文字,请你列出肯定坏掉的那些键. 输入格式: 输入在 2 行中分别给出应该输入的文字.以及 ...
- Mongo数据库备份
安全访问状态下 手动在线备份: mongodump -h 127.0.0.1:27017 -u=username -p=123456 -d dbname -o /home/backups 手动恢复: ...
- java-selenium定位元素和操作元素
八种定位方式 一.By.id(id):通过ID 属性查找 HTML 源码 <a onclick="return false;" id="lb" name= ...
- windows 安装 python 踩坑记录
官方不建议使用 64 bit python,容易出各种问题 Unable to find vcvarsall.bat 凡是安装与操作系统底层相关的 python 扩展都会遇到这个问题,如 PIL,Pi ...
- CE修改器使用教程 [入门篇]
Cheat Engine 一般简称CE,是一个开放源代码的作弊软件,其功能包括:内存扫描.十六进制编辑器.调试工具,Cheat Engine 自身附带了外挂制作工具,可以用它直接生成外挂工具,CE可以 ...
- java中代码块和构造方法以及普通方法的代码执行顺序总结
说实话,这块真的不好理解啊~都怪jvm 执行顺序搞这么复杂,哼╭(╯^╰)╮ 但是 我们能怎么办,只能研究呗!!! !:首先,毫无置疑的,静态代码块在加载时就执行了,所以肯定是最先执行的.... ...
