nginx使用lua waf防火墙来做防CC配置
nginx添加lua模块
启动和安装nginx
yum install -y nginx

systemctl daemon-reload

systemctl enable nginx

#为了实验方便这里就直接yum安装了,配置了开机启动

注意:出现报错

[root@wh02 ~]# useradd  nginx -M -s /sbin/nologin

useradd: cannot open /etc/shadow

表示 你曾经锁定了/etc/shadow 文件

#添加nginx系统启动:

vim /usr/lib/systemd/system/nginx.service

添加以下内容:

#----------------------------------------------------------

[Unit]

Description=nginx - high performance web server

Documentation=http://nginx.org/en/docs/

After=network.target remote-fs.target nss-lookup.target

[Service]

Type=forking

PIDFile=/run/nginx.pid

ExecStartPre=/usr/sbin/nginx -t -c /etc/nginx/nginx.conf

ExecStart=/usr/sbin/nginx -c /etc/nginx/nginx.conf

ExecReload=/bin/kill -s HUP $MAINPID

ExecStop=/bin/kill -s QUIT $MAINPID

PrivateTmp=true

[Install]

WantedBy=multi-user.target

#----------------------------------------------------------

#启动 nginx

[root@wh02 ~]# systemctl daemon-reload

[root@wh02 ~]# systemctl start nginx

#查看状态

[root@wh02 ~]# systemctl status nginx

#停止

[root@wh02 ~]# systemctl stop nginx

#获取默认编译参数,用于后面添加 lua模块

[root@wh02 ~]# nginx -V

nginx version: nginx/1.16.1

built by gcc 4.8.5 20150623 (Red Hat 4.8.5-39) (GCC)

built with OpenSSL 1.0.2k-fips  26 Jan 2017

TLS SNI support enabled

configure arguments: --prefix=/usr/share/nginx --sbin-path=/usr/sbin/nginx --modules-path=/usr/lib64/nginx/modules --conf-path=/etc/nginx/nginx.conf --error-log-path=/var/log/nginx/error.log --http-log-path=/var/log/nginx/access.log --http-client-body-temp-path=/var/lib/nginx/tmp/client_body --http-proxy-temp-path=/var/lib/nginx/tmp/proxy --http-fastcgi-temp-path=/var/lib/nginx/tmp/fastcgi --http-uwsgi-temp-path=/var/lib/nginx/tmp/uwsgi --http-scgi-temp-path=/var/lib/nginx/tmp/scgi --pid-path=/run/nginx.pid --lock-path=/run/lock/subsys/nginx --user=nginx --group=nginx --with-file-aio --with-ipv6 --with-http_ssl_module --with-http_v2_module --with-http_realip_module --with-stream_ssl_preread_module --with-http_addition_module --with-http_xslt_module=dynamic --with-http_image_filter_module=dynamic --with-http_sub_module --with-http_dav_module --with-http_flv_module --with-http_mp4_module --with-http_gunzip_module --with-http_gzip_static_module --with-http_random_index_module --with-http_secure_link_module --with-http_degradation_module --with-http_slice_module --with-http_stub_status_module --with-http_perl_module=dynamic --with-http_auth_request_module --with-mail=dynamic --with-mail_ssl_module --with-pcre --with-pcre-jit --with-stream=dynamic --with-stream_ssl_module --with-google_perftools_module --with-debug --with-cc-opt='-O2 -g -pipe -Wall -Wp,-D_FORTIFY_SOURCE=2 -fexceptions -fstack-protector-strong --param=ssp-buffer-size=4 -grecord-gcc-switches -specs=/usr/lib/rpm/redhat/redhat-hardened-cc1 -m64 -mtune=generic' --with-ld-opt='-Wl,-z,relro -specs=/usr/lib/rpm/redhat/redhat-hardened-ld -Wl,-E'
编译安装lua模块
echo "export LUAJIT_LIB=/usr/local/luajit/lib

export LUAJIT_INC=/usr/local/luajit/include/luajit-2.0 " >>/etc/profile

#ngx_devle_kit下载解压

mkdir  /leilei

cd /leilei

wget https://github.com/simpl/ngx_devel_kit/archive/v0.3.0.tar.gz

tar -xf v0.3.0.tar.gz

#lua-nginx-module模块下载解压

wget https://github.com/openresty/lua-nginx-module/archive/v0.10.8.tar.gz

tar xf v0.10.8.tar.gz

#安装luajit

wget http://luajit.org/download/LuaJIT-2.0.5.tar.gz

tar zxf LuaJIT-2.0.5.tar.gz

cd LuaJIT-2.0.5

make

make install

#增加环境变量

export LUAJIT_LIB=/usr/local/lib

export LUAJIT_INC=/usr/local/include/luajit-2.0

#----------------至此 模块都配置好了,需要在nginx中导入模块 ------------------------#

#编译模块可能出现的报错:

[root@wh02 LuaJIT-2.0.5]# make PREFIX=/usr/local/luajit

==== Building LuaJIT 2.0.5 ====

make -C src

make[1]: gcc: Command not found

make[1]: Entering directory `/usr/local/src/LuaJIT-2.0.4/src'

make[1]: gcc: Command not found

make[1]: gcc: Command not found

make[1]: gcc: Command not found

make[1]: gcc: Command not found

make[1]: gcc: Command not found

Makefile:233: *** Unsupported target architecture.  Stop.

make[1]: Leaving directory `/usr/local/src/LuaJIT-2.0.4/src'

make: *** [default] Error 2

解决办法:   yum install -y gcc

#编译安装lua模块:

tar xf LuaJIT-2.0.5.tar.gz

cd LuaJIT-2.0.5

make PREFIX=/usr/local/luajit

make install PREFIX=/usr/local/luajit
下载扩展模块:
cd /server/tools/leilei

wget https://github.com/simpl/ngx_devel_kit/archive/v0.3.0.tar.gz

tar -xf v0.3.0.tar.gz

wget https://github.com/openresty/lua-nginx-module/archive/v0.10.11.tar.gz

tar xf v0.10.11.tar.gz

[root@wh02 leilei]# ll

total 680

drwxrwxr-x 10 root root   4096 Nov  4  2017 lua-nginx-module-0.10.11

drwxrwxr-x  9 root root   4096 May 10  2016 ngx_devel_kit-0.3.0

-rw-r--r--  1 root root 616653 Jan  5 04:32 v0.10.11.tar.gz

-rw-r--r--  1 root root  66455 Jan  5 04:32 v0.3.0.tar.gz
nginx添加扩展模块
#获取原来的编译参数

[root@wh02 tools]# nginx -V

nginx version: nginx/1.16.1

built by gcc 4.8.5 20150623 (Red Hat 4.8.5-39) (GCC)

built with OpenSSL 1.0.2k-fips  26 Jan 2017

TLS SNI support enabled

configure arguments: --prefix=/usr/share/nginx --sbin-path=/usr/sbin/nginx --modules-path=/usr/lib64/nginx/modules --conf-path=/etc/nginx/nginx.conf --error-log-path=/var/log/nginx/error.log --http-log-path=/var/log/nginx/access.log --http-client-body-temp-path=/var/lib/nginx/tmp/client_body --http-proxy-temp-path=/var/lib/nginx/tmp/proxy --http-fastcgi-temp-path=/var/lib/nginx/tmp/fastcgi --http-uwsgi-temp-path=/var/lib/nginx/tmp/uwsgi --http-scgi-temp-path=/var/lib/nginx/tmp/scgi --pid-path=/run/nginx.pid --lock-path=/run/lock/subsys/nginx --user=nginx --group=nginx --with-file-aio --with-ipv6 --with-http_ssl_module --with-http_v2_module --with-http_realip_module --with-stream_ssl_preread_module --with-http_addition_module --with-http_xslt_module=dynamic --with-http_image_filter_module=dynamic --with-http_sub_module --with-http_dav_module --with-http_flv_module --with-http_mp4_module --with-http_gunzip_module --with-http_gzip_static_module --with-http_random_index_module --with-http_secure_link_module --with-http_degradation_module --with-http_slice_module --with-http_stub_status_module --with-http_perl_module=dynamic --with-http_auth_request_module --with-mail=dynamic --with-mail_ssl_module --with-pcre --with-pcre-jit --with-stream=dynamic --with-stream_ssl_module --with-google_perftools_module --with-debug --with-cc-opt='-O2 -g -pipe -Wall -Wp,-D_FORTIFY_SOURCE=2 -fexceptions -fstack-protector-strong --param=ssp-buffer-size=4 -grecord-gcc-switches -specs=/usr/lib/rpm/redhat/redhat-hardened-cc1 -m64 -mtune=generic' --with-ld-opt='-Wl,-z,relro -specs=/usr/lib/rpm/redhat/redhat-hardened-ld -Wl,-E'

# 下载nginx 1.16.1 安装包:

cd /server/tools/leilei

wget http://nginx.org/download/nginx-1.16.1.tar.gz

tar xf nginx-1.16.1.tar.gz

cd nginx-1.16.1/

#重新编译nginx

./configure  --prefix=/usr/share/nginx --sbin-path=/usr/sbin/nginx --modules-path=/usr/lib64/nginx/modules --conf-path=/etc/nginx/nginx.conf --error-log-path=/var/log/nginx/error.log --http-log-path=/var/log/nginx/access.log --http-client-body-temp-path=/var/lib/nginx/tmp/client_body --http-proxy-temp-path=/var/lib/nginx/tmp/proxy --http-fastcgi-temp-path=/var/lib/nginx/tmp/fastcgi --http-uwsgi-temp-path=/var/lib/nginx/tmp/uwsgi --http-scgi-temp-path=/var/lib/nginx/tmp/scgi --pid-path=/run/nginx.pid --lock-path=/run/lock/subsys/nginx --user=nginx --group=nginx --with-file-aio --with-http_ssl_module --with-http_v2_module --with-http_realip_module --with-stream_ssl_preread_module --with-http_addition_module --with-http_xslt_module=dynamic --with-http_image_filter_module=dynamic --with-http_sub_module --with-http_dav_module --with-http_flv_module --with-http_mp4_module --with-http_gunzip_module --with-http_gzip_static_module --with-http_random_index_module --with-http_secure_link_module --with-http_degradation_module --with-http_slice_module --with-http_stub_status_module --with-http_perl_module=dynamic --with-http_auth_request_module --with-mail=dynamic --with-mail_ssl_module --with-pcre --with-pcre-jit --with-stream=dynamic --with-stream_ssl_module --with-google_perftools_module --with-debug --with-cc-opt='-O2 -g -pipe -Wall -Wp,-D_FORTIFY_SOURCE=2 -fexceptions -fstack-protector-strong --param=ssp-buffer-size=4 -grecord-gcc-switches -specs=/usr/lib/rpm/redhat/redhat-hardened-cc1 -m64 -mtune=generic' --with-ld-opt='-Wl,-z,relro -specs=/usr/lib/rpm/redhat/redhat-hardened-ld -Wl,-E' --add-module=/server/tools/leilei/ngx_devel_kit-0.3.0 --add-module=/server/tools/leilei/lua-nginx-module-0.10.11

#这是添加了这两个模块后编译的:

 --add-module=/server/tools/leilei/ngx_devel_kit-0.3.0 --add-module=/server/tools/leilei/lua-nginx-module-0.10.11

 编译也有可能会报错: ./configure: error: the invalid value in --with-ld-opt="-Wl,-z,relro -specs=/usr/lib/rpm/redhat/redhat-hardened-ld -Wl,-E"

 解决方法:

 yum -y install redhat-rpm-config.noarch

编译出错: ./configure: error: ngx_http_lua_module requires the Lua library.

解决办法:

yum install lua-devel -y

编译出错:/configure: error: the HTTP XSLT module requires the libxml2/libxslt

解决办法:

yum install libxslt-devel -y

编译出错: ./configure: error: the HTTP image filter module requires the GD library.

解决办法:

yum install gd gd-devel -y

编译出错: ./configure: error: perl module ExtUtils::Embed is required

解决办法:

yum install perl-ExtUtils-Embed -y

编译出错: ./configure: error: the Google perftools module requires the Google perftools

解决办法:

yum install gperftools -y

安装完毕:

Configuration summary

  + using system PCRE library

  + using system OpenSSL library

  + using system zlib library

  nginx path prefix: "/usr/share/nginx"

  nginx binary file: "/usr/sbin/nginx"

  nginx modules path: "/usr/lib64/nginx/modules"

  nginx configuration prefix: "/etc/nginx"

  nginx configuration file: "/etc/nginx/nginx.conf"

  nginx pid file: "/run/nginx.pid"

  nginx error log file: "/var/log/nginx/error.log"

  nginx http access log file: "/var/log/nginx/access.log"

  nginx http client request body temporary files: "/var/lib/nginx/tmp/client_body"

  nginx http proxy temporary files: "/var/lib/nginx/tmp/proxy"

  nginx http fastcgi temporary files: "/var/lib/nginx/tmp/fastcgi"

  nginx http uwsgi temporary files: "/var/lib/nginx/tmp/uwsgi"

  nginx http scgi temporary files: "/var/lib/nginx/tmp/scgi"

## 编译安装nginx

  make

## 平滑升级:

\cp -af /usr/sbin/nginx ~

[root@wh02 nginx-1.16.1]# cp -af objs/nginx /usr/sbin/

cp: overwrite ‘/usr/sbin/nginx’? y

#发送协同工作信号

[root@wh02 nginx-1.16.1]# kill -USR2 `cat /run/nginx.pid`

[root@wh02 nginx-1.16.1]# ps -ef|grep nginx

root     21305 23677  0 01:31 ?        00:00:00 nginx: master process /usr/sbin/nginx

nginx    21306 21305  0 01:31 ?        00:00:00 nginx: worker process

root     21311  1443  0 01:31 pts/2    00:00:00 grep --color=auto nginx

root     23677     1  0 Jan04 ?        00:00:00 nginx: master process /usr/sbin/nginx

nginx    23678 23677  0 Jan04 ?        00:00:00 nginx: worker process

#发送退出信号

[root@wh02 nginx-1.16.1]#  kill -QUIT `cat /run/nginx.pid`

[root@wh02 nginx-1.16.1]# ps -ef|grep nginx

root     21368  1443  0 01:32 pts/2    00:00:00 grep --color=auto nginx

root     23677     1  0 Jan04 ?        00:00:00 nginx: master process /usr/sbin/nginx

nginx    23678 23677  0 Jan04 ?        00:00:00 nginx: worker process

升级完毕!
lua模块添加
步骤整理:

wget http://luajit.org/download/LuaJIT-2.0.2.tar.gz

tar xf LuaJIT-2.0.5.tar.gz

cd LuaJIT-2.0.5

make PREFIX=/usr/local/LuaJIT/include/luajit

make install PREFIX=/usr/local/nginx/lua/luajit

wget https://github.com/simplresty/ngx_devel_kit/archive/v0.3.0.tar.gz

tar xf v0.3.0.tar.gz

get https://github.com/openresty/lua-nginx-module/archive/v0.10.11.tar.gz

tar xf v0.10.11.tar.gz

export LUAJIT_LIB=/opt/programs/nginx_1.12.2/lua/luajit/lib

export LUAJIT_INC=/opt/programs/nginx_1.12.2/lua/luajit/include/luajit-2.0
配置:
#nginx.conf配置文件中的http区块加入如下:

#----------waf防火墙-----------------------------#

lua_package_path "/etc/nginx/conf.d/waf/?.lua";

lua_shared_dict limit 10m;

init_by_lua_file  /etc/nginx/conf.d/waf/init.lua;

access_by_lua_file /etc/nginx/conf.d/waf/waf.lua;

#----------waf防火墙-----------------------------#

#nginx目录下创建相关目录:

mkdir -p /etc/nginx/conf.d/waf/

#进入相关目录下载lua配置文件:

cd /etc/nginx/conf.d/waf/

git clone https://github.com/loveshell/ngx_lua_waf.git

mv ngx_lua_waf waf

cd waf/

[root@wh02 waf]# ll

total 32

-rw-r--r-- 1 root root 2377 Jan  5 04:50 config.lua

-rw-r--r-- 1 root root 6405 Jan  5 04:50 init.lua

-rw-r--r-- 1 root root 1587 Jan  5 04:50 install.sh

-rw-r--r-- 1 root root 4612 Jan  5 04:50 README.md

drwxr-xr-x 2 root root 4096 Jan  5 04:50 wafconf

-rw-r--r-- 1 root root 2295 Jan  5 04:50 waf.lua

# 添加到nginx配置文件中

vim /etc/nginx/nginx.conf

http  {

...

...

#----------waf防火墙-----------------------------#

lua_load_resty_core off;

lua_shared_dict limit 30m;

lua_package_path "/etc/nginx/conf.d/waf/?.lua";

init_by_lua_file  /etc/nginx/conf.d/waf/init.lua;

access_by_lua_file /etc/nginx/conf.d/waf/waf.lua;

#----------waf防火墙-----------------------------#

...

...

}

# 修改 vim /etc/nginx/conf.d/waf/config.lua 配置文件,将规则路径改为: /etc/nginx/conf.d/waf/

RulePath = "/etc/nginx/conf.d/waf/wafconf/"

attacklog = "on"

logdir = "/etc/nginx/logs/hack/"

#没有相关目录就创建相关目录

mkdir -p /etc/nginx/conf.d/waf/wafconf/

mkdir -p /etc/nginx/logs/hack/

通过以上配置并没有让他生效,如果需要生效还需要取config.lua中开启规则才可以.
nginx中添加配置:

开启waf 防火墙:
vim /etc/nginx/conf.d/waf/config.lua

config_waf_enable= "on"

由于版本更新,新版本的lua配置中已经没有了 waf 开关了,默认就是开启状态,如果需要关闭则需要去 nginx.conf中注释lua.
waf防火墙规则配置:
目录: /etc/nginx/conf.d/waf/config.lua

vim /etc/nginx/conf.d/waf/config.lua

#没修改之前都是默认规则.

	RulePath = "/usr/local/nginx/conf/waf/wafconf/"

    --规则存放目录

	attacklog = "on"

    --是否开启攻击信息记录,需要配置logdir

    logdir = "/usr/local/nginx/logs/hack/"

    --log存储目录,该目录需要用户自己新建,切需要nginx用户的可写权限

    UrlDeny="on"

    --是否拦截url访问

    Redirect="on"

    --是否拦截后重定向

    CookieMatch = "on"

    --是否拦截cookie攻击

    postMatch = "on"

    --是否拦截post攻击

    whiteModule = "on"

    --是否开启URL白名单

    black_fileExt={"php","jsp"}

    --填写不允许上传文件后缀类型

    ipWhitelist={"127.0.0.1"}

    --ip白名单,多个ip用逗号分隔

    ipBlocklist={"1.0.0.1"}

    --ip黑名单,多个ip用逗号分隔

    CCDeny="on"

    --是否开启拦截cc攻击(需要nginx.conf的http段增加lua_shared_dict limit 10m;)

    CCrate = "100/60"

    --设置cc攻击频率,单位为秒.

    --默认1分钟同一个IP只能请求同一个地址100次

    html=[[Please go away~~]]

    --警告内容,可在中括号内自定义

    备注:不要乱动双引号,区分大小写
访问测试:
http://115.159.79.190/index.php?id=../etc/passwd
访问一个敏感信息,检查是否会被阻止
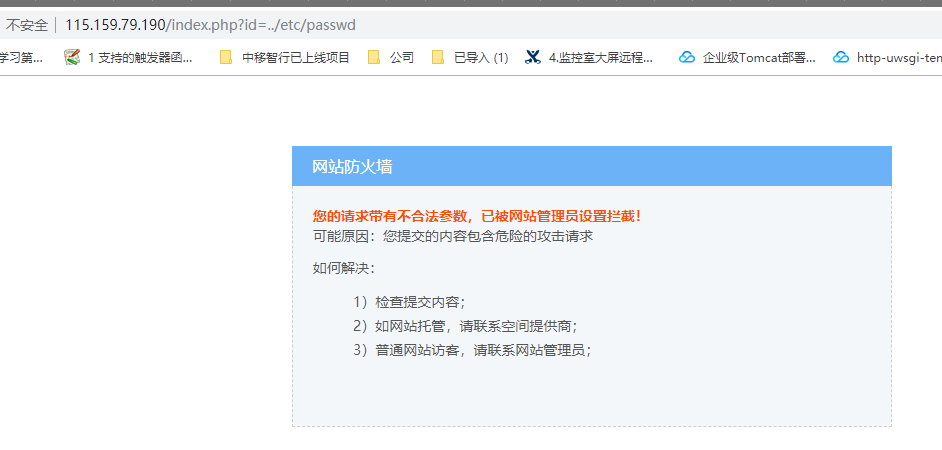
看到这个提示说明 waf防火墙配置成功!
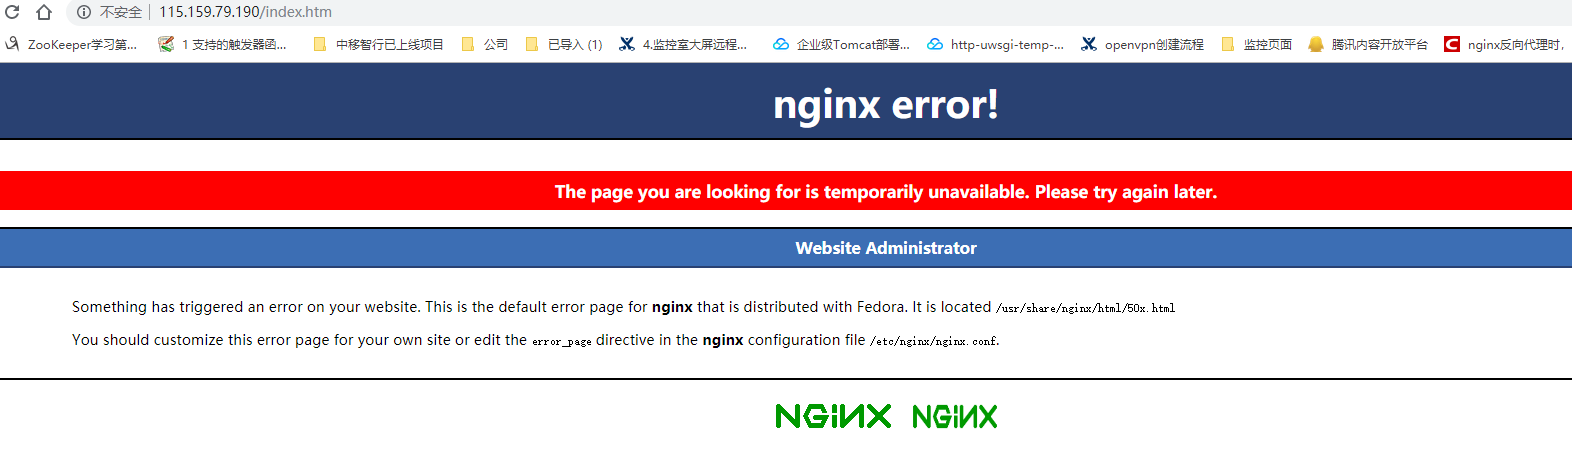
错误页面也有可能是这样:
测试禁止IP访问:
#黑名单

ipBlocklist={"1.0.0.1","117.186.242.158"}  #添加上我们自己的IP地址 117.186.242.158,分号分隔

#白名单

ipWhitelist={"127.0.0.1"}  #添加上我们自己的IP地址 117.186.242.158,分号分隔
实际黑名单效果: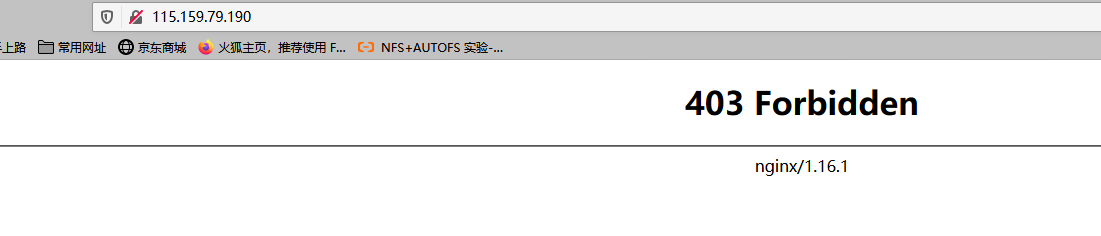
--lock-path=/run/lock/subsys/nginx --user=nginx --group=nginx --with-file-aio --with-ipv6 --with-http_ssl_mod
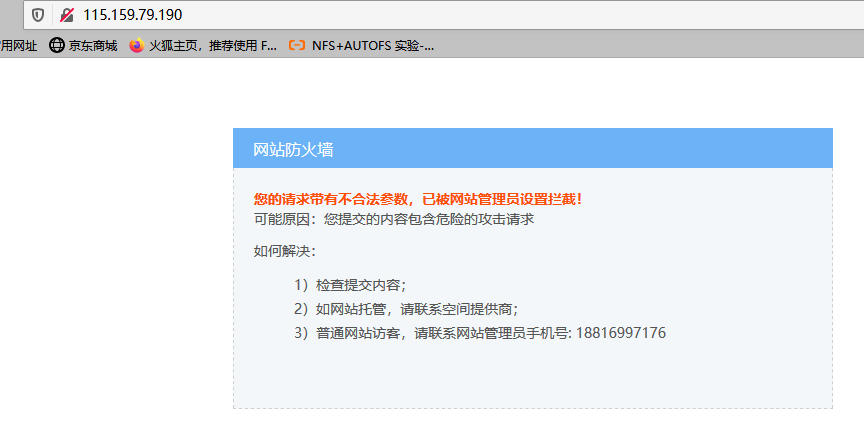
自定义的网站阻止页面:

网站根目录下创建 50x.html 写入以下内容

cat /usr/share/nginx/html

#-------------------------------------------------------

<html xmlns="http://www.w3.org/1999/xhtml"><head>

<meta http-equiv="Content-Type" content="text/html; charset=utf-8">

<title>网站防火墙</title>

<style>

p {

        line-height:20px;

}

ul{ list-style-type:none;}

li{ list-style-type:none;}

</style>

</head>

<body style=" padding:0; margin:0; font:14px/1.5 Microsoft Yahei, 宋体,sans-serif; color:#555;">

 <div style="margin: 0 auto; width:1000px; padding-top:70px; overflow:hidden;">

  <div style="width:600px; float:left;">

    <div style=" height:40px; line-height:40px; color:#fff; font-size:16px; overflow:hidden; background:#6bb3f6; padding-left:20px;">网站防火墙 </div>

    <div style="border:1px dashed #cdcece; border-top:none; font-size:14px; background:#fff; color:#555; line-height:24px; height:220px; padding:20px 20px 0 20px; overflow-y:auto;background:#f3f7f9;">

      <p style=" margin-top:0px; margin-bottom:0px; margin-left:0px; margin-right:0px; -qt-block-indent:0; text-indent:0px;"><span style=" font-weight:600; color:#fc4f03;">您的请求带有不合法参数,已被网站管理员设置拦截!</span></p>

<p style=" margin-top:0px; margin-bottom:0px; margin-left:0px; margin-right:0px; -qt-block-indent:0; text-indent:0px;">可能原因:您提交的内容包含危险的攻击请求</p>

<p style=" margin-top:12px; margin-bottom:12px; margin-left:0px; margin-right:0px; -qt-block-indent:1; text-indent:0px;">如何解决:</p>

<ul style="margin-top: 0px; margin-bottom: 0px; margin-left: 0px; margin-right: 0px; -qt-list-indent: 1;"><li style=" margin-top:12px; margin-bottom:0px; margin-left:0px; margin-right:0px; -qt-block-indent:0; text-indent:0px;">1)检查提

交内容;</li>

<li style=" margin-top:0px; margin-bottom:0px; margin-left:0px; margin-right:0px; -qt-block-indent:0; text-indent:0px;">2)如网站托管,请联系空间提供商;</li>

<li style=" margin-top:0px; margin-bottom:0px; margin-left:0px; margin-right:0px; -qt-block-indent:0; text-indent:0px;">3)普通网站访客,请联系网站管理员手机号: 18816997176 </li></ul>

    </div>

  </div>

</div>

</body></html>

#-------------------------------------------------------
效果图:
nginx使用lua waf防火墙来做防CC配置的更多相关文章
- NGINX的奇淫技巧 —— 5. NGINX实现金盾防火墙的功能(防CC)
NGINX的奇淫技巧 —— 5. NGINX实现金盾防火墙的功能(防CC) ARGUS 1月13日 发布 推荐 0 推荐 收藏 2 收藏,1.1k 浏览 文章整理中...... 实现思路 当服务器接收 ...
- nginx利用limit模块设置IP并发防CC攻击
nginx利用limit模块设置IP并发防CC攻击 分类: 系统2013-01-21 09:02 759人阅读 评论(0) 收藏 举报 来源:http://blog.xencdn.net/nginx- ...
- Azure WAF防火墙工作原理分析和配置向导
Azure WAF工作原理分析和配置向导 本文博客地址为:http://www.cnblogs.com/taosha/p/6716434.html ,转载请保留出处,多谢! 本地数据中心往云端迁移的的 ...
- nginx中使用waf防火墙
1.安装依赖 yum install -y readline-devel ncurses-devel 2.安装Lua # .tar.gz # cd lua- # make linux # make i ...
- 防cc攻击利器之Httpgrard
一.httpgrard介绍 HttpGuard是基于openresty,以lua脚本语言开发的防cc攻击软件.而openresty是集成了高性能web服务器Nginx,以及一系列的Nginx模块,这其 ...
- Nginx + Lua 搭建网站WAF防火墙
前言 对于项目里面只是使用代理等常用功能,在线安装即可,如需制定化模块,则推荐编译安装 PS:本文不仅仅包含Nginx相关的知识点,还包含了逆天学习方法(对待新事物的处理) 官方网站:https:// ...
- Nginx详解二十八:Nginx架构篇Nginx+Lua的安全waf防火墙
Nginx+Lua的安全waf防火墙 看一下别人写好的:https://github.com/loveshell/ngx_lua_waf 先安装git:yum -y install git 在/opt ...
- nginx+lua实现灰度发布/waf防火墙
nginx+lua 实现灰度发布 waf防火墙 课程链接:[课程]Nginx 与 Lua 实现灰度发布与 WAF 防火墙(完)_哔哩哔哩 (゜-゜)つロ 干杯~-bilibili 参考博客 Nginx ...
- Nginx使用Lua模块实现WAF
前言:最近一段时间在写加密数据功能,对安全相关知识还是缺少积累,无意间接触到了WAF相关知识,刚好Nginx可以实现WAF功能,也简单学习了Lua这门语言,分享下 一.WAF产生的背景 过去企业通常会 ...
- 安装nginx+ngx_lua支持WAF防护功能
安装nginx+ngx_lua支持WAF防护功能 nginx lua模块淘宝开发的nginx第三方模块,它能将lua语言嵌入到nginx配置中,从而使用lua就极大增强了nginx的能力.nginx以 ...
随机推荐
- 五款最优秀的java微服务框架
微服务被广泛用于创建多功能的应用程序,通过组合每个功能部分并将它们逐层放在一个单元中.许多人可能没有意识到微服务是一组小型服务中制作单个应用程序的方法,每个服务都独立运行(进程). java微服务框架 ...
- js中“??“和“?.“怎么用?
??:空值合并操作符 逻辑操作符,左侧为null和undefined时,才返回右侧的数const sum = null ?? 12console.log(sum);//输出12const sum1 = ...
- Mac搭建appium环境及python运行代码示例
Appium主要是通过调用安卓提供的接口来执行命令的,所以需要安装Java和安卓SDK. 1.安装Appium服务端 appium的服务端是基于node的,直接使用npm(node包管理器)安装即可, ...
- 【Oracle】ORDER BY 2 DESC,1 ASC,同时对多个数据列进行不同的顺序排序&Oracle中的 (+)
最初想对 travelled_distance 降序排列 ,如果有两个或者更多的用户旅行了相同的距离, 那么再以 name 升序排列 然后就写了下面的 SELECT U.NAME name, NVL( ...
- 【笔记】go语言--切片的操作
go语言--切片的操作 接上篇切片的概念开始 //Slice添加元素 arr := [...]int{0,1,2,3,4,5,6,7} s1 := arr[2:6] s2 := s1[3:5]//[5 ...
- 力扣197(MySQL)-上升的温度(简单)
题目: 表: Weather 编写一个 SQL 查询,来查找与之前(昨天的)日期相比温度更高的所有日期的 id . 返回结果 不要求顺序 . 查询结果格式如下例. 解题思路: 方法一:使用窗口函数la ...
- 力扣482(java)-密钥格式化(简单)
题目: 给定一个许可密钥字符串 s,仅由字母.数字字符和破折号组成.字符串由 n 个破折号分成 n + 1 组.你也会得到一个整数 k . 我们想要重新格式化字符串 s,使每一组包含 k 个字符,除了 ...
- 国内唯一连续入选Gartner,Quick BI是如何做到的?
简介:阿里云Quick BI凭借灵活的公共云部署,私有化独立部署能力.无缝对接各类云上数据库和自建数据库.可视化搭建分析.高效数据处理能力与强大数据计算能力,使得在2022年持续入选Gartner ...
- Nacos 2.0 性能提升十倍,贡献者 80% 以上来自阿里之外
简介: 3 月 20 日,Nacos 2.0 正式发布.Nacos 是阿里巴巴在 2018 年开源的一个更易于构建云原生应用的动态服务发现.配置管理和服务管理平台,也可以理解为微服务的注册中心 + 配 ...
- [Mobi] Android Studio arm 模拟器
从右下角 Configure 打开 AVD Manager. 点击 "Create New Device" 来创建新设备 选择TV 接着Next,然后用 Other Imag ...