PHP之GD函数的使用
本文讲解常用GD函数的应用
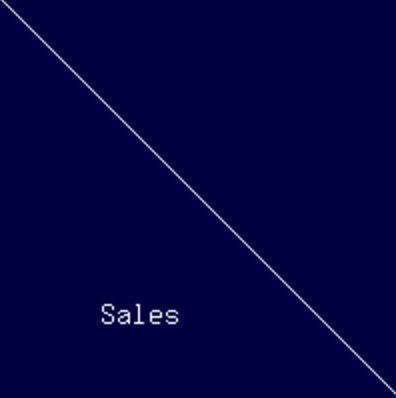
1.一个简单的图像
我们先看一个例子:
<?php

$w = 200;

$h = 200;

$img = imagecreatetruecolor($w,$h);

$white = imagecolorallocate($img,255,255,255);

$blue = imagecolorallocate($img,0,0,64);

imagefill($img,0,0,$blue);

imageline($img,0,0,$w,$h,$white);

imagestring($img,4,50,150,'Sales',$white);

Header('Content-type: image/png');

imagepng($img);

imagedestroy($img);

?>
运行结果:
这段代码中我们用了一下几个函数:
imagecreatetruecolor- 新建一个真彩色图像.函数原型为resource imagecreatetruecolor ( int $width , int $height )。imagecreatetruecolor() 返回一个图像标识符,代表了一幅大小为 x_size 和 y_size 的黑色图像。imagecolorallocate- 为一幅图像分配颜色. 函数原型为int imagecolorallocate ( resource $image , int $red , int $green , int $blue ). imagecolorallocate() 返回一个标识符,代表了由给定的 RGB 成分组成的颜色。red,green 和 blue 分别是所需要的颜色的红,绿,蓝成分。这些参数是 0 到 255 的整数或者十六进制的 0x00 到 0xFF。imagecolorallocate() 必须被调用以创建每一种用在 image 所代表的图像中的颜色。imagefill- 区域填充. 函数原型为bool imagefill ( resource $image , int $x , int $y , int $color ). imagefill() 在 image 图像的坐标 x,y(图像左上角为 0, 0)处用 color 颜色执行区域填充(即与 x, y 点颜色相同且相邻的点都会被填充)。imagestring- 水平地画一行字符串. 函数原型为bool imagestring ( resource $image , int $font , int $x , int $y , string $s , int $col ). imagestring() 用 col 颜色将字符串 s 画到 image 所代表的图像的 x,y 坐标处(这是字符串左上角坐标,整幅图像的左上角为 0,0)。如果 font 是 1,2,3,4 或 5,则使用内置字体。以 PNG 格式将图像输出到浏览器或文件- 以 PNG 格式将图像输出到浏览器或文件. 函数原型为bool imagepng ( resource $image [, string $filename ] ). imagepng() 将 GD 图像流(image)以 PNG 格式输出到标准输出(通常为浏览器),或者如果用 filename 给出了文件名则将其输出到该文件。imagedestroy- 销毁一图像 函数原型为bool imagedestroy ( resource $image ). imagedestroy() 释放与 image 关联的内存。image 是由图像创建函数返回的图像标识符,例如 imagecreatetruecolor()。
2.使用文本和字体创建图像
<?php

$button_text = $_REQUEST['button_text'];

$button_text_color = $_REQUEST['color'];

if (empty($button_text) || empty($button_text_color)) {

    echo 'Please input text';

    exit;

}

//创建画布

$img = imagecreatefrompng($button_text_color . '_button.png');

//设置按钮的宽和高

$width_image = imagesx($img);

$height_image = imagesy($img);

//没有边界的宽和高,边界设置定为18个像素

$margin = 18;

$width_image_without_margins = $width_image - 2 * $margin;

$height_image_without_margins = $height_image - 2 * $margin;

//字体

$font_size = 240;

//使用字体必须告诉GD2字体的位置

putenv('GDFONTPATH=/System/Library/Fonts');

$fontname = 'MarkerFelt.ttc';

//循环遍历边界,寻找合适的字体font

do {

    $font_size--;

    $bbox = imagettfbbox($font_size, 0, $fontname, $button_text);

    $left = $bbox[0];

    $right = $bbox[2];

    $width_text = $right - $left;

    $height_text = abs($bbox[7] - $bbox[1]);

}while ($font_size > 8 && ($width_text > $width_image_without_margins || $height_text > $height_image_without_margins)) ;

//检查文字边界问题

if ($width_text > $width_image_without_margins || $height_text > $height_image_without_margins) {

    echo 'Text given will not fit button. <br />';

}else {

    //计算文本坐标

    $text_x = $width_image / 2.0 - $width_text / 2.0;

    $text_y = $height_image / 2.0 - $height_text / 2.0;

    //矫正

    if ($left < 0) {

        $text_x = abs($left);

    }

    $above_line_text = abs($bbox[7]);

    $text_y += $above_line_text;

    $text_y -= 2;

    //渲染文本

    $white = imagecolorallocate($img, 255, 255, 255);

    imagettftext($img, $font_size, 0, $text_x, $text_y, $white, $fontname, $button_text);

    Header('Content-type: image/png');

    imagepng($img);

}

imagedestroy($img);

?>
演示页面为:
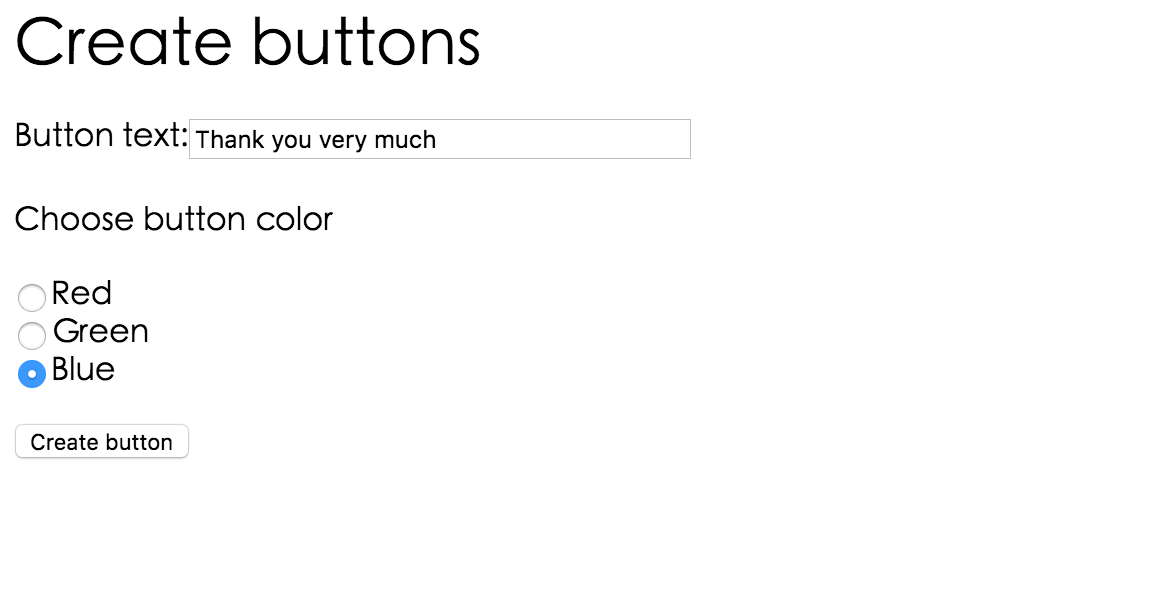


除了上边我们解释的函数外,又新增了一些新的函数,我们一一作出解释:
imagecreatefrompng- 由文件或 URL 创建一个新图象。函数原型为resource imagecreatefrompng ( string $filename )。imagecreatefrompng() 返回一图像标识符,代表了从给定的文件名取得的图像。imagesx- 取得图像宽度。 函数原型为int imagesx ( resource $image )。imagesx() 返回 image 所代表的图像的宽度。imagesy- 取得图像高度。 函数原型为int imagesy ( resource $image )。 imagesy() 返回 image 所代表的图像的高度。imagettfbbox- 取得使用 TrueType 字体的文本的范围。函数原型为array imagettfbbox ( float $size , float $angle , string $fontfile , string $text )。本函数计算并返回一个包围着 TrueType 文本范围的虚拟方框的像素大小。其中参数size:像素单位的字体大小,angle:text 将被度量的角度大小,fontfile:TrueType 字体文件的文件名(可以是 URL)。根据 PHP 所使用的 GD 库版本,可能尝试搜索那些不是以 '/' 开头的文件名并加上 '.ttf' 的后缀并搜索库定义的字体路径,text:要度量的字符串。imagettfbbox() 返回一个含有 8 个单元的数组表示了文本外框的四个角:
角标 坐标 0 左下角 X 位置 1 左下角 Y 位置 2 右下角 X 位置 3 右下角 Y 位置 4 右上角 X 位置 5 右上角 Y 位置 6 左上角 X 位置 7 左上角 Y 位置 这些点是相对于文本的而和角度无关,因此“左上角”指的是以水平方向看文字时其左上角。
本函数同时需要 GD 库和 FreeType 库。逆时针方向imagettftext- 用 TrueType 字体向图像写入文本。 函数原型为array imagettftext ( resource $image , float $size , float $angle , int $x , int $y , int $color , string $fontfile , string $text )。使用 TrueType 字体将 指定的 text 写入图像。其中text参数使用UTF-8 编码的文本字符串。
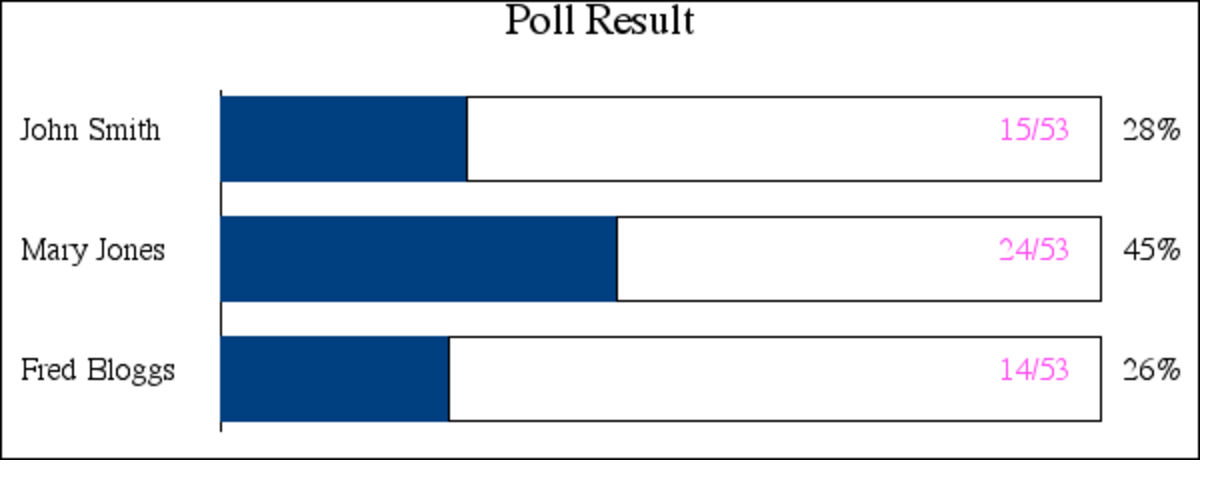
3.绘制图像与用图表描述数据
<?php

/********************************************************

          Database query to get poll info

********************************************************/

//get vote

$vote = $_REQUEST['vote'];

//login mysql

@ $db = new mysqli('127.0.0.1', 'poll', 'poll', 'poll');

if (mysqli_connect_errno()) {

  echo 'Could not connect to db <br />';

  exit;

}

if (!empty($vote)) {

  $vote = addslashes($vote);

  //update

  $query = 'update poll_results set num_votes = num_votes + 1 where candidate = \'' . $vote . '\'';

  $result = $db -> query($query);

  if (!$result) {

    echo 'Could not connect to db <br />';

    exit;

  }

  //query

  $query = 'select * from poll_results';

  $result = $db -> query($query);

  if (!$result) {

    echo 'Could not connect to db <br />';

    exit;

  }

  $num_candidates = $result -> num_rows;

  $total_votes = 0;

  while ($row = $result -> fetch_object()) {

    $total_votes += $row -> num_votes;

  }

  $result -> data_seek(0);

/********************************************************

          Initial calculations for graph

********************************************************/

//使用字体必须告诉GD2字体的位置

putenv('GDFONTPATH=/System/Library/Fonts');

$fontname = 'Times.dfont';

$width = 600;

$left_margin = 50;

$right_margin = 50;

$bar_height = 40;

$bar_spacing = $bar_height / 2;

$title_size = 16;

$main_size = 12;

$small_size = 12;

$text_indent = 10;

$x = $left_margin + 60;

$y = 50;

$bar_unit = ($width - ($x + $right_margin)) / 100;

$height = $num_candidates * ($bar_height + $bar_spacing) + 50;

/********************************************************

          Setup base image

********************************************************/

$img = imagecreatetruecolor($width, $height);

$white = imagecolorallocate($img, 255, 255, 255);

$blue = imagecolorallocate($img, 0, 64, 128);

$black = imagecolorallocate($img, 0, 0, 0);

$pink = imagecolorallocate($img, 255, 78, 243);

$text_color = $black;

$percent_color = $black;

$line_color = $black;

$bg_color = $white;

$bar_color = $blue;

$number_color = $pink;

imagefilledrectangle($img, 0, 0, $width, $height, $white);

imagerectangle($img, 0, 0, $width - 1, $height - 1, $line_color);

//Add title

$title = 'Poll Result';

$title_dimensions = imagettfbbox($title_size, 0, $fontname, $title);

$title_length = $title_dimensions[2] - $title_dimensions[0];

$title_height = abs($title_dimensions[7] - $title_dimensions[1]);

$title_above_line = abs($title_dimensions[7]);

$title_x = ($width - $title_length) / 2;

$title_y = ($y - $title_height) / 2;

imagettftext($img, $title_size, 0, $title_x, $title_y, $text_color, $fontname, $title);

imageline($img, $x, $y - 5, $x, $height - 15, $line_color);

/********************************************************

          Draw data into gragh

********************************************************/

while ($row = $result -> fetch_object()) {

  $percent = 0;

  if ($total_votes > 0) {

    $percent = intval($row -> num_votes / $total_votes * 100);

  }

  $percent_cahr = eurofix('%');

  $percent_dimension = imagettfbbox($main_size, 0, $fontname, $percent . $percent_cahr);

  $percent_lenght = $percent_dimension[2] - $percent_dimension[0];

  imagettftext($img, $main_size, 0, $width - $percent_lenght - $text_indent, $y + $bar_height / 2,

   $percent_color, $fontname, $percent . $percent_cahr);

$bar_lenght = $x + $percent * $bar_unit;

imagefilledrectangle($img, $x, $y - 2, $bar_lenght, $y + $bar_height, $bar_color);

imagettftext($img, $main_size, 0, $text_indent, $y + $bar_height / 2,

   $text_color, $fontname, $row -> candidate);

imagerectangle($img, $bar_lenght, $y - 2, $x + (100 * $bar_unit), $y + $bar_height, $line_color);

imagettftext($img, $small_size, 0, $x + (100 * $bar_unit) - 50, $y + $bar_height / 2,

   $number_color, $fontname, $row -> num_votes . '/' . $total_votes);

  $y = $y + $bar_height + $bar_spacing;

}

header('Content-type: image/png');

imagepng($img);

imagedestroy($img);

}

function eurofix($str) {

$euro=utf8_encode('€');

$str = preg_replace('/\x80/',$euro,$str);

return ($str);

}

?>
这上边的代码使用了我们上边没有介绍的函数有:
imagefilledrectangle- 画一矩形并填充 函数原型为:bool imagefilledrectangle ( resource $image , int $x1 , int $y1 , int $x2 , int $y2 , int $color )。imagefilledrectangle() 在 image 图像中画一个用 color 颜色填充了的矩形,其左上角坐标为 x1,y1,右下角坐标为 x2,y2。0, 0 是图像的最左上角。imagerectangle- 画一个矩形 函数原型为:bool imagerectangle ( resource $image , int $x1 , int $y1 , int $x2 , int $y2 , int $col )。imagerectangle() 用 col 颜色在 image 图像中画一个矩形,其左上角坐标为 x1, y1,右下角坐标为 x2, y2。图像的左上角坐标为 0, 0。
我们新建一个vote.html文件,并写了如下的代码:
<html>

  <head>

    <title>

      Pop Poll

    </title>

  </head>

  <body>

    <form method="post" action="show_poll.php">

    <h1>Pop Poll</h1>

    <p>Who will you vote for in the election?</p>

    <input type="radio" name="vote" value="John Smith">John Smith <br />

    <input type="radio" name="vote" value="Mary Jones" >Mary Jones <br />

    <input type="radio" name="vote" value="Fred Bloggs" >Fred Bloggs <br /> <br />

    <input type="submit" value="Show results">

    </form>

  </body>

</html>
运行后:
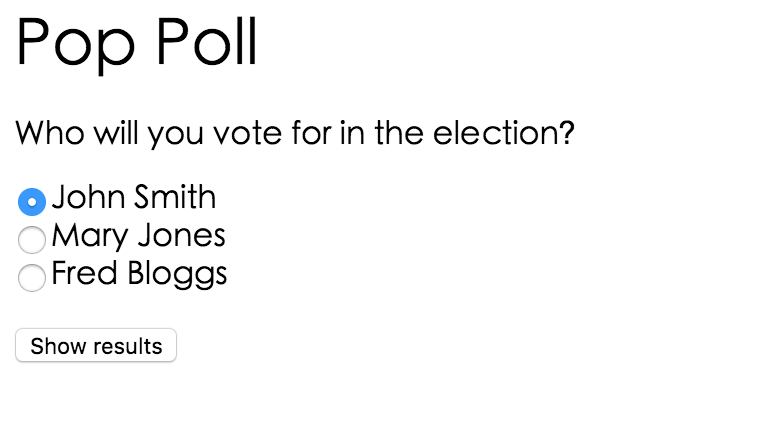
选择后,点击Show results 就成功绘制了表格
说明
本文只演示了GD的部分函数,查看全部函数和用法,点击这个网站http://php.net/manual/zh/ref.image.php
PHP之GD函数的使用的更多相关文章
- 配置php支持gd函数模块
配置php支持gd函数模块 今天在联系上线源码包tttuangou 的时候,出现了对gd_info和imagecreatefromjpeg模块缺失的提示,我丈二和尚摸不着头脑,决定彻底学习一番 什么是 ...
- PHP的GD库
GD库 PHP通过GD库,可以对JPG.PNG.GIF.SWF等图片进行处理.GD库常用在图片加水印,验证码生成等方面. 绘制线条 要对图形进行操作,首先要新建一个画布,通过imagecreatetr ...
- PHP图像处理(GD库)
一.图像处理概述 1.开启GD2图像扩展库 ①PHP不仅限于只产生HTML的输出,还可以创建与操作多种不同格式的图像文件.PHP提供了一些内置的图像处理函数,也可以使用GD函数库创建新图像或处理已有的 ...
- 【PHP】解析PHP的GD库
官方文档:http://php.net/manual/en/book.image.php 1.GD库简介 PHP可以创建和操作多种不同格式的图像文件.PHP提供了一些内置的图像信息函数,也可以使用GD ...
- vim 使用说明
=========================================================本使用说明与 把VIM打造成IDE 配套======================= ...
- PHP之MVC项目实战(二)
本文主要包括以下内容 GD库图片操作 利用GD库实现验证码 文件上传 缩略图 水印 GD库图片操作 <?php $img = imagecreatetruecolor(500, 300); // ...
- php图片水印添加,压缩,剪切的封装类
php对图片文件的操作主要是利用GD库扩展.当我们频繁利用php对图片进行操作时,会自然封装很多函数,否则会写太多重复的代码.当有很多对图片的相关函数的时候,我们可以考虑将这些函数也整理一下,因而就有 ...
- 入门级的PHP验证码
参考了网上PHP 生成验证码很多是类封装了的,没有封装的验证码其实只是几个GD函数而已,初学者可以看看,可以尝试自己封装. <?php session_start(); $im = ...
- PHP上传图片如何防止图片木马?
segmentfault回答: http://segmentfault.com/q/1010000000507750 一. 其实识别图片木马是很困难的,可以在一张正常的图片里加入一句话木马. 但是只要 ...
随机推荐
- Angular2入门系列教程5-路由(一)-使用简单的路由并在在路由中传递参数
上一篇:Angular2入门系列教程-服务 上一篇文章我们将Angular2的数据服务分离出来,学习了Angular2的依赖注入,这篇文章我们将要学习Angualr2的路由 为了编写样式方便,我们这篇 ...
- 来,给Entity Framework热热身
先来看一下Entity Framework缓慢的初始化速度给我们更新程序带来的一种痛苦. 我们手动更新程序时通常的操作步骤如下: 1)把Web服务器从负载均衡中摘下来 2)更新程序 3)预热(发出一个 ...
- 逆天通用水印支持Winform,WPF,Web,WP,Win10。支持位置选择(9个位置 ==》[X])
常用技能:http://www.cnblogs.com/dunitian/p/4822808.html#skill 逆天博客:http://dnt.dkil.net 逆天通用水印扩展篇~新增剪贴板系列 ...
- 运用php做投票题,例题
要求大概是这样的,有一个题目,题目下面是复选框,要求点完复选框提交后会变成进度条,各选项的进度条百分比,和投票数量 首先还是要在数据库建两张表,如下: 要完成这个题目,需要建两个页面 <!DOC ...
- PHP之购物车的代码
该文章记录了购物车的实现代码,仅供参考 book_sc_fns.php <?php include_once('output_fns.php'); include_once('book_fns. ...
- Entity Framework 延伸系列目录
1.采用MiniProfiler监控EF与.NET MVC项目 2.采用EntityFramework.Extended 对EF进行扩展 3.EntityFramework执行存储过程中遇到的那些坑 ...
- 如果你也会C#,那不妨了解下F#(7):面向对象编程之继承、接口和泛型
前言 面向对象三大基本特性:封装.继承.多态.上一篇中介绍了类的定义,下面就了解下F#中继承和多态的使用吧.
- PHP设计模式(五)建造者模式(Builder For PHP)
建造者模式:将一个复杂对象的构造与它的表示分离,使同样的构建过程可以创建不同的表示的设计模式. 设计场景: 有一个用户的UserInfo类,创建这个类,需要创建用户的姓名,年龄,爱好等信息,才能获得用 ...
- javaScript之BOM操作1
<!doctype html> <html lang="en"> <head> <meta charset="UTF-8&quo ...
- H3 BPM让天下没有难用的流程之产品概述
一.产品简介 BPM(Business Process Management),是指根据业务环境的变化,推进人与人之间.人与系统之间以及系统与系统之间的整合及调整的经营方法与解决方案的IT工具. H3 ...