spring-boot-learning-REST风格网站
什么是REST风格:
Representational State Transfer :表现层状态转换,实际上是一种风格。标准,约定
首先需要有资源才能表现, 所以第一个名词是“ 资源”。有了资源也要根
据需要以合适的形式表现资源,这就是第二个名词一一表现层。最后是资源可以被新增、修改、删
除等,也就是第三个名词“状态转换”。
- 资源: 它可以是系统权限用户、角色和菜单等,也可以是一些媒体类型, 如文本、图片、歌曲,总之它就是一个具体存在的
对象。可以用一个URI ( Unifonn Resource Identifier ,统一资源定位符)指向它, 每个资源对应一个特定的U阳。
要获取这个资源, 访问它的U阳即可,而在REST 中每一个资源都会对应一个独一无二的U阻。在阻ST 中, URI 也可以称
为端点(End Point ) 。
- 表现层: 有了资源还需要确定如何表现这个资源。例如, 一个用户可以使用JSON 、XML 或者其他的形式表现出来,又如
可能返回的是一幅图片。在现今的互联网开发中, JSON 数据集己经是一种最常用的表现形式
REST风格当中,每一个资源都只是对应一个网址,而一个资源网址应该是一个名词,不存在动词。
URI (Unifonn Resource Identifier)统一资源定位符
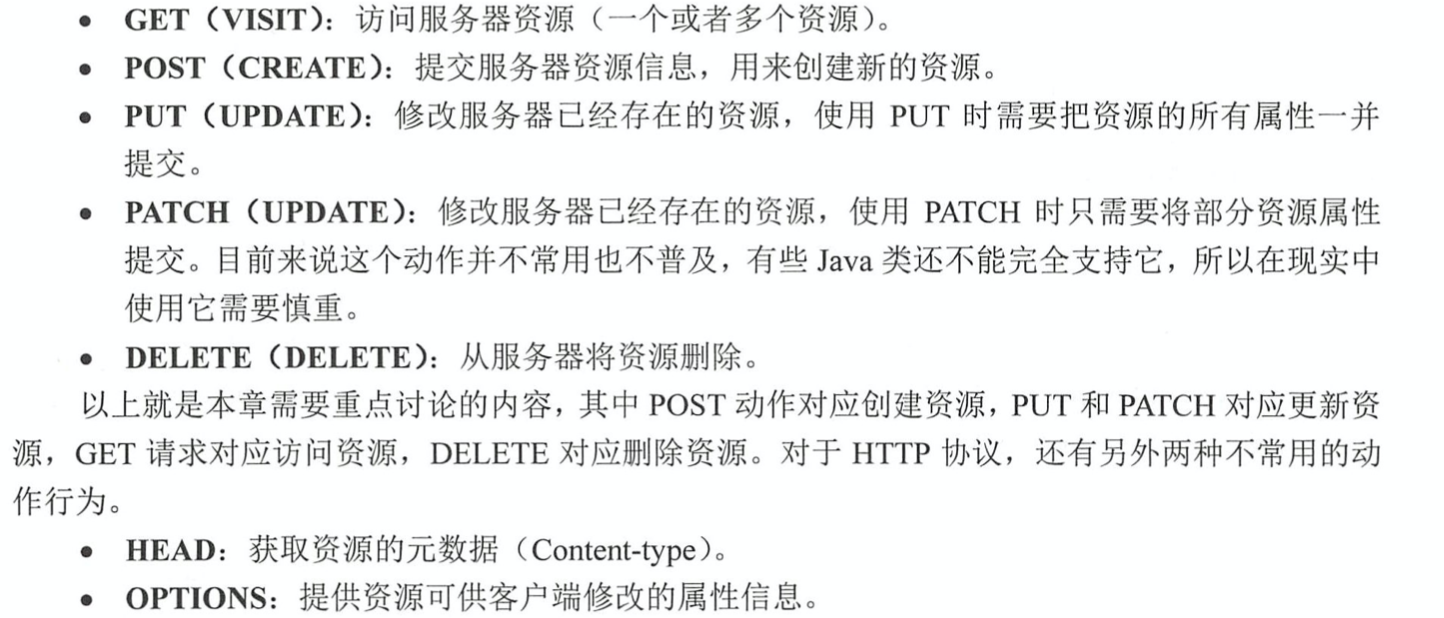
REST风格其实就是一种约定问题,不同的http请求对应的不同的资源操作,
@GetMapping
- /**
- * RestController,作用是使返回的结果能够以json数据集的方法进行返回
- * 转换为JSTL或者json
- * 11默认将方法或者类标注为application/json;charset=UTF-8
- * 22方法执行结束后,spring会遍历注册号的HttpMessageConverter接口
- * 的实现类。
- * 33注册好的MappingJackson2HttpMessageConverter就会放回true,
- * 启动转换器将结果转换为JSON数据集
- */
- @RestController
- @RequestMapping("annotation")
- public class RedisUserController {
- @Autowired
- private UserService userService =null;
- /**
- * http的get请求,获取资源
- * @param id
- * @return
- */
- @GetMapping("/{id}")
- public User getUser(@PathVariable("id") Long id){
- System.out.println(System.currentTimeMillis());
- User user = userService.getUser(id);
- System.out.println(System.currentTimeMillis());
- return user;
- }
请求:
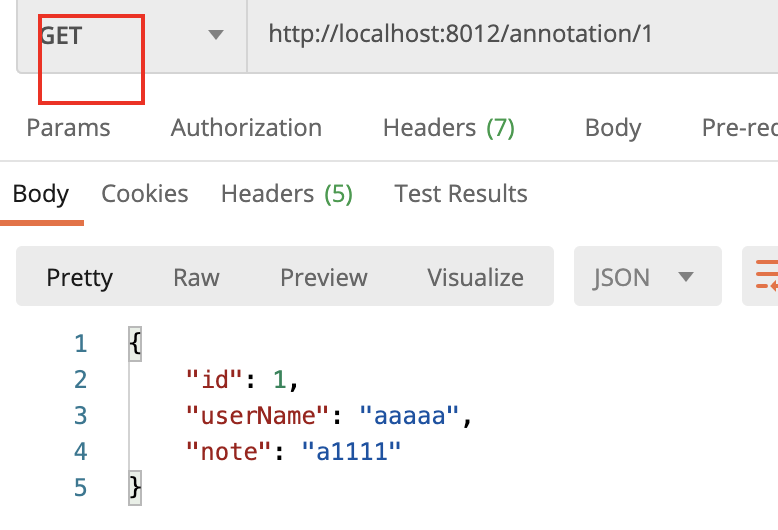
@PostMapping
- /**
- * http的post请求,创建资源
- * @param userName
- * @param note
- * @return
- */
- @PostMapping()
- public User insertUser(
- @RequestParam ("userName") String userName,
- @RequestParam ("note") String note
- ){
- User user = new User();
- user.setUserName(userName);
- user.setNote(note);
- userService.insertUser(user);
- return user;
- }
请求结果;
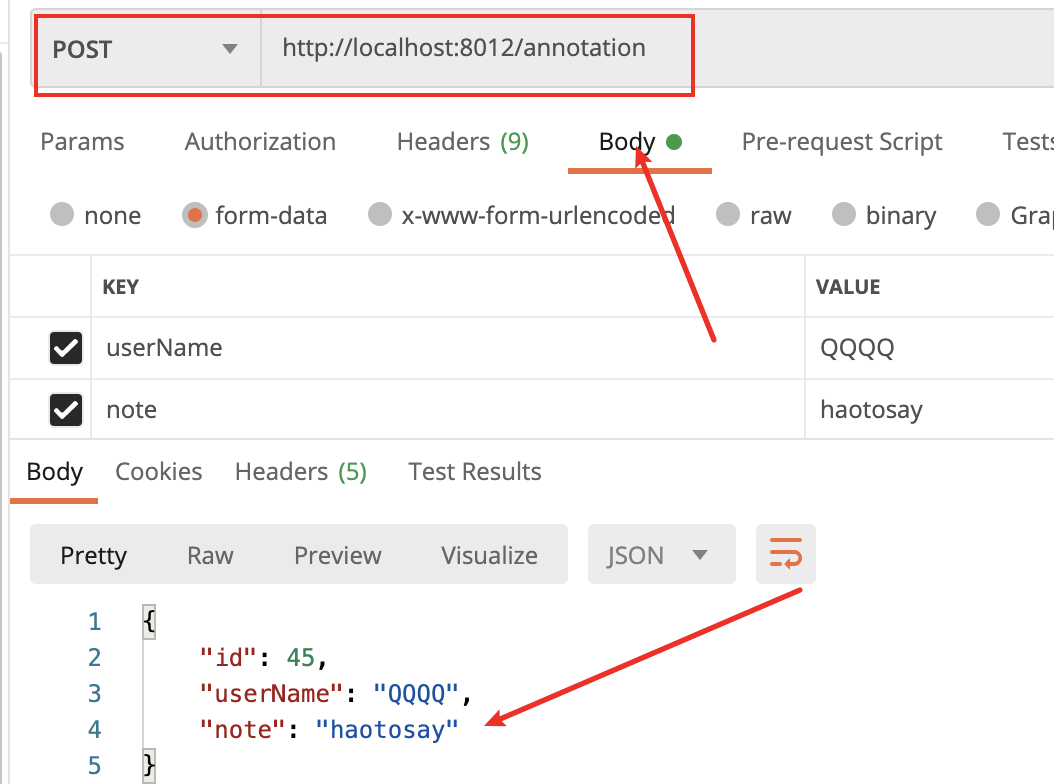
@DeleteMapping
- /**
- * http的Delete请求,删除服务器资源
- * @param id
- * @return
- */
- @DeleteMapping("{id}")
- public int delUser(@PathVariable("id") Long id){
- return userService.deleteUser(id);
- }
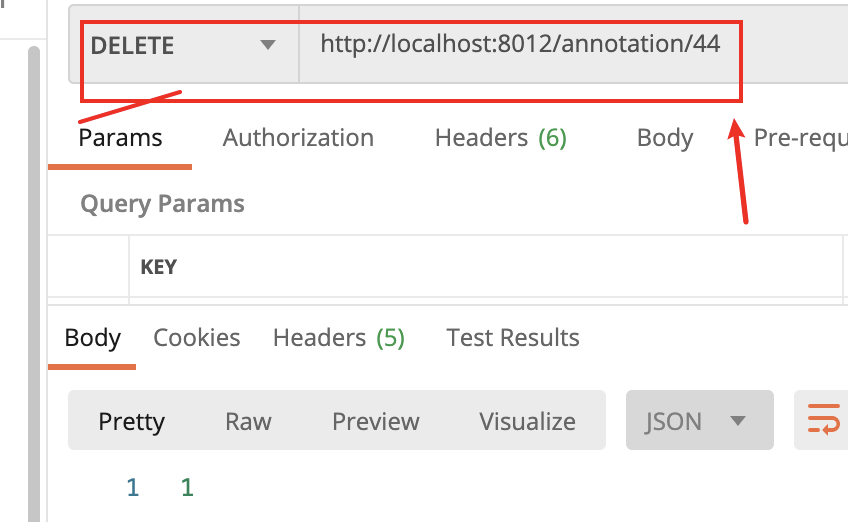
从数据库中删除了id为44员工
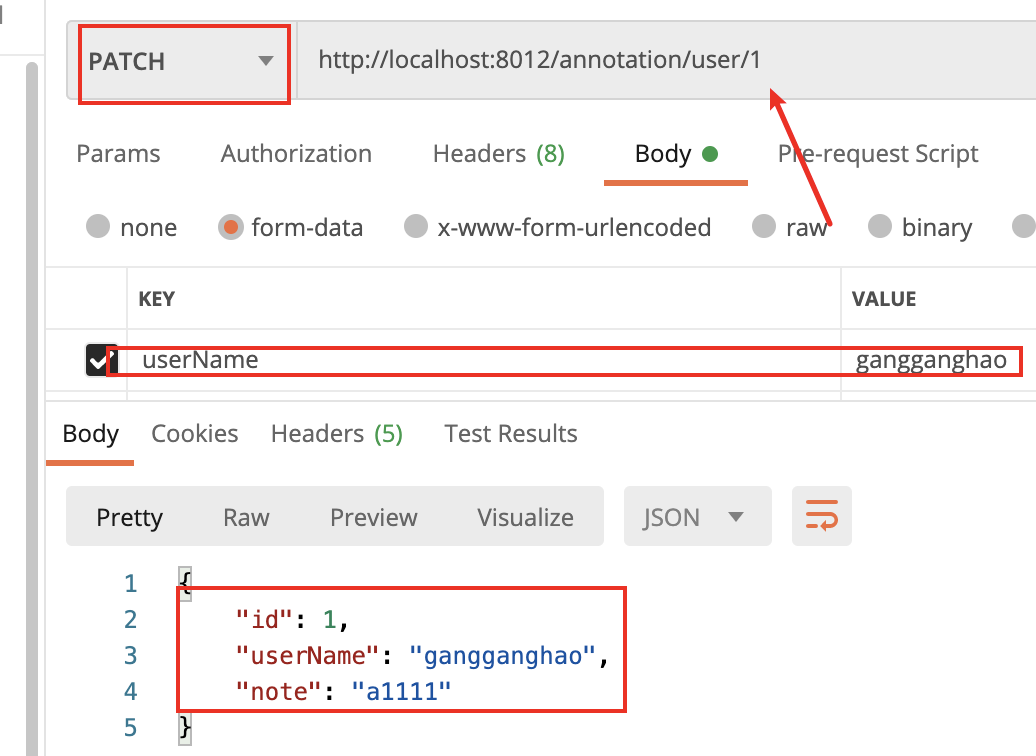
@PutMapping
@PatchMapping
- /**
- * http Put请求,提交所有的资源属性以修改资源,
- * http patch请求,提交资源的部分修改属性,
- * 其实他们两个都差不多,只不过是约定的问题而已
- * @param id
- * @param userName
- * @return
- */
- @PatchMapping("/user/{id}")
- public User updUser(
- @PathVariable("id") Long id,
- @RequestParam("userName") String userName
- ){
- return userService.updateUser(id,userName);
- }
修改之前的:

处理HTTP请求状态码,异常和响应头
通过实体类去实现;
- /**
- * 当发生资源找不到或者处理逻辑发生异常时,需要考虑返回给客户端的http状态码和错误消息
- * spring提供实体封装类ResponseEntity:有效的封装错误消息和状态码
- * 和注解@ResponseStatus:配置指定的响应码给客户端
- */
- @RestController
- public class HttpStatusController {
- @Autowired
- UserService userService;
- /**
- * 11新建一个请求头对象,
- * 22向请求头通过add方法进行加入k-v
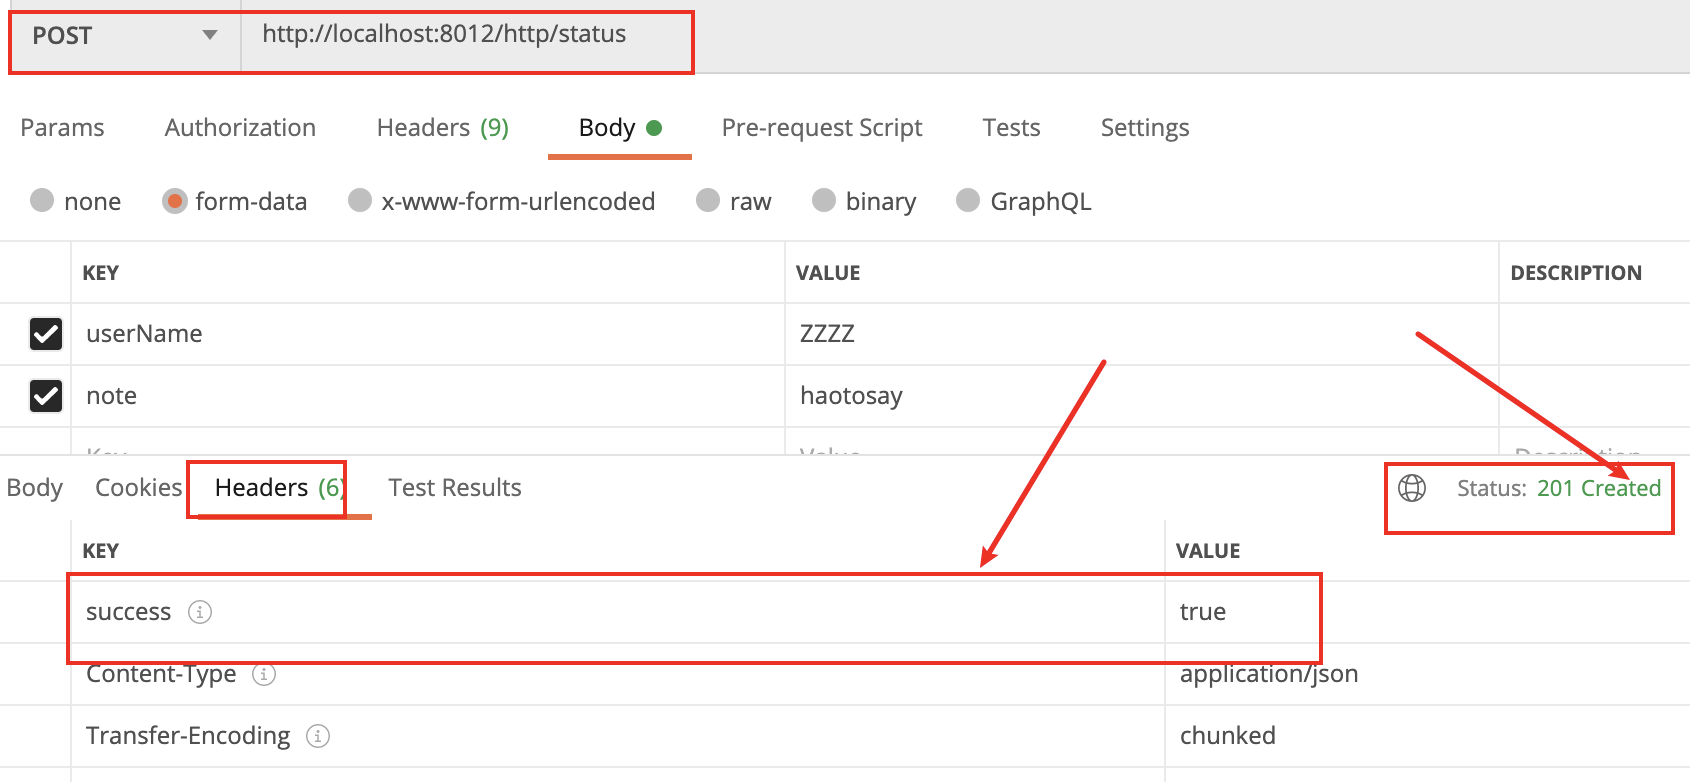
- * 33需要建立一个响应实体类,将需要放回的信息,请求头对象,响应http状态码
- * 备注:这里使用 HttpStatus.CREATED ,指定状态码为201,标识资源创建成功
- * @param userName
- * @param note
- * @return
- */
- @PostMapping("/http/status")
- public ResponseEntity<Integer> insertUser(
- @RequestParam("userName") String userName,
- @RequestParam ("note") String note
- ){
- User user = new User();
- user.setUserName(userName);
- user.setNote(note);
- Integer re = userService.insertUser(user);
- // 设置http响应头
- HttpHeaders httpHeaders = new HttpHeaders();//新建请求头
- String success = (re == 0 ) ? "false" : "true";//如果结果为0,就是false
- httpHeaders.add("success",success);
- return new ResponseEntity<Integer>(re,httpHeaders, HttpStatus.CREATED);
- }
使用注解:
- /**
- * 通过注解@ResponseStatus去指定
- * 当方法正常返回的时候,http状态码为201
- * @param userName
- * @param note
- * @return
- */
- @PostMapping("/http/status/an")
- @ResponseStatus(HttpStatus.CREATED)
- public Integer insertUseran(
- @RequestParam("userName") String userName,
- @RequestParam ("note") String note
- ){
- User user = new User();
- user.setUserName(userName);
- user.setNote(note);
- Integer re = userService.insertUser(user);
- return re;
- }
- }
异常处理;
定义一个运行时的异常:
- //场景:运行的时候,查询id用户,找不到数据或出现异常,这时候不能以正常返回去处理。
- /**
- * 11自定义异常类:找不到用户的时候抛出异常
- * 异常抛出后,可以在控制器通知@ControllerAdvice里面进行处理
- * @ControllerAdvice:定义控制器通知
- * @ExceptionHandler:指定异常发生的处理方法
- *继承的异常RuntimeException是指:运行时的异常,和我们普通的
- * Exception:受检查的异常,这种异常是强制我们catch或throw的异常。
- * 你遇到这种异常必须进行catch或throw,如果不处理,编译器会报错。
- *
- */
- public class NotFoundException extends RuntimeException{
- public static final long serialVersionUID = 1L;
- private Long code;//异常编码
- private String customMsg;//异常自定义消息
- public NotFoundException() {
- }
- public NotFoundException(Long code, String customMsg) {
- super();
- this.code = code;
- this.customMsg = customMsg;
- }
- public Long getCode() {
- return code;
- }
- public void setCode(Long code) {
- this.code = code;
- }
- public String getCustomMsg() {
- return customMsg;
- }
- public void setCustomMsg(String customMsg) {
- this.customMsg = customMsg;
- }
- }
定义一个控制器通知:
- /**
- * 2自定义一个控制器通知
- * 在@ControllerAdvice中指定拦截包路径,限定被拦截的注解为@Controller/@RestController
- * 在@ExceptionHandler注解方法上,通过value属性,指定异常类型进行拦截
- * 在@ResponseBody定义响应的信息已json的格式表达
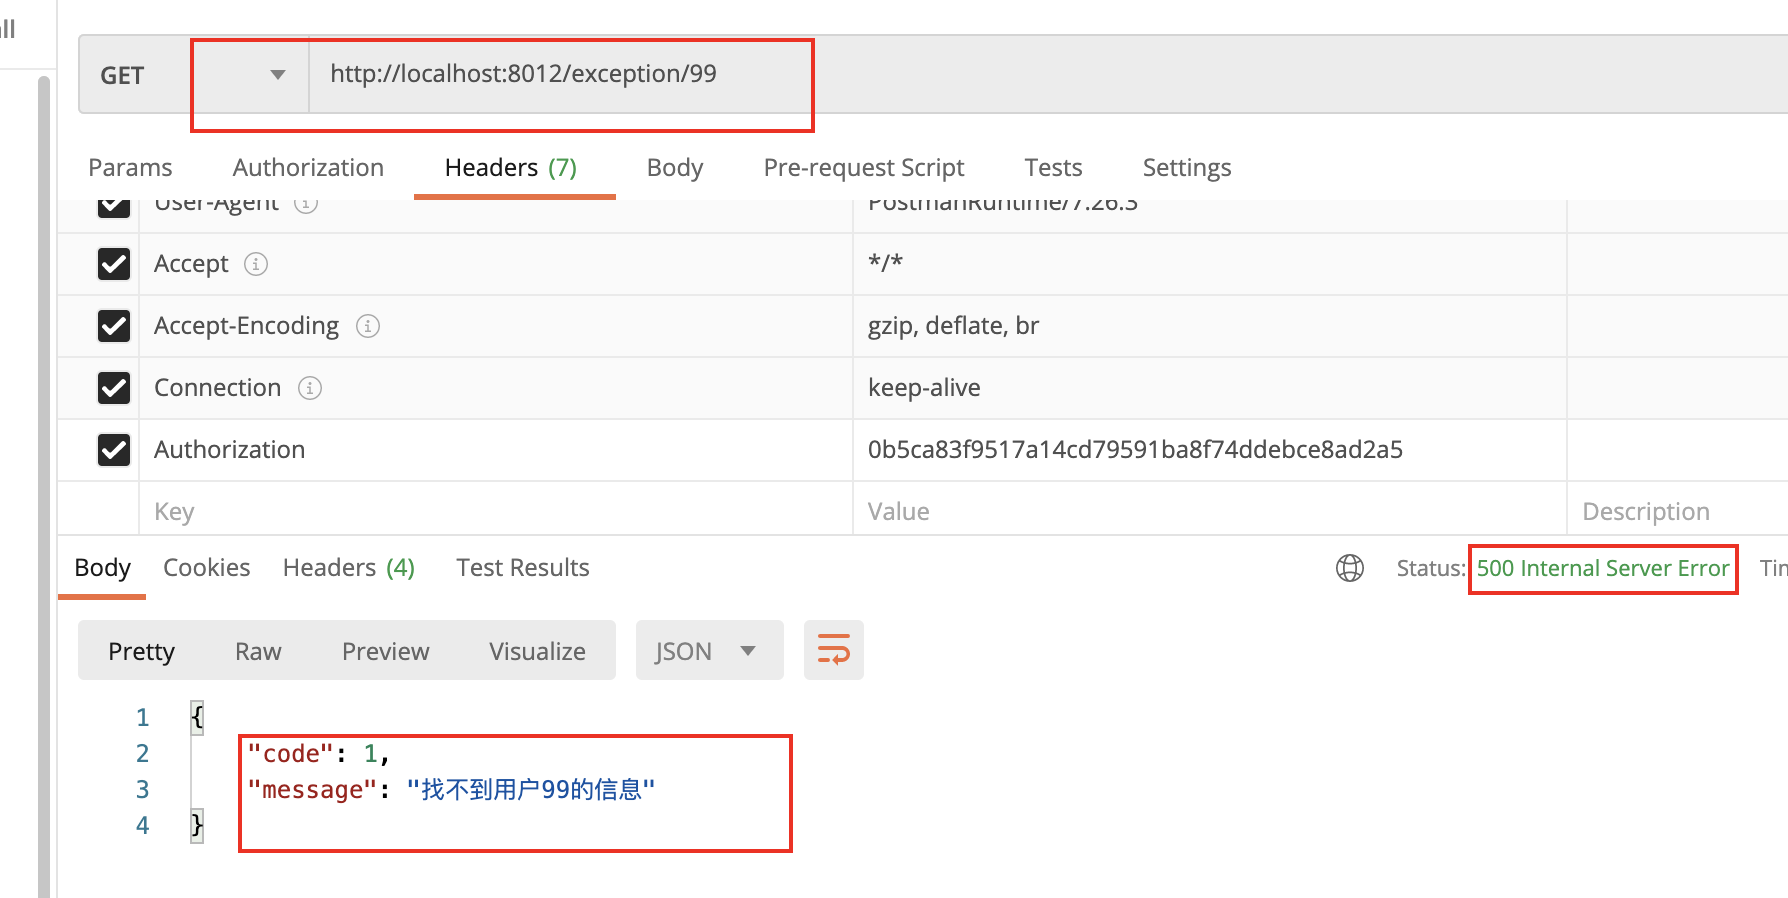
- * 在@ResponseStatus定义服务器内部错误500代码
- */
- @ControllerAdvice(
- basePackages = {"com.quan.annotationredis.controller.*"},
- annotations = {Controller.class, RestController.class}
- )
- public class UserControllerAdvice {
- @ExceptionHandler(value = NotFoundException.class)
- @ResponseStatus(HttpStatus.INTERNAL_SERVER_ERROR)//定义服务器错误代码
- @ResponseBody
- public Map<String,Object> exception(HttpServletRequest request,
- NotFoundException ex){
- Map<String,Object> msgMap = new HashMap<>();
- msgMap.put("code",ex.getCode());
- msgMap.put("message",ex.getCustomMsg());
- return msgMap;
- }
- }
测试controller:
- @Controller
- public class ExceptionController {
- @Autowired
- UserService userService;
- /**
- * 一旦方法出现异常,就会别控制器通知所拦截,最后经@ExceptionHandler定义
- * 的方法进行处理。
- * @param id
- * @return
- */
- @GetMapping("/exception/{id}")
- @ResponseStatus(HttpStatus.OK)
- @ResponseBody
- public User getUser(@PathVariable("id") Long id){
- System.out.println(System.currentTimeMillis());
- User user = userService.getUser(id);
- if (user == null){
- throw new NotFoundException(1L,"找不到用户"+id+"的信息");
- }
- System.out.println(System.currentTimeMillis());
- return user;
- }
- }
使用RestTemplate请求后端;
底层是通过类HttpURLConnection实现的。
- /**
- * restTemplate.getForObject方法中:
- * 第一个参数URL:标明请求服务器什么资源,{id}代表参数
- * 第二个参数:表示将请求返回User类的结果,实际上服务器只会给回我们json格式数据
- * 是因为restTemplate内部将其转化给java对象。
- * 第三个参数:就是URL对应的参数。
- * @return
- */
- private static User getUser() {
- int id = 1;
- RestTemplate restTemplate = new RestTemplate();
- User user = restTemplate.getForObject(
- "http://localhost:8012/annotation/{id}",
- User.class, id
- );
- System.out.println(user.getUserName());
- return user;
- }
- }
输出的日志结果:
- 14:10:42.839 [main] DEBUG org.springframework.web.client.RestTemplate - HTTP GET http://localhost:8012/annotation/1
- 14:10:42.904 [main] DEBUG org.springframework.web.client.RestTemplate - Accept=[application/json, application/*+json]
- 14:10:42.921 [main] DEBUG org.springframework.web.client.RestTemplate - Response 200 OK
- 14:10:42.924 [main] DEBUG org.springframework.web.client.RestTemplate - Reading to [com.quan.annotationredis.entity.User]
- gangganghao
多个参数的时候:
- @RestController
- @RequestMapping("annotation")
- public class RedisUserController {
- @Autowired
- private UserService userService =null;
- @PostMapping("/{userName}/{note}")
- public User insertUser(
- @PathVariable ("userName") String userName,
- @PathVariable ("note") String note
- ){
- User user = new User();
- user.setUserName(userName);
- user.setNote(note);
- userService.insertUser(user);
- return user;
- }
将参数用一个Map对象封装起来,Map的键名称和URI中所定义的参数时保持一致的。这样子就能将参数统一封装到Map中了
- /**
- *因为我们的Controller层返回的是User类型,所以我们这里也放回User,并使用ResponseEntity<User>接受
- * postForEntity ,通过post请求返回一个实体类,需要url,请求类型,返回类型,参数列表
- * responseEntity.getBody();通过类的方法从返回体里面拿到返回体的内容。(contorller里面是返回user)
- * @return
- */
- public static User insertUser(){
- RestTemplate restTemplate = new RestTemplate();
- String userName = "huolalala";
- String note = "huolalanote";
- String url = "http://localhost:8012/annotation/{userName}/{note}";
- Map<String,Object> params = new HashMap<>();
- params.put("userName",userName);
- params.put("note",note);
- ResponseEntity<User> responseEntity = restTemplate.postForEntity(url,User.class,User.class,params);
- User user = responseEntity.getBody();
- System.out.println(user);
- return user;
- }
运行日志;
- 14:55:47.888 [main] DEBUG org.springframework.web.client.RestTemplate - HTTP POST http://localhost:8012/annotation/huolalala/huolalanote
- 14:55:47.948 [main] DEBUG org.springframework.web.client.RestTemplate - Accept=[application/json, application/*+json]
- 14:55:47.966 [main] DEBUG org.springframework.web.client.RestTemplate - Writing [class com.quan.annotationredis.entity.User] with org.springframework.http.converter.json.MappingJackson2HttpMessageConverter
- 14:55:47.987 [main] DEBUG org.springframework.web.client.RestTemplate - Response 200 OK
- 14:55:47.990 [main] DEBUG org.springframework.web.client.RestTemplate - Reading to [com.quan.annotationredis.entity.User]
- User{id=49, userName='huolalala', note='huolalanote'}
请求体获取参数:
- /**
- * 11先定义请求头HttpHeaders,设置请求体为JSON格式
- * 22将请求体实体user和请求头绑定到请求实体对象HttpEntiry
- * 33restTemplate.postForObject将请求对象传递过去,
- * @return
- */
- public static User insertUser1(){
- User user = new User();
- user.setNote("RRRR");
- user.setUserName("QQQQ");
- HttpHeaders httpheaders = new HttpHeaders();
- httpheaders.setContentType(MediaType.APPLICATION_JSON_UTF8);
- HttpEntity<User> httpEntity = new HttpEntity<>(user,httpheaders);
- RestTemplate restTemplate = new RestTemplate();
- restTemplate.postForObject("http://localhost:8012/annotation",httpEntity,User.class);
- return user;
- }
删除:
- /**
- *
- */
- public static void delUser(){
- Long id = 48L;
- RestTemplate restTemplate = new RestTemplate();
- String url = "http://localhost:8012/annotation/{id}";
- restTemplate.delete(url,id);//这个方法没有返回值
- }
运行日志:
- 17:09:06.618 [main] DEBUG org.springframework.web.client.RestTemplate - HTTP DELETE http://localhost:8012/annotation/48
- 17:09:06.639 [main] DEBUG org.springframework.web.client.RestTemplate - Response 200 OK
spring-boot-learning-REST风格网站的更多相关文章
- 使用Spring boot开发RestFul 风格项目PUT/DELETE方法不起作用
在使用Spring boot 开发restful 风格的项目,put.delete方法不起作用,解决办法. 实体类Student @Data public class Student { privat ...
- Spring Boot构建 RESTful 风格应用
Spring Boot构建 RESTful 风格应用 1.Spring Boot构建 RESTful 风格应用 1.1 实战 1.1.1 创建工程 1.1.2 构建实体类 1.1.4 查询定制 1.1 ...
- Spring Boot2 系列教程(三十一)Spring Boot 构建 RESTful 风格应用
RESTful ,到现在相信已经没人不知道这个东西了吧!关于 RESTful 的概念,我这里就不做过多介绍了,传统的 Struts 对 RESTful 支持不够友好 ,但是 SpringMVC 对于 ...
- Vue + Spring Boot从零开始搭建个人网站(一) 之 项目前端Vue.js环境搭建
前言: 最近在考虑搭建个人网站,想了想决定采用前后端分离模式 前端使用Vue,负责接收数据 后端使用Spring Boot,负责提供前端需要的API 就这样开启了我边学习边实践之旅 Vue环境搭建步骤 ...
- spring boot(3)-Rest风格接口
Rest接口 虽然现在还有很多人在用jsp,但是其实这种动态页面早已过时,现在前端流行的是静态HTML+ rest接口(json格式).当然,如果是单台服务器,用动态还是静态页面可能没什么很大区别,但 ...
- Spring Boot 2.0 设置网站默认首页
Spring Boot设置默认首页,方法实验OK如下 附上Application启动代码 /** * @ClassName Application * @Description Spring-Boot ...
- Spring Boot (2) Restful风格接口
Rest接口 动态页面jsp早已过时,现在流行的是vuejs.angularjs.react等前端框架 调用 rest接口(json格式),如果是单台服务器,用动态还是静态页面可能没什么大区别,如果服 ...
- Spring boot——构建rest风格
前言rest风格严格意义上说不是一种标准,而是一种风格,在如今互联网界,这个风格被广泛用于微服务系统之间的交互. REST简单介绍 REST(Representional State Transfer ...
- Spring Boot 之restful风格
步骤一:restful风格是什么? 我们知道在做web开发的过程中,method常用的值是get和post.可事实上,method值还可以是put和delete等等其他值. 既然method值如此丰富 ...
- 一:Spring Boot、Spring Cloud
上次写了一篇文章叫Spring Cloud在国内中小型公司能用起来吗?介绍了Spring Cloud是否能在中小公司使用起来,这篇文章是它的姊妹篇.其实我们在这条路上已经走了一年多,从16年初到现在. ...
随机推荐
- python-利用random模块生成测试数据封装方法总结
1.前言: 在测试中经常有需要用到参数化,我们可以用random模块,faker模块生成测试数据,也可以用到pymysql,此文主要针对random模块生成任意个数的随机整数,随机字符串,随机手机号, ...
- EXCEL应用之商机分析:企业商机分析模板免费用
一.分析背景 商机是订单的来源,因此抓住每个销售机会,就可以更多地赢得交易.商机管理可以说是业务环节中最为关键的一步.每个企业都有自己的商机阶段划分,从销售人员接触客户.发现商机.跟进商机.推进销售 ...
- go面试集锦1
目录 1.go优缺点 2.go中常量是怎么实现 3.go的值传递和引用 4.go struct能不能比较 5.go协程线程安全吗 6.go中关键字 7.make和new区别 8.defer 9.生产者 ...
- .NET Standard与BCL有什么区别?
Net标准主要是为了改善代码共享,并使每个.Net实现中的API更加一致. .NET Standard 是.NET 平台(.net framework\.net core\.net mono)尚未在实 ...
- C# 题目
题目 http://blog.zhaojie.me/2011/03/my-interview-questions-for-dotnet-programmers.html 1.考察对常量和自读字段 初始 ...
- LayUI使用注意
# layui获取.修改checkbox的值 <input type="checkbox" name="MySwitch" value="x&q ...
- k-NN——算法实现
k-NN 没有特别的训练过程,给定训练集,标签,k,计算待预测特征到训练集的所有距离,选取前k个距离最小的训练集,k个中标签最多的为预测标签 约会类型分类.手写数字识别分类 计算输入数据到每一个训练数 ...
- python浅拷贝与深拷贝浅析
首先我们要明确,python中大多数都是浅拷贝,我们先说原因: 1.时间花费更少 2.内存更小 3.效率更高,浅拷贝只拷贝顶层数据,一般情况下比深拷贝效率高. 容器(如列表)切片是浅拷贝
- LeetCode-046-全排列
全排列 题目描述:给定一个不含重复数字的数组 nums ,返回其 所有可能的全排列 .你可以 按任意顺序 返回答案. 示例说明请见LeetCode官网. 来源:力扣(LeetCode) 链接:http ...
- spring框架中Bean的生命周期
一.Bean 的完整生命周期 在传统的Java应用中,bean的生命周期很简单,使用Java关键字 new 进行Bean 的实例化,然后该Bean 就能够使用了.一旦bean不再被使用,则由Java自 ...
