spring boot:实现图片文件上传并生成缩略图(spring boot 2.3.1)
一,为什么要给图片生成缩略图?
1, 用户上传的原始图片如果太大,不能直接展示在网站页面上,
因为不但流费server的流量,而且用户打开时非常费时间,
所以要生成缩略图。
2,服务端管理图片要注意的几点:
第一点:缩略图要与原图分开存储,
然后通过符号链接方式允许前端访问,
否则原图被直接访问仍然存在浪费流量的问题,
有图片版权的公司也不允许外部直接访问原图
第二点:图片名字要加上一些随机的数字,
避免被穷举访问
第三点:图片要分目录存放,通常每1000张保存到一个目录,
因为大量的图片如果存放到同一个目录下,
打开时会非常慢或者不能打开,
不利于我们对文件进行管理
说明:刘宏缔的架构森林是一个专注架构的博客,地址:https://www.cnblogs.com/architectforest
对应的源码可以访问这里获取: https://github.com/liuhongdi/
说明:作者:刘宏缔 邮箱: 371125307@qq.com
二,演示项目的相关信息
1,项目的地址:
https://github.com/liuhongdi/imagemodify
2,项目原理:
实现了图片的文件上传,
并用ImageMagick给非gif图片生成缩略图,
用ffmpeg生成gif图片的缩略图
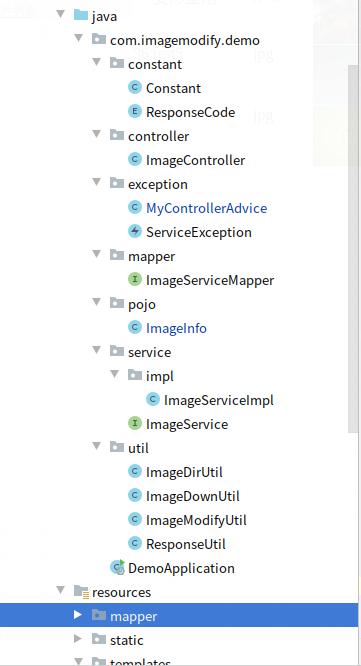
3,项目结构:如图:
三,ImageMagick/ffmpeg工具软件的安装
1,dnf安装ImageMagick
[root@blog head]# dnf install ImageMagick
说明:注意软件包名字中I和M均为大写
检查软件是否安装成功?
[root@blog head]# whereis convert

convert: /usr/bin/convert /usr/share/man/man1/convert.1.gz
2,安装ffmpeg
安装rpmfusion库
[root@blog ~]# dnf install https://download1.rpmfusion.org/free/el/rpmfusion-free-release-8.noarch.rpm
下载sdl库
[root@blog ~]# wget http://mirror.centos.org/centos/8/PowerTools/x86_64/os/Packages/SDL2-2.0.8-7.el8.x86_64.rpm
安装sdl库:
[root@blog ~]# rpm -ivh SDL2-2.0.8-7.el8.x86_64.rpm

Verifying...                          ################################# [100%]

Preparing...                          ################################# [100%]

Updating / installing...

   1:SDL2-2.0.8-7.el8                 ################################# [100%]
安装ffmpeg
[root@blog ~]# dnf install ffmpeg
四,配置文件说明:
1,application.properties
#upload

spring.servlet.multipart.maxFileSize=30MB

spring.servlet.multipart.maxRequestSize=30MB
说明:指定上传文件的最大限制,
默认大小是1M
2,nginx访问文件的host配置:file.conf
server {

    listen       81;

    server_name  file.lhdtest.com;

    root         /data/file/html;

     location ~ \.(gif|jpg|jpeg|png|bmp|ico)$ {

           root /data/file/html;

           expires 24h;

       }

    index         index.html;

    access_log      /data/logs/nginxlogs/file.access_log;

    error_log       /data/logs/nginxlogs/file.error_log;

}
3,Constant.java
    //图片从nginx访问时的host

    public static final String IMAGES_URL_HOST = "http://127.0.0.1:81";

    //默认原始图片的路径

    public static final String IMAGES_ORIG_DIR = "/data/file/html/images";

    //缩略图的文件路径

    public static final String IMAGES_TMB_DIR = "/data/file/html/tmb";

    //缩略图的长边长度

    public static final String IMAGES_TMB_LONG = "300";

    //分页显示时每页的显示数量

    public static final int IMAGES_PAGE_SIZE = 5;

    //ImageMagick命令的安装路径

    public static final String IMAGEMAGICK_DIR = "/usr/bin";

    //ffmpeg的完整路径

    public static final String FFMPEG_CMD = "/usr/bin/ffmpeg";
4,创建保存图片信息的数据表:
CREATE TABLE `image_service` (

 `image_id` bigint(11) NOT NULL AUTO_INCREMENT COMMENT '图片id',

 `image_sn` varchar(100) CHARACTER SET utf8mb4 COLLATE utf8mb4_general_ci NOT NULL COMMENT '图片编号',

 `image_type` varchar(10) NOT NULL DEFAULT '' COMMENT '图片类型',

 `title` varchar(200) NOT NULL DEFAULT '' COMMENT '标题',

 `size` int(11) NOT NULL DEFAULT '0' COMMENT '文件大小',

 `width` int(11) NOT NULL DEFAULT '0' COMMENT '宽度',

 `height` int(11) NOT NULL DEFAULT '0' COMMENT '高度',

 `add_time` datetime NOT NULL DEFAULT '2019-11-01 01:01:01' COMMENT '添加时间 ',

 `staff_id` int(11) NOT NULL DEFAULT '0' COMMENT '添加的用户',

 PRIMARY KEY (`image_id`)

) ENGINE=InnoDB AUTO_INCREMENT=0 DEFAULT CHARSET=utf8mb4 COLLATE=utf8mb4_0900_ai_ci COMMENT='图片信息表'
五,java代码说明:
1,ImageModifyUtil.java
public class ImageModifyUtil {

    //按指定的边长生成缩略图

    public static boolean image_resize_by_long_side(String orig_path, String dest_path, String long_size,String imageType) {

        try {

        List<String> command = new ArrayList<>();

         String command_one = "";

        if (imageType.equals("gif")) {

            //计算得到目标宽高

            File gifFile = new File(orig_path);

            int gifWidth = 0;

            int gifHeight = 0;

            try {

                BufferedImage imageBuffer = ImageIO.read(gifFile);

                if (imageBuffer != null) {//如果image=null 表示上传的不是图片格式

                    gifWidth = imageBuffer.getWidth();

                    gifHeight = imageBuffer.getHeight();

                }

            } catch (IOException e) {

                e.printStackTrace();

            }

            int destWidth = 0;

            int destHeight = 0;

            if (gifWidth > gifHeight) {

                destWidth = Integer.parseInt( long_size );

                destHeight = (destWidth*gifHeight) / gifWidth;

            } else if  (gifWidth == gifHeight) {

                destWidth = Integer.parseInt( long_size );

                destHeight = destWidth;

            } else {

                destHeight = Integer.parseInt( long_size );

                destWidth = (destHeight*gifWidth) / gifHeight;

            }

            command_one = Constant.FFMPEG_CMD+" -i "+orig_path+" -s "+destWidth+"x"+destHeight+" "+dest_path+" 2>&1";

        } else {

            command_one = Constant.IMAGEMAGICK_DIR+"/convert -size "+long_size+"x"+long_size+" -resize "+long_size+"x"+long_size+" +profile '*' -quality 85 "+orig_path+" "+dest_path+" 2>&1";

        }

        //System.out.println(command_one);

        command.add("sh");

        command.add("-c");

        command.add(command_one);

        // 执行cmd命令

        ProcessBuilder builder = new ProcessBuilder();

        builder.command(command);

        Process process = builder.start();

        return true;

        } catch (Exception e) {

            System.out.println("save ioexception");

            e.printStackTrace();

            return false;

        }

    }

}
这个类用来生成缩略图
说明:gif图生成缩略图时,我们要帮助ffmpeg计算出准确的长和宽
2,ImageDownUtil.java
public class ImageDownUtil {

    //按指定的路径下载一张图片

    public static void downImageByLocalPath(HttpServletResponse response,String fullImagePath,String imageName) {

        File file = new File(fullImagePath);

        if (file.exists()) {

            response.setContentType("application/force-download");// 设置强制下载不打开

            response.addHeader("Content-Disposition", "attachment;fileName=" + imageName);// 设置文件名

            byte[] buffer = new byte[1024];

            FileInputStream fis = null;

            BufferedInputStream bis = null;

            try {

                fis = new FileInputStream(file);

                bis = new BufferedInputStream(fis);

                OutputStream os = response.getOutputStream();

                int i = bis.read(buffer);

                while (i != -1) {

                    os.write(buffer, 0, i);

                    i = bis.read(buffer);

                }

                System.out.println("success");

            } catch (Exception e) {

                e.printStackTrace();

            } finally {

                if (bis != null) {

                    try {

                        bis.close();

                    } catch (IOException e) {

                        e.printStackTrace();

                    }

                }

                if (fis != null) {

                    try {

                        fis.close();

                    } catch (IOException e) {

                        e.printStackTrace();

                    }

                }

            }

        }

    }

    //按指定的文件路径显示图片

    public static ResponseEntity<InputStreamResource> dispImageByLocalPath(String fullImagePath) {

        HttpHeaders header = new HttpHeaders();

        header.setContentType(MediaType.IMAGE_JPEG);

        Path path = Paths.get(fullImagePath);

        InputStream content;

        try {

            content = Files.newInputStream(path);

            return new ResponseEntity<>(new InputStreamResource(content), header, HttpStatus.OK);

        } catch (IOException e) {

            e.printStackTrace();

            return ResponseEntity.notFound().build();

        }

    }

}
这个类用来下载图片和用java显示一张图片
六,效果测试
测试前的注意事项:
测试前要先启动服务:
mysql
nginx
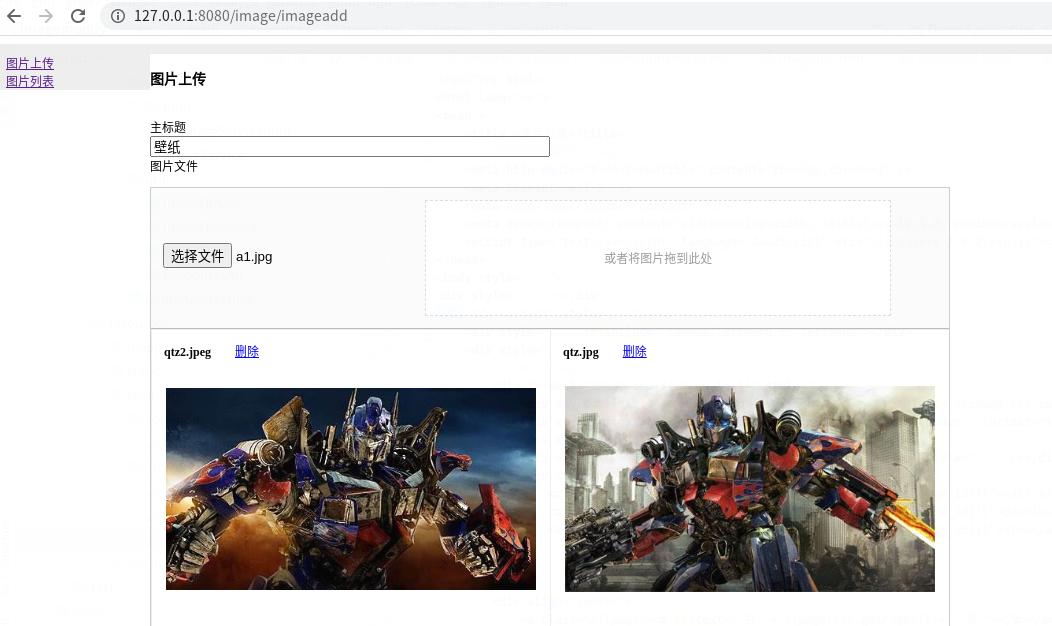
1,图片上传:
访问:
http://127.0.0.1:8080/image/imageadd
如图:
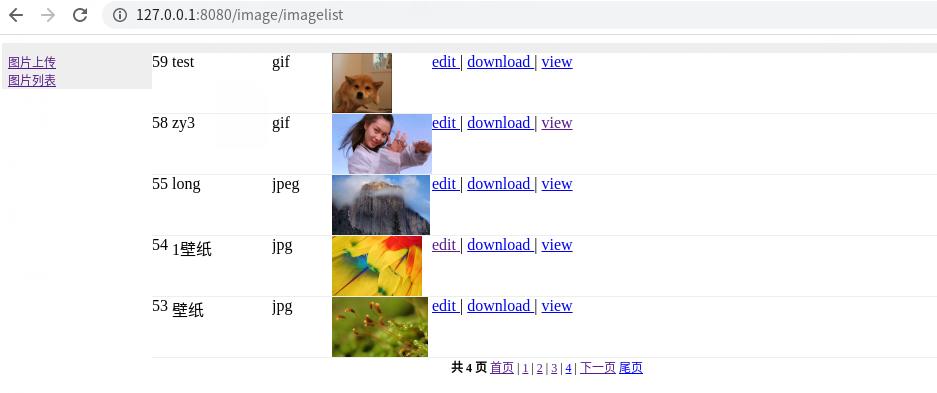
2,查看已上传的图片列表
访问:
http://127.0.0.1:8080/image/imagelist
如图:
七,查看spring boot的版本
  .   ____          _            __ _ _

 /\\ / ___'_ __ _ _(_)_ __  __ _ \ \ \ \

( ( )\___ | '_ | '_| | '_ \/ _` | \ \ \ \

 \\/  ___)| |_)| | | | | || (_| |  ) ) ) )

  '  |____| .__|_| |_|_| |_\__, | / / / /

 =========|_|==============|___/=/_/_/_/

 :: Spring Boot ::        (v2.3.1.RELEASE)
spring boot:实现图片文件上传并生成缩略图(spring boot 2.3.1)的更多相关文章
- tp3.2 自带的文件上传及生成缩略图功能
public function upload_file($file_name,$width,$height) { //检查图片尺寸是否合法 $image_size = getimagesize($_F ...
- CI自带的文件上传及生成缩略图
/* * 文件上传 * @param $upload_path 文件上传路径 * @param $formpic 表单name属性名称 */ private function doUpload($up ...
- Office文件上传自动生成缩略图
来源:微信公众号CodeL 前不久产品经理提出一个X的需求,说上传office文件的时候需要将首页自动截图,用于显示文件列表的时候将文件第一页缩略图展示给用户.实现的方式有多种,这里给大家介绍一个简单 ...
- Office文件上传自动生成缩略图-C#开发
原文: http://www.knowsky.com/898407.html 上传office文件的时候需要将首页自动截图,用于显示文件列表的时候将文件第一页缩略图展示给用户.实现的方式有多种,这里给 ...
- Spring中MultipartHttpServletRequest实现文件上传
Spring中MultipartHttpServletRequest实现文件上传 转贴自:http://my.oschina.net/nyniuch/blog/185266 实现图片上传 用户必须能 ...
- spring mvc 简单的文件上传与下载
上传文件有很多种方法,这里主要讲解的是spring mvc内提供的文件上传 前提使用:spring mvc 在这个之前我们需要把环境给配置好 1:springmvc的XML配置文件加上这一段就即可, ...
- 利用spring的MultipartFile实现文件上传【原】
利用spring的MultipartFile实现文件上传 主要依赖jar包 spring-web-3.0.6.RELEASE.jar 用到 (org.springframework.web.multi ...
- springmvc图片文件上传接口
springmvc图片文件上传 用MultipartFile文件方式传输 Controller package com.controller; import java.awt.image.Buffer ...
- SpringMvc MultipartFile 图片文件上传
spring-servlet.xml <!-- SpringMVC上传文件时,需要配置MultipartResolver处理器 --> <bean id="multipar ...
随机推荐
- [LeetCode]78. 子集(位运算;回溯法待做)
题目 给定一组不含重复元素的整数数组 nums,返回该数组所有可能的子集(幂集). 说明:解集不能包含重复的子集. 示例: 输入: nums = [1,2,3] 输出: [ [3], [1], ...
- WPF相关UI库
免费控件库: 1.Extended WPF Toolkit 官方拓展控件 http://wpftoolkit.codeplex.com/ 2.avalondock 可停靠布局(wpf toolkit包 ...
- 在windows下使用pip安装python包遇到缺失stdint.h文件的错误
今天在windows上使用pip安装一个python包python-lzf时遇到如下的错误: fatal error C1083: Cannot open include file: 'stdint. ...
- Java学习预热
预备知识 什么是计算机 点击进入百度百科(计算机) 计算机硬件组成 主要部件 CPU 内存 主板 IO设备 键盘 鼠标 麦克风 显示器 音箱 冯·诺依曼体系结构 计算机软件 系统软件 DOS wind ...
- HTTP 【值得你看个究竟】
我是一名程序员,我的主要编程语言是 Python,我更是一名 Web 开发人员,所以我必须要了解 HTTP,所以本篇文章就来带你从 HTTP 入门到进阶,看完让你有一种恍然大悟.醍醐灌顶的感觉. 认识 ...
- RXJAVA之变换操作
RXJAVA提供了以下变换操作,对Observable的消息进行变换操作: 1.window 定期将来自Observable的数据分拆成一些Observable窗口,然后发射这些窗口,而不是每次发射一 ...
- kafka学习(二)kafka工作流程分析
一.发送数据 follower的同步流程 PS:Producer在写入数据的时候永远的找leader,不会直接将数据写入follower PS:消息写入leader后,follower是主动的去lea ...
- 安装MySQL和出现的问题解决
在Windows下安装mysql,注意自己的Windows是32位还是64位. MySQL官网下载地址:https://dev.mysql.com/downloads/mysql/ 下载完之后,解压放 ...
- DevOps Next-AI / ML虚拟会议
这个中秋国庆,一起进阶反超呀!10月1日星期四,加入DevOps Next,可以参加有关AI和ML的免费活动,内容涉及持续测试,代码质量和DevOps生产力.优秀的你一起来加入! 关于本次活动 Dev ...
- Django-当前菜单激活状态-模版 request | slice
如何满足这个需求? 1. view中传递过来一个当前页面的参数标识,通过模版语言进行判断 {% if current_page == 'index' %}active{% endif %} # 每一个 ...