Blazor(WebAssembly) + .NETCore 实现斗地主
Blazor Wasm 最近更新到了3.2.0-preview1,支持了WebSocket同时启动类也有所修改,我就把这个文章重新修改一下。
Blazor Wasm先在已经更新到3.2.0正式版,本文代码也已更新
之前群里大神发了一个 html5+ .NETCore的斗地主,刚好在看Blazor WebAssembly 就尝试重写试试。
这里主要介绍Blazor的依赖注入,认证与授权,WebSocket的使用,JS互操作等,完整实现可以查看github:https://github.com/saber-wang/FightLandlord/tree/master/src/BetGame.DDZ.WasmClient,在线演示:http://39.106.159.180:31000/
另外强调一下Blazor WebAssembly 是纯前端框架,所有相关组件等都会下载到浏览器运行,要和MVC、Razor Pages等区分开来
当前是基于NetCore3.1和Blazor WebAssembly 3.2.0 ,安装Vs 2019 16.6更新后就会附带Blazor WebAssembly模板。
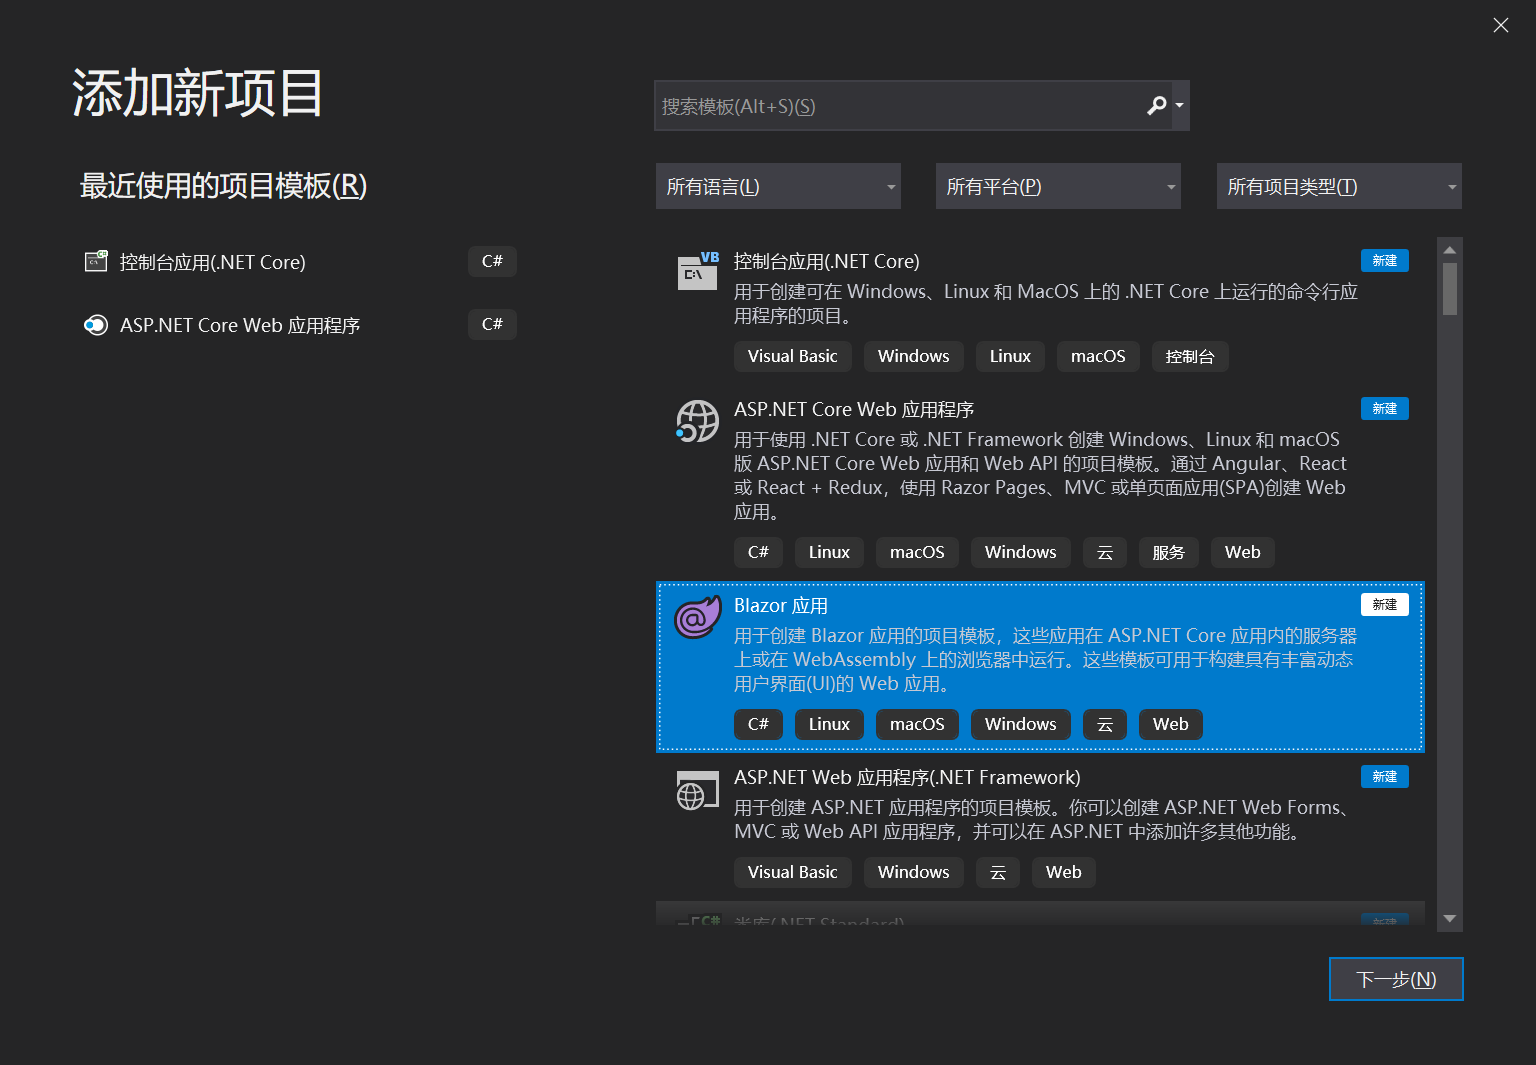
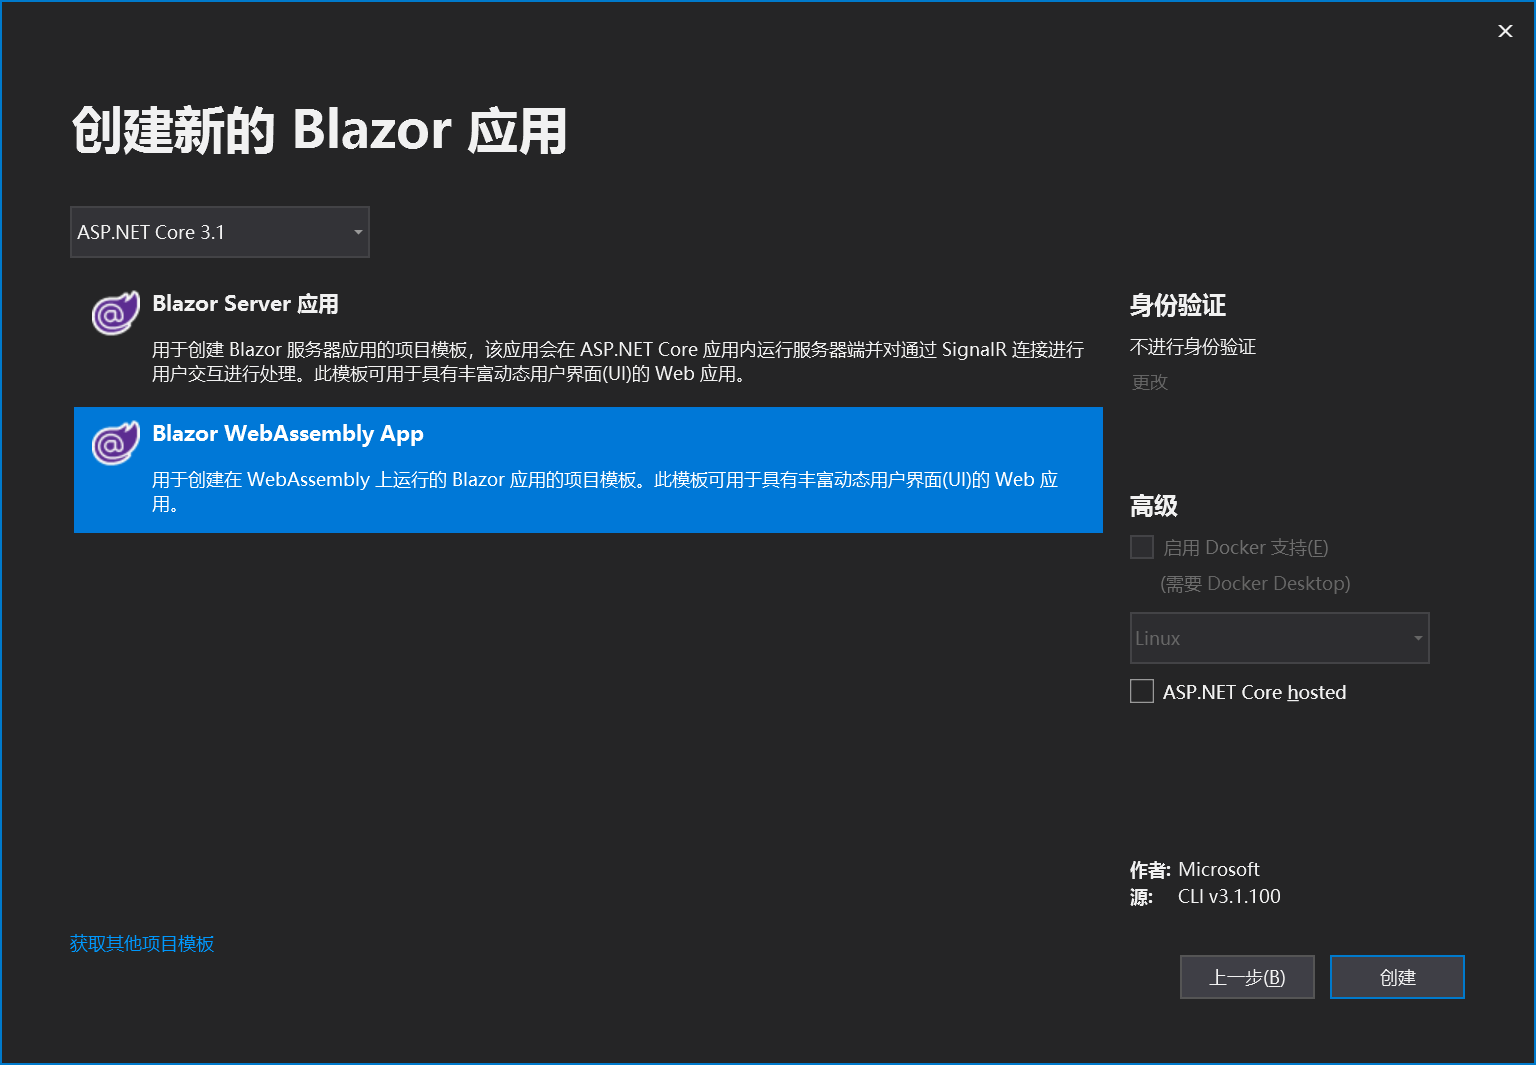
选择Blazor应用,跟着往下就会看到Blazor WebAssembly App模板,如果看不到就在ASP.NET Core3.0和3.1之间切换一下。
新建后项目结构如下。
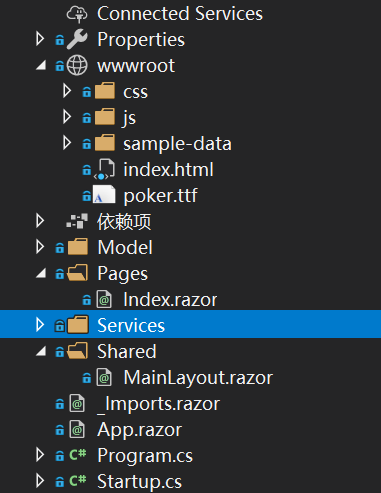
一眼看过去,大体和Razor Pages 差不多。Program.cs中创建了一个WebAssemblyHostBuilder,然后指定启动容器,代码非常简单。
public static async Task Main(string[] args)

        {

            var builder = WebAssemblyHostBuilder.CreateDefault(args);

            builder.RootComponents.Add<App>("app");

            await builder.Build().RunAsync();

        }
Blazor WebAssembly 中也支持DI,注入方式与生命周期与ASP.NET Core一致,但是Scope生命周期不太一样,注册的服务的行为类似于 Singleton 服务。
在WebAssemblyHostBuilder中有一个Services属性用来注册服务
public static async Task Main(string[] args)

        {

            var builder = WebAssemblyHostBuilder.CreateDefault(args);

            builder.Services.AddScoped<ApiService>();

            builder.Services.AddScoped<FunctionHelper>();

            builder.Services.AddScoped<LocalStorage>();

            builder.Services.AddScoped<CustomAuthStateProvider>();

            builder.Services.AddScoped<AuthenticationStateProvider>(s => s.GetRequiredService<CustomAuthStateProvider>());

            builder.Services.AddAuthorizationCore(c=> {

                c.AddPolicy("default", a => a.RequireAuthenticatedUser());

                c.DefaultPolicy = c.GetPolicy("default");

            });

            builder.Services.AddScoped(sp=>new ClientWebSocket());

            builder.RootComponents.Add<App>("app");

       builder.Services.AddTransient(sp => new HttpClient { BaseAddress = new Uri(builder.HostEnvironment.BaseAddress) });

            WebAssemblyHttpMessageHandlerOptions.DefaultCredentials = FetchCredentialsOption.Include;

            await builder.Build().RunAsync();

        }
默认已注入了IJSRuntime,NavigationManager,具体可以看官方文档介绍。
App.razor中定义了路由和默认路由,修改添加AuthorizeRouteView和CascadingAuthenticationState以支持AuthorizeView、AuthenticationState等用于认证和获取当前的身份验证状态。
<Router AppAssembly="@typeof(Program).Assembly">

    <Found Context="routeData">

        <AuthorizeRouteView RouteData="@routeData" DefaultLayout="@typeof(MainLayout)" />

    </Found>

    <NotFound>

        <CascadingAuthenticationState>

            <LayoutView Layout="@typeof(MainLayout)">

                <p>Sorry, there's nothing at this address.</p>

            </LayoutView>

        </CascadingAuthenticationState>

    </NotFound>

</Router>
自定义AuthenticationStateProvider并注入为AuthorizeView和CascadingAuthenticationState组件提供认证。
         builder.Services.AddScoped<CustomAuthStateProvider>();

            builder.Services.AddScoped<AuthenticationStateProvider>(s => s.GetRequiredService<CustomAuthStateProvider>());

            //在wasm中没有默认配置,所以需要设置一下

            builder.Services.AddAuthorizationCore(c=> {

                c.AddPolicy("default", a => a.RequireAuthenticatedUser());

                c.DefaultPolicy = c.GetPolicy("default");

            });
CustomAuthStateProvider的实现如下。
public class CustomAuthStateProvider : AuthenticationStateProvider

    {

        ApiService _apiService;

        Player _playerCache;

        public CustomAuthStateProvider(ApiService apiService)

        {

            _apiService = apiService;

        }

        public override async Task<AuthenticationState> GetAuthenticationStateAsync()

        {

            var player = _playerCache??= await _apiService.GetPlayer();

            if (player == null)

            {

                return new AuthenticationState(new ClaimsPrincipal());

            }

            else

            {

                //认证通过则提供ClaimsPrincipal

                var user = Utils.GetClaimsIdentity(player);

                return new AuthenticationState(user);

            }

        }

        /// <summary>

        /// 通知AuthorizeView等用户状态更改

        /// </summary>

        public void NotifyAuthenticationState()

        {

            NotifyAuthenticationStateChanged(GetAuthenticationStateAsync());

        }

        /// <summary>

        /// 提供Player并通知AuthorizeView等用户状态更改

        /// </summary>

        public void NotifyAuthenticationState(Player player)

        {

            _playerCache = player;

            NotifyAuthenticationState();

        }

    }
我们这个时候就可以在组件上添加AuthorizeView根据用户是否有权查看来选择性地显示 UI,该组件公开了一个 AuthenticationState 类型的 context 变量,可以使用该变量来访问有关已登录用户的信息。
<AuthorizeView>

    <Authorized>

     //认证通过 @context.User

    </Authorized>

    <NotAuthorized>

     //认证不通过

    </NotAuthorized>

</AuthorizeView>
使身份验证状态作为级联参数
[CascadingParameter]

private Task<AuthenticationState> authenticationStateTask { get; set; }
获取当前用户信息
    private async Task GetPlayer()

    {

        var user = await authenticationStateTask;

        if (user?.User?.Identity?.IsAuthenticated == true)

        {

            player = new Player

            {

                Balance = Convert.ToInt32(user.User.FindFirst(nameof(Player.Balance)).Value),

                GameState = user.User.FindFirst(nameof(Player.GameState)).Value,

                Id = user.User.FindFirst(nameof(Player.Id)).Value,

                IsOnline = Convert.ToBoolean(user.User.FindFirst(nameof(Player.IsOnline)).Value),

                Nick = user.User.FindFirst(nameof(Player.Nick)).Value,

                Score = Convert.ToInt32(user.User.FindFirst(nameof(Player.Score)).Value),

            };

            await ConnectWebsocket();

        }

    }
注册用户并通知AuthorizeView状态更新
    private async Task GetOrAddPlayer(MouseEventArgs e)

    {

        GetOrAddPlayering = true;

        player = await ApiService.GetOrAddPlayer(editNick);

        this.GetOrAddPlayering = false;

        if (player != null)

        {

            CustomAuthStateProvider.NotifyAuthenticationState(player);

            await ConnectWebsocket();

        }

    }
JavaScript 互操作,虽然很希望完全不操作JavaScript,但目前版本的Web WebAssembly不太现实,例如弹窗、本地存储等,Blazor中操作JavaScript主要靠IJSRuntime 抽象,在重构的时候遇到最多的错误就是类型转换和索引溢出错误:)。
从Blazor操作JavaScript比较简单,操作的JavaScript需要是公开的,这里实现从Blazor调用alert和localStorage如下
public class FunctionHelper

    {

        private readonly IJSRuntime _jsRuntime;

        public FunctionHelper(IJSRuntime jsRuntime)

        {

            _jsRuntime = jsRuntime;

        }

        public ValueTask Alert(object message)

        {

            //无返回值使用InvokeVoidAsync

            return _jsRuntime.InvokeVoidAsync("alert", message);

        }

    }
public class LocalStorage

    {

        private readonly IJSRuntime _jsRuntime;

        private readonly static JsonSerializerOptions SerializerOptions = new JsonSerializerOptions();

        public LocalStorage(IJSRuntime jsRuntime)

        {

            _jsRuntime = jsRuntime;

        }

        public ValueTask SetAsync(string key, object value)

        {

            if (string.IsNullOrEmpty(key))

            {

                throw new ArgumentException("Cannot be null or empty", nameof(key));

            }

            var json = JsonSerializer.Serialize(value, options: SerializerOptions);

            return _jsRuntime.InvokeVoidAsync("localStorage.setItem", key, json);

        }

        public async ValueTask<T> GetAsync<T>(string key)

        {

            if (string.IsNullOrEmpty(key))

            {

                throw new ArgumentException("Cannot be null or empty", nameof(key));

            }

            //有返回值使用InvokeAsync

            var json =await _jsRuntime.InvokeAsync<string>("localStorage.getItem", key);

            if (json == null)

            {

                return default;

            }

            return JsonSerializer.Deserialize<T>(json, options: SerializerOptions);

        }

        public ValueTask DeleteAsync(string key)

        {

            return _jsRuntime.InvokeVoidAsync(

                $"localStorage.removeItem",key);

        }

    }
从JavaScript调用C#方法则需要把C#方法使用[JSInvokable]特性标记且必须为公开的。调用C#静态方法看这里,这里主要介绍调用C#的实例方法。
因为Blazor Wasm暂时不支持ClientWebSocket,所以我们用JavaScript互操作来实现WebSocket的链接与C#方法的回调。
使用C#实现一个调用JavaScript的WebSocket,并使用DotNetObjectReference.Create包装一个实例传递给JavaScript方法的参数(dotnetHelper),这里直接传递了当前实例。
    [JSInvokable]

    public async Task ConnectWebsocket()

    {

        Console.WriteLine("ConnectWebsocket");

        var serviceurl = await ApiService.ConnectWebsocket();

        //TODO ConnectWebsocket

        if (!string.IsNullOrWhiteSpace(serviceurl))

            await _jsRuntime.InvokeAsync<string>("newWebSocket", serviceurl, DotNetObjectReference.Create(this));

    }
JavaScript代码里使用参数(dotnetHelper)接收的实例调用C#方法(dotnetHelper.invokeMethodAsync('方法名',方法参数...))。
var gsocket = null;

var gsocketTimeId = null;

function newWebSocket(url, dotnetHelper)

{

    console.log('newWebSocket');

    if (gsocket) gsocket.close();

    gsocket = null;

    gsocket = new WebSocket(url);

    gsocket.onopen = function (e) {

        console.log('websocket connect');

        //调用C#的onopen();

        dotnetHelper.invokeMethodAsync('onopen')

    };

    gsocket.onclose = function (e) {

        console.log('websocket disconnect');

        dotnetHelper.invokeMethodAsync('onclose')

        gsocket = null;

        clearTimeout(gsocketTimeId);

        gsocketTimeId = setTimeout(function () {

            console.log('websocket onclose ConnectWebsocket');

            //调用C#的ConnectWebsocket();

            dotnetHelper.invokeMethodAsync('ConnectWebsocket');

            //_self.ConnectWebsocket.call(_self);

        }, 5000);

    };

    gsocket.onmessage = function (e) {

        try {

            console.log('websocket onmessage');

            var msg = JSON.parse(e.data);

            //调用C#的onmessage();

            dotnetHelper.invokeMethodAsync('onmessage', msg);

            //_self.onmessage.call(_self, msg);

        } catch (e) {

            console.log(e);

            return;

        }

    };

    gsocket.onerror = function (e) {

        console.log('websocket error');

        gsocket = null;

        clearTimeout(gsocketTimeId);

        gsocketTimeId = setTimeout(function () {

            console.log('websocket onerror ConnectWebsocket');

            dotnetHelper.invokeMethodAsync('ConnectWebsocket');

            //_self.ConnectWebsocket.call(_self);

        }, 5000);

    };

}
Blazor中已经实现了Websocket,现在我们可以很简单的操作Websocket。
    public async Task ConnectWebsocket()

    {

        Console.WriteLine("ConnectWebsocket");

        //获取Websocket链接

        var serviceurl = await ApiService.ConnectWebsocket();

        if (!string.IsNullOrWhiteSpace(serviceurl))

        {

            wsConnectState = 1010;

            //链接Websocket

            await clientWebSocket.ConnectAsync(new Uri(serviceurl),default);

            //后台接收消息

            ReceiveMessages();

            //链接Websocket时调用

            await onopen();

            //await _jsRuntime.InvokeAsync<string>("newWebSocket", serviceurl, DotNetObjectReference.Create(this));

        }

    }
ReceiveMessages的实现如下
    private async Task ReceiveMessages()

    {

        List<byte> vs = new List<byte>();

        while (true)

        {

            Memory<byte> memory = new Memory<byte>(new byte[1024]);

            var res = await clientWebSocket.ReceiveAsync(memory, default);

            var bt = memory.ToArray().Take(res.Count);

            vs.AddRange(bt);

            if (res.EndOfMessage)

            {

                if (res.MessageType == WebSocketMessageType.Close)

                {

                    onclose();

                }

                else

                {

                    var jsonDocument = JsonSerializer.Deserialize<object>(vs.ToArray());

                    vs.Clear();

                    await onmessage(jsonDocument);

                }

                //当前方法在后台执行,所以我们需要手动更新UI

                StateHasChanged();

            }

        }

    }
onopen,onclose,onmessage实现如下
public async Task onopen()

    {

        Console.WriteLine("websocket connect");

        wsConnectState = ;

        await GetDesks();

        StateHasChanged();

    }

    public void onclose()

    {

        Console.WriteLine("websocket disconnect");

        wsConnectState = ;

    }

    public async Task onmessage(object msgobjer)

    {

        try

        {

            var jsonDocument = JsonSerializer.Deserialize<object>(msgobjer.ToString());

            if (jsonDocument is JsonElement msg)

            {

                if (msg.TryGetProperty("type", out var element) && element.ValueKind == JsonValueKind.String)

                {

                    Console.WriteLine(element.ToString());

                    if (element.GetString() == "Sitdown")

                    {

                        Console.WriteLine(msg.GetProperty("msg").GetString());

                        var deskId = msg.GetProperty("deskId").GetInt32();

                        foreach (var desk in desks)

                        {

                            if (desk.Id.Equals(deskId))

                            {

                                var pos = msg.GetProperty("pos").GetInt32();

                                Console.WriteLine(pos);

                                var player = JsonSerializer.Deserialize<Player>(msg.GetProperty("player").ToString());

                                switch (pos)

                                {

                                    case :

                                        desk.player1 = player;

                                        break;

                                    case :

                                        desk.player2 = player;

                                        break;

                                    case :

                                        desk.player3 = player;

                                        break;

                                }

                                break;

                            }

                        }

                    }

                    else if (element.GetString() == "Standup")

                    {

                        Console.WriteLine(msg.GetProperty("msg").GetString());

                        var deskId = msg.GetProperty("deskId").GetInt32();

                        foreach (var desk in desks)

                        {

                            if (desk.Id.Equals(deskId))

                            {

                                var pos = msg.GetProperty("pos").GetInt32();

                                Console.WriteLine(pos);

                                switch (pos)

                                {

                                    case :

                                        desk.player1 = null;

                                        break;

                                    case :

                                        desk.player2 = null;

                                        break;

                                    case :

                                        desk.player3 = null;

                                        break;

                                }

                                break;

                            }

                        }

                    }

                    else if (element.GetString() == "GameStarted")

                    {

                        Console.WriteLine(msg.GetProperty("msg").GetString());

                        currentChannel.msgs.Insert(, msg);

                    }

                    else if (element.GetString() == "GameOvered")

                    {

                        Console.WriteLine(msg.GetProperty("msg").GetString());

                        currentChannel.msgs.Insert(, msg);

                    }

                    else if (element.GetString() == "GamePlay")

                    {

                        ddzid = msg.GetProperty("ddzid").GetString();

                        ddzdata = JsonSerializer.Deserialize<GameInfo>(msg.GetProperty("data").ToString());

                        Console.WriteLine(msg.GetProperty("data").ToString());

                        stage = ddzdata.stage;

                        selectedPokers = new int?[];

                        if (playTips.Any())

                            playTips.RemoveRange(, playTips.Count);

                        playTipsIndex = ;

                        if (this.stage == "游戏结束")

                        {

                            foreach (var ddz in this.ddzdata.players)

                            {

                                if (ddz.id == player.Nick)

                                {

                                    this.player.Score += ddz.score;

                                    break;

                                }

                            }

                        }

                        if (this.ddzdata.operationTimeoutSeconds >  && this.ddzdata.operationTimeoutSeconds < )

                            await this.operationTimeoutTimer();

                    }

                    else if (element.GetString() == "chanmsg")

                    {

                        currentChannel.msgs.Insert(, msg);

                        if (currentChannel.msgs.Count > )

                            currentChannel.msgs.RemoveRange(, );

                    }

                }

                Console.WriteLine("onmessage_end");

            }

        }

        catch (Exception ex)

        {

            Console.WriteLine($"onmessage_ex_{ex.Message}_{msgobjer}");

        }

    }
在html5版中有使用setTimeout来刷新用户的等待操作时间,我们可以通过一个折中方法实现
    private CancellationTokenSource timernnnxx { get; set; }

    //js setTimeout

    private async Task setTimeout(Func<Task> action, int time)

    {

        try

        {

            timernnnxx = new CancellationTokenSource();

            await Task.Delay(time, timernnnxx.Token);

            await action?.Invoke();

        }

        catch (Exception ex)

        {

            Console.WriteLine($"setTimeout_{ex.Message}");

        }

    }

    private async Task operationTimeoutTimer()

    {

        Console.WriteLine("operationTimeoutTimer_" + this.ddzdata.operationTimeoutSeconds);

        if (timernnnxx != null)

        {

            timernnnxx.Cancel(false);

            Console.WriteLine("operationTimeoutTimer 取消");

        }

        this.ddzdata.operationTimeoutSeconds--;

        StateHasChanged();

        if (this.ddzdata.operationTimeoutSeconds > )

        {

            await setTimeout(this.operationTimeoutTimer, );

        }

    }
其他组件相关如数据绑定,事件处理,组件参数等等推荐直接看文档。
浏览器下载的部分资源如下

Blazor Wasm
Blazor(WebAssembly) + .NETCore 实现斗地主的更多相关文章
- 使用WebApi和Asp.Net Core Identity 认证 Blazor WebAssembly(Blazor客户端应用)
原文:https://chrissainty.com/securing-your-blazor-apps-authentication-with-clientside-blazor-using-web ...
- 浏览器中的 .Net Core —— Blazor WebAssembly 初体验
前言 在两年多以前就听闻 Blazor 框架,是 .Net 之父的业余实验性项目,其目的是探索 .Net 与 WebAssembly 的兼容性和应用前景.现在这个项目已经正式成为 Asp.Net Co ...
- 通过 Serverless 加速 Blazor WebAssembly
Blazor ❤ Serverless 我正在开发 Ant Design 的 Blazor 版本,预览页面部署在 Github Pages 上,但是加载速度很不理想,往往需要 1 分钟多钟才完成. 项 ...
- Blazor WebAssembly 3.2.0 Preview 4 如期发布
ASP.NET团队如期3.16在官方博客发布了 Blazor WebAssembly 3.2.0 Preview 4:https://devblogs.microsoft.com/aspnet/bla ...
- Blazor WebAssembly 3.2.0 已在塔架就位 将发射新一代前端SPA框架
最美人间四月天,春光不负赶路人.在充满无限希望的明媚春天里,一路风雨兼程的.NET团队正奋力实现新的突破. 根据计划,新一代基于WebAssembly 技术研发的前端SPA框架Blazor 将于5月1 ...
- Blazor WebAssembly 3.2.0 正式起飞,blazor 适合你吗?
最近blazor更新很快,今天在官方博客上发布了Blazor WebAssembly 3.2.0 RC:https://devblogs.microsoft.com/aspnet/blazor-web ...
- ASP.NET Core Blazor 初探之 Blazor WebAssembly
最近Blazor热度很高,传说马上就要发布正式版了,做为微软脑残粉,赶紧也来凑个热闹,学习一下. Blazor Blazor是微软在ASP.NET Core框架下开发的一种全新的Web开发框架.Bla ...
- Blazor WebAssembly 3.2 正式发布
5月 20日,微软 发布了 Blazor WebAssembly 3.2(https://devblogs.microsoft.com/aspnet/blazor-webassembly-3-2-0- ...
- [Asp.Net Core] Blazor WebAssembly - 工程向 - 如何在欢迎页面里, 预先加载wasm所需的文件
前言, Blazor Assembly 需要最少 1.9M 的下载量. ( Blazor WebAssembly 船新项目下载量测试 , 仅供参考. ) 随着程序越来越复杂, 引用的东西越来越多, ...
随机推荐
- springboot+swagger接口文档企业实践(下)
目录 1.引言 2. swagger接口过滤 2.1 按包过滤(package) 2.2 按类注解过滤 2.3 按方法注解过滤 2.4 按分组过滤 2.4.1 定义注解ApiVersion 2.4.2 ...
- solr数据操作
本文介绍solr的基本数据操作,基于solr 8.2.solr支持多种数据格式,包括XML,JSON,CSV等,并提供多种脚本和工具来操作数据.本文讲解curl请求和JSON数据格式的处理方式. 本文 ...
- 使用three.js创建大小不随着场景变化的文字
使用three.js创建大小不随着场景变化的文字,需要以下两步: 1.将文字绘制到画布上. 2.创建着色器材质,把文字放到三维场景中. 优点: 1.跟用html实现文字相比,这些文字可以被模型遮挡,更 ...
- VS #region
1.C# 预处理指令 #region使您得以在使用Visual Studio代码编辑器的大纲显示功能时指定可展开或折叠的代码块. #region name 其中:name 希 ...
- iptables规则备份和恢复、firewalld的9个zone、以及firewalld关于zone和service的操作 使用介绍
第7周第5次课(5月11日) 课程内容: 10.19 iptables规则备份和恢复10.20 firewalld的9个zone10.21 firewalld关于zone的操作10.22 firewa ...
- 2019-2020-1 20199304《Linux内核原理与分析》第二周作业
计算机工作原理 存储程序计算机模型 冯·诺依曼体系结构 冯·诺依曼体系结构如图所示: 冯·诺依曼体系结构包含五大部分 运算器:在控制器的统一控制下,负责对数据进行加工.完成各种运算,如算术运算.逻辑运 ...
- shell脚本编程基础--文本比较
1.概述 允许测试Linux文件系统上文件的目录和状态. 2.详解 2.1 检查目录 -d测试会检查指定的目录是否存在于系统中.当我们打算将文件写入目录或是准备切换到该目录时,先进行测试是比较好的做法 ...
- 车标知识学习网页开发,与Flask通过base64展示二进制图片 #华为云·寻找黑马程序员#
万法同源 一直觉得可能自己不太适合搞技术,更适合在天桥底下支个摊子说书.技术的东西从来没人关注,扯东扯西的文章莫名的火.之前的一篇文章MarkDown添加图片的三种方式不管是在技术为主的CSDN还是娱 ...
- 深入比特币原理(三)——交易的输入(input)与输出(output)
本节内容非常重要,如果你不能很好的掌握本节内容,你无法真正理解比特币的运行原理,请务必要学习清楚. 比特币的交易模型为UTXO(unspend transaction output),即只记录未花费的 ...
- Asp.net Core 3.0 Identity 使用smtp账户确认和密码恢复
当新建一个core项目后,使用identity基架后,确认邮件出现了错误,并不能正常使用. 建立文档在这里 https://docs.microsoft.com/zh-cn/aspnet/core/s ...