SpringMVC 学习笔记(三)数据的校验
34. 尚硅谷_佟刚_SpringMVC_数据绑定流程分析.avi
例如:在jsp中输入一个String字符串类型,需要转换成Date类型的流程如下


convertservice对传入的数据进行转换
Validator对传入的数据进行格式校验
如果在转换和校验的过程中出现异常,将异常的结果封装到BingdinResult对象中
springMVC数据绑定流程
- springMVC框架将ServletRequest对象及方法的如参实例传递给WebDataBinderFactory石丽以创建DataBinder对象。
- DataBinder调用装配在springMVC上下文的ConversionService组件进行数据类型转换、数据格式化(类型转换和格式化是一起的一会来看源码),将Servlet中的请求信息填充到如参的对象中。
- 调用Validator组件对已经完成绑定了的请求消息的入参对象进行数据合法性校验,把最终生成数据绑定结果BindingData对象
- 如果在数据类型转换、格式化和校验的过程中出现错误的话,会把处理的结果放到BindingResult对象中,将它们赋给处理方法的响应入参。
35. 尚硅谷_佟刚_SpringMVC_自定义类型转换器.avi
在SpringMvc中会将来自web页面的请求和响应数据与controller中对应的处理方法的入参进行绑定,即数据绑定。流程如下:
-1.SpringMvc主框架将ServletRequest对象及目标方法的入参实例传递给WebDataBinderFactory实例,以创建DataBinder实例对象
-2.DataBinder对象调用装配在SpringMvc上下文中的ConversionService组件进行数据类型转换,数据格式化工作,将Servlet中的请求信息填充到入参对象中。
-3.调用Validator组件对已经绑定了请求消息的入参对象进行数据合法性校验,并最终生成数据绑定结果BindingData对象
-4.SpringMvc抽取BindingResult中的入参对象和校验错误对象,将它们赋给处理方法的相应入参。
总结起来:大致流程是 绑定(bindingResult)--》数据转换(conversionService)--》校验(validators)
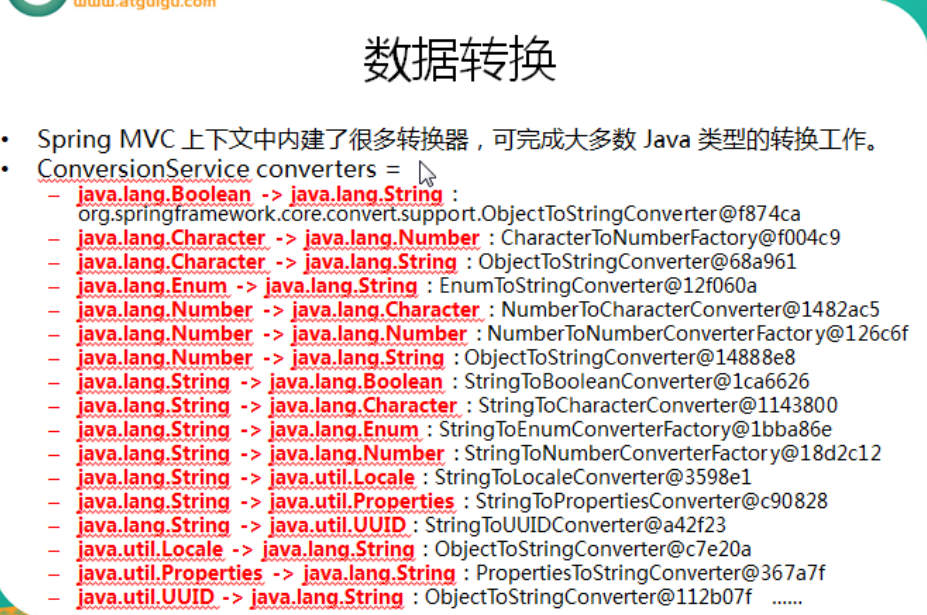
数据转换
SpringMvc上下文中内建了很多转换器,可以完成大多数Java类型转换工作。但是如果就要转换成我们自定义的类型时,那么我们就要自定义类型转换器,并将其加入到conversionService中去,conversionService中包含了很多SpringMvc内建的转换器。
ConversionService是SpringMvc类型转换体系的核心接口,可以利用ConversionServiceFactoryBean在Spring的IOC容器中定义一个ConversionService,Spring将自动识别出IOC容器中的ConversionService,并在bean属性配置及SpringMvc处理方法入参绑定等场合使用它进行数据转换。
springmvc自定义的类型转换器
首先定义一个转换器
package com.ibigsea.springmvc.handler;

import org.springframework.core.convert.converter.Converter;

import com.ibigsea.springmvc.model.Department;

import com.ibigsea.springmvc.model.Employee;

public class EmployeeConverts implements Converter<String, Employee>{

     /*

        * source就是前台web页面传递过来的字符串

        * 如:gg-gg@qq.com-0-105   姓名-邮件-性别-部门ID

        * */

    public Employee convert(String source) {

        // TODO Auto-generated method stub

        if(source!=null){

            String[] vals=source.split("-");

            //获得雇员的姓名

            String name=vals[0];

            //获得雇员的邮件

            String email=vals[1];

            //获得雇员的性别

            Integer sex=Integer.parseInt(vals[2]);

            //获得雇员的部门

            Department department=new Department();

            department.setId(Integer.parseInt(vals[3]));

            Employee employee= new Employee(null, name, email,sex , department);

            return employee;

        }

        //如果字符串为空,就不生成雇员对象

        return null;

    }

}
其次:修改handle文件
package com.ibigsea.springmvc.handler;

import java.util.Collection;

import java.util.Map;

import org.springframework.beans.factory.annotation.Autowired;

import org.springframework.stereotype.Controller;

import org.springframework.web.bind.annotation.ModelAttribute;

import org.springframework.web.bind.annotation.PathVariable;

import org.springframework.web.bind.annotation.RequestMapping;

import org.springframework.web.bind.annotation.RequestMethod;

import org.springframework.web.bind.annotation.RequestParam;

import com.ibigsea.springmvc.dao.DepartmentDao;

import com.ibigsea.springmvc.dao.EmployeeDao;

import com.ibigsea.springmvc.model.Department;

import com.ibigsea.springmvc.model.Employee;

@Controller

public class EmployeeHandler {

    @Autowired

    private EmployeeDao employeeDao;

    @Autowired

    private DepartmentDao departmentDao;

    /***

     * 自定义数据类型转换器,将特定格式的字符串转换成员工对象保存到数据库中

     * @RequestParam("source")输入参数的名字是source格式的文本对象,转换之后成为了emloyee对象

     * */

    @RequestMapping(value="/testConvertService")

    public String testConvertService(@RequestParam("source") Employee employee){

        employeeDao.save(employee);

        return "redirect:/emps";

    }

    /**

     * 点击修改联系人,跳转到修改联系人页面,显示需要修改的联系人信息,其中联系人的名字不能被修改

     * */

    @RequestMapping(value="/edit/{id}",method=RequestMethod.GET)

    public String input(@PathVariable("id") Integer id,Map<String,Object> map){

    Collection<Department> departments = departmentDao.getAll();

    map.put("departments", departments);

    //通过id查找需要修改的联系人

    Employee employee = employeeDao.getEmpById(id);

    map.put("employ", employee);

    return"input";

    }

    /**

     * 这里需要在执行修改联系人在保存的时候先查询出来,否则自己保存

     *  m is :Employee [id=1002, name=null, email=BB@ibigsea.com, sex=0, department=Department [id=101, name=null]]

     *  会存在联系人名字为空的情况,修改修改联系人页面没有传递联系人姓名的属性值

     * */

    @ModelAttribute

    public void getEmployee(@RequestParam(value="id",required = false) Integer id ,Map<String,Object> map){

        if(id != null){

            Employee employee = employeeDao.getEmpById(id);

            //map.put("employ", employee)名字和@ModelAttribute("employ")中的一一对应

            map.put("employ", employee);

        }

    }

    /***

     * 保存修改联系人页面,修改的联系人,对应的action是addEmp

     * <form:form action="addEmp" method="post" modelAttribute="employ" >

     * 对应的访问方式是对应的访问方式是PUT方式

     *  <input type="hidden" name="_method" value="PUT"/>

     *

     *  注意点2:

     *  这里在修改修改联系人的时候,需要被修改联系人的name属性不能被修改

     *  m is :Employee [id=1002, name=null, email=BB@ibigsea.com, sex=0, department=Department [id=101, name=null]]

     * */

    @RequestMapping(value="/addEmp", method=RequestMethod.PUT)

    public String update(@ModelAttribute("employ")Employee em){

        System.out.println("em is :"+em.toString());

        employeeDao.save(em);

        return "redirect:/emps";

    }

    /*

     * 执行添加联系人操作,重定向到显示所有联系人的页面

     * */

    @RequestMapping(value="/delete/{id}", method=RequestMethod.DELETE)

    public String deletEmp(@PathVariable("id") Integer id ){

        employeeDao.delEmpById(id);

        //employeeDao.save(employ);

        return "redirect:/emps";

    }

    /*

     * 执行添加联系人操作,重定向到显示所有联系人的页面

     * */

    @RequestMapping(value="/addEmp", method=RequestMethod.POST)

    public String addEmp(Employee em){

        employeeDao.save(em);

        return "redirect:/emps";

    }

    /**

     * 点击添加联系人,跳转到添加联系人页面

     * */

    @RequestMapping(value="/emp",method=RequestMethod.GET)

    public String input(Map<String,Object> map){

    Collection<Department> departments = departmentDao.getAll();

    map.put("departments", departments);

    Employee employee = new Employee();

    map.put("employ", employee);

    return"input";

    }

    /*

     * 查询所有的员工信息

     * */

    @RequestMapping(value="/emps",method=RequestMethod.GET)

    public String listAllEmployees(Map<String,Object> map){

        Collection<Employee> allEmployees = employeeDao.getAll();

        map.put("employees", allEmployees);

        return"list";

    }

}
在spring-mvc文件中配置自定义转换器
<?xml version="1.0" encoding="UTF-8"?>

<beans xmlns="http://www.springframework.org/schema/beans"

    xmlns:xsi="http://www.w3.org/2001/XMLSchema-instance"

    xmlns:context="http://www.springframework.org/schema/context"

    xmlns:mvc="http://www.springframework.org/schema/mvc"

    xsi:schemaLocation="http://www.springframework.org/schema/mvc http://www.springframework.org/schema/mvc/spring-mvc-4.1.xsd

        http://www.springframework.org/schema/beans http://www.springframework.org/schema/beans/spring-beans.xsd

        http://www.springframework.org/schema/context http://www.springframework.org/schema/context/spring-context-4.1.xsd">

    <!-- 配置自动扫描包  扫描com.ibigsea.springmvc 包下的类,后期会使用spring进行管理 -->

    <context:component-scan base-package="com.ibigsea.springmvc"/>

<!-- 配置视图解析器 如返回helloworld

                         为 [/WEB-INF/pages/helloworld.jsp] -->

    <bean class="org.springframework.web.servlet.view.InternalResourceViewResolver">

     <!-- 前缀 -->

        <property name="prefix" value="/WEB-INF/pages/"/>

         <!-- 后缀 -->

        <property name="suffix" value=".jsp"/>

    </bean>

    <!--将自定义的转换器加入到框架中-->

       <bean id="conversionService" class="org.springframework.context.support.ConversionServiceFactoryBean">

              <property name="converters">

                     <set>

                            <bean class="com.ibigsea.springmvc.handler.EmployeeConverts"/>

                     </set>

              </property>

       </bean>

    <!-- 配置运行可以访问静态资源文化 -->

    <mvc:default-servlet-handler/>

    <mvc:annotation-driven conversion-service="conversionService"></mvc:annotation-driven>

</beans>
上面的配置还可以写成下面的形式
<!--将自定义的转换器加入到框架中-->

       <bean id="conversionService" class="org.springframework.format.support.FormattingConversionServiceFactoryBean">

              <property name="converters">

                     <set>

                            <bean class="com.ibigsea.springmvc.handler.EmployeeConverts"/>

                     </set>

              </property>

       </bean>
使用该配置既可以支持自定义的类型转换器,也支持springmvc自带的类型转换器@NumberFormat annotation @DateTimeFormat
访问自定义类型转换器
<%@ page language="java" import="java.util.*" pageEncoding="UTF-8"%>

<%

String path = request.getContextPath();

String basePath = request.getScheme()+"://"+request.getServerName()+":"+request.getServerPort()+path+"/";

%>

<!DOCTYPE HTML PUBLIC "-//W3C//DTD HTML 4.01 Transitional//EN">

<html>

  <head>

    <base href="<%=basePath%>">

    <title>My JSP 'index.jsp' starting page</title>

    <meta http-equiv="pragma" content="no-cache">

    <meta http-equiv="cache-control" content="no-cache">

    <meta http-equiv="expires" content="0">

    <meta http-equiv="keywords" content="keyword1,keyword2,keyword3">

    <meta http-equiv="description" content="This is my page">

    <!--

    <link rel="stylesheet" type="text/css" href="styles.css">

    -->

  </head>

  <body>

    <a href="emps">查询所有员工的信息</a> <br>

    <!-- 输入这样的格式的一个文本框,输入自定义格式转换成employeeduix -->

    <!-- gg-gg@qq.com-0-105   姓名-邮件-性别-部门ID -->

    <form action="${pageContext.request.contextPath}/testConvertService">

     <input type="text" name="source" />

     <input type="submit" name="submit" />

    </form>

  </body>

</html>
整个项目的代码下载地址为:
https://pan.baidu.com/s/1xx-BeEh3Sxlakk3ux-6STw
Spring支持三种类型的转换器接口,实现任意一个转换器接口都可以作为自定义转换器注册ConversionServiceFactoryBean中:
-Converter<S,T>:将S类型的对象转为T类型对象
-ConverterFactory:将相同系列多个"同质"Converter封装在仪器,如果希望将一种类型的对象转换为一种类型及其子类的对象(例如将String转化为Number及Number的子类)
-GenericConverter:会根据源类对象与目标类对象所在的宿主类中的上下文信息进行类型转换。<mvc:annotation-driven conversion-service="conversionService"/>会将自定义的ConversionService注册到SpringMvc的上下文中去。
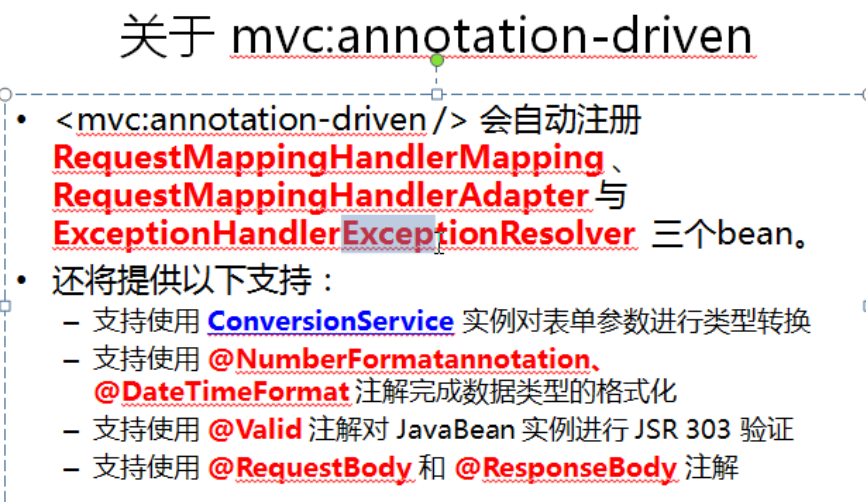
关于mvc:annotation-driven
<mvc:annotation-driven/>会自动注册ReuqestMappingHandlerMapping、ReuqestMappingHandlerHandler、ExceptionHanderExceptionResolver三个bean。还提供以下支持:
-支持使用ConversionService实例对表单参数进行类型转换
-支持使用@NumberFormat annotation @DateTimeFormat 注解完成数据类型的格式化
-支持使用@Valid注解对JavaBean实例进行JSR303验证
-支持使用@RequestBody 和@ResponseBody注解
37. 尚硅谷_佟刚_SpringMVC_InitBinder注解.avi
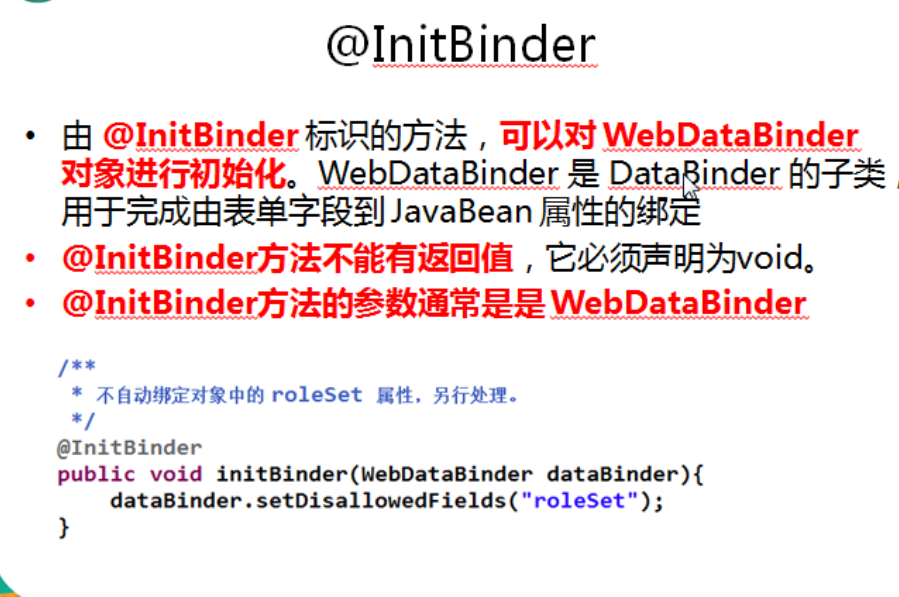
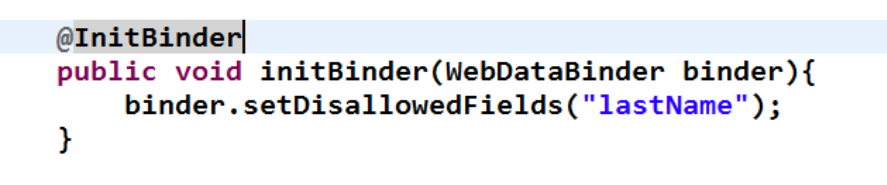
我们表单添加联系人的时候,不让联系人的属性自定绑定到对应的员工对象中,可以达到这样一个效果
或者:在使用SpringMVC的时候,经常会遇到表单中的日期字符串和JavaBean的Date类型的转换,而SpringMVC默认不支持这个格式的转换,所以需要手动配置,自定义数据的绑定才能解决这个问题。
在需要日期转换的Controller中使用SpringMVC的注解@initbinder和Spring自带的WebDateBinder类来操作。
39. 尚硅谷_佟刚_SpringMVC_JSR303数据校验.avi
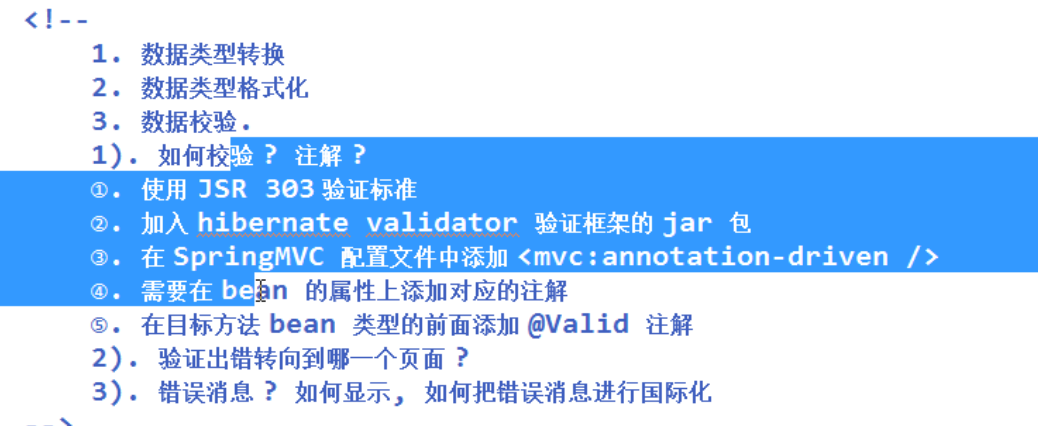
下载所需要的java包为

我们在添加员工页面对姓名和邮件地址进行校验,添加上对应的注解
接下来修改员工类
package com.ibigsea.springmvc.model;

import javax.validation.constraints.NotNull;

import org.hibernate.validator.constraints.Email;

public class Employee {

    private Integer id;

    @NotNull

    private String name;

    @Email

    private String email;

    private int sex;

    private Department department;

    public Employee(Integer id, String name, String email, int sex,

            Department department) {

        super();

        this.id = id;

        this.name = name;

        this.email = email;

        this.sex = sex;

        this.department = department;

    }

    public Employee() {

        super();

    }

    public Integer getId() {

        return id;

    }

    public void setId(Integer id) {

        this.id = id;

    }

    public String getName() {

        return name;

    }

    public void setName(String name) {

        this.name = name;

    }

    public String getEmail() {

        return email;

    }

    public void setEmail(String email) {

        this.email = email;

    }

    public int getSex() {

        return sex;

    }

    public void setSex(int sex) {

        this.sex = sex;

    }

    public Department getDepartment() {

        return department;

    }

    public void setDepartment(Department department) {

        this.department = department;

    }

    @Override

    public String toString() {

        return "Employee [id=" + id + ", name=" + name + ", email=" + email

                + ", sex=" + sex + ", department=" + department + "]";

    }

}
接下来修改handler处理器文件
package com.ibigsea.springmvc.handler;

import java.util.Collection;

import java.util.List;

import java.util.Map;

import javax.validation.Valid;

import org.springframework.beans.factory.annotation.Autowired;

import org.springframework.stereotype.Controller;

import org.springframework.validation.BindingResult;

import org.springframework.validation.ObjectError;

import org.springframework.web.bind.annotation.ModelAttribute;

import org.springframework.web.bind.annotation.PathVariable;

import org.springframework.web.bind.annotation.RequestMapping;

import org.springframework.web.bind.annotation.RequestMethod;

import org.springframework.web.bind.annotation.RequestParam;

import com.ibigsea.springmvc.dao.DepartmentDao;

import com.ibigsea.springmvc.dao.EmployeeDao;

import com.ibigsea.springmvc.model.Department;

import com.ibigsea.springmvc.model.Employee;

@Controller

public class EmployeeHandler {

    @Autowired

    private EmployeeDao employeeDao;

    @Autowired

    private DepartmentDao departmentDao;

    /***

     * 自定义数据类型转换器,将特定格式的字符串转换成员工对象保存到数据库中

     * @RequestParam("source")输入参数的名字是source格式的文本对象,转换之后成为了emloyee对象

     * */

    @RequestMapping(value="/testConvertService")

    public String testConvertService(@RequestParam("source") Employee employee){

        employeeDao.save(employee);

        return "redirect:/emps";

    }

    /**

     * 点击修改联系人,跳转到修改联系人页面,显示需要修改的联系人信息,其中联系人的名字不能被修改

     * */

    @RequestMapping(value="/edit/{id}",method=RequestMethod.GET)

    public String input(@PathVariable("id") Integer id,Map<String,Object> map){

    Collection<Department> departments = departmentDao.getAll();

    map.put("departments", departments);

    //通过id查找需要修改的联系人

    Employee employee = employeeDao.getEmpById(id);

    map.put("employ", employee);

    return"input";

    }

    /**

     * 这里需要在执行修改联系人在保存的时候先查询出来,否则自己保存

     *  m is :Employee [id=1002, name=null, email=BB@ibigsea.com, sex=0, department=Department [id=101, name=null]]

     *  会存在联系人名字为空的情况,修改修改联系人页面没有传递联系人姓名的属性值

     * */

    @ModelAttribute

    public void getEmployee(@RequestParam(value="id",required = false) Integer id ,Map<String,Object> map){

        if(id != null){

            Employee employee = employeeDao.getEmpById(id);

            //map.put("employ", employee)名字和@ModelAttribute("employ")中的一一对应

            map.put("employ", employee);

        }

    }

    /***

     * 保存修改联系人页面,修改的联系人,对应的action是addEmp

     * <form:form action="addEmp" method="post" modelAttribute="employ" >

     * 对应的访问方式是对应的访问方式是PUT方式

     *  <input type="hidden" name="_method" value="PUT"/>

     *

     *  注意点2:

     *  这里在修改修改联系人的时候,需要被修改联系人的name属性不能被修改

     *  m is :Employee [id=1002, name=null, email=BB@ibigsea.com, sex=0, department=Department [id=101, name=null]]

     * */

    @RequestMapping(value="/addEmp", method=RequestMethod.PUT)

    public String update(@ModelAttribute("employ")Employee em){

        System.out.println("em is :"+em.toString());

        employeeDao.save(em);

        return "redirect:/emps";

    }

    /*

     * 执行添加联系人操作,重定向到显示所有联系人的页面

     * */

    @RequestMapping(value="/delete/{id}", method=RequestMethod.DELETE)

    public String deletEmp(@PathVariable("id") Integer id ){

        employeeDao.delEmpById(id);

        //employeeDao.save(employ);

        return "redirect:/emps";

    }

    /*

     * 执行添加联系人操作,重定向到显示所有联系人的页面

     * */

    @RequestMapping(value="/addEmp", method=RequestMethod.POST)

    public String addEmp(@Valid Employee em,BindingResult bindingResult){

        //参数绑定和转换错误的信息会封装到bindingResult对象中

        if(bindingResult != null){

            List<ObjectError> allErrors = bindingResult.getAllErrors();

            for(int i= 0; i< bindingResult.getErrorCount();i++){

                System.out.println("error is:"+allErrors.get(i).toString());

            }

        }

        employeeDao.save(em);

        return "redirect:/emps";

    }

    /**

     * 点击添加联系人,跳转到添加联系人页面

     * */

    @RequestMapping(value="/emp",method=RequestMethod.GET)

    public String input(Map<String,Object> map){

    Collection<Department> departments = departmentDao.getAll();

    map.put("departments", departments);

    Employee employee = new Employee();

    map.put("employ", employee);

    return"input";

    }

    /*

     * 查询所有的员工信息

     * */

    @RequestMapping(value="/emps",method=RequestMethod.GET)

    public String listAllEmployees(Map<String,Object> map){

        Collection<Employee> allEmployees = employeeDao.getAll();

        map.put("employees", allEmployees);

        return"list";

    }

}
对需要检验的类使用@Valid进行修饰,并且如果参数转化错误,错误的信息封装到参数bingResult对象中,这里只是将错误信息打印出来
如果页面上出入的不是一个合法的邮箱地址,打印信息为
error is:Field error in object 'employee' on field 'email': rejected value [w]; codes [Email.employee.email,Email.email,Email.java.lang.String,Email]; arguments [org.springframework.context.support.DefaultMessageSourceResolvable: codes [employee.email,email]; arguments []; default message [email],[Ljavax.validation.constraints.Pattern$Flag;@617e4b3f,.*]; default message [不是一个合法的电子邮件地址]
代码下载地址为:
https://pan.baidu.com/s/1wTNmjmQWvgExkL4qdPvkxA
需要强调的是:
BindingResult参数,必须紧跟在@Valid参数之后。
备注:这里一个@Valid的参数后必须紧挨着一个BindingResult 参数,否则spring会在校验不通过时直接抛出异常
40. 尚硅谷_佟刚_SpringMVC_错误消息的显示及国际化.avi
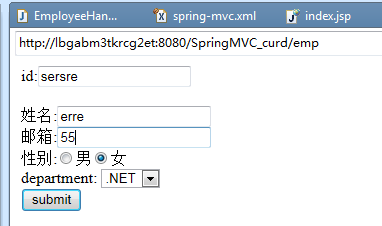
上面当参数输入错误的时候,我们只是将错误信息打印出来,现在我们要让错误信息在jsp页面上显示出来如何实现了
我们来看handle的处理
/*

     * 执行添加联系人操作,重定向到显示所有联系人的页面

     * */

    @RequestMapping(value="/addEmp", method=RequestMethod.POST)

    public String addEmp(@Valid Employee em,BindingResult bindingResult

            ,Map<String,Object>map){

        //参数绑定和转换错误的信息会封装到bindingResult对象中

        if(bindingResult != null){

            List<ObjectError> allErrors = bindingResult.getAllErrors();

            for(int i= 0; i< bindingResult.getErrorCount();i++){

                System.out.println("error is:"+allErrors.get(i).toString());

            }

            //重新返回到添加联系人页面将错误信息显示出来,需要将部门信息传递过去

            Collection<Department> departments = departmentDao.getAll();

            map.put("departments", departments);

            map.put("employ", em);

            return "input";

        }

        employeeDao.save(em);

        return "redirect:/emps";

    }
在input.jsp中如果显示错误信息可以使用下面的两种方式
<%@page import="java.util.Map"%>

<%@page import="java.util.HashMap"%>

<%@ page language="java" contentType="text/html; charset=UTF-8"

    pageEncoding="UTF-8"%>

 <%@taglib uri="http://www.springframework.org/tags/form" prefix="form" %>

 <%@taglib prefix="c" uri="http://java.sun.com/jsp/jstl/core"%>

<!DOCTYPE html PUBLIC "-//W3C//DTD HTML 4.01 Transitional//EN" "http://www.w3.org/TR/html4/loose.dtd">

<html>

<head>

<meta http-equiv="Content-Type" content="text/html; charset=UTF-8">

<title>添加员工信息</title>

</head>

<body>

  <form:errors path="email" cssClass="errorMsg"></form:errors>

<!-- 这里是使用springmvc的form标签

    private Integer id;

    private String name;

    private String email;

    private int sex;

    private Department department;

 -->

<form:form action="${pageContext.request.contextPath}/addEmp" method="post" modelAttribute="employ" >

 <!-- 判断id的值是否存在,如果存在就是修改联系人,不显示id标签 -->

  <!-- 判断id的值是否存在,如果存在就是修改联系人,联系人的name属性不能被修改 -->

 <c:if test="${ employ.id == null}">

  id:<form:input path="id"/><br>

   <br>

        姓名:<form:input path="name"/>

 <br>

 </c:if>

<!-- 不等于null,需要将联系人id的值重新传递到handle进行处理

对象中存在id属性,可以直接传递,并且需要将表单的post请求转化成put请求。我们需要传递一个_method属性,对应的value值是PUT传递到handle中-->

 <c:if test="${ employ.id != null}">

  <form:hidden path="id"/>

  <input type="hidden" name="_method" value="PUT"/>

 </c:if>

   邮箱:<form:input path="email"/>

   <!-- 使用 <form:errors path="email"></form:errors>显示邮箱对应的错误信息-->

   <span style="font-family:SimSun;font-size:24px;"><form:errors path="email"></form:errors></span>

 <br>

 <%

   Map<String,String> genders = new HashMap();

   genders.put("1", "男");

   genders.put("0", "女");

   request.setAttribute("sexMap",genders);

 %>

    性别:<form:radiobuttons path="sex" items="${sexMap }"/>

<br>

  department: <form:select path="department.id" itemLabel="name"

       items="${departments}" itemValue="id"></form:select>

  <br>

     <input type="submit" value="submit"/>

</form:form>

</body>

</html>
如果显示全部的错误信息
<form:errors path="*"></form:errors>
如果要显示自定义的错误信息,可以采用下面的方式
二.错误消息的国际化
1.配置国际化资源文件i18n.properties
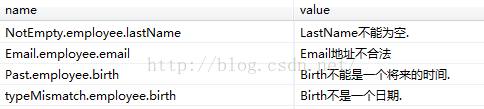
第一个参数是jsr303对于的标签,对二个是@Valide修饰对象的值,如果对象没有使用@modelAttrute修饰,就是类名第一个字母小写,第三个是对象对应的属性
3..在spring-mvc.xml中配置ResourceBundleMessageSource 对应国际化的资源文件
       <!-- 配置国际资源化文件 -->

<bean name="messageSource" class="org.springframework.context.support.ResourceBundleMessageSource">

        <property name="basename" value="i18n"></property>

</bean>
SpringMVC 学习笔记(三)数据的校验的更多相关文章
- SpringMVC学习笔记(三)
一.SpringMVC使用注解完成 1.首先,导入SpringMVC需要的jar包. 2.添加Web.xml配置文件中关于SpringMVC的配置 <!--configure the setti ...
- SpringMVC学习笔记:数据的接收与返回
SpringMVC的定义:Spring Web MVC is the original web framework built on the Servlet API and included in t ...
- springMVC学习笔记三
十三.springMVC和spring集成 配置文件,spring的配置路径applicationContext.xml 在默认的web-inf下面 strut的配置文件默认在src下面 用了什么框架 ...
- SpringMVC学习笔记三:拦截器
一:拦截器工作原理 类比Struts2的拦截器,通过拦截器可以实现在调用controller的方法前.后进行一些操作. 二:拦截器实现 1:实现拦截器类 实现HandlerInterceptor 接口 ...
- SpringMVC学习笔记三:Controller的返回值
springMVC的返回值有ModelAndView,String,void,Object类型 项目目录树: 该项目是在前面项目的基础上修改的,这里的pom.xml文件需要加入使用到的包,应为@Res ...
- SpringMVC学习笔记三 整合jdbc和事务
spring整合JDBC spring提供了很多模板整合Dao技术,用于简化编程. 引入相关jar包 spring中提供了一个可以操作数据库的对象,JDBCTemplate(JDBC模板对象).对象封 ...
- springmvc学习笔记三:整合JDBC,简单案例==数据库事务配置(切面)
package cn.itcast.bean; import org.springframework.jdbc.core.PreparedStatementSetter; public class U ...
- springmvc学习笔记(18)-json数据交互
springmvc学习笔记(18)-json数据交互 标签: springmvc springmvc学习笔记18-json数据交互 springmvc进行json交互 环境准备 加入json转换的依赖 ...
- SpringMVC学习笔记之二(SpringMVC高级参数绑定)
一.高级参数绑定 1.1 绑定数组 需求:在商品列表页面选中多个商品,然后删除. 需求分析:功能要求商品列表页面中的每个商品前有一个checkbok,选中多个商品后点击删除按钮把商品id传递给Cont ...
随机推荐
- Chisel3 - Scala语言专家
https://mp.weixin.qq.com/s/j8mt_qvwliKIKtlN6JcyqQ 介绍Intellij IDEA安装Scala插件后,如何在阅读和编码两方面助益开发者. ...
- 用js数组实现最原始的图片轮播实现
上班以来看到了,写了很多的轮播图效果,实现方法大致有 1.将图片局对定位,利用z-index和opacity实现图片渐现 2.用css3 的transtion:Xx xx left/right,实现左 ...
- 程序员的脑袋系列---利用ffmpeg命令提取音频
今日各大播放器的版权控制越来越严格.导致很多歌曲无法听,但是MV却可以听.这样很蛋疼有木有? 然而,我们可以利用ffmpeg工具提取MV的音频,比如做成MP3格式,这样就可以听了.--哈哈(邪恶地笑) ...
- Java实现 LeetCode 218 天际线问题
218. 天际线问题 城市的天际线是从远处观看该城市中所有建筑物形成的轮廓的外部轮廓.现在,假设您获得了城市风光照片(图A)上显示的所有建筑物的位置和高度,请编写一个程序以输出由这些建筑物形成的天际线 ...
- Java实现 洛谷 P1426 小鱼会有危险吗
import java.util.LinkedList; import java.util.Scanner; public class Main { private static Scanner ci ...
- Java实现第八届蓝桥杯承压计算
承压计算 题目描述 X星球的高科技实验室中整齐地堆放着某批珍贵金属原料. 每块金属原料的外形.尺寸完全一致,但重量不同. 金属材料被严格地堆放成金字塔形. 7 5 8 7 8 8 9 2 7 2 8 ...
- Linux 源码包服务的管理
源码包安装服务的启动 使用绝对路径,调用启动脚本来启动.不同源码包的启动脚本不同,可以查看源码包的安装说明,查看启动脚本的方法 /usr/local/apache2/bin/apachectl sta ...
- System.getProperty("user.dir")获取的到底是什么路径?
一直用System.getProperty("user.dir")来获取文件目录,我在执行单个方法调试和执行测试脚本的时候碰到一个问题, 我写了一个类ElementInitiali ...
- 11.经典O(n²)比较型排序算法
关注公号「码哥字节」修炼技术内功心法,完整代码可跳转 GitHub:https://github.com/UniqueDong/algorithms.git 摘要:排序算法提多了,很多甚至连名字你都没 ...
- 什么!你想要封装好的ajax
ajax作为前端开发领域一个必不可少的内容,也是灵魂所在,今天就ajax的封装给大家做一个分析, 如果没有猜错的话现在基本上用原生去写ajax的意见不多了,这是肯定的 ,为什么这么说,jq的ajax大 ...