Silverlight之OOB模式下的一些事
本文简介:
1.为什么要使用OOB?使用OOB的作用?
2.如何实现OOB模式
3.对OOB进行一些设置;
4.检测OOB的安装状态;
5.更新应用程序;
6.WebBrowser控件;
7.桌面通知窗口;
8.记录窗体的状态;
9.提升信任;
10.子窗体(非ChildWindow,同时可响应的多个窗体);
11.Com组件访问;
12.在浏览器中提升信任。
1.理解Oob
实现OOB之后将有如下的作用:
(1)获得一个桌面的快捷方式;
(2)可以实现离线访问(当然要结合本地存储);
(3)获得更高的信任权限。
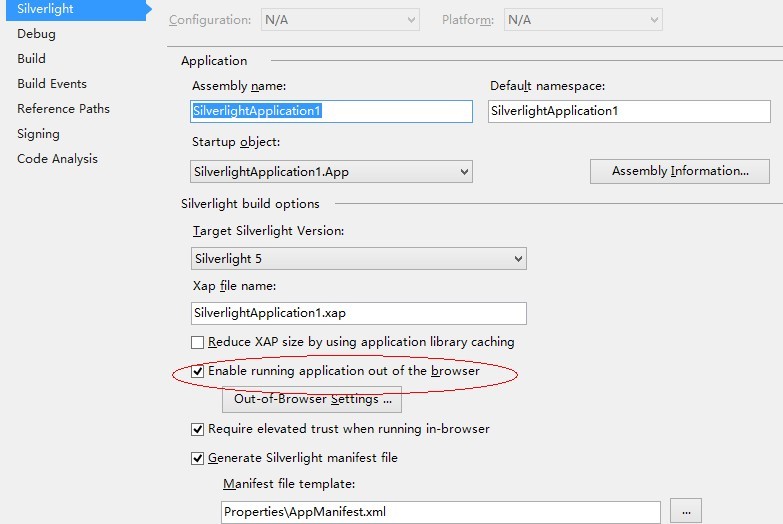
2.实现一个最简单的OOB应用程序
(1)右键Silverlight应用程序选择Silverlight选项卡;
(2)选中"Enable running application out of the browser"复选框;
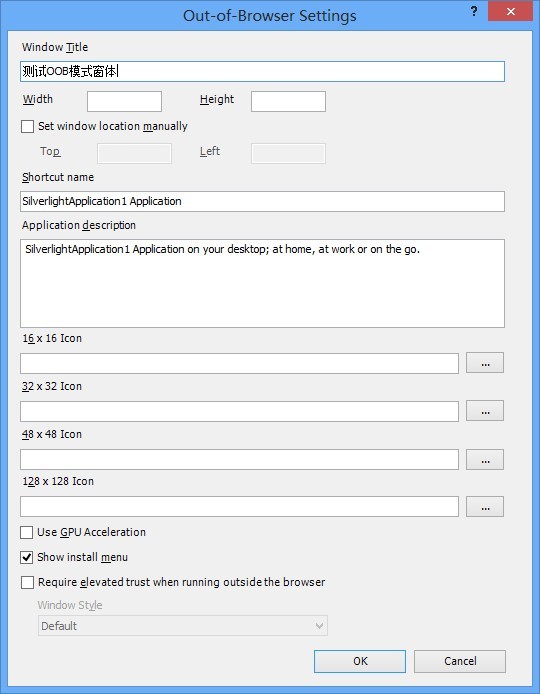
(3)点击"Out-of-Browser Settings"(OOB设置)按钮,如下:
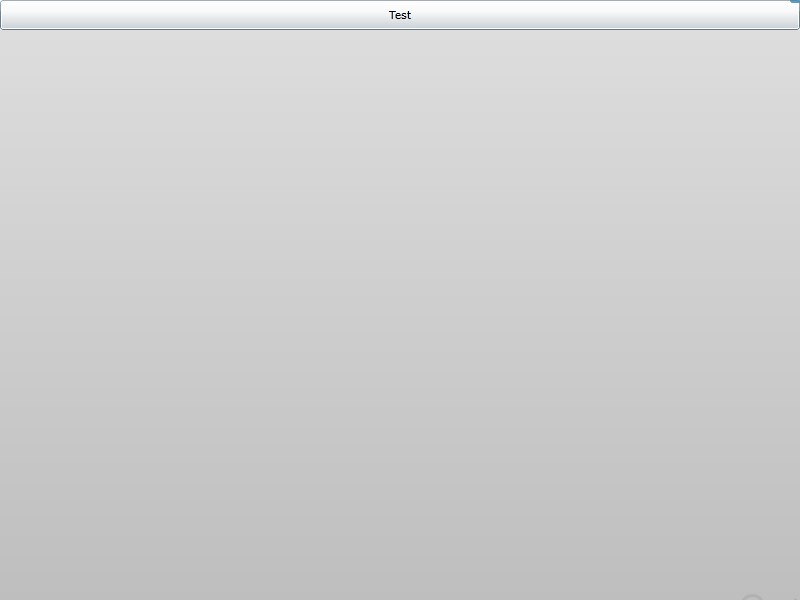
可以在Title中输入自己想要的标题即可。
这样一个最简单的OOB程序就创建好了,赶紧运行看看吧。
3.自定义应用程序的图标
在上图中的Icon填写处可以选择一个自定义的图片来作为安装后的快捷方式的图标。
4.检测OOB的安装状态
一般我们通过Application.Current.IsRunningOutOfBrowser来判断当前的程序是否是以OOB模式运行的,当然也可以判断当前OOB安装的状态; Application.Current.InstallState表示当前OOB安装的状态,一共四个值:Not Installed(未安装),Installing(安装中),InstallFailed(安装失败),Installed(已安装)。
在APP中添加如下代码,以检测安装状态的变化:
this.InstallStateChanged += App_InstallStateChanged;
事件代码如下:
            InstallPage page = this.RootVisual as InstallPage;

            if (page != null)

            {

                // Tell the root visual to show a message by calling a method

                // in InstallPage that updates the display.

                switch (this.InstallState)

                {

                    case InstallState.InstallFailed:

                        page.DisplayFailed();

                        break;

                    case InstallState.Installed:

                        page.DisplayInstalled();

                        break;

                }

            }
InstallPage为自定义安装界面,可自行实现:
InstallPage.Xaml:
    <Border Margin="10" Padding="10" Background="LightSteelBlue"

            BorderBrush="SteelBlue" BorderThickness="1" CornerRadius="3"

            HorizontalAlignment="Left" VerticalAlignment="Top" MaxWidth="400">

    <Grid x:Name="LayoutRoot">

        <Grid.RowDefinitions>

            <RowDefinition Height="Auto"></RowDefinition>

            <RowDefinition Height="Auto"></RowDefinition>

        </Grid.RowDefinitions>

        <TextBlock Margin="5" x:Name="lblMessage" TextWrapping="Wrap">You need to install this application to run it.</TextBlock>

        <Button x:Name="cmdInstall" Grid.Row="1" Content="Install" HorizontalAlignment="Center" Padding="10" Margin="15" Click="cmdInstall_Click"></Button>

        </Grid>

    </Border>
InstallPage.Xaml.cs:
 public InstallPage()

        {

            InitializeComponent();

            if (Application.Current.InstallState == InstallState.Installed)

            {

                lblMessage.Text = "This application is already installed. " +

                    "You cannot use the browser to run it. " +

                    "Instead, use the shortcut on your computer.";

                cmdInstall.IsEnabled = false;

            }

        }

        private void cmdInstall_Click(object sender, RoutedEventArgs e)

        {

            // Make sure that the application is not already installed.

            if (Application.Current.InstallState != InstallState.Installed)

            {

                // Attempt to install it.

                bool installAccepted = Application.Current.Install();

                if (!installAccepted)

                {

                    lblMessage.Text =

                      "You declined the install. Click Install to try again.";

                }

                else

                {

                    cmdInstall.IsEnabled = false;

                    lblMessage.Text = "The application is installing... ";

                }

            }

        }

        public void DisplayInstalled()

        {

            lblMessage.Text =

              "The application installed and launched. You can close this page.";

        }

        public void DisplayFailed()

        {

            lblMessage.Text = "The application failed to install.";

            cmdInstall.IsEnabled = true;

        }
5.更新OOB应用程序
更新OOB应用程序
        private void Application_Startup(object sender, StartupEventArgs e)

        {

            if (Application.Current.IsRunningOutOfBrowser)

            {

                // Check for updates.

                Application.Current.CheckAndDownloadUpdateCompleted +=

                Application_CheckAndDownloadUpdateCompleted;

                Application.Current.CheckAndDownloadUpdateAsync();

                this.RootVisual = new MainPage();

            }

            else

            {

                this.RootVisual = new InstallPage();

            }

        }
上述代码中添加了CheckAndDownloadUpdateCompleted 回调函数,即检查和下载应用程序之后执行。
        void Current_CheckAndDownloadUpdateCompleted(object sender, CheckAndDownloadUpdateCompletedEventArgs e)

        {

            if (e.UpdateAvailable)

            {

                MessageBox.Show("发现了更新,请重新登陆!");

            }

            else if (e.Error != null)

            {

                if (e.Error is PlatformNotSupportedException)

                {

                    MessageBox.Show("哦,我去,出现了平台错误,需要一个新版本的Silverlight,请访问 "  +

                    " http://silverlight.net 进行更新.");

                }

                else

                {

                    MessageBox.Show("发现了应用程序更新,但是更新出现了错误。请删除当前的版本,然后重新安装新版本。 ");

                }

            }

        }
6.WebBrowser控件的使用
只需设置Source属性即可,切记要写上http://.
<WebBrowser Source="http://www.baidu.com"></WebBrowser>
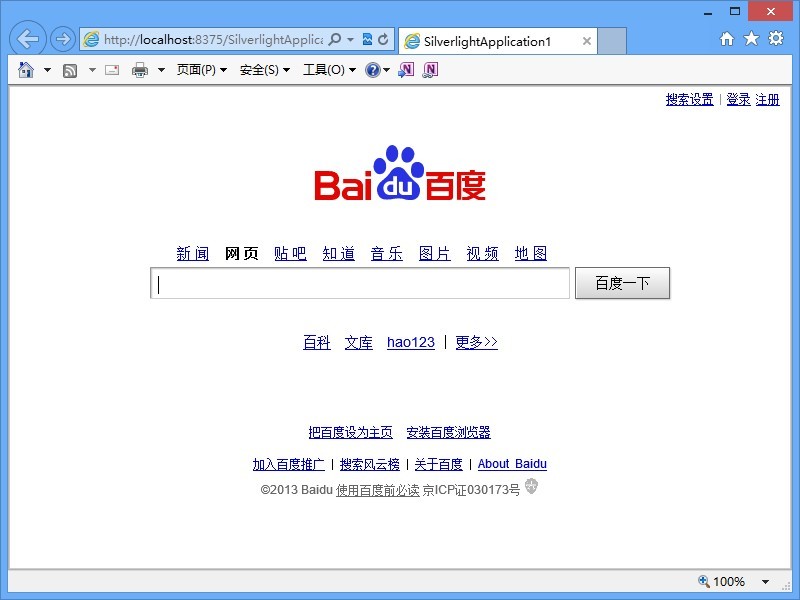
当你在Silverlight中使用WebBrowser(请注意不是OOB),那么将会提示你WebBrowser只能在Silverlight提升了权限后才可以在浏览器内显示,那么就需要去属性中将"Require evevated trust when running in-browser"选中即可。
执行脚本方法:
browser.InvokeScript("AddTwoNumbers", new string[] { "", "" });
调用WebBrowser的InvokeScript方法,第一个参数为函数名称,第二个参数为脚本函数的参数。
7.桌面通知窗口
即在Windows桌面的右下角弹出窗口,需要两步骤:
(1)创建一个自定义通知窗体即一个UserControl
 <Grid>

        <Grid.RowDefinitions>

            <RowDefinition Height="Auto"></RowDefinition>

            <RowDefinition></RowDefinition>

        </Grid.RowDefinitions>

        <Border Background="LightGray" Height="20">

            <TextBlock Margin="3" FontSize="10" Text="MyApplication Notification"></TextBlock>

        </Border>

        <Border Grid.Row="1">

            <Border.Background>

                <LinearGradientBrush>

                    <LinearGradientBrush.GradientStops>

                        <GradientStop Color="DarkOrange"></GradientStop>

                        <GradientStop Color="Crimson" Offset="0.3"></GradientStop>

                        <GradientStop Color="DeepPink" Offset="0.5"></GradientStop>

                        <GradientStop Color="DarkOrange" Offset="0.7"></GradientStop>

                        <GradientStop Color="Crimson" Offset="1"></GradientStop>

                    </LinearGradientBrush.GradientStops>

                </LinearGradientBrush>

            </Border.Background>

            <TextBlock x:Name="lblMessage" Margin="10" FontWeight="Bold" FontSize="16" Foreground="White" TextWrapping="Wrap"

                   HorizontalAlignment="Center" VerticalAlignment="Center">Notification goes here.</TextBlock>

        </Border>

    </Grid>
代码比较简单,就是两行,第一行为一个TextBlock,第二行为一个Border,里边也是一个TextBlock,但是在后置代码中对TextBlock的Text进行了修改。
   public string Message

        {

            get

            {

                return lblMessage.Text;

            }

            set

            {

                lblMessage.Text = value;

            }

        }
后置代码就这一句即可。
(2)修改App.xaml.cs代码
           if (Application.Current.IsRunningOutOfBrowser == true)

            {

                CustomNotification notification = new CustomNotification();

                notification.Message = "You have just been notified. The time is " +

                DateTime.Now.ToLongTimeString() + ".";

                NotificationWindow window = new NotificationWindow();

                window.Content = notification;

                window.Show();

            }
在Application_Startup中加入以上代码即可,可以看到对Message属性就行了赋值,显示当前的时间,这样就可以在右下角显示通知窗口。
8.记录窗体的状态
有时候用户希望保存下来最后窗体的状态(Top , Left , Height , Width , WindowState , TopMost),那么通过以下代码即可实现保存和读取这些值,当然这里用到了独立存 储,不了解的童鞋自行去复习哦。
(1)读取配置,还是在Application_Startup事件中加入如下代码
  if (Application.Current.IsRunningOutOfBrowser)

                {

                    IsolatedStorageFile store =

                    IsolatedStorageFile.GetUserStoreForApplication();

                    if (store.FileExists("window.Settings"))

                    {

                        using (IsolatedStorageFileStream fs =

                        store.OpenFile("window.Settings", FileMode.Open))

                        {

                            BinaryReader r = new BinaryReader(fs);

                            Application.Current.MainWindow.Top = r.ReadDouble();

                            Application.Current.MainWindow.Left = r.ReadDouble();

                            Application.Current.MainWindow.Width = r.ReadDouble();

                            Application.Current.MainWindow.Height = r.ReadDouble();

                            r.Close();

                        }

                    }

                }
(2)保存配置
        private void Application_Exit(object sender, EventArgs e)

        {

            if (Application.Current.IsRunningOutOfBrowser)

            {

                // Store window state.

                try

                {

                    IsolatedStorageFile store =

                    IsolatedStorageFile.GetUserStoreForApplication();

                    using (IsolatedStorageFileStream fs =

                    store.CreateFile("window.Settings"))

                    {

                        BinaryWriter w = new BinaryWriter(fs);

                        w.Write(Application.Current.MainWindow.Top);

                        w.Write(Application.Current.MainWindow.Left);

                        w.Write(Application.Current.MainWindow.Width);

                        w.Write(Application.Current.MainWindow.Height);

                        w.Close();

                    }

                }

                catch (Exception err)

                {

                }

            }

        }
9.提升Silverlight应用程序信任
之所以要提升信任,最主要的原因是,不提升信任的情况下OOB程序的更新会出现问题,所以微软给提升了信任的应用程序提供了这样的功能,但是当提升了信任之后,我们需要做一个签名(虽然VS提供了,但是只是Test的,so...),这就要花钱购买了哦,在此不多说。
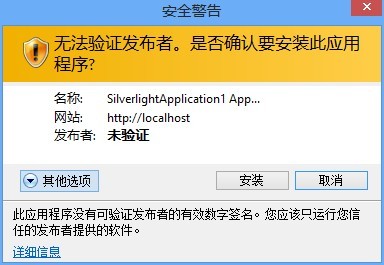
右键Silverlight应用程序,在属性中,点击OOB设置,勾上"Require elevated trust when running outside the browser"即可。
这时候在安装程序到本地的时候提示如下,可以看到发布者是未验证,也就是我们木有签名哦。
当然提升信任权限的原因不仅仅是上述的原因,提升后得到的功能如下:
(1)对文件的操作,如果不提升则只能操作 我的文档/我的图片/我的视频这几个文件夹,当提升后就可以像Winform那样操作本地的磁盘;
(2)无限制的全屏支持,再也不用看到"Enter esc to ..";
(3)无限制的访问WebService,即不会再出现跨域的情况;
(4)更少的用户同意限制,即当访问剪切板或者访问独立存储等功能的时候更少的显示通知用户是否同意;
(5)自定义窗体,如果你不喜欢窗体的默认Border这样的东西,在信任的程序中你可以自定义,下文会提到;
(6)字窗体,如果是信任的程序则可以打开第二个字窗体;
(7)Com组件交互;
(8)平台调用 (P/Invoke),可以访问Windows API等。
9.1制作一个自定义的窗体
无边框的窗体,分为两步。第一步,右键Silverlight应用程序,然后属性,然后到OOB设置,在Windows Style列表中选择"No Border"即可,这样就可以看到一个无边框的东西哦。
第二步,可以给窗体加一个边框,在窗体的根节点(默认应该是Grid)外放一个Border,如下,这样就有了一个边框。
<Border x:Name="windowFrame" BorderBrush="DarkSlateBlue" BorderThickness="5" CornerRadius="2" Margin="0,0,1,1">
虽然看起来蛮酷的,可是发现无法对窗体进行拖动和大小的修改,所以在操作中还是有点问题的。
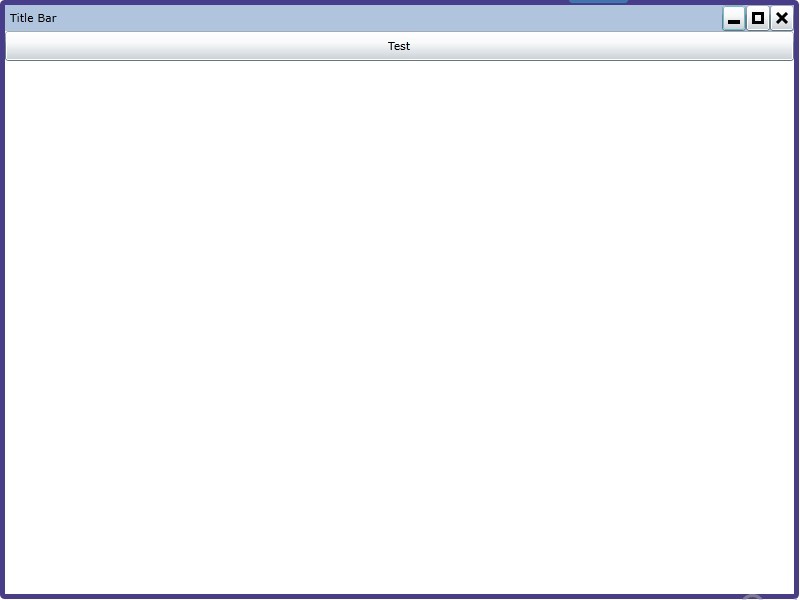
9.2 自定义窗体进阶
第一步,给窗体制作一个工具栏
     <Border x:Name="titleBar" Background="LightSteelBlue" MouseLeftButtonDown="titleBar_MouseLeftButtonDown">

                <Grid>

                    <Grid.ColumnDefinitions>

                        <ColumnDefinition></ColumnDefinition>

                        <ColumnDefinition Width="Auto"></ColumnDefinition>

                        <ColumnDefinition Width="Auto"></ColumnDefinition>

                        <ColumnDefinition Width="Auto"></ColumnDefinition>

                    </Grid.ColumnDefinitions>

                    <TextBlock Margin="5">Title Bar</TextBlock>

                    <Button Grid.Column="1" x:Name="cmdMinimize" Width="24" Click="cmdMinimize_Click">

                        <Path Stroke="Black" StrokeThickness="4" Data="M 1,10 L 13,10" />

                    </Button>

                    <Button Grid.Column="2" x:Name="cmdMaximize" Width="24" Click="cmdMaximize_Click">

                        <Rectangle Stroke="Black" StrokeThickness="3" Height="12" Width="12" />

                    </Button>

                    <Button Grid.Column="3" x:Name="cmdClose" Width="24" Click="cmdClose_Click">

                        <Path Stroke="Black" StrokeThickness="3" Data="M 2,2 L 12,12 M 12,2 L 2,12" />

                    </Button>

                </Grid>

            </Border>
   private Window currentWindow;

        public Window CurrentWindow

        {

            get

            {

                if (currentWindow != null)

                {

                    // This is being used as a secondary (child) window.

                    return currentWindow;

                }

                else

                {

                    // This is being used as a main window (or as a child window, incorrectly).

                    return Application.Current.MainWindow;

                }

            }

            set

            {

                currentWindow = value;

            }

        }

        private void titleBar_MouseLeftButtonDown(object sender, System.Windows.Input.MouseButtonEventArgs e)

        {

            CurrentWindow.DragMove();

        }

        private void cmdMinimize_Click(object sender, System.Windows.RoutedEventArgs e)

        {

            CurrentWindow.WindowState = WindowState.Minimized;

        }

        private void cmdMaximize_Click(object sender, System.Windows.RoutedEventArgs e)

        {

            if (CurrentWindow.WindowState == WindowState.Normal)

            {

                CurrentWindow.WindowState = WindowState.Maximized;

            }

            else

            {

                CurrentWindow.WindowState = WindowState.Normal;

            }

        }

        private void cmdClose_Click(object sender, System.Windows.RoutedEventArgs e)

        {

            CurrentWindow.Close();

        }
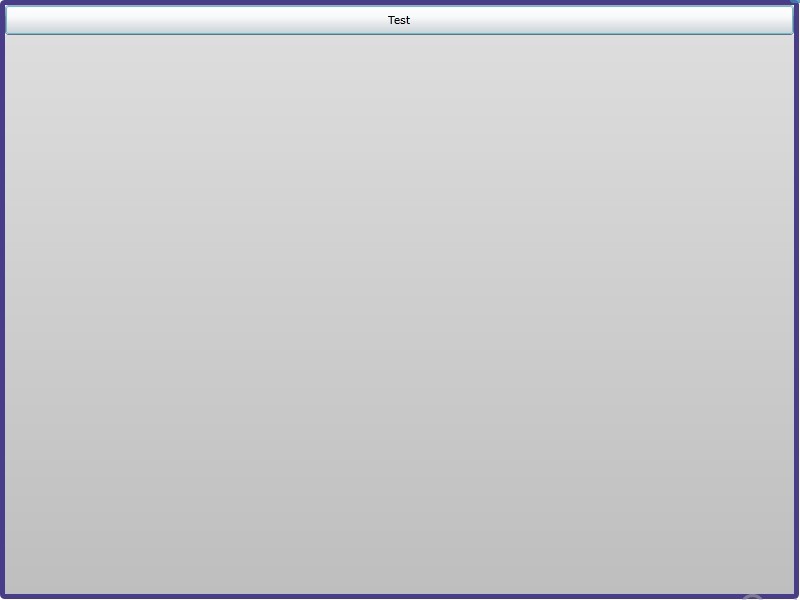
第二步,修改刚才我们的代码,即在Border中放一个StackPanel或者放一个两行的Grid,使工具栏和内容分别位于上下位置即可,效果如下。
这样可以在工具栏上按下左键进行拖动,也可以通过三个按钮进行最小化,最大化,关闭操作,此时看起来还算一个不错的自定义窗体,但是你会发现无法进行ReSize,接下来进行ReSize的处理。
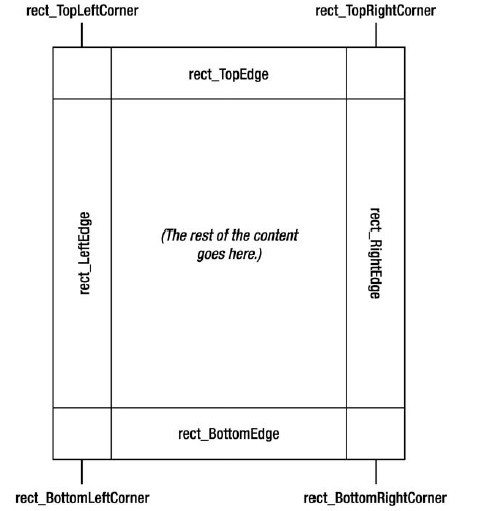
上图就是一个可进行Resize效果的部件组成,在Content内容的四周均为Rectangle,当然这些Rectangle都是可以进行拉伸和缩放的,代码如下:
 <Border x:Name="windowFrame" BorderBrush="DarkSlateBlue" BorderThickness="5" CornerRadius="2" Margin="0,0,1,1">

        <Grid x:Name="resizeContainer">

            <Grid.ColumnDefinitions>

                <ColumnDefinition Width="5"></ColumnDefinition>

                <ColumnDefinition Width="*"></ColumnDefinition>

                <ColumnDefinition Width="5"></ColumnDefinition>

            </Grid.ColumnDefinitions>

            <Grid.RowDefinitions>

            <RowDefinition Height="5"></RowDefinition>

            <RowDefinition Height="*"></RowDefinition>

            <RowDefinition Height="5"></RowDefinition>

            </Grid.RowDefinitions>

            <Rectangle x:Name="rect_TopLeftCorner" Grid.Row="0" Grid.Column="0" Cursor="SizeNWSE" Fill="Transparent" MouseLeftButtonDown="rect_Resize" />

            <Rectangle x:Name="rect_TopEdge" Grid.Row="0" Grid.Column="1" Cursor="SizeNS" Fill="Transparent" MouseLeftButtonDown="rect_Resize" />

            <Rectangle x:Name="rect_TopRightCorner" Grid.Row="0" Grid.Column="2" Cursor="SizeNESW" Fill="Transparent" MouseLeftButtonDown="rect_Resize" />

            <Rectangle x:Name="rect_LeftEdge" Grid.Row="1" Grid.Column="0" Cursor="SizeWE" Fill="Transparent" MouseLeftButtonDown="rect_Resize" />

            <Rectangle x:Name="rect_RightEdge" Grid.Row="1" Grid.Column="2" Cursor="SizeWE" Fill="Transparent" MouseLeftButtonDown="rect_Resize" />

            <Rectangle x:Name="rect_BottomLeftCorner" Grid.Row="2" Grid.Column="0" Cursor="SizeNESW" Fill="Transparent" MouseLeftButtonDown="rect_Resize" />

            <Rectangle x:Name="rect_BottomEdge" Grid.Row="2" Grid.Column="1" Cursor="SizeNS" Fill="Transparent" MouseLeftButtonDown="rect_Resize" />

            <Rectangle x:Name="rect_BottomRightCorner" Grid.Row="2" Grid.Column="2" Cursor="SizeNWSE" Fill="Transparent" MouseLeftButtonDown="rect_Resize" />

            <StackPanel Grid.Row="1" Grid.Column="1">

                <Border x:Name="titleBar" Background="LightSteelBlue" MouseLeftButtonDown="titleBar_MouseLeftButtonDown">

                    <Grid>

                        <Grid.ColumnDefinitions>

                            <ColumnDefinition></ColumnDefinition>

                            <ColumnDefinition Width="Auto"></ColumnDefinition>

                            <ColumnDefinition Width="Auto"></ColumnDefinition>

                            <ColumnDefinition Width="Auto"></ColumnDefinition>

                        </Grid.ColumnDefinitions>

                        <TextBlock Margin="5">Title Bar</TextBlock>

                        <Button Grid.Column="1" x:Name="cmdMinimize" Width="24" Click="cmdMinimize_Click">

                            <Path Stroke="Black" StrokeThickness="4" Data="M 1,10 L 13,10" />

                        </Button>

                        <Button Grid.Column="2" x:Name="cmdMaximize" Width="24" Click="cmdMaximize_Click">

                            <Rectangle Stroke="Black" StrokeThickness="3" Height="12" Width="12" />

                        </Button>

                        <Button Grid.Column="3" x:Name="cmdClose" Width="24" Click="cmdClose_Click">

                            <Path Stroke="Black" StrokeThickness="3" Data="M 2,2 L 12,12 M 12,2 L 2,12" />

                        </Button>

                    </Grid>

                </Border>

                <Grid x:Name="LayoutRoot" Background="White">

                    <Grid.RowDefinitions>

                        <RowDefinition Height="*"></RowDefinition>

                    </Grid.RowDefinitions>

                    <Image Source="2.jpg"></Image>

                </Grid>

            </StackPanel>

        </Grid>

        </Border>
在外围的Border中有一个Grid,共为三行和三列,第一行和第三行以及第一列和第二列均为Rectangle的位置,而中间区域为内容,另外为每一个Rectangle添加了鼠标按下左键事件,代码如下:
 private void rect_Resize(object sender, MouseButtonEventArgs e)

        {

            if (sender == rect_TopLeftCorner)

            {

                Application.Current.MainWindow.DragResize(WindowResizeEdge.TopLeft);

            }

            else if (sender == rect_TopEdge)

            {

                Application.Current.MainWindow.DragResize(WindowResizeEdge.Top);

            }

            else if (sender == rect_TopRightCorner)

            {

                Application.Current.MainWindow.DragResize(WindowResizeEdge.TopRight);

            }

            else if (sender == rect_LeftEdge)

            {

                Application.Current.MainWindow.DragResize(WindowResizeEdge.Left);

            }

            else if (sender == rect_RightEdge)

            {

                Application.Current.MainWindow.DragResize(WindowResizeEdge.Right);

            }

            else if (sender == rect_BottomLeftCorner)

            {

                Application.Current.MainWindow.DragResize(WindowResizeEdge.BottomLeft);

            }

            else if (sender == rect_BottomEdge)

            {

                Application.Current.MainWindow.DragResize(WindowResizeEdge.Bottom);

            }

            else if (sender == rect_BottomRightCorner)

            {

                Application.Current.MainWindow.DragResize(WindowResizeEdge.BottomRight);

            }

        }
效果图对比如下:

默认大小。
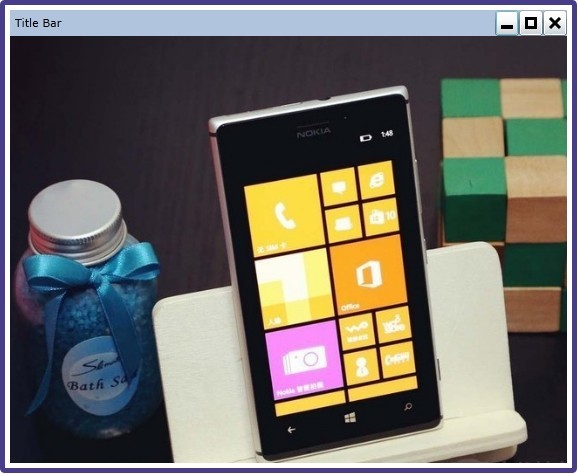
手动调整后的大小。
10.子窗体
在普通的Silverlight程序中我们可以通过ChildWindow来实现子窗体,可是仍然是只有一个窗体可响应,在这里要说的子窗体是可以同时响应的,效果如下:
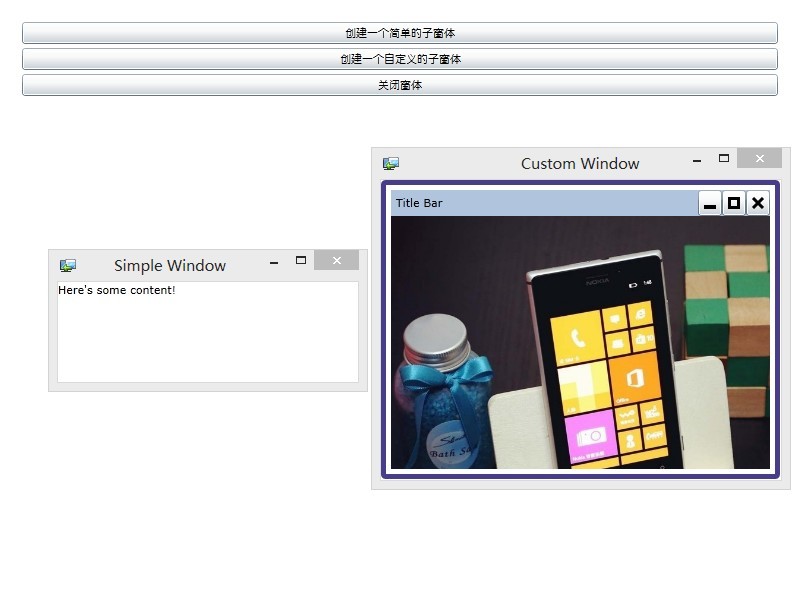
最下边的窗体为主窗体,顶层的两个为创建的子窗体,怎样是不是很像winform中的那样呢,开始进入代码:
主窗体代码:
    <Grid x:Name="LayoutRoot" Background="White">

        <StackPanel Margin="20">

            <Button x:Name="btnCreateBasicWindow" Content="创建一个简单的子窗体" Margin="2" Click="btnCreateBasicWindow_Click"></Button>

            <Button x:Name="btnCreateFancyWindow" Content="创建一个自定义的子窗体" Margin="2" Click="btnCreateFancyWindow_Click"></Button>

            <Button x:Name="btnCloseWindow" Content="关闭窗体" Margin="2" Click="btnCloseWindow_Click"></Button>

        </StackPanel>

    </Grid>
后置代码:
        private Window winSimple;

        private Window winFancy;

        private void btnCreateBasicWindow_Click(object sender, RoutedEventArgs e)

        {

            Grid grid = new Grid();

            grid.Background = new SolidColorBrush(Colors.White);

            TextBlock textContent = new TextBlock();

            textContent.Text = "Here's some content!";

            grid.Children.Add(textContent);

            winSimple = new Window();

            winSimple.Content = grid;

            winSimple.Width = ;

            winSimple.Height = ;

            winSimple.Title = "Simple Window";

            winSimple.Visibility = Visibility.Visible;

        }

        private void btnCreateFancyWindow_Click(object sender, RoutedEventArgs e)

        {

            winFancy = new Window();

            MainPage userControl = new MainPage();

            winFancy.Width = 200;

            winFancy.Height = 300;

            winFancy.Content = userControl;

            winFancy.Title = "Custom Window";

            //winStandard.Show();和下述代码效果一样

            winFancy.Visibility = Visibility.Visible;

        }

        private void btnCloseWindow_Click(object sender, RoutedEventArgs e)

        {

            winSimple.Visibility = System.Windows.Visibility.Collapsed;

            winFancy.Visibility = System.Windows.Visibility.Collapsed;

        }
代码原理很简单,手动创建一个Window,然后将其Content设置为创建的Usercontrol,然后设置下高度和宽度,最后要让其Visible,这样就ok了;关闭也就是让其Collapsed。
问题来了,当你弹出自定义的窗体之后,并且试图去进行Resize的时候,你会发现效果并不是之前设想的,拖动之后改变的大小是主窗体的而非自己的,这是因为我们在窗体中修改的大小是Application.Current.MainWindow,所以改变的就是主窗体了,当然我们可以进行修改,如下:
            winFancy = new Window();

            MainPage userControl = new MainPage();

            userControl.CurrentWindow = winFancy;

            winFancy.Width = ;

            winFancy.Height = ;

            winFancy.Content = userControl;

            winFancy.Title = "Custom Window";

            //winStandard.Show();和下述代码效果一样

            winFancy.Visibility = Visibility.Visible;
改动只有两处,一处就是上述代码中添加了"userControl.CurrentWindow = winFancy;",CurrentWindow,为我们在自定义窗体中定义的属性,表示当前的主窗体,将主窗体设置为外围的容器窗体,这样进行Resize就可以同步了哦。
11.Com组件的访问
下面是一个访问Word的Com组件调用方式:
            using (dynamic word = AutomationFactory.CreateObject("Word.Application"))

            {

                dynamic document = word.Documents.Add();

                dynamic paragraph = document.Content.Paragraphs.Add;

                paragraph.Range.Text = "Heading 1";

                paragraph.Range.Font.Bold = true;

                paragraph.Format.SpaceAfter = ;

                paragraph.Range.InsertParagraphAfter();

                paragraph = document.Content.Paragraphs.Add;

                paragraph.Range.Font.Bold = false;

                paragraph.Range.Text = "This is some more text";

                word.Visible = true;

            }
下面这个是访问计算器的一个Com组件:
            using (dynamic shell = AutomationFactory.CreateObject("WScript.Shell"))

            {

                shell.Run("calc.exe");

            }
12.在浏览器中提升权限
有时候我们希望在浏览器中也是可以操作桌面的一些功能,比如上述中德操作Com组件,那么通过提升权限也是可以做到的,并不需要一定是OOB模式。
好了,到此 OOB下的一些事情说得挺多的,当然还有很多没有提到,大家可以多搜索,多总结,多提意见和建议。
Silverlight之OOB模式下的一些事的更多相关文章
- 【Siverlight - 扩展篇】Silverlight在OOB模式下实现默认打开最大化
在App.xaml.cs中输入以下代码:在OOB客户端打开,可以实现窗口默认最大化: private void Application_Startup(object sender, Startup ...
- silverlight 4.0 的oob模式下,调用com通过wmi重启自身进程 killself
silverlight目前开发的应用,想做到系统内注销后自动重新启动下 sllauncher.exe ,实现方式是通过WMI的COM接口,获取到当前应用的执行命令行(CommandLine):并通过s ...
- Silverlight中在MVVM模式下对DatagridRow选择控件封装
在项目中,凡是涉及到表格的地方用的最多的控件,自然少不了DataGrid的身影,它明了的展示各种数据让人十分喜欢.现在要实现一个功能,使DataGrid具有全选和项选中的功能,如果在传统后台代码中完成 ...
- ASM:《X86汇编语言-从实模式到保护模式》第17章:保护模式下中断和异常的处理与抢占式多任务
★PART1:中断和异常概述 1. 中断(Interrupt) 中断包括硬件中断和软中断.硬件中断是由外围设备发出的中断信号引发的,以请求处理器提供服务.当I/O接口发出中断请求的时候,会被像8259 ...
- ASM:《X86汇编语言-从实模式到保护模式》第9章:实模式下中断机制和实时时钟
中断是处理器一个非常重要的工作机制.第9章是讲中断在实模式下如何工作,第17章是讲中断在保护模式下如何工作. ★PART1:外部硬件中断 外部硬件中断是通过两个信号线引入处理器内部的,这两条线分别叫N ...
- AngularJS中在前后端分离模式下实现权限控制 - 基于RBAC
一:RBAC 百科解释: 基于角色的访问控制(Role-Based Access Control)作为传统访问控制(自主访问,强制访问)的有前景的代替受到广泛的关注.在RBAC中,权限与角色相关联,用 ...
- ARM 7 用户模式下禁止/使能中断的一种方法--使用软中断 for Keil MDK
最近写一个程序,需要在用户模式下关中断,但ARM 7的体系结构决定了中断必须在特权模式下才可以更改,所以想到使用ARM的软中断来实现关中断和开中断. 使用软中断,首先要有硬件指令的支持.ARM有条指令 ...
- Intellij IDEA debug模式下项目启动慢/无法启动的事件解决过程记录
项目无法启动了 简单的介绍一下事件过程:周一的早上,收到前端同事抛过来的一个任务,说是一个接口无法正常返回数据,于是就让他把参数发过来,我想试着在本地重现一下并且将问题修复掉,这种情况肯定是要通过de ...
- 设置GRUB密码以防止单用户模式下root密码被恶意更改
在使用LInux系统的时候可能会发生忘记root密码的情况,通常管理员会进入单用户模式下进行重置root密码.那么问题来了,既然管理员可以进入单用户模式,如果恶意用户可以接触的到计算机的话毫无疑问也是 ...
随机推荐
- spring3.2以后的cglib的jar包问题
关于cglib的jar包官方的文档上有这么一段话 Note For this dynamic subclassing to work, the class that the Spring contai ...
- c#基础笔记-----------集合
首先所谓集合是用于管理对象的容器类.一方面集合将独立的对象汇集成群集,作为一个群集来管理,以便进行整体性操作:而另一方面,集合可以方便地获取群集中的个体,进行个体化操作.在.Net中,集合被封装为对象 ...
- thymeleaf 内联语法
十二. thymeleaf内联语法 内联:th:inline,值有三种:text,javascript,none 12.1 th:inline="text"文本内联 <p t ...
- nginx 重启命令
#重启nginx sudo /etc/init.d/nginx restart sudo /etc/init.d/nginx Usage: /etc/init.d/nginx {start|stop| ...
- AngularJs--过滤器(filter)
过滤器(filter)正如其名,作用就是接收一个输入,通过某个规则进行处理,然后返回处理后的结果.主要用在数据的格式化上,例如获取一个数组中的子集,对数组中的元素进行排序等.ng内置了一些过滤器,它们 ...
- PHP连接局域网MYSQL数据库的简单实例
PHP连接局域网MYSQL数据库的简单实例 [php] view plaincopy <?PHP /** * php连接mysql数据库 * by www.jbxue.com */ $conn= ...
- PHP 归并排序
在我们日常的程序开发时候,有时候需要对一个已知的集合按照一定的规则进行排序,其实当数据的规模不太大时或者数据的有序特征比较明显,其实我们可以采用其它的排序算法例如:Bubble Sort, Inser ...
- The content of element type "sqlMapConfig" is incomplete,
The content of element type "sqlMapConfig" is incomplete, it must match "(properties? ...
- ueditor使用中的坑
项目中要使用富文本编辑于是采用了百度的开源富文本编辑器 ueditor 官网 http://ueditor.baidu.com/website/ 使用方法就按照官方的来的. 经过使用记录以下要点 ...
- 巧用system函数个性化屏幕显示
函数名:system 功 能: 发出一个DOS命令 用 法: system("DOS命令"); (system函数需加头文件<stdlib.h&g ...