iOS-贝塞尔曲线之自定义饼图
项目中需要统计数据展现, 采用了饼图形式展现.
第一步: 了解下贝塞尔曲线相关概念
贝塞尔曲线相关概念:
UIBezierPath :画贝塞尔曲线的path类
UIBezierPath定义 : 贝赛尔曲线的每一个顶点都有两个控制点,用于控制在该顶点两侧的曲线的弧度。
曲线的定义有四个点:起始点、终止点(也称锚点)以及两个相互分离的中间点。
滑动两个中间点,贝塞尔曲线的形状会发生变化。
UIBezierPath:对象是CGPathRef数据类型的封装,可以方便的让我们画出矩形 、 椭圆 或者 直线和曲线的组合形状.
使用贝塞尔曲线的基本步骤:
(1)创建一个Bezier path对象。
(2)使用方法moveToPoint:去设置初始线段的起点。
(3)添加line或者curve去定义一个或者多个subpaths。
(4)改变UIBezierPath对象跟绘图相关的属性。
初始化方法:
+ (instancetype)bezierPath;
创建一个矩形:
+ (instancetype)bezierPathWithRect:(CGRect)rect;
创建圆形或者椭圆形:
 + (instancetype)bezierPathWithOvalInRect:(CGRect)rect;

 + (instancetype)bezierPathWithRoundedRect:(CGRect)rect cornerRadius:(CGFloat)cornerRadius; // rounds all corners with the same horizontal and vertical radius

 + (instancetype)bezierPathWithRoundedRect:(CGRect)rect byRoundingCorners:(UIRectCorner)corners cornerRadii:(CGSize)cornerRadii;

 + (instancetype)bezierPathWithArcCenter:(CGPoint)center radius:(CGFloat)radius startAngle:(CGFloat)startAngle endAngle:(CGFloat)endAngle clockwise:(BOOL)clockwise;

 + (instancetype)bezierPathWithCGPath:(CGPathRef)CGPath;
最基本的使用方法是:
 // 设置描绘的起点

 - (void)moveToPoint:(CGPoint)point;

 // 画直线

 - (void)addLineToPoint:(CGPoint)point;

// 画曲线

// a.绘制二次贝塞尔曲线   分别对应终点和一个控制点

 - (void)addQuadCurveToPoint:(CGPoint)endPoint controlPoint:(CGPoint)controlPoint

// b.绘制三次贝塞尔曲线   分别对应终点和两个控制点

 - (void)addCurveToPoint:(CGPoint)endPoint controlPoint1:(CGPoint)controlPoint1 controlPoint2:(CGPoint)controlPoint2;

 //  画圆弧

 - (void)addArcWithCenter:(CGPoint)center radius:(CGFloat)radius startAngle:(CGFloat)startAngle endAngle:(CGFloat)endAngle clockwise:(BOOL)clockwise
第二步: 自定义饼图实现相关代码
自定义饼图:
针对上面的饼图, 实现主要思路:
1.初始化画布
2.bezierPath形成闭合的扇形路径
3.自定义饼图填充颜色
4.饼图的引出点及指引线
5.画引出直线
6.添加饼图相对应提示文字
7.空心展示饼图
8.露出方法,在所需控制器里调用即可
1. 初始化画布
+ (instancetype)initWithFrame:(CGRect)frame {
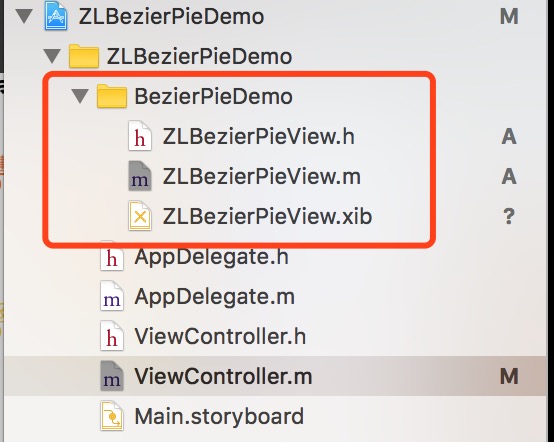
ZLBezierPieView *bezierCurveView = [[NSBundle mainBundle] loadNibNamed:@"ZLBezierPieView" owner:self options:nil].lastObject;
bezierCurveView.frame = frame;
//背景视图
UIView *backView = [[UIView alloc] initWithFrame:CGRectMake(0, 0, frame.size.width, frame.size.height)];
backView.backgroundColor = [UIColor clearColor];
[bezierCurveView addSubview:backView];
myFrame = frame;
return bezierCurveView;
}
2. bezierPath形成闭合的扇形路径
UIBezierPath *bezierPath = [UIBezierPath bezierPathWithArcCenter:point

                                                                  radius:radius

                                                              startAngle:startAngle                                                                 endAngle:endAngle

                                                               clockwise:YES];

[bezierPath addLineToPoint:point];

[bezierPath closePath];
3. 自定义饼图填充颜色
// 可自定义饼图填充颜色(根据自己需求添加)

NSArray *redArray = @[@"46",@"255",@"62",@"254",@"253",@"153",@"110", @"173",@"223",@"196"];

NSArray *greenArray = @[@"191",@"48",@"209",@"199",@"109",@"208",@"123", @"110",@"142",@"193"];

NSArray *blueArray = @[@"238",@"145",@"185",@"17",@"31",@"60",@"254", @"157",@"36",@"48"];

// 填充色

UIColor *customColor = [UIColor colorWithRed:[[redArray objectAtIndex:i] intValue]/255.0  green:[[greenArray objectAtIndex:i] intValue]/255.0 blue:[[blueArray objectAtIndex:i] intValue]/255.0 alpha:1];

// 渲染

CAShapeLayer *shapeLayer = [CAShapeLayer layer];

shapeLayer.lineWidth = 1;

// 填充色

shapeLayer.fillColor = customColor.CGColor;

shapeLayer.path = bezierPath.CGPath;

[self.layer addSublayer:shapeLayer];
4. 饼图的引出点及指引线
// 饼图引出点

CGFloat pieX = point.x + (radius)*cos(startAngle+(endAngle-startAngle)/2);

CGFloat pieY = point.y + (radius)*sin(startAngle+(endAngle-startAngle)/2);

// 指引线引出点

CGFloat X = point.x + (radius+20)*cos(startAngle+(endAngle-startAngle)/2);

CGFloat Y = point.y + (radius+20)*sin(startAngle+(endAngle-startAngle)/2);

CGFloat lineWidth = 80;

// 绘制小圆点

CAShapeLayer *circleLayer = [CAShapeLayer layer];

circleLayer.frame = CGRectMake(0, 0, 1, 1); // 指定frame,只是为了设置宽度和高度

circleLayer.position = CGPointMake(X, Y); // 设置居中显示

circleLayer.fillColor = [UIColor clearColor].CGColor; // 设置填充颜色

circleLayer.lineWidth = 2.0;

circleLayer.strokeColor = customColor.CGColor;

// 使用UIBezierPath创建路径

CGRect frame = CGRectMake(0, 0, 2, 2);

UIBezierPath *circlePath = [UIBezierPath bezierPathWithOvalInRect:frame];

// 设置CAShapeLayer与UIBezierPath关联

circleLayer.path = circlePath.CGPath;

// 将CAShaperLayer放到某个层上显示

[self.layer addSublayer:circleLayer];
5. 画引出直线
// 画第一段直线

CAShapeLayer *lineLayer = [CAShapeLayer layer];

lineLayer.frame = CGRectMake(0, 0, 1, 1); // 指定frame,只是为了设置宽度和高度

lineLayer.fillColor = [UIColor clearColor].CGColor; // 设置填充颜色

lineLayer.lineWidth = 1.0;

lineLayer.strokeColor = customColor.CGColor;

UIBezierPath *indicatrixLine = [UIBezierPath bezierPath];

[indicatrixLine moveToPoint:CGPointMake(pieX, pieY)];

[indicatrixLine addLineToPoint:CGPointMake(X, Y)];

lineLayer.path = indicatrixLine.CGPath;

lineLayer.lineWidth = 1.0;

lineLayer.strokeColor = customColor.CGColor;

[self.layer addSublayer:lineLayer];

if (X < point.x) { // 饼图左侧

    X = X - lineWidth;

}

// 添加指引线(第二段直线)

UIView *line = [[UIView alloc] initWithFrame:CGRectMake(X, Y, lineWidth, 1)];

line.backgroundColor = customColor;

[self.subviews[0] addSubview:line];
6. 添加饼图相对应提示文字
// 添加文字

UILabel *label = [[UILabel alloc]initWithFrame:CGRectMake(X, Y - 15, lineWidth, 30)];

label.font = [UIFont systemFontOfSize:13];

label.textColor = customColor;

label.numberOfLines = 0;

label.text = type_names[i];

label.attributedText = [self setupAttriLabelWithTitleStr:type_names[i] ValueStr:[NSString stringWithFormat:@"%@", targetValues[i]]];

[self.subviews[0] addSubview:label];

if (X < point.x) { // 饼图左侧

    label.textAlignment = NSTextAlignmentLeft;

} else {

    label.textAlignment = NSTextAlignmentRight;

}
/**

 * label 的富文本布局

 *

 * titleStr 标题

 * ValueStr 值

 */

- (NSMutableAttributedString *)setupAttriLabelWithTitleStr:(NSString *)titleStr ValueStr:(NSString *)valueStr {

    NSMutableAttributedString *string = [[NSMutableAttributedString alloc]initWithString:[NSString stringWithFormat:@"%@\n%@", titleStr, valueStr]];

    [string addAttribute:NSFontAttributeName value:[UIFont systemFontOfSize:12] range:NSMakeRange(titleStr.length+1, valueStr.length)];

    return string;

}
7. 空心展示饼图
// 画一个圆, 用来空心(如果满圆则可以不要这块)

UIBezierPath *radiusPath = [UIBezierPath bezierPathWithArcCenter:point radius:radius * 0.3 startAngle:0 endAngle:2*M_PI clockwise:YES];

[radiusPath addLineToPoint:point];

[radiusPath closePath];

CAShapeLayer *shapeLayer = [CAShapeLayer layer];

shapeLayer.lineWidth = 1;

shapeLayer.fillColor = [UIColor whiteColor].CGColor;

shapeLayer.path = radiusPath.CGPath;

[self.layer addSublayer:shapeLayer];
8. 露出方法,在所需控制器里调用即可
/**

 *  画饼状图

 *  @param type_names   分类名称值

 *  @param targetValues 所有目标值

 */

- (void)drawPieChartViewWithType_Names:(NSMutableArray *)type_names TargetValues:(NSMutableArray *)targetValues;
初始化:
// 饼图相关

@property (strong, nonatomic) ZLBezierPieView *pieChartView;

@property (strong, nonatomic) NSMutableArray *type_names; // 类型名称

@property (strong, nonatomic) NSMutableArray *type_values; // 数据值
懒加载:
#pragma mark - 懒加载

// 饼图类型名称

- (NSMutableArray *)type_names {

    if (!_type_names) {

        _type_names = [NSMutableArray array];

        _type_names = [NSMutableArray arrayWithArray:@[@"主粮系列",@"零食世界",@"益智玩具",@"衣服狗窝",@"保健医用",@"活体",@"日用系列"]];

    }

    return _type_names;

}

// 饼图类型数据

- (NSMutableArray *)type_values {

    if (!_type_values) {

        _type_values = [NSMutableArray array];

        _type_values = [NSMutableArray arrayWithArray:@[@"100",@"100",@"100",@"200",@"200",@"100",@"200"]];

    }

    return _type_values;

}
饼图画布初始化:
// 饼图画布初始化

_pieChartView = [ZLBezierPieView initWithFrame:CGRectMake(0, 100, [UIScreen mainScreen].bounds.size.width, 250)];

_pieChartView.backgroundColor = [UIColor clearColor];

[self.view addSubview:_pieChartView];

// 饼图

[_pieChartView drawPieChartViewWithType_Names:self.type_names TargetValues:self.type_values];
第三步: 项目截图及运行效果截图
项目截图:
运行效果截图:

界面性问题可以根据自己项目需求调整即可, 具体可参考代码, 项目能够直接运行!iOS-贝塞尔曲线之自定义饼图
注:本文著作权归作者,由demo大师代发,拒绝转载,转载需要作者授权
iOS-贝塞尔曲线之自定义饼图的更多相关文章
- iOS贝塞尔曲线(UIBezierPath)的基本使用方法
简介 UIBezierPath是对Core Graphics框架的一个封装,使用UIBezierPath类我们可以画出圆形(弧线)或者多边形(比如:矩形)等形状,所以在画复杂图形的时候会经常用到. 分 ...
- UIBezierPath IOS贝塞尔曲线
//记录 贝塞尔曲线使用 //根据一个矩形画曲线 + (UIBezierPath *)bezierPathWithRect:(CGRect)rect //根据矩形框的内切圆画曲线 + (UIBezi ...
- IOS贝塞尔曲线圆形进度条和加载动画
做项目让做一个加载动画,一个圈圈在转中间加一个图片,网上有好多demo,这里我也自己写了一个,中间的图片可加可不加.其中主要用到贝塞尔曲线.UIBezierPath是对CGContextRef的进一步 ...
- IOS 贝塞尔曲线切割圆角
写一个UIView扩展 1. .h文件 @interface UIView (Corner) - (void)setCornerWithType:(UIRectCorner)type Radius:( ...
- iOS - 贝塞尔曲线,折线,曲线,波浪线
watermark/2/text/aHR0cDovL2Jsb2cuY3Nkbi5uZXQvZHlsYW5fbHdiXw==/font/5a6L5L2T/fontsize/400/fill/I0JBQk ...
- iOS开发 贝塞尔曲线
iOS开发 贝塞尔曲线UIBezierPath - 陌云 时间 2014-03-14 11:04:00 博客园-所有随笔区 原文 http://www.cnblogs.com/moyunmo/p/ ...
- iOS开发 贝塞尔曲线UIBezierPath
最近项目中需要用到用贝塞尔曲线去绘制路径 ,然后往路径里面填充图片,找到这篇文章挺好,记录下来 自己学习! 转至 http://blog.csdn.net/guo_hongjun1611/articl ...
- Unity3d游戏中自定义贝塞尔曲线编辑器[转]
关于贝塞尔曲线曲线我们再前面的文章提到过<Unity 教程之-在Unity3d中使用贝塞尔曲线>,那么本篇文章我们来深入学习下,并自定义实现贝塞尔曲线编辑器,贝塞尔曲线是最基本的曲线,一般 ...
- IOS用CGContextRef画各种图形(文字、圆、直线、弧线、矩形、扇形、椭圆、三角形、圆角矩形、贝塞尔曲线、图片)
... 首先了解一下CGContextRef: An opaque type that represents a Quartz 2D drawing environment. Graphics Con ...
随机推荐
- [转载]数据层的多租户浅谈(SAAS多租户数据库设计)
原文:http://www.ibm.com/developerworks/cn/java/j-lo-dataMultitenant/index.html 在上一篇“浅析多租户在 Java 平台和某些 ...
- JS / jquery 实现页面 面板拖动 QQ网页版登陆页面拖动
参考:慕课网DOM实践探秘 http://www.imooc.com/learn/138 实现需求:点击页面头部,可以拖动面板.使用js原生和jquery 各实现一次. 可以学到:1.鼠标在当前页面的 ...
- Nvidia 的新显卡架构 Maxwell 性能相比开普勒提升了多少?
作者:喵西和熊链接:https://www.zhihu.com/question/22630075/answer/29041618来源:知乎著作权归作者所有.商业转载请联系作者获得授权,非商业转载请注 ...
- Git命令使用指南
继续git相关的东西,网上很多讲解的,但是还是喜欢这个图:(爱屋及乌,当然内容也很好,文章链接:http://me.iblogc.com/2015/01/16/Git命令使用指南/) Git是软件开发 ...
- Hive知识
HIVEQL CREATE DATABASE financials(创建数据库) SHOW DATABASES(显示数据库) SHOW TABLES IN 数据库(列出数据库的所有表) SHOW DA ...
- Dfs【p4306(bzoj 2208)】 [JSOI2010]连通数
Description 度量一个有向图恋情情况的一个指标是连通,指途中可达点对的个数. 下图的连通数是14 现在要你求出连通数 Input 输入数据第一行是图顶点的数量,一个正整数N. 接下来N行,每 ...
- hihocoder Popular Products(STL)
Popular Products 时间限制:10000ms 单点时限:1000ms 内存限制:256MB 描述 Given N lists of customer purchase, your tas ...
- 9Andrew.S.Tanenbaum计算机网络第三版读书笔记-总体概览
- 【树链剖分】【线段树】bzoj3083 遥远的国度
记最开始的根为root,换根之后,对于当前的根rtnow和询问子树U而言, ①rtnow==U,询问整棵树 ②fa[rtnow]==U,询问除了rtnow所在子树以外的整棵树 ③rtnow在U的子树里 ...
- 【点分治】【map】【哈希表】hdu4670 Cube number on a tree
求树上点权积为立方数的路径数. 显然,分解质因数后,若所有的质因子出现的次数都%3==0,则该数是立方数. 于是在模意义下暴力统计即可. 当然,为了不MLE/TLE,我们不能存一个30长度的数组,而要 ...