Elasticsearch rest-high-level-client 基本操作
Elasticsearch rest-high-level-client 基本操作
本篇主要讲解一下 rest-high-level-client 去操作 Elasticsearch , 虽然这个客户端在后续版本中会慢慢淘汰,但是目前大部分公司中使用Elasticsearch 版本都是6.x 所以这个客户端还是有一定的了解

前置准备
- 准备一个SpringBoot环境 2.2.11 版本
- 准备一个Elasticsearch 环境 我这里是8.x版本
- 引入依赖 elasticsearch-rest-high-level-client 7.4.2
1.配置依赖
注意: 我使用的是 springboot 2.2.11 版本 , 它内部的 elasticsearch 和 elasticsearch-rest-client 都是 6.8.13 需要注意
   <dependency>

            <groupId>org.springframework.boot</groupId>

            <artifactId>spring-boot-starter-web</artifactId>

        </dependency>

        <dependency>

            <groupId>org.projectlombok</groupId>

            <artifactId>lombok</artifactId>

            <optional>true</optional>

        </dependency>

        <dependency>

            <groupId>org.springframework.boot</groupId>

            <artifactId>spring-boot-starter-test</artifactId>

            <scope>test</scope>

        </dependency>

       <!-- 引入 elasticsearch 7.4.2  -->

        <dependency>

            <groupId>org.elasticsearch</groupId>

            <artifactId>elasticsearch</artifactId>

            <version>7.4.2</version>

            <exclusions>

                <exclusion>

                    <artifactId>log4j-api</artifactId>

                    <groupId>org.apache.logging.log4j</groupId>

                </exclusion>

            </exclusions>

        </dependency>

      <!-- 排除 elasticsearch-rest-client , 也可不排除 为了把maven冲突解决   -->

        <dependency>

            <groupId>org.elasticsearch.client</groupId>

            <artifactId>elasticsearch-rest-high-level-client</artifactId>

            <version>7.4.2</version>

            <exclusions>

                <exclusion>

                    <groupId>org.elasticsearch.client</groupId>

                    <artifactId>elasticsearch-rest-client</artifactId>

                </exclusion>

                <exclusion>

                    <artifactId>elasticsearch</artifactId>

                    <groupId>org.elasticsearch</groupId>

                </exclusion>

            </exclusions>

        </dependency>

        <!-- 不引入会导致可能 使用 springboot的 elasticsearch-rest-client 6.8.13 -->

        <dependency>

            <groupId>org.elasticsearch.client</groupId>

            <artifactId>elasticsearch-rest-client</artifactId>

            <version>7.4.2</version>

        </dependency>

        <!-- elasticsearch 依赖 2.x 的 log4j -->

        <dependency>

            <groupId>org.apache.logging.log4j</groupId>

            <artifactId>log4j-core</artifactId>

            <version>2.8.2</version>

            <!--  排除掉 log4j-api 因为springbootstarter 中引入了loging模块 -->

            <exclusions>

                <exclusion>

                    <artifactId>log4j-api</artifactId>

                    <groupId>org.apache.logging.log4j</groupId>

                </exclusion>

            </exclusions>

        </dependency>

        <!-- junit 单元测试 -->

        <dependency>

            <groupId>junit</groupId>

            <artifactId>junit</artifactId>

            <version>4.12</version>

        </dependency>
2.构建 RestHighLevelClient
highlevelclient 是 高级客户端 需要通过它去操作 Elasticsearch , 它底层也是要依赖 rest-client 低级客户端
@Slf4j

public class TestEsClient {

    private RestHighLevelClient client = null;

    private ObjectMapper objectMapper = new ObjectMapper();

    //构建 RestHighLevelClient

    @Before

    public void prepare() {

        // 创建Client连接对象

        String[] ips = {"172.16.225.111:9200"};

        HttpHost[] httpHosts = new HttpHost[ips.length];

        for (int i = 0; i < ips.length; i++) {

            httpHosts[i] = HttpHost.create(ips[i]);

        }

        RestClientBuilder builder = RestClient.builder(httpHosts);

        client = new RestHighLevelClient(builder);

    }

}
3.创建索引 client.indices().create
创建索引 需要使用 CreateIndexRequest 对象 , 操作 索引基本上是 client.indices().xxx
构建 CreateIndexRequest 对象
@Test

public void test1() {

    CreateIndexRequest request = new CreateIndexRequest("blog1");

    try {

        CreateIndexResponse createIndexResponse =

                client.indices().create(request, RequestOptions.DEFAULT);

        boolean acknowledged = createIndexResponse.isAcknowledged();

        log.info("[create index blog :{}]", acknowledged);

    } catch (IOException e) {

        e.printStackTrace();

    }

}
4.删除索引 client.indices().delete
构建 DeleteIndexRequest 对象
@Test

public void testDeleteIndex(){

    DeleteIndexRequest deleteIndexRequest = new DeleteIndexRequest("blog1");

    try {

        AcknowledgedResponse response = client.indices().delete(deleteIndexRequest, RequestOptions.DEFAULT);

        log.info("[delete index response: {}", response.isAcknowledged());

    } catch (IOException e) {

        e.printStackTrace();

    }

}
4.查询索引 client.indices().get
构建 GetIndexRequest 对象
@Test

public void testSearchIndex() {

    GetIndexRequest request = new GetIndexRequest("blog1");

    try {

        GetIndexResponse getIndexResponse =

                client.indices().get(request, RequestOptions.DEFAULT);

        Map<String, List<AliasMetaData>> aliases = getIndexResponse.getAliases();

        Map<String, MappingMetaData> mappings = getIndexResponse.getMappings();

        Map<String, Settings> settings = getIndexResponse.getSettings();

        log.info("[aliases: {}]", aliases);

        log.info("[mappings: {}]", mappings);

        log.info("[settings: {}", settings);

    } catch (IOException e) {

        e.printStackTrace();

    }

}

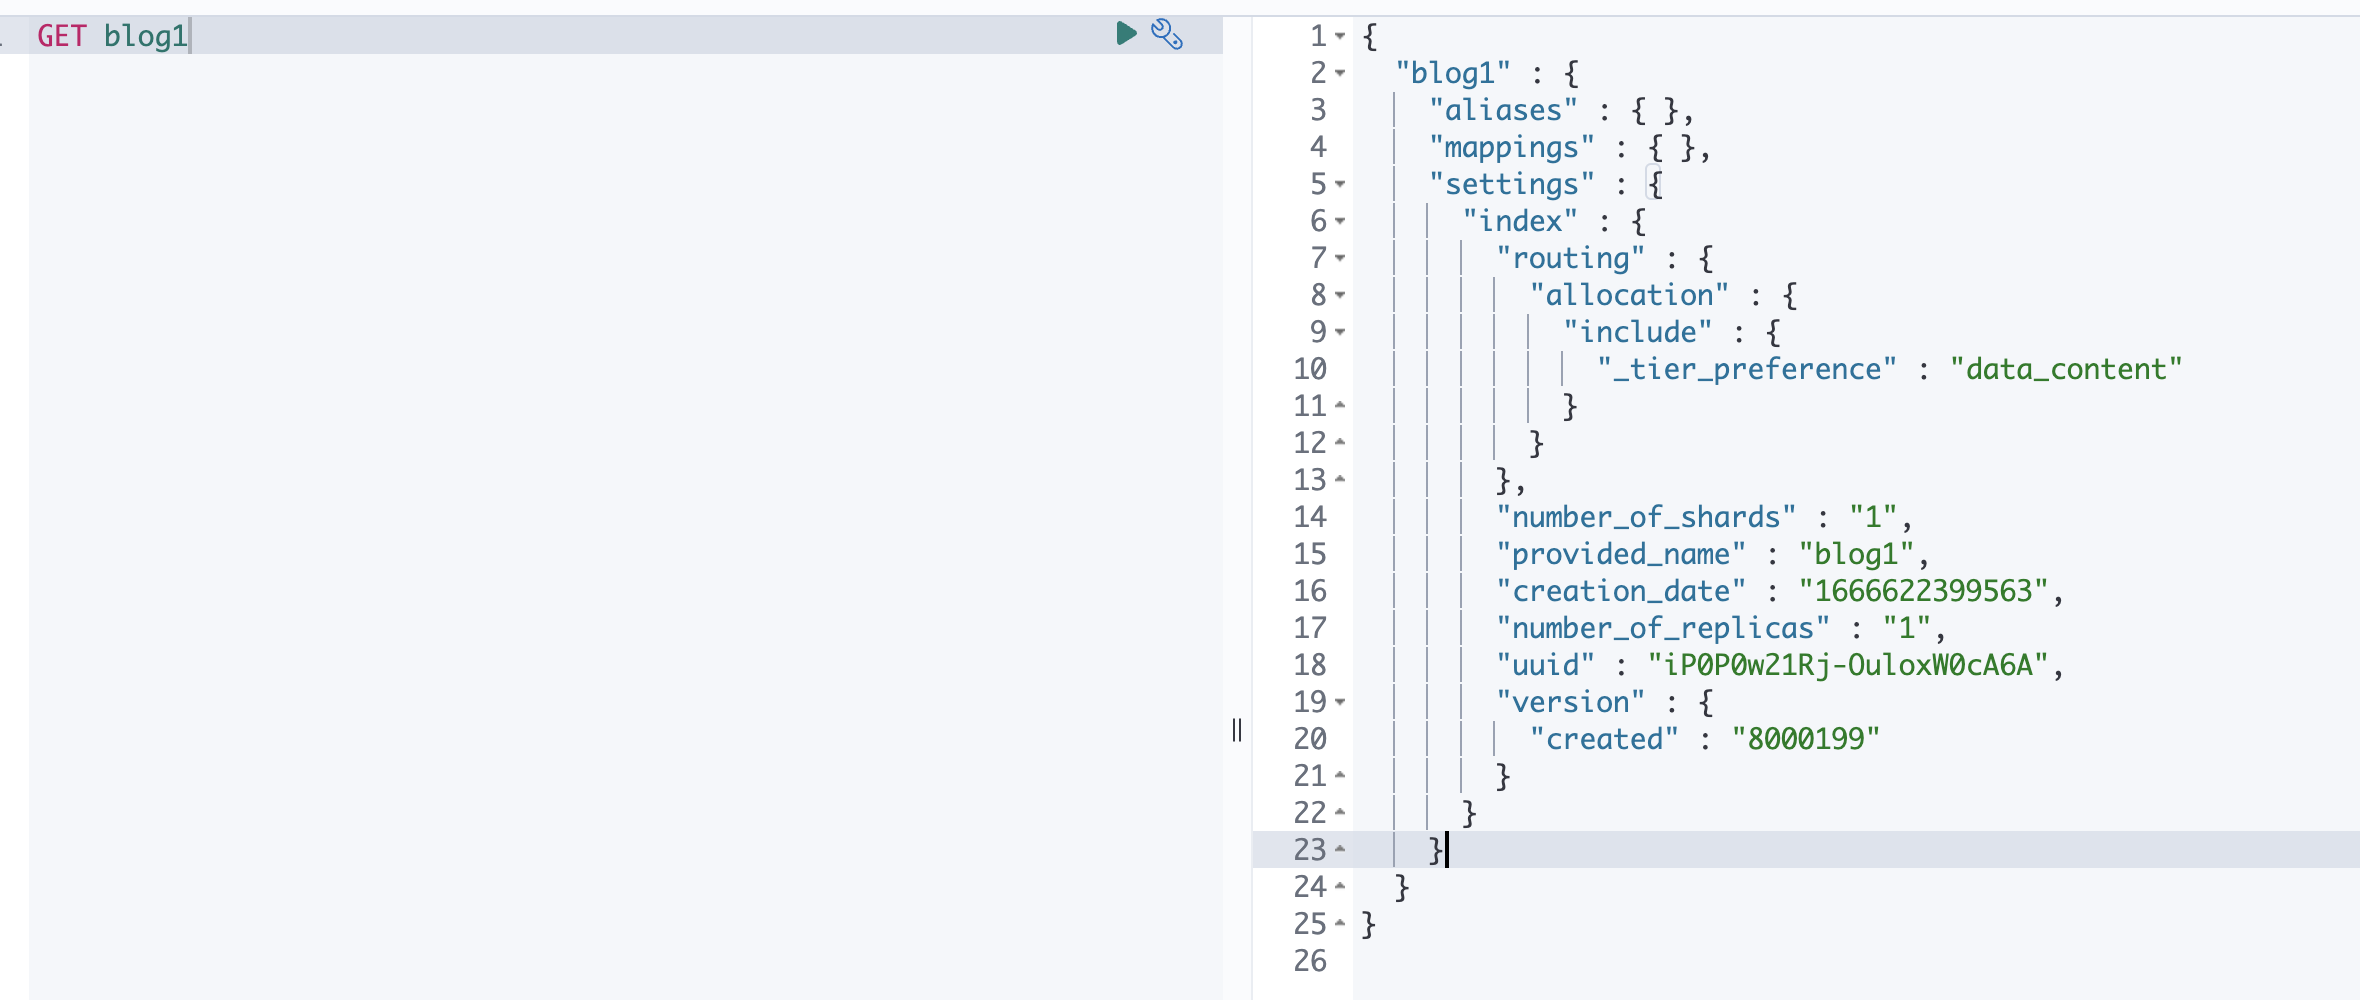
可以根据 response 获取 aliases , mappings , settings 等等 和 Kibana 中返回的一样

5.插入文档 client.index
插入文档 需要使用 IndexRequest 对象 , 注意 不是 InsertRequest , 不知道为什么不这样定义 感觉会更加好理解
request.source(blogInfoJsonStr, XContentType.JSON);
@Test

public void insertDoc() {

    IndexRequest request = new IndexRequest();

    request.index("blog1").id("1");

    BlogInfo blogInfo =

            new BlogInfo()

                    .setBlogName("Elasticsearch 入门第一章")

                    .setBlogType("Elasticsearch")

                    .setBlogDesc("本篇主要介绍了Elasticsearch 的基本client操作");

    try {

         //提供java 对象的 json str

        String blogInfoJsonStr = objectMapper.writeValueAsString(blogInfo);

        request.source(blogInfoJsonStr, XContentType.JSON);

        // 这里会抛错 原因是 我的 Elasticsearch 版本8.x 而 使用的 restHighLevel 已经解析不了,因为新的es已经不推荐使用

        // restHighLevel,而使用 Elasticsearch Java API Client

        IndexResponse index = client.index(request, RequestOptions.DEFAULT);

        log.info("[Result insert doc :{} ]", index);

    } catch (IOException e) {

    }

}
6.查询文档 client.get
注意 getResponse.getSourceAsString() 返回文档数据
@Test

public void testSelectDoc() {

    GetRequest getRequest = new GetRequest();

    getRequest.index("blog1").id("1");

    try {

        GetResponse getResponse = client.get(getRequest, RequestOptions.DEFAULT);

        BlogInfo blogInfo =

                objectMapper.readValue(getResponse.getSourceAsString(), BlogInfo.class);

        log.info("[get doc :{}] ", blogInfo);

    } catch (IOException e) {

        e.printStackTrace();

    }

}

7.删除文档 client.delete
注意 删除文档 的 response 也解析不了 Elasticsearch 8.x 版本
@Test

public void testDeleteDoc() {

    DeleteRequest deleteRequest = new DeleteRequest();

    deleteRequest.index("blog1").id("1");

    try {

        // 这里也会抛错 和上面的一样

        DeleteResponse deleteResponse = client.delete(deleteRequest, RequestOptions.DEFAULT);

        log.info("[delete response:{} ]", deleteResponse);

    } catch (IOException e) {

    }

}
总结
本篇主要介绍了 java 操作Elasticsearch 的客户端 rest-high-level-client 的基本使用 , 如果你是使用springboot 需要注意jar 冲突问题, 后续操作 Elasticsearch 客户端 逐渐变成 Elasticsearch Java API Client , 不过目前大部分还是使用 rest-high-level-client
欢迎大家访问 个人博客 Johnny小屋
欢迎关注个人公众号

Elasticsearch rest-high-level-client 基本操作的更多相关文章
- springboot整合elasticsearch(基于es7.2和官方high level client)
前言 最近写的一个个人项目(传送门:全终端云书签)中需要用到全文检索功能,目前 mysql,es 都可以做全文检索,mysql 胜在配置方便很快就能搞定上线(参考这里),不考虑上手难度,es 在全文检 ...
- elasticsearch java 客户端之Client简介
elasticsearch通过构造一个client对外提供了一套丰富的java调用接口.总体来说client分为两类cluster信息方面的client及数据(index)方面的client.这两个大 ...
- ElasticSearch的javaAPI之Client
翻译的原文:http://www.elasticsearch.org/guide/en/elasticsearch/client/java-api/current/client.html#node-c ...
- Elasticsearch Java Low Level REST Client(嗅探器)
https://segmentfault.com/a/1190000016828977?utm_source=tag-newest#articleHeader0 嗅探器 允许从正在运行的Elastic ...
- springboot 配置elasticsearch Java High Rest Client
前提声明 在新版本的spring boot中逐渐放弃了对Spring Data Elasticsearch的支持,所以不推荐使用,使用ES官方推出的Java High Rest Client. 引入依 ...
- Elasticsearch【JAVA REST Client】客户端操作
ES系统作为集群,环境搭建非常方便简单. 现在在我们的应用中,如何对这个集群进行操作呢? 我们利用ES系统,通常都是下面的架构: 在这里,客户端的请求通过LB进行负载均衡,因为操作任何一个ES的实例, ...
- ElasticSearch的基本认识和基本操作
1.1. ElasticSearch(简称ES) ES即为了解决原生Lucene使用的不足,优化Lucene的调用方式,并实现了高可用的分布式集群的搜索方案,其第一个版本于2010年2月出现在Git ...
- JAVA Rest High Level Client如何取聚合后得数据
对于刚刚学习es的童鞋来说,很容易不清楚怎么获取客户端对es文档的聚合结果,下面就演示一下模仿DSL写聚合,然后获取到聚合对结果. 一, 对于下面这个简单的聚合,目的是对于文档全文匹配,聚合颜色字段. ...
- elasticsearch Java High Level REST 相关操作封装
pox.xml文件添加以下内容 <dependency> <groupId>org.elasticsearch.client</groupId> <artif ...
- 【ELK】【ElasticSearch】3.es入门基本操作
docker安装elasticSearch步骤 ================================================================== 本篇参考: htt ...
随机推荐
- Java集合容器的深度理解
Java容器里有很多写好的容器API,这使我们很方便的可以存储.操作我们的数据. 下面是我写的容器的特点,一些容器的不同之处,从底层源码解析一下容器实现原理 一.常用的容器目录 上图可以看出,java ...
- 如何在win下安装dlib的whl文件(Anaconda方式)
问题描述 由于作业需要用到dlib的人脸检测函数,所以尝试安装了一下dlib.顺便贴上dlib的下载网址dlib下载. 但当我直接输入pip install dlib-19.7.0-cp36-cp36 ...
- Go 语言图片处理简明教程
虽然 Go 语言主要用于 Web 后端以及各类中间件和基础设施开发,也难免遇到一些图像处理的需求.Go 语言提供的 image 标准库提供了基本的图片加载.裁剪.绘制等能力,可以帮助我们实现一些绘图需 ...
- Canvas 非常重要的三个函数
beginPath 绘制路径必须添加 beginPath().它标志着一个画笔在画布中哪个地方开始画起.没有它,新起的画笔位置必定与上一次画笔结束的位置相连. // 第一个半圆 ctx.arc(60, ...
- 从零开始Blazor Server(13)--消息通知
我们现在做了用户管理.角色管理.菜单管理. 但是大家有没有发现,我们的菜单要变化的话必须要刷新页面才行.这个体验感觉不太好. 今天我们就用全局通知组件来解决这个问题. 首先我们要改造以下我们的Main ...
- Windows批量修改文件
如图我是建立了壁纸文件夹 Windows自带的排序方式 如何不用自带的呢? 在这个文件夹里面建一个.txt文件 如下 ok第二步骤 将UTF-8格式改为ANSI格式 点击文件-另存为ANSI格式-替换 ...
- ak日记 831 dxm
import sys from math import inf line = sys.stdin.readline().strip() vs = list(map(int, line.split()) ...
- Helm安装ingress-nginx-4.1.4
Application version 1.2.1 Chart version 4.1.4 获取chart包 helm fetch ingress-nginx/ingress-nginx --vers ...
- spark 写入数据到Geomesa(Hbase)
package com.grady.geomesa import org.apache.spark.sql.jts.PointUDT import org.apache.spark.sql.types ...
- Ansible_基础模块
特点:无主从,即装即用,基于ssh 安装ansible yum install epel-release -y yum install ansible -y 定义主机清单 vim /etc/ansib ...
