[转]使用WCF 4.0 构建 REST Service
本文转自:http://www.cnblogs.com/lanvige/archive/2010/12/03/set_up_rest_service_with_wcf_4.html
用过一段时间的Ruby on Rails,感觉它内置的RESTful结构非常的完美,也对.NET WCF 3实现REST颇有微议,今天在.NET 4.0下试了新的WCF 4,发现其重写了对REST的支持,使用了类似MVC Routing来配置URL导向,非常迷人。
下面来看下如何一步一步来创建新的REST结构的WCF项目。
创建项目
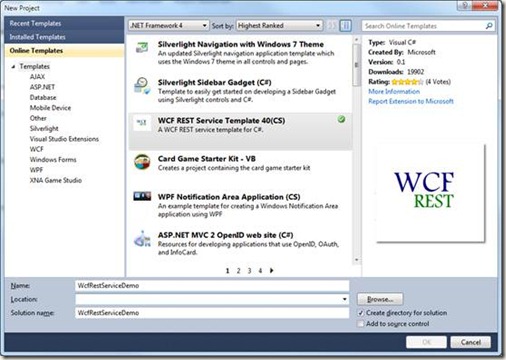
1 打开VS 2010,选择新建项目,我们选择已有的模板来方便创建新的项目,在左侧Online Templates中选择WCF REST Service Template 40(CS)。
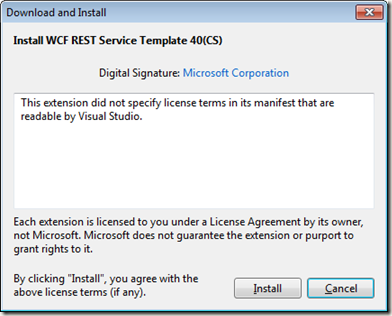
接下来去安装这个模板到本地,第一次安装时需要同意该使用协议,点击“安装”:
这样我们就很简单的用这个模板生成了一个新的项目。
改变之处
该模板使用了一种新的结构来创建简单的REST Service,在细读代码前,先看下项目的文件结构:
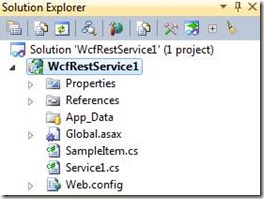
相对于之前的版本
l 项目中不再有SVC文件,这样就不能每次都通过xx.svc/users/1 来访问,而是通过URL Routing来配置。
l 也不再有接口文件作契约。
Global.asax配置
可以看到在.NET 4中构建REST服务相当容易。项目通过在Global.asax中来配置类似于ASP.NET 中的Routing进行URL重定向。见如下代码。
 1 public class Global : HttpApplication

 2 {

 3     void Application_Start(object sender, EventArgs e)

 4     {

 5         RegisterRoutes();

 6     }

 7

 8     private void RegisterRoutes()

 9     {

10         // Edit the base address of Service1 by replacing the "Service1" string below

11         RouteTable.Routes.Add(new ServiceRoute("Service1", new WebServiceHostFactory(), typeof(Service1)));

12     }

13 }
通过代码我们可以看到,通过ServiceRoute类来进行URL重定向的,这里我们配置了一个名为Service1的Resource,指定到Service1类上。
Web.config
同时,在web.config中包含着部署所需要的一些配置。下面的代码是默认生成的。
 1 <?xml version="1.0"?>

 2 <configuration>

 3   <system.web>

 4     <compilation debug="true" targetFramework="4.0" />

 5   </system.web>

 6

 7   <system.webServer>

 8     <modules runAllManagedModulesForAllRequests="true">

 9       <add name="UrlRoutingModule" type="System.Web.Routing.UrlRoutingModule, System.Web, Version=4.0.0.0, Culture=neutral, PublicKeyToken=b03f5f7f11d50a3a" />

10     </modules>

11   </system.webServer>

12

13   <system.serviceModel>

14     <serviceHostingEnvironment aspNetCompatibilityEnabled="true"/>

15     <standardEndpoints>

16       <webHttpEndpoint>

17         <!--

18             Configure the WCF REST service base address via the global.asax.cs file and the default endpoint

19             via the attributes on the <standardEndpoint> element below

20         -->

21         <standardEndpoint name="" helpEnabled="true" automaticFormatSelectionEnabled="true"/>

22       </webHttpEndpoint>

23     </standardEndpoints>

24   </system.serviceModel>

25 </configuration>
Resource代码
默认生成的Resource:Service1代码,可以看到这是一个完整RESTful的结构,有着Get, Put, Post, Delete的完整支持。
 1 [ServiceContract]

 2 [AspNetCompatibilityRequirements(RequirementsMode = AspNetCompatibilityRequirementsMode.Allowed)]

 3 [ServiceBehavior(InstanceContextMode = InstanceContextMode.PerCall)]

 4 public class Service1

 5 {

 6     // GET /Service1/

 7     [WebGet(UriTemplate = "")]

 8     public List<SampleItem> GetCollection()

 9     {

10         return new List<SampleItem>() { new SampleItem() { Id = 1, StringValue = "Hello" } };

11     }

12

13     //  POST /Service1/

14     [WebInvoke(UriTemplate = "", Method = "POST")]

15     public SampleItem Create(SampleItem instance)

16     {

17         throw new NotImplementedException();

18     }

19

20     // GET /Service1/100

21     [WebGet(UriTemplate = "{id}")]

22     public string Get(string id)

23     {

24         return "welcome";

25     }

26

27     // PUT /Service1/100

28     [WebInvoke(UriTemplate = "{id}", Method = "PUT")]

29     public SampleItem Update(string id, SampleItem instance)

30     {

31         throw new NotImplementedException();

32     }

33

34     // DELETE /Service1/100

35     [WebInvoke(UriTemplate = "{id}", Method = "DELETE")]

36     public void Delete(string id)

37     {

38         // TODO: Remove the instance of SampleItem with the given id from the collection

39         throw new NotImplementedException();

40     }

41 }
运行测试
为了测试,将Get(string id)进行修改。可以直接运行项目(F5)。
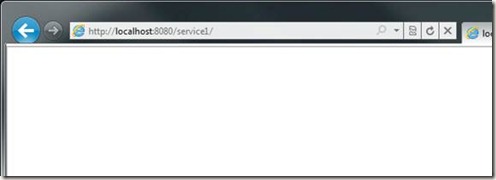
在地址栏中加上Service1,可以看到打开一个空白页面,此时内容已经生成,只是XML数默认不直接显示在页面上。
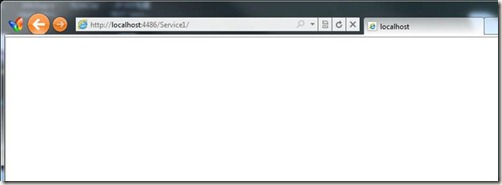
通过查看其Source,可以看到返回的数据集。

此时参数为空,也就是会调用下面一个返回集合的方法:
1 [WebGet(UriTemplate = "")]

2 public List<SampleItem> GetCollection()
同时,也可以发起带参数的GET请求,如/Service1/1/,则会调用相对应的参数函数:
1 [WebGet(UriTemplate = "{id}")]

2 public string Get(string id)
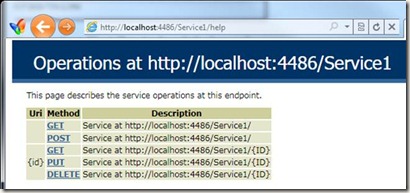
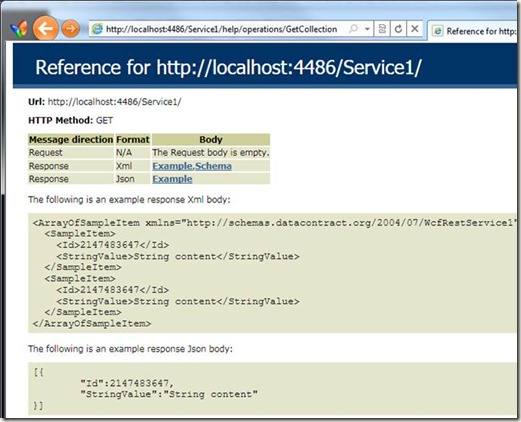
Help 页面
模板同时也为我们生成了一个帮助页面,帮助我们快速了解该Resource所对应的URI祥情。
布署到IIS 7
该项目的布署和普通ASP.NET项目相同,这里写下方法。
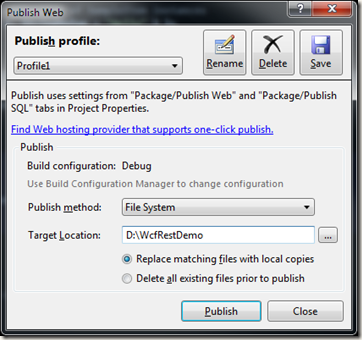
将项目发布到本地磁盘:
在IIS中新建一个Site,在右侧Action下有一个Add Web Site。也可以在Default Web Site下新建一个Application,方式相同:

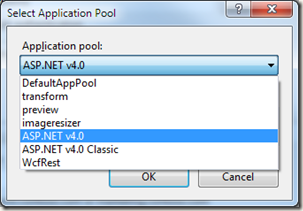
这一步一定要选Application pool为 ASP.NET v4.0,端口任意指定,这里使用8080
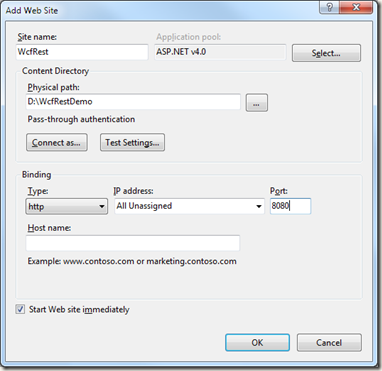
再强调一次,一定要选ASP.NET v4.0
在浏览器中打开可以看到结果。
[转]使用WCF 4.0 构建 REST Service的更多相关文章
- Service Discovery in WCF 4.0 – Part 1 z
Service Discovery in WCF 4.0 – Part 1 When designing a service oriented architecture (SOA) system, t ...
- Service Discovery in WCF 4.0 – Part 2 z
Service Discovery in WCF 4.0 – Part 2 In the previous post I discussed about the basic usage of WCF ...
- Java与WCF交互(二):WCF客户端调用Java web service【转】
原文:http://www.cnblogs.com/downmoon/archive/2010/08/25/1807982.html 在上篇< Java与WCF交互(一):Java客户端调用WC ...
- 转载——Java与WCF交互(二):WCF客户端调用Java Web Service
在上篇< Java与WCF交互(一):Java客户端调用WCF服务>中,我介绍了自己如何使用axis2生成java客户端的悲惨经历.有同学问起使用什么协议,经初步验证,发现只有wsHttp ...
- WCF 4.0 进阶系列 -- 随笔汇总
WCF4.0 进阶系列–前言 WCF4.0 进阶系列--第一章 WCF简介 WCF4.0进阶系列--第二章 寄宿WCF服务 WCF4.0进阶系列--第三章 构建健壮的程序和服务 WCF4.0进阶系列- ...
- 使用XFire+Spring构建Web Service(一)——helloWorld篇
转自:http://www.blogjava.net/amigoxie/archive/2007/09/26/148207.html原文出处:http://tech.it168.com/j/2007- ...
- 使用XFire+Spring构建Web Service
XFire是与Axis 2并列的新一代Web Service框架,通过提供简单的API支持Web Service各项标准协议,帮助你方便快速地开发Web Service应用. 相 对于Axis来说,目 ...
- XFire+Spring构建Web Service经验总结
使用工具 MyEclipse:6.5 ,tomcat6.x. 1.新建web项目,要导入用的包: 2程序结构: 3 web.xml配置文件 <?xml version="1.0&quo ...
- Android 开发 8.0版本启动Service的方法
前言 google在更新Android8.0后对Service的权限越发收紧.导致目前想要启动服务必需实现服务的前台化(否则在服务启动5秒后,系统将自动报错).下面我们就来看看如何在8.0上启动服务 ...
随机推荐
- 提高Android Studio的Build速度实践
1.在下面的目录创建gradle.properties文件 /home/<username>/.gradle/ (Linux) /Users/<username>/.gradl ...
- java之压缩流(ZipOutputStream)
一.文件压缩,是很有必要的,我们在进行文件,传输过程中,很多时候都是,都是单个文件单个文件发送接收,但是当数据量特别大,或者文件数量比较多的时候,这个时候就可以考虑文件压缩. 二.优势:文件压缩过后, ...
- Oracle NVL与NVL2函数
nvl( ) 函数 从两个表达式返回一个非 null 值. 语法 NVL(eExpression1, eExpression2) 参数 eExpression1, eExpression2 如果 eE ...
- js 各种距离
网页可见区域宽 document.body.clientWidth 网页可见区域高 document.body.clientHeight 网页可见区域宽(包括边线的宽) document.b ...
- leetcode507
public class Solution { public bool CheckPerfectNumber(int num) { ) { return false; } ; ; i <= nu ...
- 3.Ehcache中储存缓存的方式
转自:https://www.cnblogs.com/crazylqy/p/4238148.html 目录 1 堆内存(MemoryStore) 1.1 指定可用内存 1.2 ...
- [jOOQ中文]3. 数据库版本管理工具Flyway
https://segmentfault.com/a/1190000010526452 在执行数据库迁移时,我们推荐使用jOOQ与Flyway - 数据库迁移轻松. 在本章中,我们将简单的来使用这两个 ...
- sqlplus 方式连接 远程数据库
方式一:简易连接,不用进行网络配置,其实就是tnsname.ora文件,但只支持oracle10G以上.命令:sqlplus 用户名/密码@ip地址[:端口]/service_name [as sys ...
- python之daemon线程
[python之daemon线程] A thread can be flagged as a “daemon thread”. The significance of this flag is tha ...
- 一些js知识点总结
1. 函数声明与函数表达式 解析器在像执行环境中加载数据时,会先读取函数声明,并使其在执行任何代码之前都可以访问,对于函数表达式,必须等到解析器执行到它所在的代码行,才会真正被执行. 例: alert ...