Appium和Python实现蚂蚁森林自动化收取能量
准备环境
Window10系统
查看支付宝apk包信息
使用android sdk aapt命令查看支付宝apk包信息,后面会用到,如下。
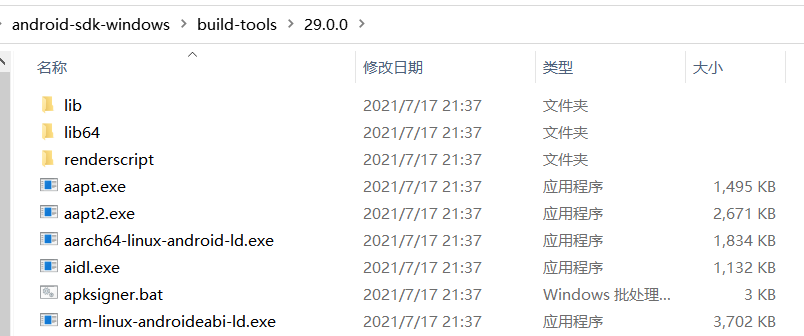
Android Asset Packaging Tool

Usage:

 aapt l[ist] [-v] [-a] file.{zip,jar,apk}

   List contents of Zip-compatible archive.

 aapt d[ump] [--values] [--include-meta-data] WHAT file.{apk} [asset [asset ...]]

   strings          Print the contents of the resource table string pool in the APK.

   badging          Print the label and icon for the app declared in APK.

   permissions      Print the permissions from the APK.

   resources        Print the resource table from the APK.

   configurations   Print the configurations in the APK.

   xmltree          Print the compiled xmls in the given assets.

   xmlstrings       Print the strings of the given compiled xml assets.

D:\android-sdk-windows\build-tools\29.0.0> .\aapt.exe dump badging C:\Users\XXX\Downloads\alipay_wap_main.apk

输出结果如下:
package: name='com.eg.android.AlipayGphone'
versionCode='410'
versionName='10.2.26.9000'
compileSdkVersion='29'
compileSdkVersionCodename='10'
install-location:'auto'
sdkVersion:'18'
targetSdkVersion:'29'
launchable-activity: name='com.eg.android.AlipayGphone.AlipayLogin'
检测设备是否连接
一开始想用模拟器(如夜神模拟器)进行自动化,后来发现支付宝在模拟器里运行特别卡,最终决定使用真机了。这里使用android sdk的adb工具检测手机设备是否连接正常,如下。如果看不到连接信息或者显示unauthorized的,请开启手机的USB调试权限,也有可能开启开发者模式呦。

准备知识
安装自动化工具包
pip install Appium-Python-Client --user
An extension library for adding Selenium 3.0 draft and Mobile JSON Wire Protocol Specification draft functionality to the Python language bindings, for use with the mobile testing framework Appium.
pip install pytest --user
The pytest framework makes it easy to write small tests, yet scales to support complex functional testing for applications and libraries.
安装包的时候加上参数--user 包就会自动安装到自定义路径下面
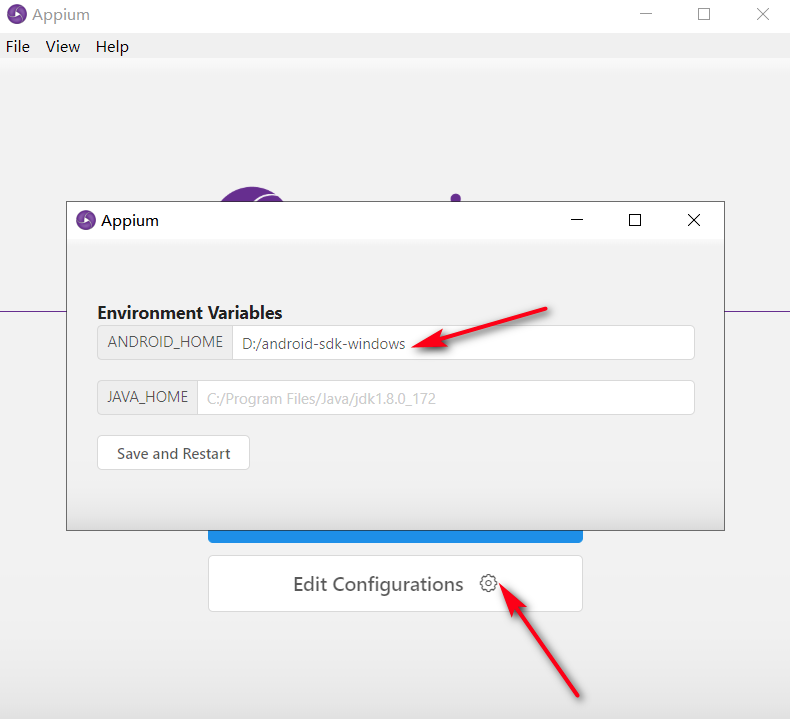
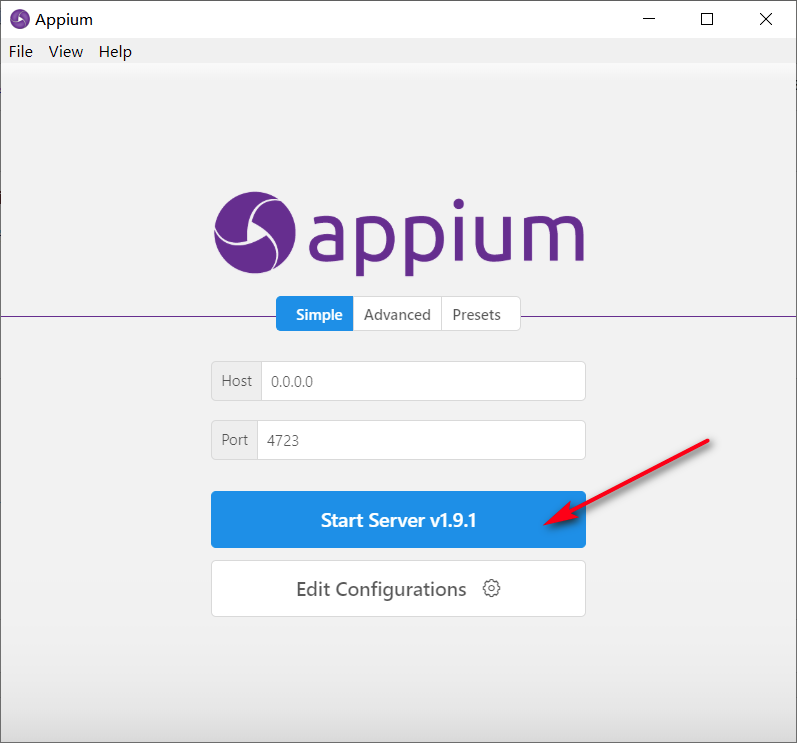
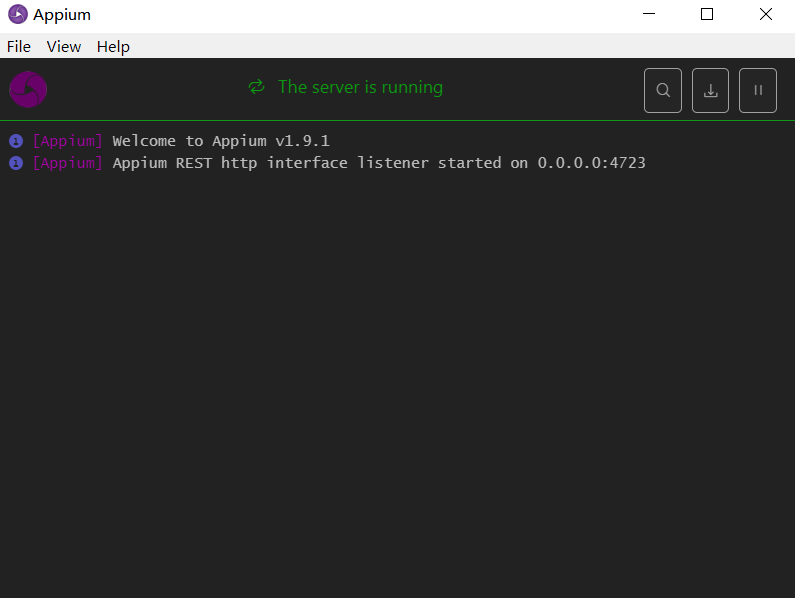
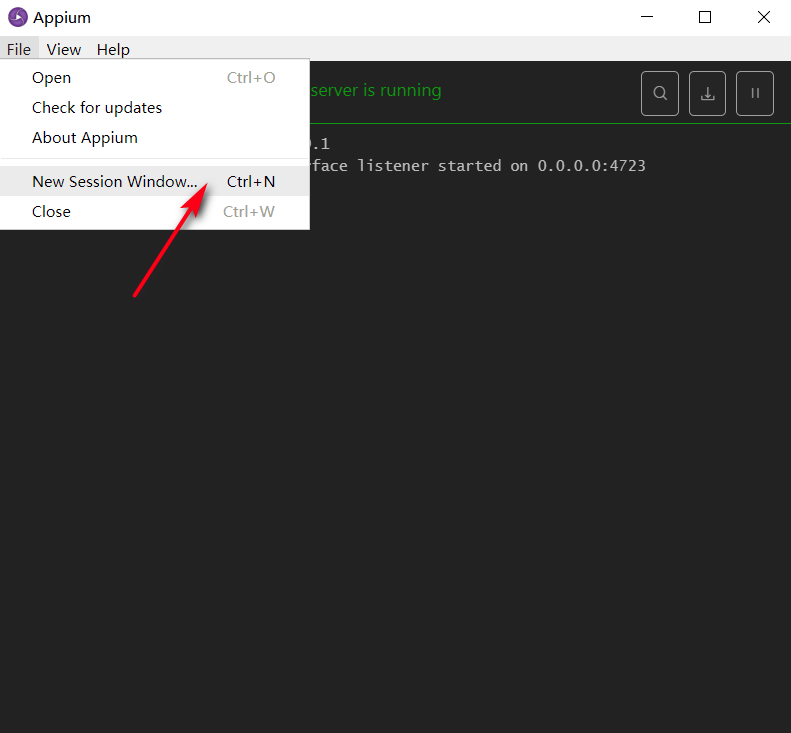
启动Appium服务端
开启新会话定位画面元素
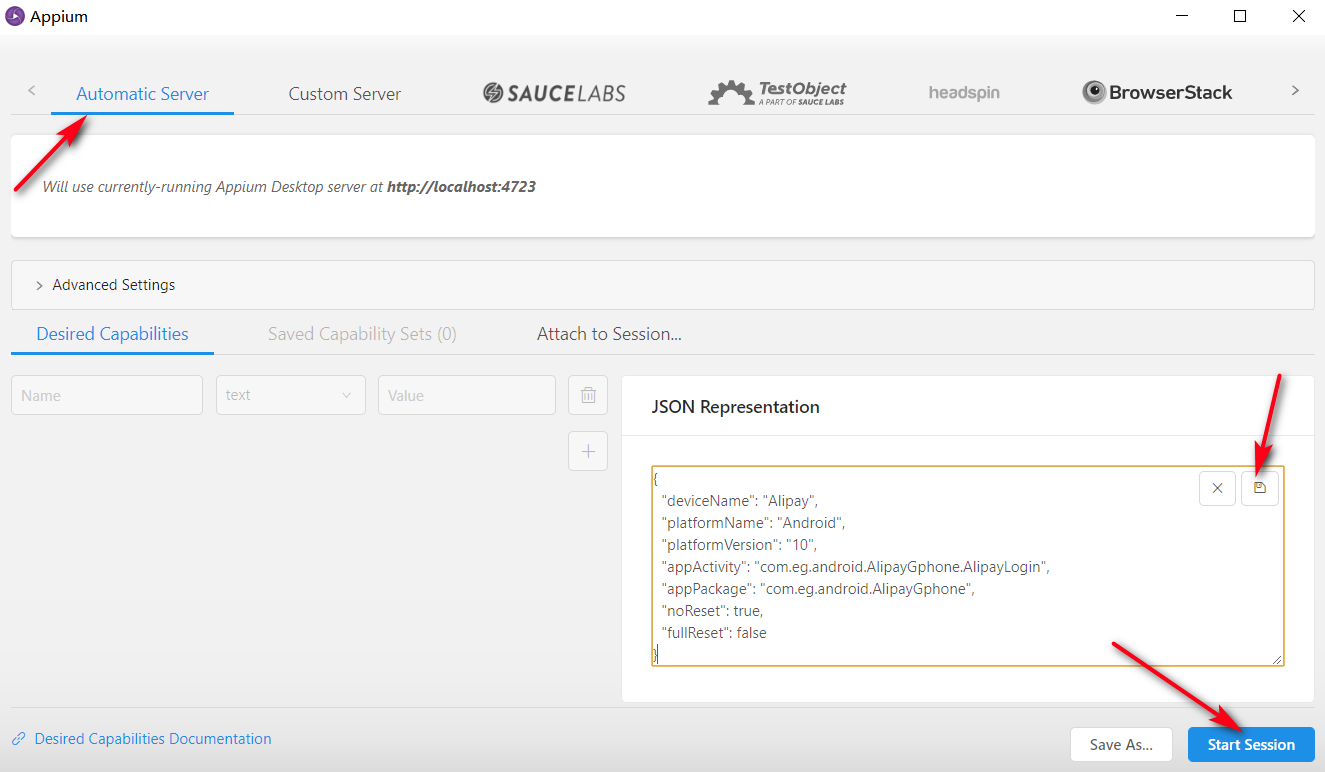
{

  "deviceName": "Alipay-Test",

  "platformName": "Android",

  "platformVersion": "10",

  "appActivity": "com.eg.android.AlipayGphone.AlipayLogin",

  "appPackage": "com.eg.android.AlipayGphone",

  "noReset": true,

  "fullReset": false

}
编写python脚本
知道如何定位支付宝界面的元素后,开始编写python自动化运行脚本。大体分为如下几个步骤。
初始化客户端
def setUp(self):

    desired_caps = {}

    desired_caps['platformName'] = 'Android'

    desired_caps['platformVersion'] = '10'

    desired_caps['deviceName'] = 'Alipay'

    desired_caps['appActivity'] = 'com.eg.android.AlipayGphone.AlipayLogin'

    desired_caps['appPackage'] = 'com.eg.android.AlipayGphone'

    desired_caps['noReset'] = True

    desired_caps['fullReset'] = False

    self.driver = webdriver.Remote('http://localhost:4723/wd/hub', desired_caps)
客户端初始化后会自动启动支付宝APP,注意noReset和fullReset参数的设置。
If noReset is set to TRUE, the app data will NOT be cleared before this session starts.

If fullReset is set to true, the app will get uninstalled and all data will be cleared.
解锁手机
def unlocked(self):

    sz = self.getSize();

    x1 = int(sz[0] * 0.10)      #x坐标

    y1 = int(sz[1] * 0.95)      #起始y坐标

    y2 = int(sz[1] * 0.15)      #终点y坐标

    self.driver.swipe(x1, y1, x1, y2, 1000)

    sleep(1)

    try:

        self.driver.find_element_by_id('com.android.systemui:id/vivo_pin_keyboard')

        for k in [5,1,2,9,9,9]:

            self.driver.find_element_by_id('com.android.systemui:id/VivoPinkey%d' % k).click()

        print('手机解锁成功...')

    except NoSuchElementException:

        print('手机已解锁或解锁失败')
进入蚂蚁森林
def entry_ant_forest(self):

  try:

      sleep(2)

      # 点击蚂蚁森林icon

      self.driver.find_element_by_android_uiautomator('new UiSelector().text("蚂蚁森林")').click()

  except NoSuchElementException:

      # 异常回到首页重试

      self.driver.back()

      sleep(2)

      # 点击支付宝icon

      self.driver.find_element_by_android_uiautomator('new UiSelector().text("支付宝")').click()

      sleep(2)

      # 点击蚂蚁森林icon

      self.driver.find_element_by_android_uiautomator('new UiSelector().text("蚂蚁森林")').click()
按理说进入蚂蚁森林直接模拟点击“蚂蚁森林”icon就可以了,但是偶尔会抛出NoSuchElementException异常。也就是Appium在切换activity后导致元素无法定位,如果手机不锁屏不会发生这种情况(可以在开发者模式中指定),锁屏解锁后切换到支付宝的activity后偶尔会出现这种情况。没有找到太好的解决方法,发生异常时使手机界面返回到首页,然后点击支付宝重新进入,最后点击蚂蚁森林进入。
搜索能量
def search_energy(self):

    # 点击找能量

    self.driver.tap([(1000, 1520), (1080, 1580)], 1000)

    sleep(3)

    try:

        self.driver.find_element_by_android_uiautomator('new UiSelector().textContains("好友能量都收完了")')

    except NoSuchElementException:

        try:

            self.driver.find_element_by_android_uiautomator('new UiSelector().textContains("返回我的森林")')

        except NoSuchElementException:

            pass

        else:

            print('全部好友能量收取完毕...')

            return

        # 收取好友能量

        self.collect_energy()

        # 继续找能量

        self.search_energy()

    else:

        print('全部好友能量收取完毕...')
点击“找能量”功能自动定位到有能量偷取的好友界面。如果界面中有“好友能量都收完了”或者“返回我的森林”相关字样,结束查找,否则开始收取好友能量。
收取好友能量
def collect_energy(self):

    name = ''

    try:

        name = self.driver.find_element_by_id('com.alipay.mobile.nebula:id/h5_tv_title').text

    except NoSuchElementException:

        pass

    print('开始收取%s的能量...' % name)

    # 获取手机屏幕宽高

    sz = self.getSize();

    width = sz[0]

    height = sz[1]

    # 能量球可能出现的区域坐标

    start_x = 110

    end_x = 940

    start_y = 460

    end_y = 880

    for i in range(start_y, end_y, 80):

        for j in range(start_x,end_x, 80):

            try:

                self.driver.find_element_by_android_uiautomator('new UiSelector().textContains("关闭")').click()

                sleep(1)

            except NoSuchElementException:

                pass

            tap_x1 = int((int(j) / width) * width)

            tap_y1 = int((int(i) / height) * height)

            # 点击指定坐标

            self.driver.tap([(tap_x1, tap_y1), (tap_x1, tap_y1)], 1000)

    print('结束收取%s的能量...' % name)
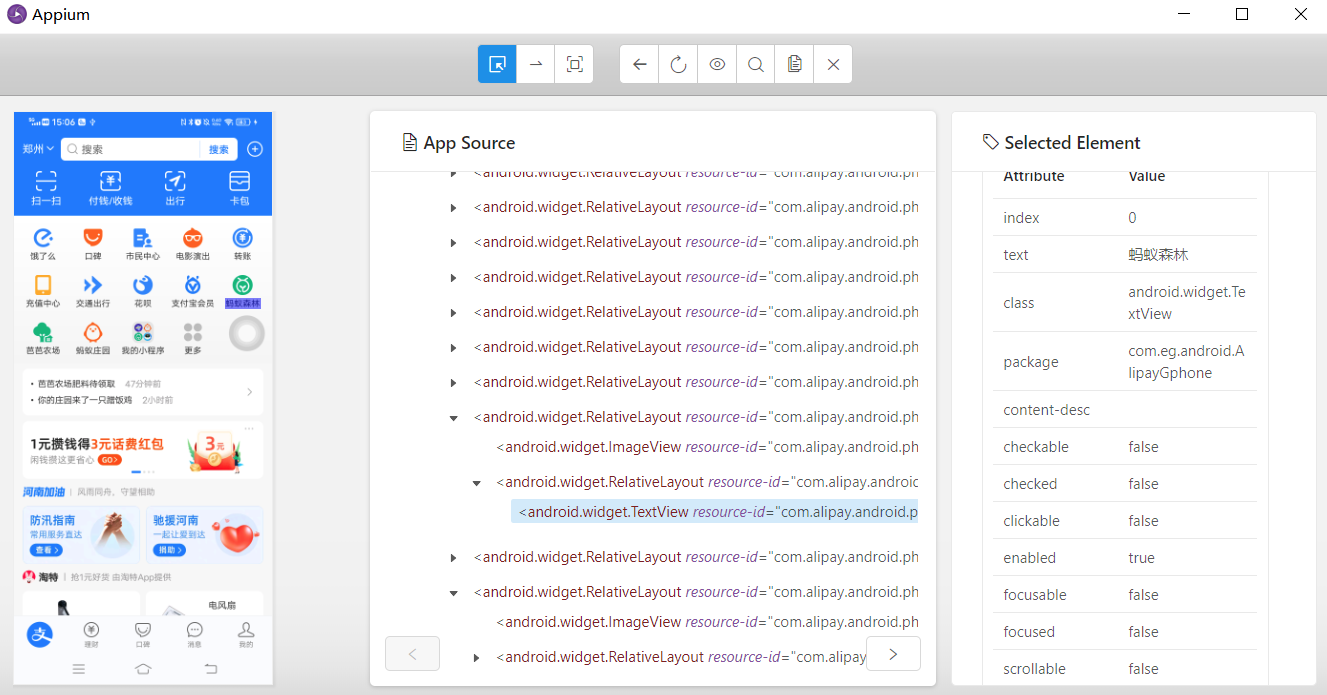
首先获取当前页面的“com.alipay.mobile.nebula:id/h5_tv_title”元素,代表好友的名字;因为蚂蚁森林现在不能定位能量球元素了,所以要在能量球可能出现的方块区域按照一定的坐标步长模拟点击进行能量偷取。上面的方案中,规定的能量球可能出现的区域为[(110,460),(940,880)],这个坐标可以根据实际的机型进行修改,可以通过Appium坐标定位判断出矩形区域,如下。

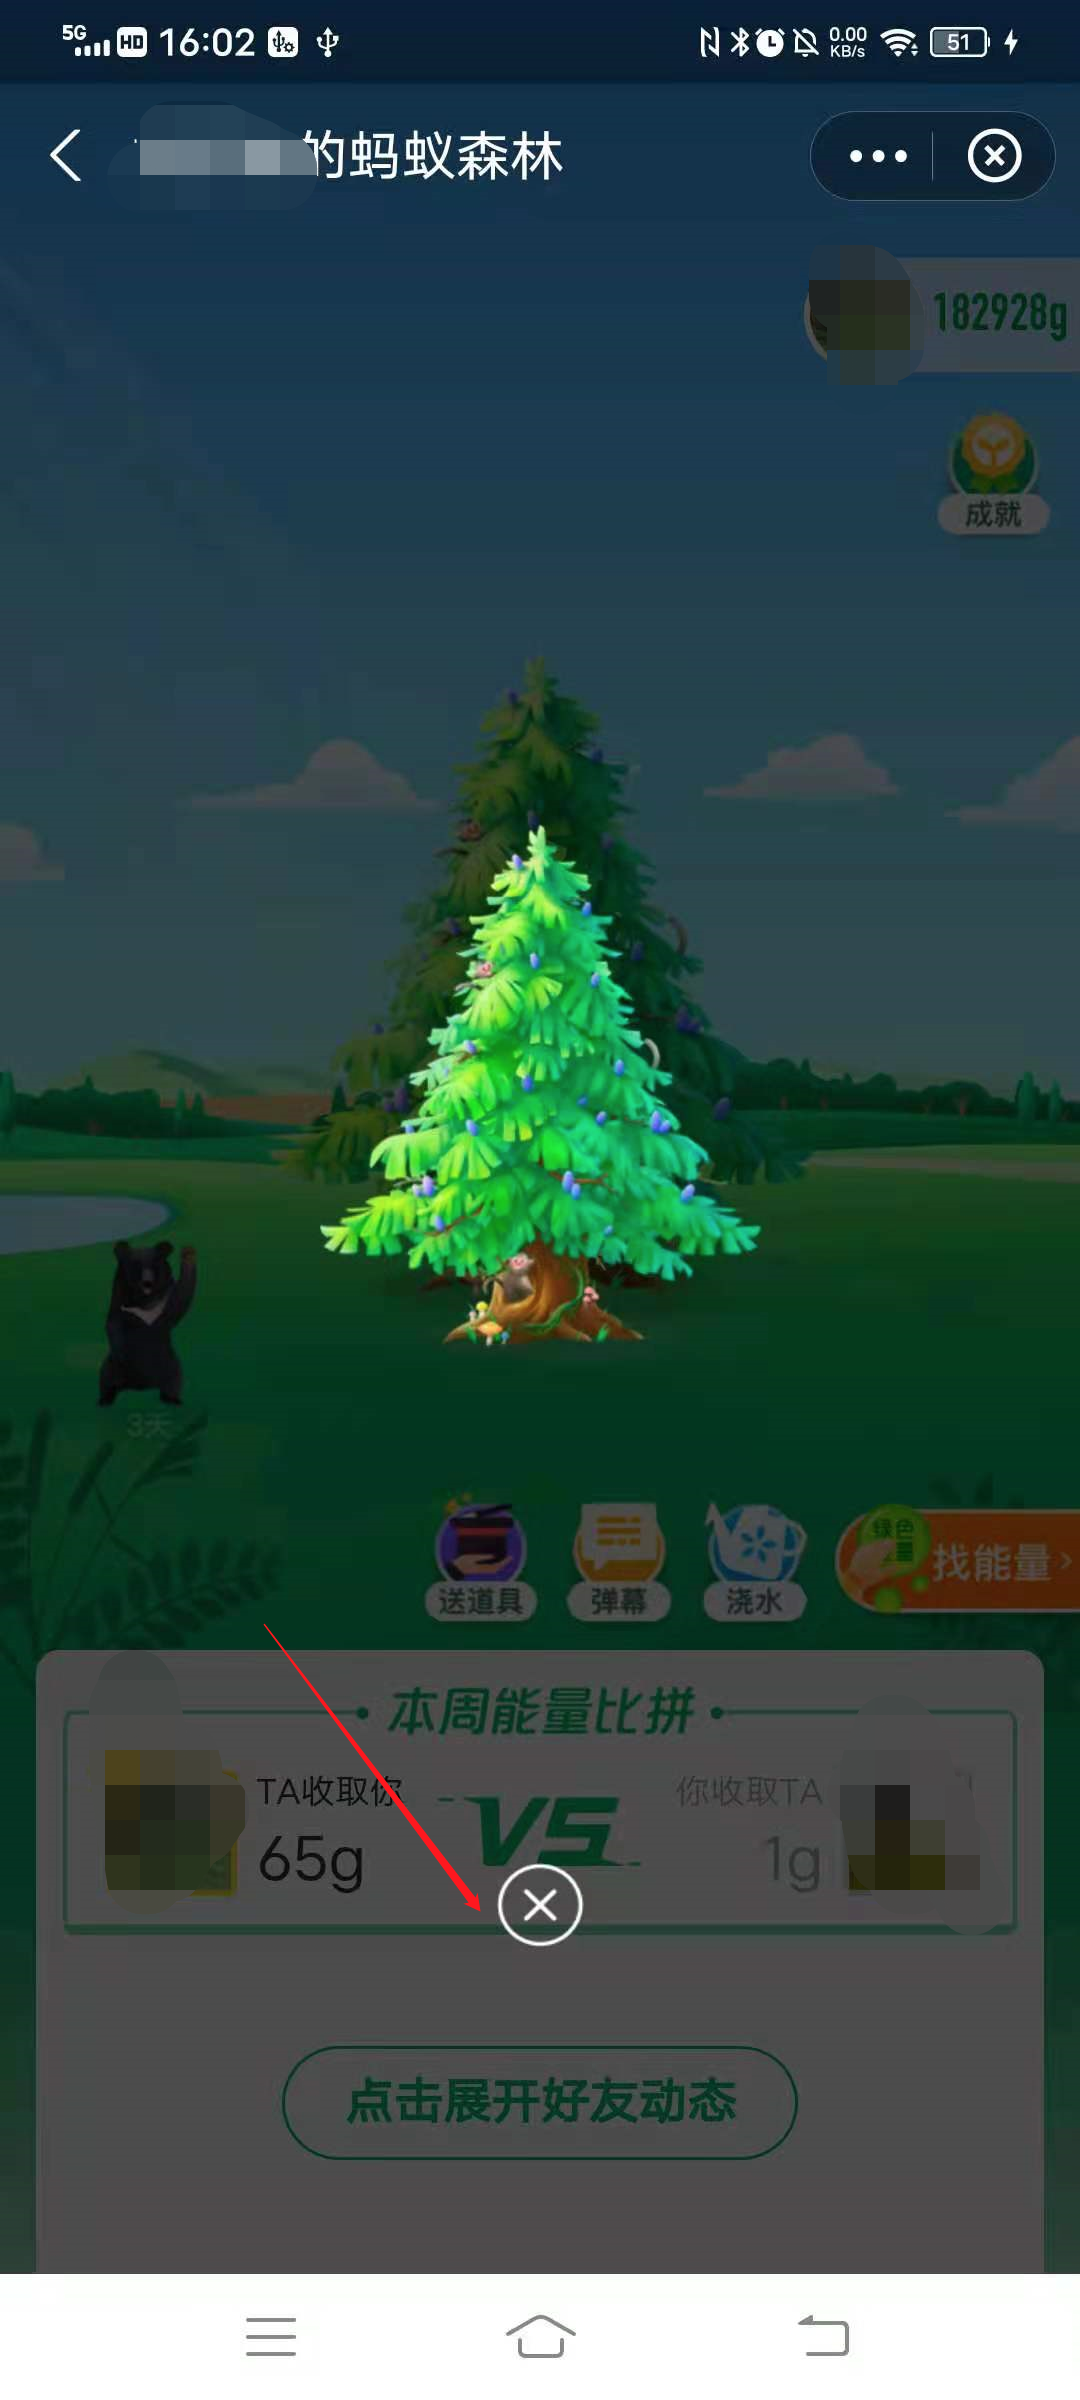
还要一个点需要注意的,点击的时候可能会出现装饰树和挂件的展示,如下图所示。这时候需要在界面中查找“关闭”元素,然后click事件关闭就行了。
演示效果
如果效果感觉还不错的话,那就关注一下微信公众号(请扫下方二维码),回复“蚂蚁森林”获取完整代码吧。
Appium和Python实现蚂蚁森林自动化收取能量的更多相关文章
- 自动化测试 Appium之Python运行环境搭建 Part2
Appium之Python运行环境搭建 Part2 by:授客 QQ:1033553122 实践环境 参见 Appium之Python运行环境搭建 Part1 环境部署 1.安装Android SDK ...
- Appium使用Python运行appium测试的实例
Appium使用Python运行appium测试的实例 一. Appium之介绍 https://testerhome.com/topics/8038 详情参考--https://testerhom ...
- 基于Appium、Python的自动化测试
基于Appium.Python的自动化测试环境部署和实践 第一章 导言 1.1 编制目的 该文档为选用Appium作为移动设备原生(Native).混合(Hybrid).移动Web(Mobile ...
- 自动化测试 Appium之Python运行环境搭建 Part1
Appium之Python运行环境搭建 Part1 by:授客 QQ:1033553122 实践环境 Win7 Python 3.4.0 JAVA JDK 1.8.0_121 node.js8.11. ...
- python入门以及接口自动化实践
一.Python入门必备基础语法# 标识符:python中我们自己命名的都是标识符# 项目名 包名 模块名# 变量名 函数名 类名# 1:字母 下划线 数字组成 命名的时候不能以数字开头# 2:见名知 ...
- 用Python实现随机森林算法,深度学习
用Python实现随机森林算法,深度学习 拥有高方差使得决策树(secision tress)在处理特定训练数据集时其结果显得相对脆弱.bagging(bootstrap aggregating 的缩 ...
- Appium(Python)测试混血App
Hybrid App(混合模式移动应用)是指介于web-app.native-app这两者之间的app兼具Native App良好用户交互体验的优势和Web App跨平台开发的优势 HybridApp ...
- Appium+eclipse+python环境配置
1.安装安卓开发环境(教程很多,不细写) 2.安装eclipse 下载eclipse,解压即可 3.安装python 下载地址:https://www.python.org/downloads/r ...
- Python+Django+ansible playbook自动化运维项目实战☝☝☝
Python+Django+ansible playbook自动化运维项目实战☝☝☝ 一.入门引导 DevOPSDevOps(英文Development和Operations的组合)是一组过程.方法 ...
随机推荐
- 新的微芯片MCU增加了来自外部闪存的安全引导保护
新的微芯片MCU增加了来自外部闪存的安全引导保护 New Microchip MCU Adds Secure Boot Protection from External Flash 对于从外部SPI闪 ...
- MEMS传感器作为变革的驱动力
MEMS sensors as drivers for change 物联网(IoT)正在改变与周围世界互动的方式.每个人,每件事,都是相互联系的,很快就会相互联系.微机电系统(MEMS)设备和传感器 ...
- https://www.jianshu.com/writer#/notebooks/164311/notes/88906048/preview
什么是 webassembly 在 2019 年 12 月之前,如果你要编写一个web页面,那一定离不开 html.css.js 这三个好兄弟.在 2019 年 12 月之后 W3C 宣布 webas ...
- 重新整理 mysql 基础篇————— mysql 事务[三]
前言 简单整理一下事务. 正文 事务有四大特性: 1.原子性(atomicity) 一个事务必须被视为一个不可分割的最小单元. 2.一致性(consistency) 数据库总是从一个一致性的状态转换到 ...
- 【VBA】类型转换
每个函数都可以强制将一个表达式转换成某种特定数据类型. 语法 CBool(expression) CByte(expression) CCur(expression) CDate(expression ...
- 【NX二次开发】 删除面操作
录制修改封装删除面 DeleteFaces 1 #include <uf_defs.h> 2 #include <NXOpen/NXException.hxx> 3 #incl ...
- 从架构师角度谈谈mybatis-plus可能存在的问题
存在这么一个情况:对于缺营养的人来说,医生更倾向于建议他选择纯牛奶,而不是有机奶(因其有添加剂).然而,大部分人却更加倾向于选择有机奶, 因其口感不错,因此,对于选择纯牛奶还是有机奶,这是个博弈问题. ...
- 大数据初级sy
1.spark 是用以下哪种编程语言实现的? A.C B C++ C JAVA D.Scala (正确答案) 2.FusionIn ...
- 单臂路由&链路捆绑
单臂路由&链路捆绑 目录 一.单臂路由 1.1.单臂路由作用 1.2.单臂路由实现不同VLAN间通信的原理 二.单臂路由相关命令配置 三.链路捆绑 3.1.以太网链路聚合原理 3.2.命令配置 ...
- Unity接入ShareSDK实现QQ登录和QQ分享、微信分享
原文链接:Unity接入ShareSDK实现QQ登录和QQ分享.微信分享 由于微信登录需要企业审核,我这里就不说明了,有需要的可以去官网看一下文档,和QQ登录比多了一个打包的步骤. 第一步:到官网申请 ...