pointNet代码
介绍
组成
1.PointNet classification network分类网络
- part segmentation network
数据集
1.point clouds sampled from 3D shapes
2.ShapeNetPart dataset.
结构
其主要分成以下三部分:
- 数据处理
- model构建
- 结果选择
数据处理
将点云处理成程序可用的格式,具体实现在 provider.py 中,主要包含了数据下载、预处理(shuffle->rotate->jitter)、格式转换(hdf5->txt)
shuffle
def shuffle_data(data, labels):

    """ Shuffle data and labels.

        Input:

          data: B,N,... numpy array

          label: B,... numpy array

        Return:

          shuffled data, label and shuffle indices

    """

    idx = np.arange(len(labels))#返回一个列表

    # print('idx=',idx)#idx= [   0    1    2 ... 2045 2046 2047]

    np.random.shuffle(idx)#把idx进行shuffle

    # print('idx=', idx)

    return data[idx, ...], labels[idx], idx
rotate旋转处理
def rotate_point_cloud(batch_data):

    # print('batch data shape=',batch_data.shape)#(32, 1024, 3)

    rotated_data = np.zeros(batch_data.shape, dtype=np.float32)

    for k in range(batch_data.shape[0]):

        rotation_angle = np.random.uniform() * 2 * np.pi#生成一个随机数

        cosval = np.cos(rotation_angle)

        sinval = np.sin(rotation_angle)

        rotation_matrix = np.array([[cosval, 0, sinval],

                                    [0, 1, 0],

                                    [-sinval, 0, cosval]])

        shape_pc = batch_data[k, ...]

        rotated_data[k, ...] = np.dot(shape_pc.reshape((-1, 3)), rotation_matrix)

        #先让shape_pc的形状变成(?,3),因为旋转矩阵为(3,3)

    return rotated_data
jitter抖动处理
def jitter_point_cloud(batch_data, sigma=0.01, clip=0.05):

    B, N, C = batch_data.shape

    assert(clip > 0)

    jittered_data = np.clip(sigma * np.random.randn(B, N, C), -1*clip, clip)#将数组范围限制在(-1*clip, clip)

    jittered_data += batch_data

    return jittered_data
model构建
Feature transform net
with tf.variable_scope('transform_net1') as sc:#T-net

    transform = input_transform_net(point_cloud, is_training, bn_decay, K=3)

print('point cloud=',point_cloud)#(32, 1024, 3)

# print('input transform=',transform)#(32, 3, 3)

point_cloud_transformed = tf.matmul(point_cloud, transform)

# print('point_cloud_transformed=',point_cloud_transformed)#(32, 1024, 3)
mlp(64,128,1024)
net = tf_util.conv2d(net_transformed, 64, [1,1],

                         padding='VALID', stride=[1,1],

                         bn=True, is_training=is_training,

                         scope='conv3', bn_decay=bn_decay)

print('net3=',net)#(32, 1024, 1, 64)

net = tf_util.conv2d(net, 128, [1,1],

                         padding='VALID', stride=[1,1],

                         bn=True, is_training=is_training,

                         scope='conv4', bn_decay=bn_decay)

print('net4=',net)#(32, 1024, 1, 128)

net = tf_util.conv2d(net, 1024, [1,1],

                         padding='VALID', stride=[1,1],

                         bn=True, is_training=is_training,

                         scope='conv5', bn_decay=bn_decay)

print('net5=',net)#(32, 1024, 1, 1024)
类别投票
实现方法
batch_pred_sum.shape=(?,40) # 每个data对40个类的可能性
pred_val.shape=(?,) # 每个data所属的可能性最大的类
 pred_val = np.argmax(batch_pred_sum, 1)

 #返回沿轴axis最大值的索引,即得到预测值最大的那一类的idx(label)
评估
输出(预测label,真实label)
</dump/pred_label.txt>
4, 4

0, 0

2, 2

8, 8

14, 23

...
<shape_names.txt>

airplane

bathtub

bed

bench

bookshelf

bottle

bowl

car

chair

cone

cup
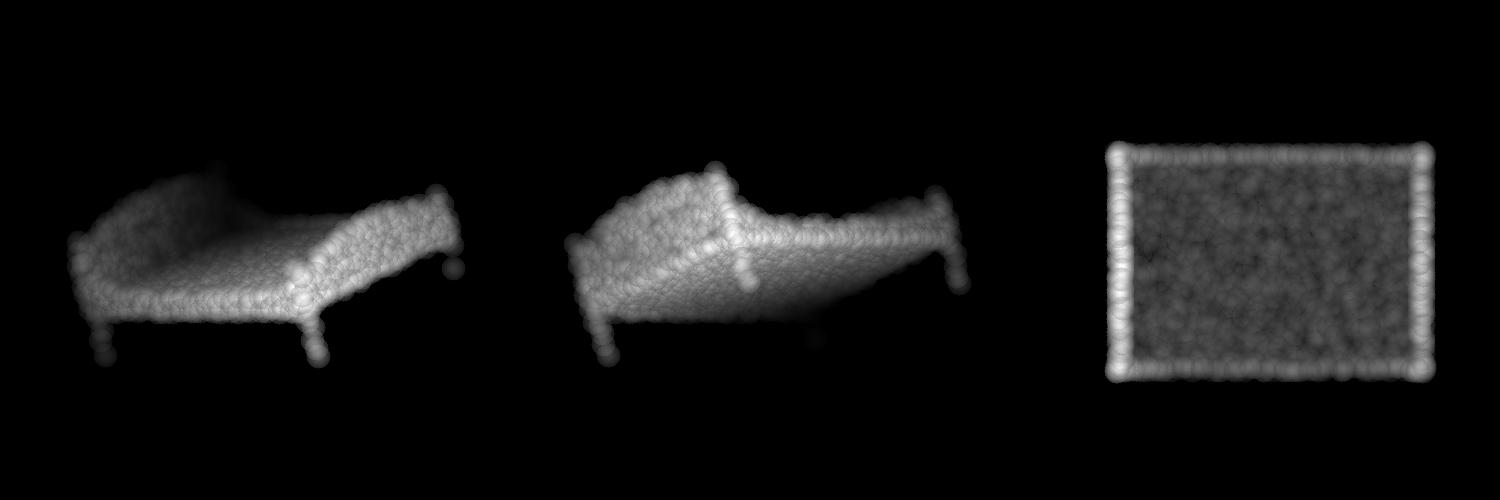
保存预测错误的图片,并可视化
</dump/xxxx_pred_name.jpg>
命名=第几个预测错误的图片+真实label+预测label
例子 /dump/1028_label_bed_pred_sofa.jpg

三张点云图片,分别是当前点云数据旋转三个不同角度之后的样子
save code
  for i in range(start_idx, end_idx):

        l = current_label[i]

        total_seen_class[l] += 1

        total_correct_class[l] += (pred_val[i-start_idx] == l)

        fout.write('%d, %d\n' % (pred_val[i-start_idx], l))

        # print('!!!!!!!!!!','%d, %d\n' % (pred_val[i-start_idx], l))

        if pred_val[i-start_idx] != l and FLAGS.visu: # ERROR CASE, DUMP!如果预测错了

            img_filename = '%d_label_%s_pred_%s.jpg' % (error_cnt, SHAPE_NAMES[l],

                                                   SHAPE_NAMES[pred_val[i-start_idx]])

            #第几个预测错误的图片+真实label+预测label

            img_filename = os.path.join(DUMP_DIR, img_filename)

            output_img = pc_util.point_cloud_three_views(np.squeeze(current_data[i, :, :]))

            scipy.misc.imsave(img_filename, output_img)

            error_cnt += 1
画点云图的code
draw_point_cloud()
Input:
points: Nx3 numpy array
Output:
gray image
记录loss,预测精确度
/dump/log_evaluate.txt
eval mean loss: 1.816358

eval accuracy: 0.501216

eval avg class acc: 0.421297

  airplane: 0.980

   bathtub: 0.440

       bed: 0.940

     bench: 0.450

     ...
pointNet代码的更多相关文章
- pointnet.pytorch代码解析
pointnet.pytorch代码解析 代码运行 Training cd utils python train_classification.py --dataset <dataset pat ...
- pointnet++之classification/train.py
1.数据集加载 if FLAGS.normal: assert(NUM_POINT<=10000) DATA_PATH = os.path.join(ROOT_DIR, 'data/modeln ...
- pointnet++的pytorch实现
代码参考:https://blog.csdn.net/weixin_39373480/article/details/88934146 def recognize_all_data(test_area ...
- pointnet++之scannet/train.py
1.作者可能把scannet数据集分成了训练集和测试集并处理成了.pickle文件. 2.在代码运行过程中,作者从.pickle文件中读出训练集1201个场景的x.y.z坐标和测试集312个场景的x. ...
- 论文笔记:(NIPS2017)PointNet++: Deep Hierarchical Feature Learning on Point Sets in a Metric Space
目录 一. 存在的问题 1.提取局部特征的能力 2.点云密度不均问题 二.解决方案 1.改进特征提取方法: (1)采样层(sampling) (2)分组层(grouping) (3)特征提取层(fea ...
- 论文笔记:(CVPR2017)PointNet: Deep Learning on Point Sets for 3D Classification and Segmentation
目录 一. 存在的问题 二. 解决的方案 1.点云特征 2.解决方法 三. 网络结构 四. 理论证明 五.实验效果 1.应用 (1)分类: ModelNet40数据集 (2)部件分割:ShapeNet ...
- 日期格式代码出现两次的错误 ORA-01810
错误的原因是使用了两次MM . 一.Oracle中使用to_date()时格式化日期需要注意格式码 如:select to_date('2005-01-01 11:11:21','yyyy-MM-dd ...
- 可爱的豆子——使用Beans思想让Python代码更易维护
title: 可爱的豆子--使用Beans思想让Python代码更易维护 toc: false comments: true date: 2016-06-19 21:43:33 tags: [Pyth ...
- iOS代码规范(OC和Swift)
下面说下iOS的代码规范问题,如果大家觉得还不错,可以直接用到项目中,有不同意见 可以在下面讨论下. 相信很多人工作中最烦的就是代码不规范,命名不规范,曾经见过一个VC里有3个按钮被命名为button ...
随机推荐
- Node.js接口避免重复启动
众所周知,一个Node接口要是想被调用,得先在命令行中执行如下代码来启动接口 node base.js 但是一旦修改了base.js,就得重新执行这句命令 注:这里的base.js是我的node接口文 ...
- 三、ITK的dcm图像读写
一.主要功能 1.读取单张dcm图像 2.写入单张dcm图像 3.图像调整之后以.jpg格式写入 4.调整之后重新以.dcm格式写入 二.代码 #include "itkImageFileR ...
- skkyk:点分治
由题开始== 例题:求在一棵有权树上,是否存在一条路径满足权值和为K 解法:以每个点为根一次,看在他的子树间是否存在两段,其和为K;O(==) 和例题一样,对于树上问题,求某些要求的路径(数量或者存在 ...
- 给Java0基础的五个学习的思路?
关于Java初学者来说,想学习Java教程,需求了解,根底打好才干学得更好,Java教程之学习Java的路线图的五个必经阶段,希望能对Java学习者有所帮忙. 第一个阶段-java根底阶段 1.jav ...
- 在Windows系统中安装matplotlib,需要注意的问题
matplotlib的下载地址:https://pypi.org/project/matplotlib/#files 以python3.6为例,适合的版本matplotlib-3.1.1-cp36-c ...
- 抓包工具之fiddler实战2-设置断点
Fiddler作为抓工具包,功能强大,作为代理服务器,可以对抓获到的请求或响应进行修改,然后模拟客户端发送新的请求或模拟服务器返回修改后的响应结果. Fiddler中设置断点修改Request Fid ...
- 06-Django视图
什么是视图? 视图就是应用中views.py文件中的函数,视图函数的第一个参数必须是request(HttpRequest)对象.返回的时候必须返回一个HttpResponse对象或子对象(包含Htt ...
- SqlServer ----- 根据查询语句创建视图
我们都知道视图的本质就是查询语句,那么就可以根据查询语句创建视图, 前提 知道视图的组成,已经写好的sql 语句,多表或单表的查询语句,将查询语句变成视图. 所以视图可以由单表,多表或视图加表构成. ...
- 依赖注入在 dotnet core 中实现与使用:2 使用 Extensions DependencyInjection
既然是依赖注入容器,必然会涉及到服务的注册,获取服务实例,管理作用域,服务注入这四个方面. 服务注册涉及如何将我们的定义的服务注册到容器中.这通常是实际开发中使用容器的第一步,而容器本身通常是由框架来 ...
- WPF ListBox 隐藏滑块
<ListBox ScrollViewer.VerticalScrollBarVisibility = "Disabled"; </ListBox>
