SSM-SpringMVC-18:SpringMVC中参数自动装配
------------吾亦无他,唯手熟尔,谦卑若愚,好学若饥-------------
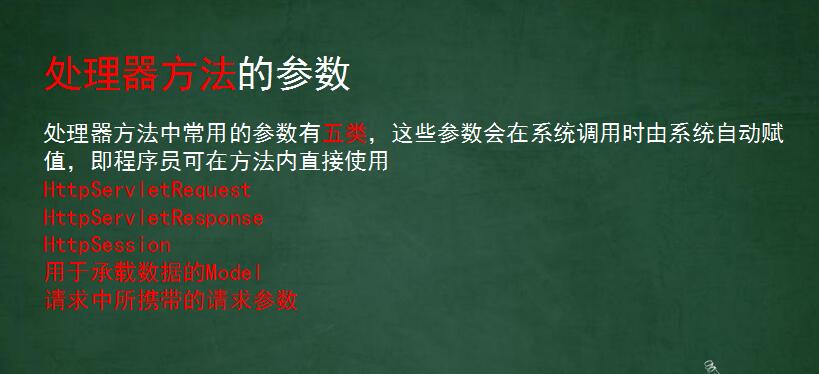
在处理方法中,参数写上之后,只要符合特定规则,就可以自动装配
首先

其次是:自定义的参数的自动装配:
案例如下:我的相同的配置文件就在下面不重复展示,不同的就展示一下:
第一种,零散参数自动装配:
在处理器中定义方法:
package cn.dawn.day11autowire;

import org.springframework.stereotype.Controller;

import org.springframework.ui.Model;

import org.springframework.web.bind.annotation.PathVariable;

import org.springframework.web.bind.annotation.RequestMapping;

import org.springframework.web.bind.annotation.RequestMethod;

import org.springframework.web.bind.annotation.RequestParam;

/**

 * Created by Dawn on 2018/3/24.

 */

/*注解定义处理器*/

@Controller

/*定义处理器访问路径*/

@RequestMapping("/user")

public class MyAController {

    /*第一种零散根据name*/

    @RequestMapping("/doLogin")

    public String doLogin(String username,String password, Model model) throws Exception {

        model.addAttribute("username",username);

        System.out.println(username);

        System.out.println(password);

        return "success";

    }

}
在自定义配置文件中:
<?xml version="1.0" encoding="UTF-8"?>

<beans xmlns="http://www.springframework.org/schema/beans"

       xmlns:xsi="http://www.w3.org/2001/XMLSchema-instance" xmlns:mvc="http://www.springframework.org/schema/mvc"

       xmlns:context="http://www.springframework.org/schema/context"

       xsi:schemaLocation="http://www.springframework.org/schema/beans http://www.springframework.org/schema/beans/spring-beans.xsd http://www.springframework.org/schema/mvc http://www.springframework.org/schema/mvc/spring-mvc.xsd http://www.springframework.org/schema/context http://www.springframework.org/schema/context/spring-context.xsd">

    <!--包扫描器-->

    <context:component-scan base-package="cn.dawn.day11autowire"></context:component-scan>

    <!--视图解析器-->

    <bean class="org.springframework.web.servlet.view.InternalResourceViewResolver">

        <property name="prefix" value="/"></property>

        <property name="suffix" value=".jsp"></property>

    </bean>

</beans>
xml配置文件中只需要包扫描器和视图解析器
jsp页面:
<%@ page  pageEncoding="UTF-8" contentType="text/html;charset=UTF-8" language="java" isELIgnored="false"  %>

<html>

<head>

    <title>Title</title>

</head>

<body>

<h2>登录</h2>

<form action="${pageContext.request.contextPath}/user/doLogin" method="post">

    <%--第一种自动装配零散参数--%>

    用户名:<input name="username">

    <input type="submit" value="登录"/>

</form>

</body>

</html>
第二个jsp页面:success.jsp
<%@ page language="java" pageEncoding="utf-8" isELIgnored="false" %>

<html>

<body>

<%--<img src="data:image/1.jpg">--%>

<h2>Success!</h2>

<p>${username}</p>

</body>

</html>
在web.xml中需要将指定的xml文件改成现在的即可
第二种:当写前台提交的name的属性名和实体类字段名或者参数名的不是一个人,有可能出现不一致,怎么解决
处理方法:
    /*第二种零散参数name不一致*/

    @RequestMapping("/doLoginBie")

    public String doLoginBie(@RequestParam("uname") String username, String password, Model model) throws Exception {

        model.addAttribute("username",username);

        System.out.println(username);

        System.out.println(password);

        return "success";

    }
form表单中的值,记得改action指向的地址,改为新的处理方法
    <%--第二种自动装配零散参数  别名--%>

    用户名:<input name="uname">
第二种用到了@RequestParam("xxx")的这个注解
第三种:对象参数自动装配:只要表单里的name属性与对象的字段对应,就可以自动装配
此处我将最终版实体类对象发上来(因为案例全做完才写的博客,不好删减):UserInfo实体类:
package cn.dawn.day11autowire;

import java.util.List;

/**

 * Created by Dawn on 2018/3/26.

 */

public class UserInfo {

    private String username;

    private String password;

    private Car car;

    private List<Girls> girlsList;

    @Override

    public String toString() {

        return "UserInfo{" +

                "username='" + username + '\'' +

                ", password='" + password + '\'' +

                ", car=" + car +

                ", girlsList=" + girlsList +

                '}';

    }

    public List<Girls> getGirlsList() {

        return girlsList;

    }

    public void setGirlsList(List<Girls> girlsList) {

        this.girlsList = girlsList;

    }

    public Car getCar() {

        return car;

    }

    public void setCar(Car car) {

        this.car = car;

    }

    public String getUsername() {

        return username;

    }

    public void setUsername(String username) {

        this.username = username;

    }

    public String getPassword() {

        return password;

    }

    public void setPassword(String password) {

        this.password = password;

    }

}
第三个案例只用到了前俩个字段,我们看一下jsp中的form中的内容:记得改action指向的地址,改为新的处理方法
    用户名:<input name="username">

    密码:<input name="password">
第四种:当有域属性的时候怎么办?
用到了UserInfo的car这个字段,所以,建一个Car的实体类:
package cn.dawn.day11autowire;

/**

 * Created by Dawn on 2018/3/26.

 */

public class Car {

    private String type;

    @Override

    public String toString() {

        return "Car{" +

                "type='" + type + '\'' +

                '}';

    }

    public String getType() {

        return type;

    }

    public void setType(String type) {

        this.type = type;

    }

}
处理方法如下:
    /*第三种对象参数传*/

    @RequestMapping("/doLoginObject")

    public String doLoginObject(UserInfo info, Model model) throws Exception {

        model.addAttribute("username",info.getUsername());

        System.out.println(info);

        return "success";

    }
jsp页面from表单中的如下:action指向新的处理方法地址:
    用户名:<input name="username">

    密码:<input name="password">

    <%--第四种带域属性--%>

    车:<input name="car.type">
这儿需注意的是car.type这个写法
第五种:集合自动装配
在实体类中用到了girlsList这个对象List集合字段:所以我们建一个Girls表:
package cn.dawn.day11autowire;

/**

 * Created by Dawn on 2018/3/26.

 */

public class Girls {

    private String cool;

    @Override

    public String toString() {

        return "Girls{" +

                "cool='" + cool + '\'' +

                '}';

    }

    public String getCool() {

        return cool;

    }

    public void setCool(String cool) {

        this.cool = cool;

    }

}
处理方法如下:
    /*第五种对象携带集合对象参数传*/

    @RequestMapping("/doLoginObjectList")

    public String doLoginObjectList(UserInfo info, Model model) throws Exception {

        model.addAttribute("username",info.getUsername());

        System.out.println(info);

        return "success";

    }
form表单内容如下:action指向新地址:
    用户名:<input name="username">

    密码:<input name="password">

    车:<input name="car.type">

    <%--第五种带List集合--%>

    女1:<input name="girlsList[0].cool">

    女2:<input name="girlsList[1].cool">

    <input type="submit" value="登录"/>
第六种:路径参数自动装配:是可以通过占位的方式来写的:
处理方法如下:
    /*第六种路径参数传法1*/

    @RequestMapping("/doPathVariable01/{uname}")

    public String doPathVariable01(@PathVariable("uname") String username, Model model) throws Exception {

        model.addAttribute("username",username);

        System.out.println(username);

        return "success";

    }
URL访问只需要在处理器方法之后加 /值 就可以自动装配
用到了注解@PathVariable()和@RequestMapping中的{占位符}
延伸出来一个问题:如果form传过来的name值和action访问的Url地址中占位的那个参数一样,会出现什么
看
第七种:
处理器方法:
    /*第七种路径参数传法2*/

    @RequestMapping("/doPathVariable02/{username}")

    public String doPathVariable02(@PathVariable String username, Model model) throws Exception {

        model.addAttribute("username",username);

        System.out.println(username);

        return "success";

    }
jsp页面:
<%@ page  pageEncoding="UTF-8" contentType="text/html;charset=UTF-8" language="java" isELIgnored="false"  %>

<html>

<head>

    <title>Title</title>

</head>

<body>

<h2>登录</h2>

<form action="${pageContext.request.contextPath}/user/doPathVariable02/happy" method="post">

    用户名:<input name="username">

    <input type="submit" value="登录"/>

</form>

</body>

</html>
结果肯定是拿到URL里面的那个值
延伸出来一个问题:传中文会乱码,怎么办?看下篇博客
SSM-SpringMVC-18:SpringMVC中参数自动装配的更多相关文章
- Spring中的自动装配
src\dayday\Person.java package dayday;/** * Created by I am master on 2016/11/28. */public class Per ...
- spring第一课,beans配置(中)——自动装配
•Spring IOC 容器可以自动装配 Bean. 需要做的仅仅是在 <bean> 的 autowire 属性里指定自动装配的模式 •byType(根据类型自动装配): 若 IOC 容器 ...
- Spring中类型自动装配--byType
在Spring中,“类型自动装配”的意思是如果一个bean的数据类型与其它bean属性的数据类型相同,将自动兼容装配它. 例如,一个“persion” bean 公开以“ability”类数据类型作为 ...
- MVC参数自动装配
在拿到一个类型的所有属性以及字段的描述信息后,就可以通过循环的方式,根据这些数据成员的名字去QueryString,Form,Session,Cookie读取所需的数据了. 就是遍历参数,然后用反射遍 ...
- Spring boot 梳理 - 在bean中使用命令行参数-自动装配ApplicationArguments
If you need to access the application arguments that were passed to SpringApplication.run(…), you c ...
- SSM框架的sql中参数注入(#和$的区别)
<select id="findUsersByUserName2" resultType="java.util.Map" parameterType=&q ...
- 切记切记:Spring配置文件中,Component-scan无法扫描到的类中的自动装配对象无法被调用,报空指针错误。
Spring单例注入,单例对象可设置成Spring元件. 只有Spring的元件中@Autowired才有用,在普通类中@Autowired虽然不会编译报错,但运行时会报空指针错误.
- Spring学习--xml 中 Bean 的自动装配
Spring IOC 容器可以自动装配 Bean. 只要在 <bean> 的 autowire 属性里指定自动装配的模式. byName(根据名称自动装配):必须将目标 Bean 的名称和 ...
- SpringBoot启动代码和自动装配源码分析
随着互联网的快速发展,各种组件层出不穷,需要框架集成的组件越来越多.每一种组件与Spring容器整合需要实现相关代码.SpringMVC框架配置由于太过于繁琐和依赖XML文件:为了方便快速集成第三 ...
随机推荐
- Linux用户配置文件(第二版)
/etc/passwd文件剖析 文件格式: root:x:0:0:root:/root:/bin/bash 用户名:密码位:UID:GID[缺省组ID]:注释性的描述信息:宿主目录:shell[7部分 ...
- LeetCode之“动态规划”:Distinct Subsequences
题目链接 题目要求: Given a string S and a string T, count the number of distinct subsequences of T in S. A s ...
- 拆轮子之Fish动画分析
概述 最近发现一个很好玩的动画库,纯代码实现的而不是通过图片叠加唬人的,觉得很有意思看了下源码https://github.com/dinuscxj/LoadingDrawable, 这个动画效果使用 ...
- android 应用模式之mvp
说到MVP就不得不提到MVC,做过J2EE的猿友们肯定知道MVC是个什么东西.MVC即 Model.View.Controller, 那MVP就Model.View.Presenter.Model用于 ...
- ruby和linux shell共同编程的示例
有了shell为毛还要ruby呢?话不能这么说,有些小功能用ruby还是很方便的,比如说字符串的反转再加1功能用shell来写就比较麻烦.str="123456",我们定义一个反转 ...
- Java不走弯路教程(4.Client-Server模式(1)-Server)
4.Client-Server模式(1)-Server 在上一章中,我们完成了MyDataBase.java的编写,类似于一个简单的数据库功能,提供了用户验证,查询操作. 在本章中,我们将继续扩展这个 ...
- Docker 基础技术之 Linux cgroups 详解
PS:欢迎大家关注我的公众号:aCloudDeveloper,专注技术分享,努力打造干货分享平台,二维码在文末可以扫,谢谢大家. 推荐大家到公众号阅读,那里阅读体验更好,也沉淀了很多篇干货. 前面两篇 ...
- c#调用野狗云 rest api
野狗云就不多介绍了,这里主要是记录一下c#调用他们提供的rest api,把数据post到野狗云存储,直接上代码 static void Main(string[] args) { string st ...
- Js 实现自定义事件
var Event = { on: function (eventName, callback) { if (!this[eventName]) { this[eventName] = []; } t ...
- Python高阶函数之 - 装饰器
高阶函数: 1. 函数名可以作为参数传入 2. 函数名可以作为返回值. python装饰器是用于拓展原来函数功能的一种函数 , 这个函数的特殊之处在于它的返回值也是一个函数 , 使用pyth ...
