SpringCloud实战-Feign声明式服务调用
在前面的文章中可以发现当我们通过RestTemplate调用其它服务的API时,所需要的参数须在请求的URL中进行拼接,如果参数少的话或许我们还可以忍受,一旦有多个参数的话,这时拼接请求字符串就会效率低下,并且显得好傻。
那么有没有更好的解决方案呢?答案是确定的有,Netflix已经为我们提供了一个框架:Feign。
Feign是一个声明式的Web Service客户端,它的目的就是让Web Service调用更加简单。Feign提供了HTTP请求的模板,通过编写简单的接口和插入注解,就可以定义好HTTP请求的参数、格式、地址等信息。
而Feign则会完全代理HTTP请求,我们只需要像调用方法一样调用它就可以完成服务请求及相关处理。Feign整合了Ribbon和Hystrix(关于Hystrix我们后面再讲),可以让我们不再需要显式地使用这两个组件。
总起来说,Feign具有如下特性:
- 可插拔的注解支持,包括Feign注解和JAX-RS注解;
- 支持可插拔的HTTP编码器和解码器;
- 支持Hystrix和它的Fallback;
- 支持Ribbon的负载均衡;
- 支持HTTP请求和响应的压缩。
这看起来有点像我们springmvc模式的Controller层的RequestMapping映射。这种模式是我们非常喜欢的。Feign是用@FeignClient来映射服务的。
首先第一步,在原来的基础上新建一个Feign模块,接着引入相关依赖,引入Feign依赖,会自动引入Hystrix依赖的,如下:
    <dependency>

            <groupId>org.springframework.cloud</groupId>

            <artifactId>spring-cloud-starter-eureka</artifactId>

            <version>1.3..RELEASE</version>

        </dependency>

        <dependency>

            <groupId>org.springframework.cloud</groupId>

            <artifactId>spring-cloud-starter-feign</artifactId>

            <version>1.4..RELEASE</version>

        </dependency>
application.yml配置如下:
server:

  port:

spring:

  application:

    name: feign-consumer

eureka:

  client:

    service-url:

      defaultZone: http://localhost:8888/eureka/,http://localhost:8889/eureka/
接着在前面文章中的的的两个provider1和provider2两个模块的服务新增几个方法,如下代码所示:
/**

 * Created by cong on 2018/5/8.

 */

@RestController

public class HelloController {

    @RequestMapping("/hello")

    public String hello(){

        System.out.println("访问来1了......");

        return "hello1";

    }

    @RequestMapping("/hjcs")

    public List<String> laowangs(String ids){

        List<String> list = new ArrayList<>();

        list.add("laowang1");

        list.add("laowang2");

        list.add("laowang3");

        return list;

    }

    //新增的方法

    @RequestMapping(value = "/hellol", method= RequestMethod.GET)

    public String hello(@RequestParam String name) {

        return "Hello " + name;

    }

    @RequestMapping(value = "/hello2", method= RequestMethod.GET)

    public User hello(@RequestHeader String name, @RequestHeader Integer age) {

        return new User(name, age);

    }

    @RequestMapping(value = "/hello3", method = RequestMethod.POST)

    public String hello (@RequestBody User user) {

        return "Hello "+ user. getName () + ", " + user. getAge ();

    }

}
接着是上面代码所需用到的User类,代码如下:
/**

 * Created by cong 2017/12/2.

 */

public class User {

    private String name;

    private Integer age;

    //序列化传输的时候必须要有空构造方法,不然会出错

    public User() {

    }

    public User(String name, Integer age) {

        this.name = name;

        this.age = age;

    }

    public String getName() {

        return name;

    }

    public void setName(String name) {

        this.name = name;

    }

    public Integer getAge() {

        return age;

    }

    public void setAge(Integer age) {

        this.age = age;

    }

}
接下来用Feign的@FeignClient(“服务名称”)映射服务调用。代码如下:
package hjc;

import org.springframework.cloud.netflix.feign.FeignClient;

import org.springframework.web.bind.annotation.*;

/**

 * Created by cong on 2018/5/17.

 */

//configuration = xxx.class  这个类配置Hystrix的一些精确属性
//value=“你用到的服务名称”

@FeignClient(value = "hello-service",fallback = FeignFallBack.class)

public interface FeignService {

  //服务中方法的映射路径

    @RequestMapping("/hello")

    String hello();

    @RequestMapping(value = "/hellol", method= RequestMethod.GET)

    String hello(@RequestParam("name") String name) ;

    @RequestMapping(value = "/hello2", method= RequestMethod.GET)

    User hello(@RequestHeader("name") String name, @RequestHeader("age") Integer age);

    @RequestMapping(value = "/hello3", method= RequestMethod.POST)

    String hello(@RequestBody User user);

}
接着在Controller层注入FeiService这个接口,进行远程服务调用,代码如下:
/**

 * Created by cong on 2018/5/17.

 */

@RestController

public class ConsumerController {

    @Autowired

    FeignService feignService;

    @RequestMapping("/consumer")

    public String helloConsumer(){

        return feignService.hello();

    }

    @RequestMapping("/consumer2")

    public String helloConsumer2(){

        String r1 = feignService.hello("hjc");

        String r2 = feignService.hello("hjc", ).toString();

        String r3 = feignService.hello(new User("hjc", ));

        return r1 + "-----" + r2 + "----" + r3;

    }

}
接着在Feign模块的启动类哪里打上Eureka客户端的注解@EnableDiscoveryClient Feign客户端的注解@EnableFeignClients,代码如下:
@SpringBootApplication

@EnableDiscoveryClient

@EnableFeignClients

public class FeignApplication {

    public static void main(String[] args) {

        SpringApplication.run(FeignApplication.class, args);

    }

}
接着启动启动类,浏览器上输入localhost:8083/consumer 运行结果如下:
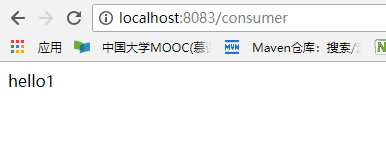
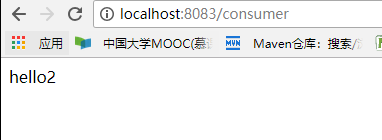
可以看到负载均衡轮询出现hello1,hello2。
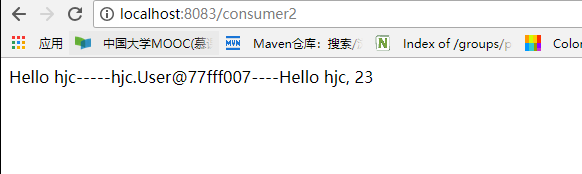
接着继续在浏览器上输入localhost:8083/consumer2,运行结果如下:
接下来我们进行Feign声明式调用服务下的,服务降级的使用,那么我们就必须新建一个FeignFallBack类来继承FeiService,代码如下:
package hjc;

import org.springframework.stereotype.Component;

/**

 * Created by cong on 2018/5/17.

 */

@Component

public class FeignFallBack implements FeignService{
  //实现的方法是服务调用的降级方法

    @Override

    public String hello() {

        return "error";

    }

    @Override

    public String hello(String name) {

        return "error";

    }

    @Override

    public User hello(String name, Integer age) {

        return new User();

    }

    @Override

    public String hello(User user) {

        return "error";

    }

}
接着我们再把那两个服务提供模块provider1,provider2模块进行停止,运行结果如下所示:

可以看到我们这几个调用,都进行了服务降级了。
那么如果我们想精确的控制一下Hystrix的参数也是可以的,比方说跟Hystrix结合的参数,那么可以在FeignClient注解里面配置一个Configuration=XXX类.class属性,在哪个类里面精确的指定一下属性。
或者在application.yml里面配置,如下:
hystrix:

  command:

    default:

      execution:

        isolation:

          thread:

            timeoutinMilliseconds:

ribbon:

  connectTimeout:

#如果想对单独的某个服务进行详细配置,如下

hello-service:

  ribbon:

    connectTimeout:
这里满足了我们大部分场景的调用,但是有写精细场景,还是要用原生的Hystrix,跟我们之前的Hystrix用法一下,不要走Feign客户端调用就行了,如下:
/**

 * Created by cong on 2018/5/17.

 */

public class HjcCommand extends HystrixCommand {

    protected HjcCommand(HystrixCommandGroupKey group) {

        super(group);

    }

    @Override

    protected Object run() throws Exception {

        return null;

    }

}
那么我们如果想用原声的HystrixCommand去搞一个异步请求怎么办?代码如下:
首先再引入一个依赖,feign客户端没有默认引入进来,需要我们自己引入:
    <dependency>

            <groupId>com.netflix.hystrix</groupId>

            <artifactId>hystrix-javanica</artifactId>

            <version>1.5.</version>

        </dependency>
接着用HystrixCommand注解方式实现:
/**

 * Created by cong on 2018/5/17.

 */

@Service

public class HjcCommand {

    @Autowired

    private FeignService feignService;

    //同步方式

    @HystrixCommand

    public Future<String> getEmployeesAsync(){

        return new AsyncResult<String>() {

            @Override

            public String invoke() {

                return feignService.hello("hjc");

            }

        };

    }

    //用同步方式还不如直接用Feign客户端

    @HystrixCommand

    public String getEmployeesAsync1(){

        return feignService.hello("laowang");

    }

}
这样还不行,我们还需要声明一个切面,HystrixConfiguration,接着,将HystrixConfiguration加入到spring管理,代码如下:
@Configuration

public class HystrixConfiguration {

    @Bean

    public HystrixCommandAspect hystrixAspect(){

        return  new HystrixCommandAspect();

    }

}
SpringCloud实战-Feign声明式服务调用的更多相关文章
- Spring Cloud Feign 声明式服务调用
目录 一.Feign是什么? 二.Feign的快速搭建 三.Feign的几种姿态 参数绑定 继承特性 四.其他配置 Ribbon 配置 Hystrix 配置 一.Feign是什么? 通过对前面Sp ...
- Spring Cloud Feign声明式服务调用(转载)+遇到的问题
转载:原文 总结: 1.pom添加依赖 2.application中填写正确的eureka配置 3.启动项中增加注解 @EnableFeignClients 4.填写正确的调用接口 通过原文使用Fei ...
- spring cloud 系列第4篇 —— feign 声明式服务调用 (F版本)
源码Gitub地址:https://github.com/heibaiying/spring-samples-for-all 一.feign 简介 在上一个用例中,我们使用ribbon+restTem ...
- springcloud(七)-Feign声明式REST调用
前言 前面我们使用的RestTemplate实现REST API调用,代码大致如下: public User findById(@PathVariable Long id) { return rest ...
- Feign声明式服务调用
Feign是一种声明式.模板化的HTTP客户端(仅在Application Client中使用).声明式调用是指,就像调用本地方法一样调用远程方法,无需感知操作远程http请求. Spring Clo ...
- 笔记:Spring Cloud Feign 声明式服务调用
在实际开发中,对于服务依赖的调用可能不止一处,往往一个接口会被多处调用,所以我们通常会针对各个微服务自行封装一些客户端类来包装这些依赖服务的调用,Spring Cloud Feign 在此基础上做了进 ...
- SpringCloud无废话入门03:Feign声明式服务调用
1.Feign概述 在上一篇的HelloService这个类中,我们有这样一行代码: return restTemplate.getForObject("http://hello-servi ...
- Spring Cloud 2-Feign 声明式服务调用(三)
Spring Cloud Feign 1. pom.xml 2. application.yml 3. Application.java 4. Client.java 简化RestTemplate调 ...
- SpringCloud系列-利用Feign实现声明式服务调用
上一篇文章<手把手带你利用Ribbon实现客户端的负载均衡>介绍了消费者通过Ribbon调用服务实现负载均衡的过程,里面所需要的参数需要在请求的URL中进行拼接,但是参数太多会导致拼接字符 ...
随机推荐
- 【一天一道LeetCode】#9. Palindrome Number
一天一道LeetCode系列 (一)题目 Determine whether an integer is a palindrome. Do this without extra space. Some ...
- 【Visual C++】游戏编程学习笔记之六:多背景循环动画
本系列文章由@二货梦想家张程 所写,转载请注明出处. 本文章链接:http://blog.csdn.net/terence1212/article/details/44264153 作者:ZeeCod ...
- 【线性代数】标准正交矩阵与Gram-Schmidt正交化
1.标准正交矩阵 假设矩阵Q有列向量q1,q2,...,qn表示,且其列向量满足下式: 则 若Q为方阵,由上面的式子则有 我们举例说明上述概念: 2.标准正交矩阵的好处 上面我们介绍了标准正交 ...
- WINCE的批处理
WINCE上没有提供象window一样的bat文件,如果需要类似功能可以借助第三方程序MortScript MortScript是一个运行于WINCE上的免费脚本解释程序,脚本文件为.mscr或.mo ...
- Android使用SVG矢量动画(二)
上篇我们学习了怎么显示SVG矢量图像,当然还有一个更强大的功能,就是让SVG图像动起来,先上一张效果图吧: 要实现上述动画效果,就得用AnimatedVectorDrawable这个类了,它就是负责V ...
- Aprior算法
在关联规则挖掘领域最经典的算法法是Apriori,其致命的缺点是需要多次扫描事务数据库.于是人们提出了各种裁剪(prune)数据集的方法以减少I/O开支,韩嘉炜老师的FP-Tree算法就是其中非常高效 ...
- UTL_HTTP Call a Web Service and Pass Parameters as Part of the URL
SET DEFINE OFF SET SERVEROUTPUT ON DECLARE req UTL_HTTP.REQ; resp UTL_HTTP.RESP; value VARCHAR2(3276 ...
- 【Android 应用开发】AndroidUI设计之 布局管理器 - 详细解析布局实现
写完博客的总结 : 以前没有弄清楚的概念清晰化 父容器与本容器属性 : android_layout...属性是本容器的属性, 定义在这个布局管理器的LayoutParams内部类中, 每个布局管理器 ...
- vim多行增加缩进
http://blog.163.com/clevertanglei900@126/blog/static/11135225920116891750734/ 在Normal Mode下,命令>&g ...
- Erlang cowboy 处理不规范的客户端
Erlang cowboy 处理不规范的客户端 Cowboy 1.0 参考 本章: Dealing with broken clients 存在许多HTTP协议的实现版本.许多广泛使用的客户端,如浏览 ...