Linux系统实现ansible自动化安装配置httpd
1、使用ansible的playbook实现自动化安装httpd
1)首先配置好ansible的hosts文件,让其对应主机能够受ansible控制

提示:我们在主机清单上配置了所管控的主机地址,但是直接用ansible的ping模块去探测主机的存活情况,却显示权限拒绝。从提示上说让我们要指定用什么验证。默认情况ansible是通过ssh的key验证的,所以我们在ansible的主机清单中配置了管控主机的ip是不够的,还要配置ssh基于KEY验证
2)配置管控主机能够基于SSH key验证
- [root@test ~]# ip a s enp2s0
- 2: enp2s0: <BROADCAST,MULTICAST,UP,LOWER_UP> mtu 1500 qdisc pfifo_fast state UP group default qlen 1000
- link/ether 00:30:18:51:af:3c brd ff:ff:ff:ff:ff:ff
- inet 192.168.0.99/24 brd 192.168.0.255 scope global noprefixroute enp2s0
- valid_lft forever preferred_lft forever
- inet 172.16.1.2/16 brd 172.16.255.255 scope global noprefixroute enp2s0:0
- valid_lft forever preferred_lft forever
- inet6 fe80::230:18ff:fe51:af3c/64 scope link
- valid_lft forever preferred_lft forever
- [root@test ~]# ssh-keygen
- Generating public/private rsa key pair.
- Enter file in which to save the key (/root/.ssh/id_rsa):
- Created directory '/root/.ssh'.
- Enter passphrase (empty for no passphrase):
- Enter same passphrase again:
- Your identification has been saved in /root/.ssh/id_rsa.
- Your public key has been saved in /root/.ssh/id_rsa.pub.
- The key fingerprint is:
- SHA256:UORxi5JhiKDBOhZP3FsbsZfyCjqUcjwqdl1qcnTyGsw root@test
- The key's randomart image is:
- +---[RSA 2048]----+
- |+.....oo= . |
- |.+.o.o B.+.. |
- |o + *o=o. |
- |o..... ++ |
- |.o * + oS. |
- | = B B . |
- |.o = E o |
- |o . = o |
- | . |
- +----[SHA256]-----+
- [root@test ~]# ssh-copy-id 192.168.0.99 -p 41319
- /bin/ssh-copy-id: INFO: Source of key(s) to be installed: "/root/.ssh/id_rsa.pub"
- The authenticity of host '[192.168.0.99]:41319 ([192.168.0.99]:41319)' can't be established.
- ECDSA key fingerprint is SHA256:W2pD2PA2K9tGKGVK+weiINcVESkUaHjsTI263OVqBh4.
- ECDSA key fingerprint is MD5:3a:f8:c9:b1:63:c6:c1:ae:e0:6e:e2:ca:17:4a:20:7a.
- Are you sure you want to continue connecting (yes/no)? yes
- /bin/ssh-copy-id: INFO: attempting to log in with the new key(s), to filter out any that are already installed
- /bin/ssh-copy-id: INFO: 1 key(s) remain to be installed -- if you are prompted now it is to install the new keys
- root@192.168.0.99's password:
- Number of key(s) added: 1
- Now try logging into the machine, with: "ssh -p '41319' '192.168.0.99'"
- and check to make sure that only the key(s) you wanted were added.
- [root@test ~]# scp -r .ssh 192.168.0.10:~/
- The authenticity of host '192.168.0.10 (192.168.0.10)' can't be established.
- ECDSA key fingerprint is SHA256:EG9nua4JJuUeofheXlgQeL9hX5H53JynOqf2vf53mII.
- ECDSA key fingerprint is MD5:57:83:e6:46:2c:4b:bb:33:13:56:17:f7:fd:76:71:cc.
- Are you sure you want to continue connecting (yes/no)? yes
- Warning: Permanently added '192.168.0.10' (ECDSA) to the list of known hosts.
- root@192.168.0.10's password:
- id_rsa 100% 1675 677.0KB/s 00:00
- id_rsa.pub 100% 391 207.6KB/s 00:00
- known_hosts 100% 356 12.2KB/s 00:00
- authorized_keys 100% 391 12.6KB/s 00:00
- [root@test ~]#
提示:做ssh基于key验证需要在ansible主机上做,我上面是现在ansible主机上生成一对ssh密钥,然后通过ssh-copy-id 把公钥复制给本机生成authorized_keys文件,然后在把.ssh目录复制给远端客户机,这样一来ansible主机可以通过ssh基于key免密登录远端客户机,同时远端客户机也可以通过ssh免密登录ansible主机,这样就实现了双向的ssh基于key验证,如果你只想单向的通过ssh基于key认证,你可以在ansible主机上生成密钥对,然后把公钥发给对方即可。有关ssh基于key认证的详细说明请参考本人博客https://www.cnblogs.com/qiuhom-1874/p/11783371.html
测试:用ansible主机通过ssh远程客户端主机
- [root@test ~]# ssh 192.168.0.10
- Last login: Mon Jan 27 04:58:46 2020 from 192.168.0.99
- [root@test-centos7-node1 ~]# ip a
- 1: lo: <LOOPBACK,UP,LOWER_UP> mtu 65536 qdisc noqueue state UNKNOWN qlen 1
- link/loopback 00:00:00:00:00:00 brd 00:00:00:00:00:00
- inet 127.0.0.1/8 scope host lo
- valid_lft forever preferred_lft forever
- inet6 ::1/128 scope host
- valid_lft forever preferred_lft forever
- 2: ens33: <BROADCAST,MULTICAST,UP,LOWER_UP> mtu 1500 qdisc pfifo_fast state UP qlen 1000
- link/ether 00:0c:29:f2:82:0c brd ff:ff:ff:ff:ff:ff
- inet 192.168.0.10/24 brd 192.168.0.255 scope global ens33
- valid_lft forever preferred_lft forever
- inet6 fe80::20c:29ff:fef2:820c/64 scope link
- valid_lft forever preferred_lft forever
- [root@test-centos7-node1 ~]# exit
- 登出
- Connection to 192.168.0.10 closed.
- [root@test ~]#
提示:可以看到ansible主机能够正常免密登录远端主机,接下我们在用ansible的ping模块去探测下被管控主机的存活
- [root@test ~]# ansible websers -m ping
- 192.168.0.10 | SUCCESS => {
- "changed": false,
- "ping": "pong"
- }
- [root@test ~]#
提示:能够看到用ansible的ping模块去探测远端主机的存活,返回的状态是SUCCESS,数据是pong说明对端主机上存活的
到此ansible的环境就准备好了,接下来写playbook来安装httpd
- [root@test ~]# cat install_httpd.yml
- ---
- - hosts: websers
- remote_user: root
- tasks:
- - name: copy epel file
- copy: src=/etc/yum.repos.d/CentOS-Base.repo dest=/etc/yum.repos.d/CentOS-Base.repo
- - name: install httpd
- yum: name=httpd
- - name: start httpd
- service: name=httpd state=started enabled=yes
- [root@test ~]# ansible-playbook -C install_httpd.yml
- PLAY [websers] ***********************************************************************************************************
- TASK [copy epel file] ****************************************************************************************************
- changed: [192.168.0.10]
- TASK [install httpd] *****************************************************************************************************
- changed: [192.168.0.10]
- TASK [start httpd] *******************************************************************************************************
- changed: [192.168.0.10]
- PLAY RECAP ***************************************************************************************************************
- 192.168.0.10 : ok=3 changed=3 unreachable=0 failed=0
- [root@test ~]#
提示:以上playbook的主要内容是把本机的yum源复制到远端服务器上,然后通过yum去安装httpd包,最后启动httpd;在写好playbook后,我们用ansible-playbook -C install_httpd.yml 命令对我们写的playbook进行了测试,没有问题,接下来我们使用ansible-playbook来安装httpd
- [root@test ~]# ansible-playbook install_httpd.yml
- PLAY [websers] ***********************************************************************************************************
- TASK [copy epel file] ****************************************************************************************************
- changed: [192.168.0.10]
- TASK [install httpd] *****************************************************************************************************
- changed: [192.168.0.10]
- TASK [start httpd] *******************************************************************************************************
- changed: [192.168.0.10]
- PLAY RECAP ***************************************************************************************************************
- 192.168.0.10 : ok=3 changed=3 unreachable=0 failed=0
- [root@test ~]#
提示:从ansible-playbook 对playbook的执行状态来看是成功了,接下来我们直接使用浏览器来访问192.168.0.10,看看httpd是否已经能够正常访问,如果能正常访问说明httpd已经安装好了

提示:可以看到我们用浏览器是直接可以访问到192.168.0.10的测试页面,说明httpd在192.168.0.10上安装成功
2、建立httpd服务器,要求提供两个基于名称的虚拟主机:
(1)www.X.com,页面文件目录为/web/vhosts/x;错误日志为/var/log/httpd/x.err,访问日志为/var/log/httpd/x.access
新建虚拟主机www.X.com的配置文件
- [root@test ~]# cat x_com.conf
- <VirtualHost *:80>
- ServerName www.X.com
- DocumentRoot "/web/vhosts/x"
- <Directory "/web/vhosts/x">
- Options None
- AllowOverride None
- Require all granted
- </Directory>
- ErrorLog "logs/x.err"
- CustomLog "logs/x.access" combined
- </VirtualHost>
- [root@test ~]#
提示:我们在ansible主机上把配置文件建立好,待会直接用ansible把文件推送到对应主机的对应目录下即可使用
(2)www.Y.com,页面文件目录为/web/vhosts/y;错误日志为 /var/log/httpd/www2.err,访问日志为/var/log/httpd/y.access
新建虚拟主机www.Y.com的配置文件
- [root@test ~]# cat y_com.conf
- <VirtualHost *:80>
- ServerName www.Y.com
- DocumentRoot "/web/vhosts/y"
- <Directory "/web/vhosts/y">
- Options None
- AllowOverride None
- Require all granted
- </Directory>
- ErrorLog "logs/www2.err"
- CustomLog "logs/y.access" combined
- </VirtualHost>
- [root@test ~]#
(3)为两个虚拟主机建立各自的主页文件index.html,内容分别为其对应的主机名
- [root@test ~]# cat x_index.html
- <h1> www.X.com</h1>
- [root@test ~]# cat y_index.html
- <h1> www.Y.com</h1>
- [root@test ~]#
提示:以上文件在ansible主机上准备好了以后,我们接下来写一个playbook把对应的文件直接推送到远端主机即可
- [root@test ~]# cat set_virtualhost_conf_file.yml
- ---
- - hosts: websers
- remote_user: root
- tasks:
- - name: mkdir virtualhost documentroot directory
- shell: mkdir -p /web/vhosts/{x,y}
- - name: copy x_com.conf to remotehost
- copy: src=/root/x_com.conf dest=/etc/httpd/conf.d/x_com.conf
- - name: copy x_com index file
- copy: src=/root/x_index.html dest=/web/vhosts/x/index.html
- - name: copy y_com.conf to remotehost
- copy: src=/root/y_com.conf dest=/etc/httpd/conf.d/y_com.conf
- - name: copy y_com index file
- copy: src=/root/y_index.html dest=/web/vhosts/y/index.html
- [root@test ~]#
提示:以上文件的内容主要把我们建立好的配置文件推送到对应主机的对应目录,接下来我们来检查下我们写的playbook是否语法问题
- [root@test ~]# ansible-playbook -C set_virtualhost_conf_file.yml
- PLAY [websers] ***********************************************************************************************************
- TASK [mkdir virtualhost documentroot directory] **************************************************************************
- skipping: [192.168.0.10]
- TASK [copy x_com.conf to remotehost] *************************************************************************************
- changed: [192.168.0.10]
- TASK [copy x_com index file] *********************************************************************************************
- changed: [192.168.0.10]
- TASK [copy y_com.conf to remotehost] *************************************************************************************
- changed: [192.168.0.10]
- TASK [copy y_com index file] *********************************************************************************************
- changed: [192.168.0.10]
- PLAY RECAP ***************************************************************************************************************
- 192.168.0.10 : ok=4 changed=4 unreachable=0 failed=0
- [root@test ~]#
提示:测试playbook没有问题,接下来我们来运行playbook,把对应的文件推送到httpd服务器上,然后在服务器上检查我们写的配置文件是否正确
- [root@test ~]# ansible-playbook set_virtualhost_conf_file.yml
- PLAY [websers] ***********************************************************************************************************
- TASK [mkdir virtualhost documentroot directory] **************************************************************************
- [WARNING]: Consider using file module with state=directory rather than running mkdir
- changed: [192.168.0.10]
- TASK [copy x_com.conf to remotehost] *************************************************************************************
- changed: [192.168.0.10]
- TASK [copy x_com index file] *********************************************************************************************
- changed: [192.168.0.10]
- TASK [copy y_com.conf to remotehost] *************************************************************************************
- changed: [192.168.0.10]
- TASK [copy y_com index file] *********************************************************************************************
- changed: [192.168.0.10]
- PLAY RECAP ***************************************************************************************************************
- 192.168.0.10 : ok=5 changed=5 unreachable=0 failed=0
- [root@test ~]#
提示:从上面的返回状态看,都是成功的,只是第一个任务提示我们使用file模块去创建目录会更好一些,接下来我们使用ansible的shell模块去检查远端服务器上的配置文件的语法是否正确
- [root@test ~]# ansible websers -m shell -a 'httpd -t'
- 192.168.0.10 | SUCCESS | rc=0 >>
- AH00558: httpd: Could not reliably determine the server's fully qualified domain name, using fe80::20c:29ff:fef2:820c. Set the 'ServerName' directive globally to suppress this message
- Syntax OK
- [root@test ~]#
提示:我们利用ansible在远程主机上检查httpd的配置文件语法是没有问题,它提示我们没有servername,这个提示可以不用管它,如果你觉得非要处理一下也可以,在httpd的主配置文件中找到ServerName 把对应的servername配置上就好了;接下来我们重启httpd,然后在客户机上访问两个虚拟主机
- [root@test ~]# ansible websers -m shell -a 'systemctl restart httpd'
- 192.168.0.10 | SUCCESS | rc=0 >>
- [root@test ~]#
在客户端上更改/etc/hosts文件,让其访问www.X.com 和www.Y.com 能够解析到远程主机
- [root@test ~]# cat /etc/hosts
- 127.0.0.1 localhost localhost.localdomain localhost4 localhost4.localdomain4
- ::1 localhost localhost.localdomain localhost6 localhost6.localdomain6
- 192.168.0.10 www.X.com www.Y.com
- [root@test ~]#
测试:利用curl 分别访问两个虚拟主机,看看对应的主页文件内容是否不同
- [root@test ~]# curl http://www.X.com/index.html
- <h1> www.X.com</h1>
- [root@test ~]# curl http://www.Y.com/index.html
- <h1> www.Y.com</h1>
- [root@test ~]#
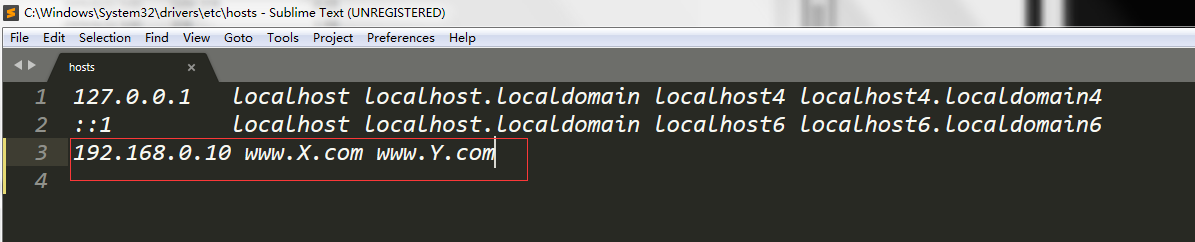
提示:我们利用curl对其各自虚拟主机的主页文件访问,都能看到对应的主页文件内容,当然你也可以更改Windows的hosts文件,把对应的解析内容写进去,然后通过Windows浏览器也是可以的,如下所示:

提示:在windows上找到hosts文件,然后把对应的记录添加进去,如下
提示:接下来我们利用Windows的浏览器来访问下两个虚拟主机


接下我们在看看httpd服务器的日志是否都已生成
- [root@test ~]# ansible websers -m shell -a 'ls -l /var/log/httpd'
- 192.168.0.10 | SUCCESS | rc=0 >>
- 总用量 16
- -rw-r--r--. 1 root root 2668 1月 27 06:30 access_log
- -rw-r--r--. 1 root root 2940 1月 27 07:34 error_log
- -rw-r--r--. 1 root root 0 1月 27 07:38 www2.err
- -rw-r--r--. 1 root root 500 1月 27 07:52 x.access
- -rw-r--r--. 1 root root 0 1月 27 07:38 x.err
- -rw-r--r--. 1 root root 500 1月 27 07:52 y.access
- [root@test ~]# ansible websers -m shell -a 'cat /var/log/httpd/x.access'
- 192.168.0.10 | SUCCESS | rc=0 >>
- 192.168.0.99 - - [27/Jan/2020:07:39:15 -0500] "GET /index.html HTTP/1.1" 200 20 "-" "curl/7.29.0"
- 192.168.0.232 - - [27/Jan/2020:07:52:31 -0500] "GET / HTTP/1.1" 200 20 "-" "Mozilla/5.0 (Windows NT 6.1; WOW64) AppleWebKit/537.36 (KHTML, like Gecko) Chrome/69.0.3497.100 Safari/537.36"
- 192.168.0.232 - - [27/Jan/2020:07:52:31 -0500] "GET /favicon.ico HTTP/1.1" 404 209 "http://www.x.com/" "Mozilla/5.0 (Windows NT 6.1; WOW64) AppleWebKit/537.36 (KHTML, like Gecko) Chrome/69.0.3497.100 Safari/537.36"
- [root@test ~]# ansible websers -m shell -a 'cat /var/log/httpd/y.access'
- 192.168.0.10 | SUCCESS | rc=0 >>
- 192.168.0.99 - - [27/Jan/2020:07:39:19 -0500] "GET /index.html HTTP/1.1" 200 20 "-" "curl/7.29.0"
- 192.168.0.232 - - [27/Jan/2020:07:52:48 -0500] "GET / HTTP/1.1" 200 20 "-" "Mozilla/5.0 (Windows NT 6.1; WOW64) AppleWebKit/537.36 (KHTML, like Gecko) Chrome/69.0.3497.100 Safari/537.36"
- 192.168.0.232 - - [27/Jan/2020:07:52:48 -0500] "GET /favicon.ico HTTP/1.1" 404 209 "http://www.y.com/" "Mozilla/5.0 (Windows NT 6.1; WOW64) AppleWebKit/537.36 (KHTML, like Gecko) Chrome/69.0.3497.100 Safari/537.36"
- [root@test ~]#
提示:可以看到httpd服务器上都已经生成了对应名称的日志文件。有关ansible的用法可以参考本人博客https://www.cnblogs.com/qiuhom-1874/category/1642813.html
Linux系统实现ansible自动化安装配置httpd的更多相关文章
- Linux系统中ElasticSearch搜索引擎安装配置Head插件
近几篇ElasticSearch系列: 1.阿里云服务器Linux系统安装配置ElasticSearch搜索引擎 2.Linux系统中ElasticSearch搜索引擎安装配置Head插件 3.Ela ...
- Linux系统下Redis缓存安装配置
Redis是一个高性能的key-value数据库,现时越来越多企业与应用使用Redis作为缓存服务器.楼主是一枚JAVA后端程序员,也算是半个运维工程师了.在Linux服务器上搭建Redis,怎么可以 ...
- Linux下apache+phppgadmin+postgresql安装配置
Linux下apache+phppgadmin+postgresql安装配置 操作系统:CentOS 安装包:httpd(首选yum), php(包括php以及php-pgsql,php-mbstri ...
- Linux系统打开core dump的配置【转】
什么是core dump core dump又叫核心转储, 当程序运行过程中发生异常, 程序异常退出时, 由操作系统把程序当前的内存状况存储在一个core文件中, 叫core dump.core du ...
- [k8s]kubespray(ansible)自动化安装k8s集群
kubespray(ansible)自动化安装k8s集群 https://github.com/kubernetes-incubator/kubespray https://kubernetes.io ...
- Linux 系统 pptpd+radius+mysql 安装攻略
分类: 原文地址:Linux 系统 pptpd+radius+mysql 安装攻略 作者:wfeng .你所需要的软件 内核最好能升级到2.6 如果你是centos的用户,可以通过yum update ...
- Linux系统中tomcat的安装及优化
Linux系统中Tomcat 8 安装 Tomcat 8 安装 官网:http://tomcat.apache.org/ Tomcat 8 官网下载:http://tomcat.apache.org/ ...
- 腾讯云Linux系统中启动自己安装的tomcat
腾讯云Linux系统中启动自己安装的tomcat 首先通过工具查看一下安装的tomcat的位置 进入命令行之后输入以下指令: 此时,tomcat已经启动了.
- Linux系统下ssh的相关配置详细解析
Linux系统下ssh的相关配置进行了详细的分析介绍. ssh是大家常用的登录linux服务器的方式,但是为了安全考虑,有时候我们需要针对ssh做一些特殊处理,本文记录笔者曾经做过的一些修改,供大家参 ...
随机推荐
- linux(raspbian)下mysql的安装,权限设置和用户管理
一 MySQL安装:(1) 使用apt-get安装, 由于raspbian是基于Debian的自由操作系统,debian默认自带apt-get指令安装应用因此可以使用来安装 sudo apt-get ...
- 导出 CVS
function ExportStoreInfoAction() { set_time_limit(0); $table = "xd_store"; $res = [[...].. ...
- 830. String Sort
830. String Sort 题解 int alpha[256] = {0};//记录字符的次数 bool cmp(char a,char b) { if(alpha[a]==alpha[b])/ ...
- .Net Core - AgileHttp
2020年新年将至,先预祝.Net Core越来越好. 做了这么多年一线开发,经常跟Http打交道.比如调用三方的Webservice,比如集成微信支付的时候服务端发起Prepay支付.特别是现在分布 ...
- GPU图形绘制管线简介
(阅读GPU+编程与CG+语言之阳春白雪下里巴人所得总结) GPU图形绘制管线是描述GPU渲染(把三维世界显示为屏幕上的二维图像)的流程,主要分为三个主要阶段应用程序阶段.几何阶段.光栅阶段. 1.应 ...
- C#实现的对文件的重命名
如下C#实现对文件的重命名的方法需要传入三个string类型的参数,分别是源文件的文件目录.目的文件目录和重命名的文件名称,实现代码如下: public ExecutionResult FileRen ...
- STM32动态内存分配需要注意的地方
STM32进行动态内存分配是需要注意动态内存分配大小不要超过.S文件中设置Heap Size大小 如图所示: 0x4000 :可以分配得最大字节是16384bytes 这个地方malloc的大小超过了 ...
- Milking Cows 挤牛奶 USACO 排序 模拟
1005: 1.2.1 Milking Cows 挤牛奶 时间限制: 1 Sec 内存限制: 128 MB提交: 15 解决: 9[提交] [状态] [讨论版] [命题人:外部导入] 题目描述 1 ...
- 02.flask-script
网址:https://pypi.org/project/Flask-Script/ 文档:https://flask-script.readthedocs.io/en/latest/ 1.安装 2.新 ...
- python 判断文件的字符编码
import chardet f = open(file='test1.txt', mode='rb') data = f.read() print(chardet.detect(data))