使用ViewPager实现Tab
一、效果演示及分析
我们直接看两幅图。如下:
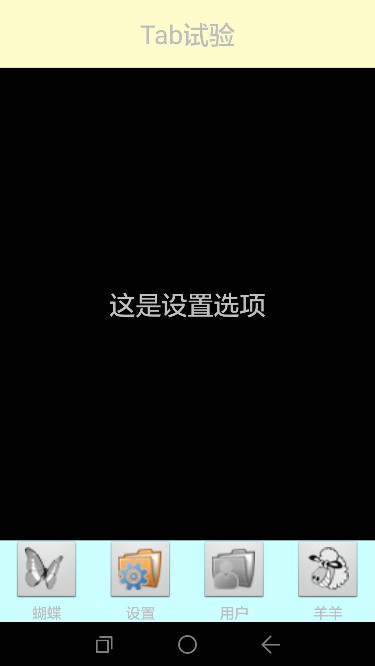

上两幅图实现的效果就是:
(1)手指左右滑动时,中间的布局呈现不同的效果。而且下面的按钮也会做相应的改变。
(2)我们也可以不左右滑动,直接点击下面的按钮来改变中间的布局。
这就是android开发中经常要用到的Tab效果,可以最大限度的使用屏幕资源。中间的View可以显示复杂又不同的界面效果。这里为了学习上的简洁,我每一个界面都只是实现了一个TextView效果而已,但这足以将利用ViewPager实现Tab的原理将清楚了。
我们很容易想到,上面的布局可以由线程布局来完成,上、中、下分别是三个线性布局,而下面的一个布局里面装了四个按钮而已。因此编写布局并不难,下面我们就开始书写吧。
二、准备相应的资源
我们只需要准备一些图片即可,即每一个按钮都有两种状态,暗色和亮色。简单利用PS就可以处理了。
三、开始写实际的代码
(1)首先我们把上面和下面的布局构建完成。
上面的布局就是 一个线性布局,中间放了一个TextView而已。我们起名为top.xml,代码很简单,如下:
- <LinearLayout xmlns:android="http://schemas.android.com/apk/res/android"
- xmlns:tools="http://schemas.android.com/tools"
- android:layout_width="match_parent"
- android:layout_height="65dp"
- android:background="#fffccc"
- android:gravity="center">
- <TextView
- android:layout_width="wrap_content"
- android:layout_height="wrap_content"
- android:text="Tab试验"
- android:textSize="25dp"/>
- </LinearLayout>
下面的布局采用一个总的线性布局安水平方向摆放四个布局,每一个布局里再放置相应的图片和文字。我们起名为bottum.xml。代码如下:
- <LinearLayout xmlns:android="http://schemas.android.com/apk/res/android"
- xmlns:tools="http://schemas.android.com/tools"
- android:layout_width="match_parent"
- android:layout_height="wrap_content"
- android:background="#ccffff"
- >
- <LinearLayout
- android:id="@+id/lay_hudie"
- android:layout_width="0dp"
- android:layout_height="match_parent"
- android:layout_weight="1"
- android:orientation="vertical"
- android:gravity="center">
- <ImageButton
- android:id="@+id/ibtn_hudie"
- android:layout_width="wrap_content"
- android:layout_height="wrap_content"
- android:clickable="false"
- android:src="@drawable/hudie"/>
- <TextView
- android:layout_width="wrap_content"
- android:layout_height="wrap_content"
- android:text="蝴蝶"/>
- "
- </LinearLayout>
- <LinearLayout
- android:id="@+id/lay_set"
- android:layout_width="0dp"
- android:layout_height="match_parent"
- android:layout_weight="1"
- android:orientation="vertical"
- android:gravity="center">
- <ImageButton
- android:id="@+id/ibtn_set"
- android:clickable="false"
- android:layout_width="wrap_content"
- android:layout_height="wrap_content"
- android:src="@drawable/set"/>
- <TextView
- android:layout_width="wrap_content"
- android:layout_height="wrap_content"
- android:text="设置"/>
- </LinearLayout>
- <LinearLayout
- android:id="@+id/lay_user"
- android:layout_width="0dp"
- android:layout_height="match_parent"
- android:layout_weight="1"
- android:orientation="vertical"
- android:gravity="center">
- <ImageButton
- android:id="@+id/ibtn_user"
- android:clickable="false"
- android:layout_width="wrap_content"
- android:layout_height="wrap_content"
- android:src="@drawable/user"/>
- <TextView
- android:layout_width="wrap_content"
- android:layout_height="wrap_content"
- android:text="用户"/>
- </LinearLayout>
- <LinearLayout
- android:id="@+id/lay_yang"
- android:layout_width="0dp"
- android:layout_height="match_parent"
- android:layout_weight="1"
- android:orientation="vertical"
- android:gravity="center">
- <ImageButton
- android:id="@+id/ibtn_yang"
- android:clickable="false"
- android:layout_width="wrap_content"
- android:layout_height="wrap_content"
- android:src="@drawable/yang"/>
- <TextView
- android:layout_width="wrap_content"
- android:layout_height="wrap_content"
- android:text="羊羊"/>
- </LinearLayout>
- </LinearLayout>
注意:ImageButton里的点击事件要设定为false。这是因为在后面我们要对它的父view,即相应的LinearLayout设置点击事件,为了保证点击事件一定能被LinearLayout捕捉到,所以要将ImageButton的点击事件设定为false。否则,如果你点击ImageButton那一部分的屏幕区域,因为它是 放在LinearLayout里面,所以点击事件先被LinearLayout捕捉。但是LinearLayout发现他里面有一个按钮也是可以处理点击事件的,就会把点击事件传递给它处理(这是android里的规定)。但是我们却没有给ImageButton设定点击事件,因为就会造成点击事件不响应。所以为了让点击事件不向下传递,我们就将按钮的点击事件设为fasle,即让它不能处理点击事件。而TextView是本身就不能响应点击事件的,因为我们不用对它设定。
(2)搭建主界面,其中就包括ViewPager
现在我们将主界面的头和尾(即上面写的),以及中间的ViewPager搭建起来。取名为activity_main.xml代码也很简单,如下:
- <LinearLayout xmlns:android="http://schemas.android.com/apk/res/android"
- xmlns:tools="http://schemas.android.com/tools"
- android:layout_width="match_parent"
- android:layout_height="match_parent"
- android:orientation="vertical"
- >
- <include layout="@layout/top"/>
- <android.support.v4.view.ViewPager
- android:id="@+id/vp"
- android:layout_width="match_parent"
- android:layout_height="0dp"
- android:layout_weight="1" >
- </android.support.v4.view.ViewPager>
- <include layout="@layout/bottum"/>"
- </LinearLayout>
注意:在这里我们应当记住,include语句是怎样引入布局的。还有ViewPager是怎样引入的。
(3)编写所有的Tab界面
从效果图上,我们可以看到Tab界面有4个(即中间黑色每滑动一次就出现不同的TextView)。很简单,我们编写四个就可以了,分别命名为Tab01.xml,Tab02.xml,Tab03.xml,Tab04.xml。代码如下:
- <LinearLayout xmlns:android="http://schemas.android.com/apk/res/android"
- xmlns:tools="http://schemas.android.com/tools"
- android:layout_width="match_parent"
- android:layout_height="match_parent"
- android:gravity="center">
- <TextView
- android:layout_width="wrap_content"
- android:layout_height="wrap_content"
- android:text="这是一只蝴蝶"
- android:textSize="25dp"/>
- </LinearLayout>
其他的一样,就是把中间的TextView显示的字改了一下而已。我就不重复了。
(4)写入活动中展示出来。
这一步还是比较复杂的。具体包括,要为按钮设定点击事件,要为ViewPager写适配器,并且要为它编写Item改变时的事件。具体看代码:
- import java.util.ArrayList;
- import java.util.List;
- import java.util.zip.Inflater;
- import android.os.Bundle;
- import android.app.Activity;
- import android.support.v4.view.PagerAdapter;
- import android.support.v4.view.ViewPager;
- import android.support.v4.view.ViewPager.OnPageChangeListener;
- import android.view.LayoutInflater;
- import android.view.Menu;
- import android.view.View;
- import android.view.View.OnClickListener;
- import android.view.ViewGroup;
- import android.widget.ImageButton;
- import android.widget.LinearLayout;
- public class MainActivity extends Activity implements OnClickListener{
- private ViewPager vp;
- private PagerAdapter mAdapter;//适配器
- private List<View> mViews = new ArrayList<View>();//数据集
- private LinearLayout mlay1;
- private LinearLayout mlay2;
- private LinearLayout mlay3;
- private LinearLayout mlay4;
- private ImageButton img1;
- private ImageButton img2;
- private ImageButton img3;
- private ImageButton img4;
- protected void onCreate(Bundle savedInstanceState) {
- super.onCreate(savedInstanceState);
- setContentView(R.layout.activity_main);
- initView();
- initEvent();//用来 初始化点击事件
- }
- //初始化点击事件
- private void initEvent() {
- mlay1.setOnClickListener(this);
- mlay2.setOnClickListener(this);
- mlay3.setOnClickListener(this);
- mlay4.setOnClickListener(this);
- //设置滑动ViewPager时的事件
- vp.setOnPageChangeListener(new OnPageChangeListener() {
- //主要在这个方法里操作,当选中相应的view时一系列的响应事件
- public void onPageSelected(int arg0) {
- resetImg();
- int item = vp.getCurrentItem();
- switch(item){
- case 0:
- img1.setImageResource(R.drawable.hudie2);
- break;
- case 1:
- img2.setImageResource(R.drawable.set2);
- break;
- case 2:
- img3.setImageResource(R.drawable.user2);
- break;
- case 3:
- img4.setImageResource(R.drawable.yang2);
- break;
- }
- }
- public void onPageScrolled(int arg0, float arg1, int arg2) {
- // TODO Auto-generated method stub
- }
- public void onPageScrollStateChanged(int arg0) {
- // TODO Auto-generated method stub
- }
- });
- }
- //该方法初始化各个view
- private void initView() {
- vp = (ViewPager) findViewById(R.id.vp);
- //获取底部的各个线性布局
- mlay1 = (LinearLayout) findViewById(R.id.lay_hudie);
- mlay2 = (LinearLayout) findViewById(R.id.lay_set);
- mlay3 = (LinearLayout) findViewById(R.id.lay_user);
- mlay4 = (LinearLayout) findViewById(R.id.lay_yang);
- //获取各个imageView
- img1 = (ImageButton) findViewById(R.id.ibtn_hudie);
- img2 = (ImageButton) findViewById(R.id.ibtn_set);
- img3 = (ImageButton) findViewById(R.id.ibtn_user);
- img4 = (ImageButton) findViewById(R.id.ibtn_yang);
- //下面将view加入到数据集中
- View v1 = LayoutInflater.from(this).inflate(R.layout.tab01, null);
- View v2 = LayoutInflater.from(this).inflate(R.layout.tab02, null);
- View v3 = LayoutInflater.from(this).inflate(R.layout.tab03, null);
- View v4 = LayoutInflater.from(this).inflate(R.layout.tab04, null);
- mViews.add(v1);
- mViews.add(v2);
- mViews.add(v3);
- mViews.add(v4);
- //然后再根据数据集配置适配器
- mAdapter = new PagerAdapter() {
- //销毁item
- public void destroyItem(ViewGroup container, int position,
- Object object) {
- container.removeView(mViews.get(position));
- }
- //初始化item
- public Object instantiateItem(ViewGroup container, int position) {
- View view = mViews.get(position);
- container.addView(view);
- return view;
- }
- //TODO
- //这个方法是什么意思,有待进一步查解
- public boolean isViewFromObject(View arg0, Object arg1) {
- return arg0 == arg1;
- }
- //获得适配的总数目
- public int getCount() {
- return mViews.size();
- }
- };
- //为ViewPager设置适配器
- vp.setAdapter(mAdapter);
- }
- //点击事件,会把执行点击的控件传进来,即view
- public void onClick(View v) {
- resetImg();
- switch(v.getId()){
- case R.id.lay_hudie:
- vp.setCurrentItem(0);//设置ViewPager当前的view
- img1.setImageResource(R.drawable.hudie2);
- break;
- case R.id.lay_set:
- vp.setCurrentItem(1);//设置ViewPager当前的view
- img2.setImageResource(R.drawable.set2);
- break;
- case R.id.lay_user:
- vp.setCurrentItem(2);//设置ViewPager当前的view
- img3.setImageResource(R.drawable.user2);
- break;
- case R.id.lay_yang:
- vp.setCurrentItem(3);//设置ViewPager当前的view
- img4.setImageResource(R.drawable.yang2);
- break;
- }
- }
- //该方法用来将图片还原到初始状态
- private void resetImg(){
- img1.setImageResource(R.drawable.hudie);
- img2.setImageResource(R.drawable.set);
- img3.setImageResource(R.drawable.user);
- img4.setImageResource(R.drawable.yang);
- }
- }
好了,所有的工作完成了,我们可以运行程序看看效果了。
四、总结
来看看编写代码的过程中,有那些重要的android知识。
(1)在一个布局中引入另外一个布局,可采用如下语句:
- <include layout="@layout/top"/>
(2)在布局中书写ViewPager的代码,关键是要记住它的包名:
- <android.support.v4.view.ViewPager
- android:id="@+id/vp"
- android:layout_width="match_parent"
- android:layout_height="0dp"
- android:layout_weight="1" >
- </android.support.v4.view.ViewPager>
(3)ViewPager的适配器,除了书写它默认的两个方法外,还要重写如下两个方法:
- public void destroyItem(ViewGroup container, int position,
- Object object)
- public Object instantiateItem(ViewGroup container, int position)
(4)当ViewPager状态发生改变时,我们想做出一系列响应,应该设置监听接口,并主要在onPageSelected进行操作。例如:
- vp.setOnPageChangeListener(new OnPageChangeListener() {
- //主要在这个方法里操作,当选中相应的view时一系列的响应事件
- public void onPageSelected(int arg0) {
- int item = vp.getCurrentItem();
- switch(item){
- case 0:
- img1.setImageResource(R.drawable.hudie2);
- break;
- case 1:
- img2.setImageResource(R.drawable.set2);
- break;
- case 2:
- img3.setImageResource(R.drawable.user2);
- break;
- case 3:
- img4.setImageResource(R.drawable.yang2);
- break;
- }
- public void onPageScrolled(int arg0, float arg1, int arg2) {
- }
- public void onPageScrollStateChanged(int arg0) {
- }
- });
- }
使用ViewPager实现Tab的更多相关文章
- 无需SherlockActionbar的SlidingMenu使用详解(二)——向Fragment中添加ViewPager和Tab
之前我们对大体框架有了一定的认识,现在我们来做Fragment界面,其实这里面和这个框架的关系就不大了,但因为有些同学对于在SlidingMenu中切换fragment还是有问题,所以我就在本篇进行详 ...
- Android开源框架ViewPageIndicator和ViewPager实现Tab导航
前言: 关于使用ViewPageIndicator和ViewPager实现Tab导航,在开发社区里已经有一堆的博客对其进行了介绍,假设我还在这里写怎样去实现.那简直就是老生常谈,毫无新奇感,并且.我也 ...
- ViewPager与Tab结合使用
我们有时候需要 标题页卡与ViewPager结合使用,其实原理也很简单. 不过工程中要引入android-support-design.jar 首先是布局文件 <android.support. ...
- FragmentPagerAdapter+ViewPager实现Tab切换效果
1.Activity 加载布局文件,获取Viewpager控件 给ViewPager填充适配器. import android.app.ActionBar; import android.app ...
- 66、多种多样的App主界面Tab(1)------ ViewPager实现Tab
<?xml version="1.0" encoding="utf-8"?> <!-- bottom.xml --> <Linea ...
- RadioGroup和ViewPager实现Tab
Activity的布局文件 <LinearLayout xmlns:android="http://schemas.android.com/apk/res/android" ...
- Android:Fragment+ViewPager实现Tab滑动
public class FragAdapter extends FragmentPagerAdapter { private List<Fragment> fragments ; pub ...
- 69、ViewPagerIndicator+ViewPager实现Tab
<LinearLayout xmlns:android="http://schemas.android.com/apk/res/android" xmlns:tools=&q ...
- 68、 FragmentPagerAdapter+ViewPager实现Tab
<LinearLayout *** <android.support.v4.view.ViewPager android:id="@+id/id_viewpager" ...
随机推荐
- jenkins启动脚本
[root@localhost system]# cat /etc/init.d/jenkins #!/bin/sh # # SUSE system statup script for Jenkins ...
- jquery 使用整理机制
短路表达式 与 多重短路表达式 短路表达式这个应该人所皆知了.在 jQuery 中,大量的使用了短路表达式与多重短路表达式. 短路表达式:作为"&&"和" ...
- IE9 和IE10 兼容性判断及效果
仅IE9可识别 .d1{ width:100px; height:100px; background:blue; } IE9及一下使用<!--[if IE 8]><![endif]- ...
- 微信小程序开发框架整理
目前除了原生的微信小程序开发外,各大厂商陆续造了自己的开发框架,现整理如下: WePY 腾讯官方开源的小程序组件化开发框架,目前有15K+Star ,一直在更新着,社区活跃,掉坑能快速的找到方法爬出来 ...
- PHP+MySql实现图书管理系统
这个图书管理系统是我学完PHP时写的一个练手项目,功能参考了自己学校的图书管理系统.为了锻炼自己的动手能力以及加深对代码的理解,前端和后端均由自己完成,前端使用了一些基本的框架(毕竟我主攻后端开发方向 ...
- C10K问题摘要
本文的内容是下面几篇文章阅读后的内容摘要: http://www.kegel.com/c10k.html (英文版) http://www.oschina.net/translate/c10k (中文 ...
- untiy3d小工具——修改scene与prefab中的sprite
坑1:因为替换图片要获取所有包含image的组件,开始我使用的是gameobject.getComponents<Image>()和FindObjectsOfType<Image&g ...
- unity3d之如何控制人物移动、旋转和动画播放
代码源自噩梦射手,记录一下方便后续使用,顺便将老师的解释给备注上去_(:з」∠)_ using UnityEngine; using UnitySampleAssets.CrossPlatformIn ...
- JS里的居民们5-数组(栈)
编码1(栈顶在最右) 练习如何使用数组来实现栈,综合考虑使用数组的 push,pop,shift,unshift操作 基于代码,实现如按钮中描述的功能: 实现如阅读材料中,队列的相关进栈.退栈.获取栈 ...
- jquery not() 方法
1.not(expression) 根据表达式参数的值,从包装集里删除元素 example : $('img[alt]').not('[alt*=joy]') 返回包含属性alt的img元素,但img ...