Netty源码分析之服务端启动
Netty服务端启动代码:
- public final class EchoServer {
- static final int PORT = Integer.parseInt(System.getProperty("port", "8007"));
- public static void main(String[] args) throws Exception {
- // Configure the server.
- EventLoopGroup bossGroup = new NioEventLoopGroup(1);
- EventLoopGroup workerGroup = new NioEventLoopGroup();
- final EchoServerHandler serverHandler = new EchoServerHandler();
- try {
- ServerBootstrap b = new ServerBootstrap();
- b.group(bossGroup, workerGroup)
- .channel(NioServerSocketChannel.class)
- .option(ChannelOption.SO_BACKLOG, 100)
- .handler(new LoggingHandler(LogLevel.INFO))
- .childHandler(new ChannelInitializer<SocketChannel>() {
- @Override
- public void initChannel(SocketChannel ch) throws Exception {
- ChannelPipeline p = ch.pipeline();
- //p.addLast(new LoggingHandler(LogLevel.INFO));
- p.addLast(serverHandler);
- }
- });
- // Start the server.
- ChannelFuture f = b.bind(PORT).sync();
- // Wait until the server socket is closed.
- f.channel().closeFuture().sync();
- } finally {
- // Shut down all event loops to terminate all threads.
- bossGroup.shutdownGracefully();
- workerGroup.shutdownGracefully();
- }
- }
- }
1.Channel的创建
通过Bootstrap.bind(PORT)调用AbstractBootstrap.doBind(),doBind()调用initAndRegister()。
- final ChannelFuture initAndRegister() {
- Channel channel = this.channelFactory().newChannel();
- try {
- this.init(channel);
- } catch (Throwable var3) {
- channel.unsafe().closeForcibly();
- return (new DefaultChannelPromise(channel, GlobalEventExecutor.INSTANCE)).setFailure(var3);
- }
- ChannelFuture regFuture = this.group().register(channel);
- if (regFuture.cause() != null) {
- if (channel.isRegistered()) {
- channel.close();
- } else {
- channel.unsafe().closeForcibly();
- }
- }
- return regFuture;
- }
从该方法可以看出,channel的创建是依赖channelFactory().newChannel()创建的,channelFactory()是获取AbstractBootstrap类的成员变量channelFactory,这个成员变量是在服务器段的Bootstarp.channel(NioServerSocketChannel.class)的时候进行设置的,而channelFactory().newChannel()则是该方法通过反射获取该类的实例变量。
- public T newChannel() {
- try {
- return (Channel)this.clazz.newInstance();
- } catch (Throwable var2) {
- throw new ChannelException("Unable to create Channel from class " + this.clazz, var2);
- }
- }
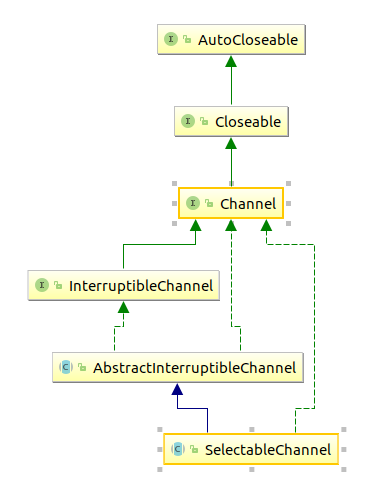
通过反射调用的是NioServerSocketChannel的默认构造函数。NioServerSocketChannel的类关系如下:

- public NioServerSocketChannel() {
- this(newSocket(DEFAULT_SELECTOR_PROVIDER));
- }
NioServerSocketChannel通过newSocket创建java nio中的channel,newSocket(DEFAULT_SELECTOR_PROVIDER)通过SelectorProvider.provider().openServerSocketChannel()打开一个ServerSocketChannel,这里的ServerSocketChannel是Java nio中的channel,在linux下,我们可以理解为JVM会调用linux操作系统的socket()函数创建了一个socket。这个地方要注意区别它跟前面NioServerSocketChannel实例的关系,他们都是一个socket channel,但是是两个不同的东西,一个是java nio中的,另外一个是经过netty包装过后的。newSocket(DEFAULT_SELECTOR_PROVIDER)返回的channel更多的是与操作系统socket相关联的一个东西,后面代码中经常遇到的通过javaChannel()返回的channel就是它,所以我们要进行底层的socket操作时,就是通过它。
然后再调用NioServerSocketChannel的另一个构造函数,调用父类的构造函数,并构造一个配置类NioServerSocketChannelConfig。
通过层层调用父类的构造函数,设置channel需要监听的事件为OP_ACCEPT,调用ch.configureBlocking(false),将channel设置为非阻塞的,并且调用AbstractChannel的构造函数,设置了channel的成员变量parent,unsafe和pipeline。
- protected AbstractChannel(Channel parent) {
- this.parent = parent;
- this.unsafe = this.newUnsafe();
- this.pipeline = new DefaultChannelPipeline(this);
- }
- public NioServerSocketChannel(java.nio.channels.ServerSocketChannel channel) {
- super((Channel)null, channel, 16);
- this.config = new NioServerSocketChannel.NioServerSocketChannelConfig(this, this.javaChannel().socket());
- }
这里的javaChannel()获取的是AbstractNioChannel的SelectableChannel,也就是之前创建java nio中的channel。
2.Channel的初始化
channel的初始化是在initAndRegister中方法中的this.init(channel)完成的,调用了AbstractBootstrap中的init。
- void init(Channel channel) throws Exception {
- Map<ChannelOption<?>, Object> options = this.options();
- synchronized(options) {
- channel.config().setOptions(options);
- }
- Map<AttributeKey<?>, Object> attrs = this.attrs();
- synchronized(attrs) {
- Iterator i$ = attrs.entrySet().iterator();
- while(true) {
- if (!i$.hasNext()) {
- break;
- }
- Entry<AttributeKey<?>, Object> e = (Entry)i$.next();
- AttributeKey<Object> key = (AttributeKey)e.getKey();
- channel.attr(key).set(e.getValue());
- }
- }
- ChannelPipeline p = channel.pipeline();
- if (this.handler() != null) {
- p.addLast(new ChannelHandler[]{this.handler()});
- }
- final EventLoopGroup currentChildGroup = this.childGroup;
- final ChannelHandler currentChildHandler = this.childHandler;
- Map var9 = this.childOptions;
- final Entry[] currentChildOptions;
- synchronized(this.childOptions) {
- currentChildOptions = (Entry[])this.childOptions.entrySet().toArray(newOptionArray(this.childOptions.size()));
- }
- var9 = this.childAttrs;
- final Entry[] currentChildAttrs;
- synchronized(this.childAttrs) {
- currentChildAttrs = (Entry[])this.childAttrs.entrySet().toArray(newAttrArray(this.childAttrs.size()));
- }
- p.addLast(new ChannelHandler[]{new ChannelInitializer<Channel>() {
- public void initChannel(Channel ch) throws Exception {
- ch.pipeline().addLast(new ChannelHandler[]{new ServerBootstrap.ServerBootstrapAcceptor(currentChildGroup, currentChildHandler, currentChildOptions, currentChildAttrs)});
- }
- }});
- }
初始化主要作用:
- 将引导类配置的option设置到上一步创建与Channel绑定的Configure类中
- 设置attrs
- 将使用引导类handler()设置的handler添加到pipeline上面
- 配置channelOption,channelOption是为了childChannel进行服务的
- 将连接器ServerBootstrapAcceptor添加到pipeline上面
连接器其实也是一种ChannelHandler,在服务器启动完成时候,NioServerSocketChannel的pipeline的结构如下:
- Head[I/O] <--> ServerBootstrapAcceptor[IN] <--> Tail[IN]
这里的连接处理器,作用就是处理客户端的连接。其逻辑比较简单:在服务器启动时调用childHandler方法设置了ServerBootstrap的子Channel的处理器,此时会将childChannelHandler添加到子Channel中(NioSocketChannel会在连接过程中创建);设置子Channel的配置和属性;最后将子Channel注册到子线程池组中。经过这个连接处理器的时候子channel已经被创建好了。
- public void channelRead(ChannelHandlerContext ctx, Object msg) {
- final Channel child = (Channel)msg;
- child.pipeline().addLast(new ChannelHandler[]{this.childHandler});
- Entry[] arr$ = this.childOptions;
- int len$ = arr$.length;
- int i$;
- Entry e;
- for(i$ = 0; i$ < len$; ++i$) {
- e = arr$[i$];
- try {
- if (!child.config().setOption((ChannelOption)e.getKey(), e.getValue())) {
- ServerBootstrap.logger.warn("Unknown channel option: " + e);
- }
- } catch (Throwable var10) {
- ServerBootstrap.logger.warn("Failed to set a channel option: " + child, var10);
- }
- }
- arr$ = this.childAttrs;
- len$ = arr$.length;
- for(i$ = 0; i$ < len$; ++i$) {
- e = arr$[i$];
- child.attr((AttributeKey)e.getKey()).set(e.getValue());
- }
- try {
- this.childGroup.register(child).addListener(new ChannelFutureListener() {
- public void operationComplete(ChannelFuture future) throws Exception {
- if (!future.isSuccess()) {
- ServerBootstrap.ServerBootstrapAcceptor.forceClose(child, future.cause());
- }
- }
- });
- } catch (Throwable var9) {
- forceClose(child, var9);
- }
- }
3.Channel的注册
- ChannelFuture regFuture = this.group().register(channel);
最终调用的是AbstractChannel的register方法,将一个channel和一个eventloop进行绑定。channel和eventloop是多对一的关系,多个channel可以注册到一个eventloop上面。
- public final void register(EventLoop eventLoop, final ChannelPromise promise) {
- if (eventLoop == null) {
- throw new NullPointerException("eventLoop");
- } else if (AbstractChannel.this.isRegistered()) {
- promise.setFailure(new IllegalStateException("registered to an event loop already"));
- } else if (!AbstractChannel.this.isCompatible(eventLoop)) {
- promise.setFailure(new IllegalStateException("incompatible event loop type: " + eventLoop.getClass().getName()));
- } else {
- AbstractChannel.this.eventLoop = eventLoop;
- if (eventLoop.inEventLoop()) {
- this.register0(promise);
- } else {
- try {
- eventLoop.execute(new OneTimeTask() {
- public void run() {
- AbstractUnsafe.this.register0(promise);
- }
- });
- } catch (Throwable var4) {
- AbstractChannel.logger.warn("Force-closing a channel whose registration task was not accepted by an event loop: {}", AbstractChannel.this, var4);
- this.closeForcibly();
- AbstractChannel.this.closeFuture.setClosed();
- this.safeSetFailure(promise, var4);
- }
- }
- }
- }
从代码可知,如果当前线程是eventloop的线程,则直接执行register0(promise),但知道现在为止,我们的代码一直在main()函数的线程中执行,所以执行的分支是eventLoop.execute(..);
继续调用会调用SingleThreadEventExecutor的executor(task)函数。
- public void execute(Runnable task) {
- if (task == null) {
- throw new NullPointerException("task");
- } else {
- boolean inEventLoop = this.inEventLoop();
- if (inEventLoop) {
- this.addTask(task);
- } else {
- this.startThread();
- this.addTask(task);
- if (this.isShutdown() && this.removeTask(task)) {
- reject();
- }
- }
- if (!this.addTaskWakesUp && this.wakesUpForTask(task)) {
- this.wakeup(inEventLoop);
- }
- }
- }
因为当前线程不是eventloop线程,所以使用startThread()创建eventloop线程,eventloop线程创建并启动后,通过调用addTask()将task任务添加到taskqueue中。
通过register0(promise)将channel进行注册。
- private void register0(ChannelPromise promise) {
- try {
- if (!promise.setUncancellable() || !this.ensureOpen(promise)) {
- return;
- }
- boolean firstRegistration = this.neverRegistered;
- AbstractChannel.this.doRegister();
- this.neverRegistered = false;
- AbstractChannel.this.registered = true;
- this.safeSetSuccess(promise);
- AbstractChannel.this.pipeline.fireChannelRegistered();
- if (firstRegistration && AbstractChannel.this.isActive()) {
- AbstractChannel.this.pipeline.fireChannelActive();
- }
- } catch (Throwable var3) {
- this.closeForcibly();
- AbstractChannel.this.closeFuture.setClosed();
- this.safeSetFailure(promise, var3);
- }
- }
- protected void doRegister() throws Exception {
- boolean selected = false;
- while(true) {
- try {
- this.selectionKey = this.javaChannel().register(this.eventLoop().selector, 0, this);
- return;
- } catch (CancelledKeyException var3) {
- if (selected) {
- throw var3;
- }
- this.eventLoop().selectNow();
- selected = true;
- }
- }
- }
可以看出最终还是通过javaChannel()注册到一个selector上面。在注册完了之后,会将channel注册完毕的事件通知到pipeline上。
- AbstractChannel.this.pipeline.fireChannelRegistered();
4.端口绑定
端口绑定是通过doBind中的doBind0()实现的。
- doBind0(regFuture, channel, localAddress, promise);
- private static void doBind0(final ChannelFuture regFuture, final Channel channel, final SocketAddress localAddress, final ChannelPromise promise) {
- channel.eventLoop().execute(new Runnable() {
- public void run() {
- if (regFuture.isSuccess()) {
- channel.bind(localAddress, promise).addListener(ChannelFutureListener.CLOSE_ON_FAILURE);
- } else {
- promise.setFailure(regFuture.cause());
- }
- }
- });
- }
Channel的bind函数调用链如下:
- // AbstractChannel
- public ChannelFuture bind(SocketAddress localAddress, ChannelPromise promise) {
- return pipeline.bind(localAddress, promise);
- }
- // DefaultChannelPipeline
- public final ChannelFuture bind(SocketAddress localAddress, ChannelPromise promise) {
- // 因为bind是一个outbound事件,从pipeline链尾tailContext开始执行
- return tail.bind(localAddress, promise);
- }
- // tail context的父类AbstractChannelHandlerContext
- public ChannelFuture bind(final SocketAddress localAddress, final ChannelPromise promise) {
- if (localAddress == null) {
- throw new NullPointerException("localAddress");
- }
- if (isNotValidPromise(promise, false)) {
- // cancelled
- return promise;
- }
- // 应用程序没有添加outbound的情况下,找到的next context是head context
- final AbstractChannelHandlerContext next = findContextOutbound();
- EventExecutor executor = next.executor();
- if (executor.inEventLoop()) {
- next.invokeBind(localAddress, promise);
- } else {
- safeExecute(executor, new Runnable() {
- @Override
- public void run() {
- next.invokeBind(localAddress, promise);
- }
- }, promise, null);
- }
- return promise;
- }
- // head context的父类AbstractChannelHandlerContext
- private void invokeBind(SocketAddress localAddress, ChannelPromise promise) {
- if (invokeHandler()) {
- try {
- ((ChannelOutboundHandler) handler()).bind(this, localAddress, promise);
- } catch (Throwable t) {
- notifyOutboundHandlerException(t, promise);
- }
- } else {
- bind(localAddress, promise);
- }
- }
- // 还在head context的父类AbstractChannelHandlerContext
- public void bind(
- ChannelHandlerContext ctx, SocketAddress localAddress, ChannelPromise promise)
- throws Exception {
- // 通过unsafe调用bind了,意味着会调用JVM的功能,操作底层的一些函数了
- unsafe.bind(localAddress, promise);
- }
- // AbstractUnsafe
- public final void bind(final SocketAddress localAddress, final ChannelPromise promise) {
- assertEventLoop();
- if (!promise.setUncancellable() || !ensureOpen(promise)) {
- return;
- }
- // See: https://github.com/netty/netty/issues/576
- if (Boolean.TRUE.equals(config().getOption(ChannelOption.SO_BROADCAST)) &&
- localAddress instanceof InetSocketAddress &&
- !((InetSocketAddress) localAddress).getAddress().isAnyLocalAddress() &&
- !PlatformDependent.isWindows() && !PlatformDependent.maybeSuperUser()) {
- // Warn a user about the fact that a non-root user can't receive a
- // broadcast packet on *nix if the socket is bound on non-wildcard address.
- logger.warn(
- "A non-root user can't receive a broadcast packet if the socket " +
- "is not bound to a wildcard address; binding to a non-wildcard " +
- "address (" + localAddress + ") anyway as requested.");
- }
- boolean wasActive = isActive();
- try {
- // 做实际的bind工作
- doBind(localAddress);
- } catch (Throwable t) {
- safeSetFailure(promise, t);
- closeIfClosed();
- return;
- }
- if (!wasActive && isActive()) {
- invokeLater(new Runnable() {
- @Override
- public void run() {
- pipeline.fireChannelActive();
- }
- });
- }
- safeSetSuccess(promise);
- }
- // NioServerSocketChannel
- protected void doBind(SocketAddress localAddress) throws Exception {
- if (PlatformDependent.javaVersion() >= 7) {
- // 最终通过JVM调用server socket的bind、listen等函数,启动服务端
- javaChannel().bind(localAddress, config.getBacklog());
- } else {
- javaChannel().socket().bind(localAddress, config.getBacklog());
- }
- }
当端口绑定完成之后,会调用fireChannelActive()方法,通知端口已经绑定完成。并且会给当前的channel注册accept事件。
- public ChannelPipeline fireChannelActive() {
- this.head.fireChannelActive();
- if (this.channel.config().isAutoRead()) {
- this.channel.read();
- }
- return this;
- }
fireChannelActive()调用channel的read(),由于read是outbound方法,最终会调用NioServerSocketChannel的unsafe的beginRead,在里面注册Accept事件。
- protected void doBeginRead() throws Exception {
- if (!this.inputShutdown) {
- SelectionKey selectionKey = this.selectionKey;
- if (selectionKey.isValid()) {
- this.readPending = true;
- int interestOps = selectionKey.interestOps();
- if ((interestOps & this.readInterestOp) == 0) {
- selectionKey.interestOps(interestOps | this.readInterestOp);
- }
- }
- }
- }
Netty源码分析之服务端启动的更多相关文章
- Netty源码分析之服务端启动过程
一.首先来看一段服务端的示例代码: public class NettyTestServer { public void bind(int port) throws Exception{ EventL ...
- zookeeper源码分析之一服务端启动过程
zookeeper简介 zookeeper是为分布式应用提供分布式协作服务的开源软件.它提供了一组简单的原子操作,分布式应用可以基于这些原子操作来实现更高层次的同步服务,配置维护,组管理和命名.zoo ...
- zookeeper源码分析之四服务端(单机)处理请求流程
上文: zookeeper源码分析之一服务端启动过程 中,我们介绍了zookeeper服务器的启动过程,其中单机是ZookeeperServer启动,集群使用QuorumPeer启动,那么这次我们分析 ...
- Netty 4源码解析:服务端启动
Netty 4源码解析:服务端启动 1.基础知识 1.1 Netty 4示例 因为Netty 5还处于测试版,所以选择了目前比较稳定的Netty 4作为学习对象.而且5.0的变化也不像4.0这么大,好 ...
- zookeeper源码分析之五服务端(集群leader)处理请求流程
leader的实现类为LeaderZooKeeperServer,它间接继承自标准ZookeeperServer.它规定了请求到达leader时需要经历的路径: PrepRequestProcesso ...
- 4. 源码分析---SOFARPC服务端暴露
服务端的示例 我们首先贴上我们的服务端的示例: public static void main(String[] args) { ServerConfig serverConfig = new Ser ...
- Nacos(二)源码分析Nacos服务端注册示例流程
上回我们讲解了客户端配置好nacos后,是如何进行注册到服务器的,那我们今天来讲解一下服务器端接收到注册实例请求后会做怎么样的处理. 首先还是把博主画的源码分析图例发一下,让大家对整个流程有一个大概的 ...
- Netty源码分析之服务启动
本节主要分析server的启动过程. Netty是基于Nio实现的,所以也离不开selector.serverSocketChannel.socketChannel和selectKey等,只不过Net ...
- TeamTalk源码分析之服务端描述
TTServer(TeamTalk服务器端)主要包含了以下几种服务器: LoginServer (C++): 登录服务器,分配一个负载小的MsgServer给客户端使用 MsgServer (C++) ...
随机推荐
- ambari安装调研
http://blog.csdn.net/daiyutage/article/details/52210830 ssh-keygen ssh-copy-id -i ~/.ssh/id_rsa.pub ...
- 最新版本sublime text3注册码
TwitterInc 200 User License EA7E-890007 1D77F72E 390CDD93 4DCBA022 FAF60790 61AA12C0 A37081C5 D03164 ...
- css 背景图片虚化效果
转载地址:http://blog.csdn.net/ohehehou/article/details/51975539 需求:一个div设置了background: url,现在需要使图片背景模糊,d ...
- background-color:transparent
background-color没有none值 在工作中发现, 这样是没反应的, 要写这个样式才能去掉背景颜色() background-color属性详细链接: http://www.w3sch ...
- 剑指offer——python【第14题】链表中倒数第k个节点
题目描述 输入一个链表,输出该链表中倒数第k个结点. 思路 注意,看清楚,是输出节点,而不是输出节点值 可以先求出链表总长度,然后正向遍历得到第n个节点 解答 class Solution: def ...
- 实战一个职业技术学校。 by:hack某某
这是我们的目标,某一技术学院,这是一个注入点 上sqlmap 跑出了管理账号密码 扫后台 没有找到,注入就相当鸡肋了 换换其他思路 dba权限,想到了直接写入 找找路径之类的 找到了,运气相当的好 直 ...
- day21 二十一、垃圾回收机制、re正则
一.内存管理 1.垃圾回收机制:不能被程序访问到的数据称之为垃圾 2.引用计数:引用计数是用来记录值的内存地址被记录的次数 每一次对值地址的引用都可以使该值的引用计数 +1 每一次对值地址的释放都可以 ...
- 解决键盘输入被JDB占用的问题
解决键盘输入被JDB占用的问题 本周的任务"迭代和JDB"在使用JDB调试时需要键盘输入数据,但我在正确的位置输入数据后发现JDB提示如图所示的错误. 上网查找后得知该错误的产生是 ...
- CH 3101 - 阶乘分解 - [埃筛]
题目链接:传送门 题解: $(1e6)!$ 这种数字,表示都表示不出来,想直接 $O(\sqrt{N})$ 分解质因数这种事情就不要想了. 考虑 $N!$ 的特殊性,这个数字的所有可能包含的质因子,就 ...
- Java图片合并
/** * 纵向合并图片,ossObject.getObjectContent()返回InputStream对象 */ private BufferedImage mergeImage(List< ...