WPF之数据绑定Data Binding
一般情况下,应用程序会有三层结构:数据存储层,数据处理层(业务逻辑层),数据展示层(UI界面)。
WPF是“数据驱动UI”。
- Binding实现(通过纯C#代码)
Binding分为source和target,即源和目标。
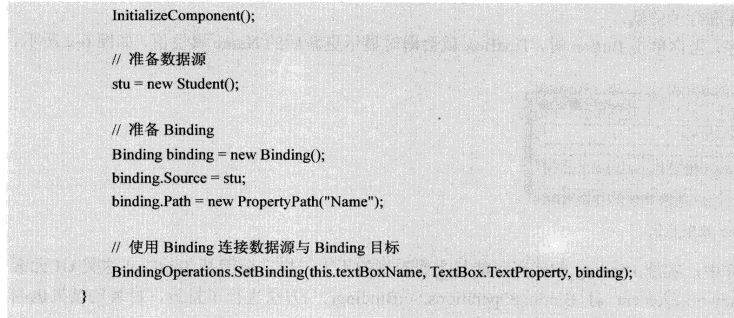
如何通过Binging实现UI元素和代码对象的连接。
首先绑定源对象要实现INotifyPropertyChanged接口,该接口引用自System.ComponentModel命名空间,所有使用前要引用该命名空间。该接口有一个PropertyChanged事件,可以帮助自动监听源对象的属性变化。
- using System;
- using System.Collections.Generic;
- using System.Linq;
- using System.Text;
- using System.Threading.Tasks;
- using System.Windows;
- using System.Windows.Controls;
- using System.Windows.Data;
- using System.Windows.Documents;
- using System.Windows.Input;
- using System.Windows.Media;
- using System.Windows.Media.Imaging;
- using System.Windows.Navigation;
- using System.Windows.Shapes;
- using System.ComponentModel;
- class Student:INotifyPropertyChanged
- {
- public event PropertyChangedEventHandler PropertyChanged;
- private string name;
- public string Name
- {
- get { return name; }
- set {
- name = value;
- if(this.PropertyChanged!=null)
- {
- this.PropertyChanged.Invoke(this, new PropertyChangedEventArgs("Name"));
- }
- }
- }
- }
如上代码所示,在绑定了接口以后,当Name属性的值发生变化时,就会自动通知,然后刷新UI元素进行更新。
当然还没有结束,我们现在需要添加界面。然后在后台代码中设置Binding

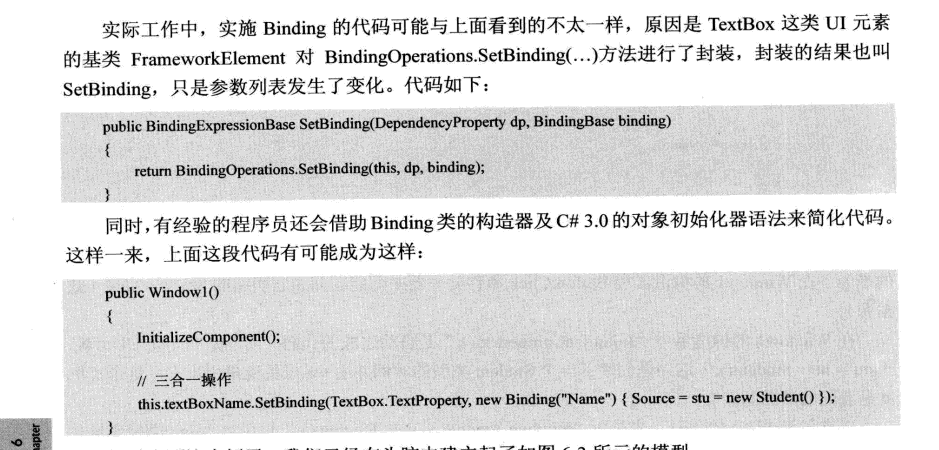
其实在textBox元素中已经为我们封装好了这些,即SetBinding方法。
所以可以改写如下:

- 标记扩展进行Data Binding
- 控制Binding数据流向的是Mode属性,而控制数据更新的是UpdateSourceTrigger属性
- 没有Path的Binding
有时候,Binding源本身就是数据,比如字符串,或者int类型,他们的实例本身就是数据,而不需要通过属性来提供访问,那么在指定path时可以通过一个.来代替,或者直接不写path,在XAML代码里可以省略不写,在C#代码中必须显式写.来表示path指向实例本身。
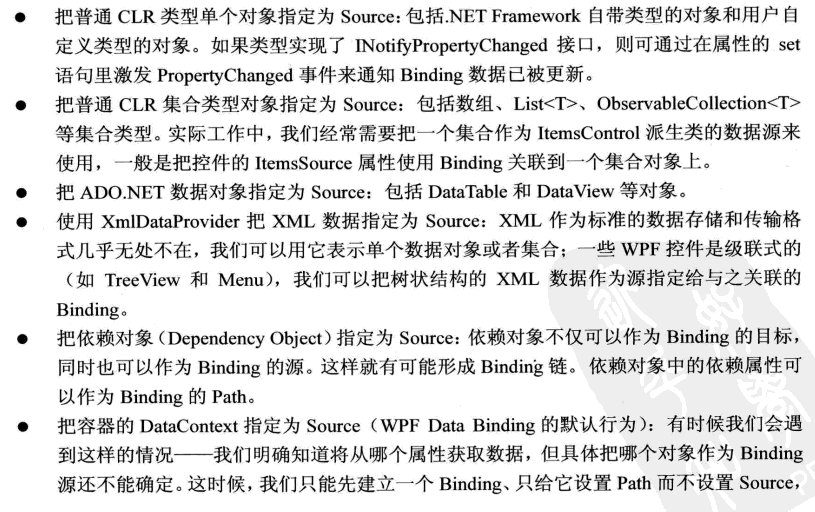
- 为Binding指定源的几种方法


- Binding过程中可以没有path,那么可不可以没有source,当然可以,可以通过添加DataContext来隐式表达source。
- 使用集合对象作为列表控件的ItemsSource
- using System;
- using System.Collections.Generic;
- using System.Linq;
- using System.Text;
- using System.Threading.Tasks;
- using System.Windows;
- using System.Windows.Controls;
- using System.Windows.Data;
- using System.Windows.Documents;
- using System.Windows.Input;
- using System.Windows.Media;
- using System.Windows.Media.Imaging;
- using System.Windows.Navigation;
- using System.Windows.Shapes;
- using System.ComponentModel;
- namespace WpfApp7
- {
- /// <summary>
- /// MainWindow.xaml 的交互逻辑
- /// </summary>
- public partial class MainWindow : Window
- {
- public MainWindow()
- {
- InitializeComponent();
- //准备数据源
- List<Student> stuList = new List<Student>()
- {
- new Student(){Id=,Name="Tim",Age=},
- new Student(){Id=,Name="Tom",Age=},
- new Student(){Id=,Name="Kyle",Age=},
- new Student(){Id=,Name="Tony",Age=},
- new Student(){Id=,Name="Vina",Age=},
- };
- //为listBox设置Binding
- this.listBoxStudents.ItemsSource = stuList;
- this.listBoxStudents.DisplayMemberPath = "Name";
- //为TextBox设置Binding
- Binding binding = new Binding("SelectedItem.Id") { Source = this.listBoxStudents };
- this.textBoxId.SetBinding(TextBox.TextProperty, binding);
- }
- }
- class Student
- {
- public int Id { get; set; }
- public string Name { get; set; }
- public int Age { get; set; }
- }
- }
界面代码如下:
- <Window x:Class="WpfApp7.MainWindow"
- xmlns="http://schemas.microsoft.com/winfx/2006/xaml/presentation"
- xmlns:x="http://schemas.microsoft.com/winfx/2006/xaml"
- xmlns:d="http://schemas.microsoft.com/expression/blend/2008"
- xmlns:mc="http://schemas.openxmlformats.org/markup-compatibility/2006"
- xmlns:local="clr-namespace:WpfApp7"
- mc:Ignorable="d"
- Title="Binding Source" Height="240" Width="300">
- <StackPanel x:Name="stackPanel1" Background="LightBlue">
- <TextBlock Text="Student ID" FontWeight="Bold" Margin="5"/>
- <TextBox x:Name="textBoxId" Margin="5"/>
- <TextBlock Text="Student List" FontWeight="Bold" Margin="5"/>
- <ListBox x:Name="listBoxStudents" Height="110" Margin="5"/>
- </StackPanel>
- </Window>
- 使用ObjectDataProvider对象作为Binding的Source
现在有一个Calculator的类,他具有加减乘除的方法:
- using System;
- using System.Collections.Generic;
- using System.Linq;
- using System.Text;
- using System.Threading.Tasks;
- using System.Windows;
- using System.Windows.Controls;
- using System.Windows.Data;
- using System.Windows.Documents;
- using System.Windows.Input;
- using System.Windows.Media;
- using System.Windows.Media.Imaging;
- using System.Windows.Navigation;
- using System.Windows.Shapes;
- namespace ObjectDateProvider
- {
- /// <summary>
- /// MainWindow.xaml 的交互逻辑
- /// </summary>
- public partial class MainWindow : Window
- {
- public MainWindow()
- {
- InitializeComponent();
- this.SetBinding();
- }
- private void SetBinding()
- {
- //创建并配置ObjectDataProvider对象
- ObjectDataProvider odp = new ObjectDataProvider
- {
- ObjectInstance = new Calculator(),
- MethodName = "Add"
- };
- odp.MethodParameters.Add("");
- odp.MethodParameters.Add("");
- //以ObjectDataProvider对象为Source创建Binding
- Binding bindingToArg1 = new Binding("MethodParameters[0]")
- {
- Source = odp,
- BindsDirectlyToSource = true,
- UpdateSourceTrigger = UpdateSourceTrigger.PropertyChanged
- };
- Binding bindingToArg2 = new Binding("MethodParameters[1]")
- {
- Source = odp,
- BindsDirectlyToSource = true,
- UpdateSourceTrigger = UpdateSourceTrigger.PropertyChanged
- };
- Binding bindingToResult = new Binding(".") { Source = odp };
- //将Binding关联到UI元素上
- this.textBoxArg1.SetBinding(TextBox.TextProperty, bindingToArg1);
- this.textBoxArg2.SetBinding(TextBox.TextProperty, bindingToArg2);
- this.textBoxResult.SetBinding(TextBox.TextProperty, bindingToResult);
- }
- }
- class Calculator
- {
- public string Add(string arg1,string arg2)
- {
- double x = ;
- double y = ;
- double z = ;
- if(double.TryParse(arg1,out x)&&double.TryParse(arg2,out y))
- {
- z = x + y;
- return z.ToString();
- }
- return "Input Error";
- }
- }
- }
界面代码如下:
- <Window x:Class="ObjectDateProvider.MainWindow"
- xmlns="http://schemas.microsoft.com/winfx/2006/xaml/presentation"
- xmlns:x="http://schemas.microsoft.com/winfx/2006/xaml"
- xmlns:d="http://schemas.microsoft.com/expression/blend/2008"
- xmlns:mc="http://schemas.openxmlformats.org/markup-compatibility/2006"
- xmlns:local="clr-namespace:ObjectDateProvider"
- mc:Ignorable="d"
- Title="MainWindow" Height="135" Width="300">
- <StackPanel Background="LightBlue">
- <TextBox x:Name="textBoxArg1" Margin="5"/>
- <TextBox x:Name="textBoxArg2" Margin="5"/>
- <TextBox x:Name="textBoxResult" Margin="5"/>
- </StackPanel>
- </Window>
界面代码
- 使用Binding的RelativeSource
- Binding对数据的转换与校验
Binding用于数据有效性检验的是ValidationRules属性,用于数据类型转换关卡的是Converter属性。
WPF之数据绑定Data Binding的更多相关文章
- [WPF]如何调试Data Binding
前言 在WPF开发中,将ViewModel中对象绑定到UI上时,会出现明明已经将数据对象Binding到UI,但是UI上就是不显示等等的问题.这篇博客将介绍WPF Data Binding相关的内容, ...
- WPF QuickStart系列之数据绑定(Data Binding)
这篇博客将展示WPF DataBinding的内容. 首先看一下WPF Data Binding的概览, Binding Source可以是任意的CLR对象,或者XML文件等,Binding Targ ...
- WPF中的数据绑定Data Binding使用小结
完整的数据绑定的语法说明可以在这里查看: http://www.nbdtech.com/Free/WpfBinding.pdf MSDN资料: Data Binding: Part 1 http:// ...
- WPF中的Data Binding调试指南
大家平时做WPF开发,相信用Visual studio的小伙伴比较多.XAML里面曾经在某些特殊版本的Visual Studio中是可以加断点进行调试的,不过目前多数版本都不支持在XAML加断点来调试 ...
- Windows phone 8.1之数据绑定(Data Binding)
学习Winphone8.1的时候经常需要对Slider进行数据绑定后使之视觉化,方便调节Slider的值. 数据绑定分为源(Source)和目标(Target),Source一般分为两种,其他控件的数 ...
- WP8.1 Study5:Data binding数据绑定
一.数据绑定 最简单的编程UI控件的方法是写自己的数据来获取和设置控件的属性,e.g. , textBox1.Text = "Hello, world"; 但在复杂的应用程序,这样 ...
- [WPF系列]-DataBinding(数据绑定) 自定义Binding
自定义Binding A base class for custom WPF binding markup extensions BindingDecoratorBase Code: public c ...
- XAML数据绑定(Data Binding)
XAML数据绑定(Data Binding) Data Binding可以使得XAML标签属性的赋值更为灵活和方便.在绑定过程中,获取数据的标签成为目标标签:提供数据的标签成为源标签.在XAML中 ...
- .NET: WPF Data Binding
WPF是分离UI和Logic的最佳工具,不同于Window Form的事件驱动原理,WPF采用的是数据驱动,让UI成为了Logic的附属,达到分离的效果. 本篇主要讲讲wpf的精华:data bind ...
随机推荐
- bfs—Catch That Cow—poj3278
Catch That Cow Time Limit: 2000MS Memory Limit: 65536K Total Submissions: 87152 Accepted: 27344 ...
- C#模板编程(2): 编写C#预处理器,让模板来的再自然一点
在<C#模板编程(1):有了泛型,为什么还需要模板?>文中,指出了C#泛型的局限性,为了突破这个局限性,我们需要模板编程.但是,C#语法以及IDE均不支持C#模板编程,怎么办呢?自己动手, ...
- 基于opencv的人脸识别程序
1. 解析opencv自带人脸识别源码(……/opencv-3.1.0/samples/cpp/facedetect.cpp) @ 操作系统:Ubuntu 15.04 OpenCV版本:3.1.0 # ...
- 贪心--HDU 2021 发工资咯
Description 作为杭电的老师,最盼望的日子就是每月的8号了,因为这一天是发工资的日子,养家糊口就靠它了,呵呵,但是对于学校财务处的工作人员来说,这一天则是很忙碌的一天,财务处的小胡老师最近就 ...
- VS Code 全部快捷键一览表(巨TM全)
常用 General 按 Press 功能 Function Ctrl + Shift + P,F1 显示命令面板 Show Command Palette Ctrl + P 快速打开 Quick O ...
- 图论--双连通E-DCC缩点模板
// tarjan算法求无向图的桥.边双连通分量并缩点 #include<iostream> #include<cstdio> #include<cstring> ...
- 图论--LCA--在线RMQ ST
板子测试POJ1330,一发入魂,作者是KuangBin神犇,感谢? #include <cstdio> #include <cstring> #include <al ...
- 利用github的webhook进行自动部署
利用github的webhook进行自动部署 github提供了webhook功能,大概意思就是,当你提交了代码,git检测到你进行了push,可以调起你一个你知道的url. 这个功能有什么用了?比如 ...
- B. Long Path dp
https://codeforces.com/problemset/problem/407/B 这个题目是一个dp,有那么一点点的递归的意思,这个应该算一个找规律的dp, dp[i]定义为第一次到第i ...
- HDU-6351 Beautiful Now 全排列暴力
Beautiful Now 题意 给出一个最大为10^9的数字n,以及一个k,你最多交换n中任意两个位置的数字k次,问形成的最大数字和最小数字. 思路 看到这题,我靠这题暴力交换一下,不难啊,咋没人做 ...
