Java-Shiro(三):Shiro与Spring MVC集成
新建Java Daynamic Web项目
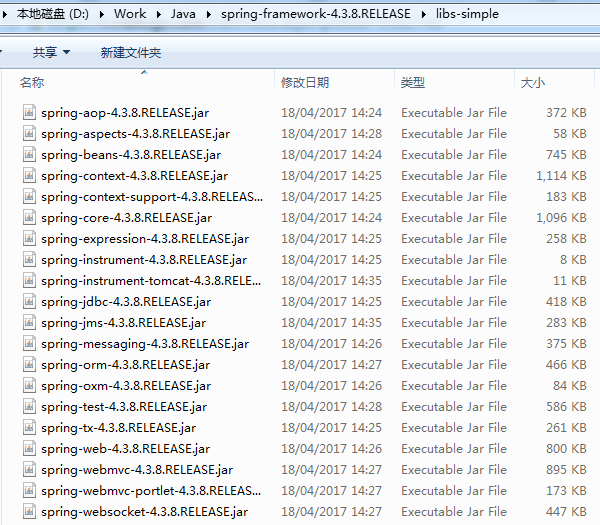
导入Spring、SpringMVC依赖包:
导入Spring & Spring MVC包(导入如下所有开发包):
Spring AOP依赖扩展包:

配置Spring :
1)修改web.xml导入“#contextLoaderListener”
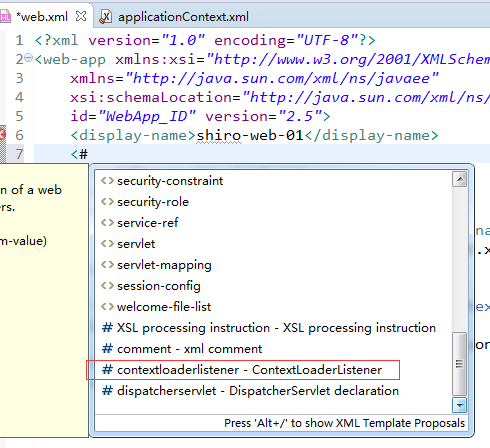
配置如下:
<?xml version="1.0" encoding="UTF-8"?>

<web-app xmlns:xsi="http://www.w3.org/2001/XMLSchema-instance"

    xmlns="http://java.sun.com/xml/ns/javaee"

    xsi:schemaLocation="http://java.sun.com/xml/ns/javaee http://java.sun.com/xml/ns/javaee/web-app_2_5.xsd"

    id="WebApp_ID" version="2.5">

    <display-name>shiro-web-01</display-name>

    <!-- 配置Spring的 ContextLoaderListener -->

    <!-- needed for ContextLoaderListener -->

    <context-param>

        <param-name>contextConfigLocation</param-name>

        <param-value>classpath:applicationContext.xml</param-value>

    </context-param>

    <!-- Bootstraps the root web application context before servlet initialization -->

    <listener>

        <listener-class>org.springframework.web.context.ContextLoaderListener</listener-class>

    </listener>

</web-app>
2)在src下添加Spring Bean配置文件applicationContext.xml
配置Spring MVC
1)在web.xm中导入“#dispatcherservlet”

配置后web.xml文件内容为:
<?xml version="1.0" encoding="UTF-8"?>

<web-app xmlns:xsi="http://www.w3.org/2001/XMLSchema-instance"

    xmlns="http://java.sun.com/xml/ns/javaee"

    xsi:schemaLocation="http://java.sun.com/xml/ns/javaee http://java.sun.com/xml/ns/javaee/web-app_2_5.xsd"

    id="WebApp_ID" version="2.5">

    <display-name>shiro-web-01</display-name>

    <!-- 配置Spring的 ContextLoaderListener -->

    <!-- needed for ContextLoaderListener -->

    <context-param>

        <param-name>contextConfigLocation</param-name>

        <param-value>classpath:applicationContext.xml</param-value>

    </context-param>

    <!-- Bootstraps the root web application context before servlet initialization -->

    <listener>

        <listener-class>org.springframework.web.context.ContextLoaderListener</listener-class>

    </listener>

    <!-- 配置Spring MVC -->

    <!-- The front controller of this Spring Web application, responsible for handling all application requests -->

    <servlet>

        <servlet-name>spring</servlet-name>

        <servlet-class>org.springframework.web.servlet.DispatcherServlet</servlet-class>

        <!--

        <init-param>

            <param-name>contextConfigLocation</param-name>

            <param-value>location</param-value>

        </init-param>

         -->

        <load-on-startup>1</load-on-startup>

    </servlet>

    <!-- Map all requests to the DispatcherServlet for handling -->

    <servlet-mapping>

        <servlet-name>spring</servlet-name>

        <url-pattern>/</url-pattern>

    </servlet-mapping>

</web-app>
2)在WEB-INF下新建Spring MVC配置文件spring-servlet.xml,并添加spring mvc配置
<?xml version="1.0" encoding="UTF-8"?>

<beans xmlns="http://www.springframework.org/schema/beans"

    xmlns:xsi="http://www.w3.org/2001/XMLSchema-instance" xmlns:context="http://www.springframework.org/schema/context"

    xmlns:mvc="http://www.springframework.org/schema/mvc"

    xsi:schemaLocation="http://www.springframework.org/schema/mvc http://www.springframework.org/schema/mvc/spring-mvc-4.3.xsd

        http://www.springframework.org/schema/beans http://www.springframework.org/schema/beans/spring-beans.xsd

        http://www.springframework.org/schema/context http://www.springframework.org/schema/context/spring-context-4.3.xsd">

    <context:component-scan base-package="com.dx.shiro"></context:component-scan>

    <bean

        class="org.springframework.web.servlet.view.InternalResourceViewResolver">

        <property name="prefix" value="/"></property>

        <property name="suffix" value=".jsp"></property>

    </bean>

    <mvc:annotation-driven></mvc:annotation-driven>

    <mvc:default-servlet-handler />

</beans>
配置Shiro环境
1)导入shiro jar包
导入Shiro开发包:

或者通过pom.xml配置:
        <dependency>

            <groupId>org.apache.shiro</groupId>

            <artifactId>shiro-all</artifactId>

            <version>1.3.2</version>

        </dependency>

        <dependency>

            <groupId>org.slf4j</groupId>

            <artifactId>slf4j-log4j12</artifactId>

            <version>1.7.13</version>

        </dependency>
2)配置web.xml,导入shiroFilter
可以参考
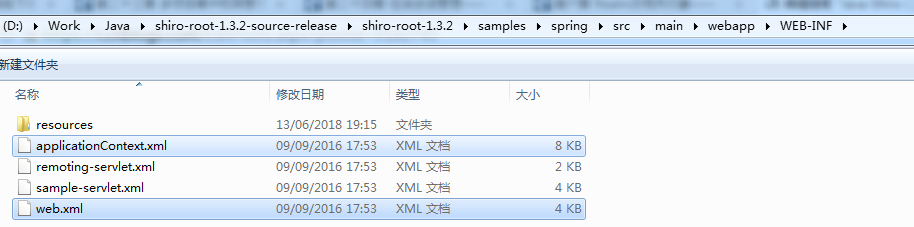
配置后web.xml内容为:
<?xml version="1.0" encoding="UTF-8"?>

<web-app xmlns:xsi="http://www.w3.org/2001/XMLSchema-instance"

    xmlns="http://java.sun.com/xml/ns/javaee"

    xsi:schemaLocation="http://java.sun.com/xml/ns/javaee http://java.sun.com/xml/ns/javaee/web-app_2_5.xsd"

    id="WebApp_ID" version="2.5">

    <display-name>shiro-web-01</display-name>

    <!-- 配置Spring的 ContextLoaderListener -->

    <!-- needed for ContextLoaderListener -->

    <context-param>

        <param-name>contextConfigLocation</param-name>

        <param-value>classpath:applicationContext.xml</param-value>

    </context-param>

    <!-- Bootstraps the root web application context before servlet initialization -->

    <listener>

        <listener-class>org.springframework.web.context.ContextLoaderListener</listener-class>

    </listener>

    <!-- 配置Spring MVC -->

    <!-- The front controller of this Spring Web application, responsible for

        handling all application requests -->

    <servlet>

        <servlet-name>spring</servlet-name>

        <servlet-class>org.springframework.web.servlet.DispatcherServlet</servlet-class>

        <!-- <init-param> <param-name>contextConfigLocation</param-name> <param-value>location</param-value>

            </init-param> -->

        <load-on-startup>1</load-on-startup>

    </servlet>

    <!-- Map all requests to the DispatcherServlet for handling -->

    <servlet-mapping>

        <servlet-name>spring</servlet-name>

        <url-pattern>/</url-pattern>

    </servlet-mapping>

    <!-- Shiro配置 -->

    <!-- ==================================================================

        Filters ================================================================== -->

    <!-- Shiro Filter is defined in the spring application context: -->

    <filter>

        <filter-name>shiroFilter</filter-name>

        <filter-class>org.springframework.web.filter.DelegatingFilterProxy</filter-class>

        <init-param>

            <param-name>targetFilterLifecycle</param-name>

            <param-value>true</param-value>

        </init-param>

    </filter>

    <filter-mapping>

        <filter-name>shiroFilter</filter-name>

        <url-pattern>/*</url-pattern>

    </filter-mapping>

</web-app>
3)配置Spring的配置文件中来配置Shiro,即在Src下来的applicationContext.xml中配置shiro
配置后的applicationContext.xml内容如下:
<?xml version="1.0" encoding="UTF-8"?>

<beans xmlns="http://www.springframework.org/schema/beans"

    xmlns:xsi="http://www.w3.org/2001/XMLSchema-instance"

    xsi:schemaLocation="http://www.springframework.org/schema/beans http://www.springframework.org/schema/beans/spring-beans.xsd">

    <!-- 1.配置SecurityManager -->

    <!-- Shiro's main business-tier object for web-enabled applications (use

        DefaultSecurityManager instead when there is no web environment) -->

    <bean id="securityManager" class="org.apache.shiro.web.mgt.DefaultWebSecurityManager">

        <property name="cacheManager" ref="cacheManager" />

        <!-- Single realm app. If you have multiple realms, use the 'realms' property

            instead. -->

        <property name="sessionMode" value="native" />

        <property name="realm" ref="jdbcRealm" />

    </bean>

    <!-- 2.配置CacheManager 2.1.配置ehcache的jar包及ehcache的配置文件 -->

    <!-- Let's use some enterprise caching support for better performance. You

        can replace this with any enterprise caching framework implementation that

        you like (Terracotta+Ehcache, Coherence, GigaSpaces, etc -->

    <bean id="cacheManager" class="org.apache.shiro.cache.ehcache.EhCacheManager">

        <!-- <property name="cacheManager" ref="ehCacheManager"/> -->

        <property name="cacheManagerConfigFile" value="classpath:ehcache.xml" />

    </bean>

    <!-- Used by the SecurityManager to access security data (users, roles,

        etc). Many other realm implementations can be used too (PropertiesRealm,

        LdapRealm, etc. -->

    <!-- 3.配置Realm -->

    <bean id="jdbcRealm" class="com.dx.shiro.realms.MyRealm">

    </bean>

    <!-- Post processor that automatically invokes init() and destroy() methods

        for Spring-configured Shiro objects so you don't have to 1) specify an init-method

        and destroy-method attributes for every bean definition and 2) even know

        which Shiro objects require these methods to be called. -->

    <!-- 4.配置org.apache.shiro.spring.LifecycleBeanPostProcessor,可以自动的来调用配置在Spring

        IOC容器中的 shiro bean的生命周期方法。 -->

    <bean id="lifecycleBeanPostProcessor" class="org.apache.shiro.spring.LifecycleBeanPostProcessor" />

    <!-- 5.启用IOC容器中使用shiro的注解,但必须在配置了DefaultAdvisorAutoProxyCreator之后才可以使用 -->

    <!-- Enable Shiro Annotations for Spring-configured beans. Only run after

        the lifecycleBeanProcessor has run: -->

    <bean

        class="org.springframework.aop.framework.autoproxy.DefaultAdvisorAutoProxyCreator"

        depends-on="lifecycleBeanPostProcessor" />

    <bean

        class="org.apache.shiro.spring.security.interceptor.AuthorizationAttributeSourceAdvisor">

        <property name="securityManager" ref="securityManager" />

    </bean>

    <!-- Define the Shiro Filter here (as a FactoryBean) instead of directly

        in web.xml - web.xml uses the DelegatingFilterProxy to access this bean.

        This allows us to wire things with more control as well utilize nice Spring

        things such as PropertiesPlaceholderConfigurer and abstract beans or anything

        else we might need: -->

    <!--

        6.配置shiroFilter

        6.1. bean的id必须和web.xml中配置的DelegatingFilterProxy的<filter-name>一致

        6.2. anon/authc是过滤器,anon允许匿名访问,authc需要认证才可以访问的页面。

        -->

    <bean id="shiroFilter" class="org.apache.shiro.spring.web.ShiroFilterFactoryBean">

        <property name="securityManager" ref="securityManager" />

        <property name="loginUrl" value="/login.jsp" />

        <property name="successUrl" value="/list.jsp" />

        <property name="unauthorizedUrl" value="/unauthorized.jsp" />

        <!-- The 'filters' property is not necessary since any declared javax.servlet.Filter

            bean defined will be automatically acquired and available via its beanName

            in chain definitions, but you can perform overrides or parent/child consolidated

            configuration here if you like: -->

        <!-- <property name="filters"> <util:map> <entry key="aName" value-ref="someFilterPojo"/>

            </util:map> </property> -->

        <property name="filterChainDefinitions">

            <value>

                /login.jsp = anon

                # everything else requires authentication:

                /** = authc

            </value>

        </property>

    </bean>

</beans>
3.1)配置ehcache的jar包及ehcache的配置文件
ehcache.xml从hibernate中找:
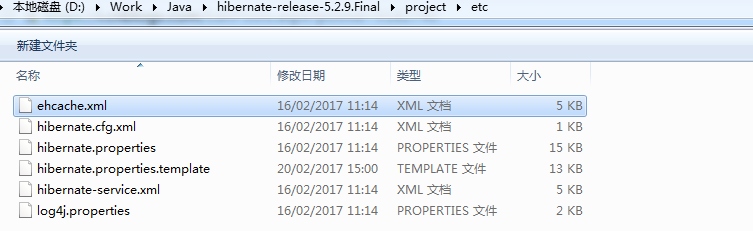
将其拷贝到src下
ehcache.jar也可以从hibernate开发包中找到:
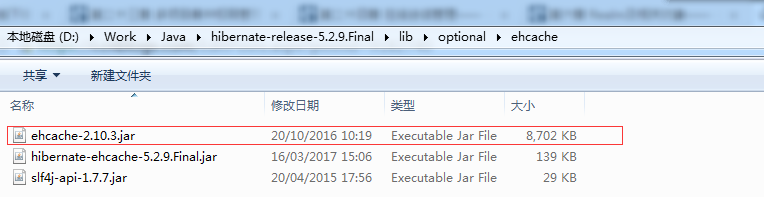
将其拷贝到WEB-INF/lib下,导入到项目中。
3.2)添加shiro realm
新建包com.dx.shiro.realms,在包下新建一个MyRealm.java
package com.dx.shiro.realms;

import org.apache.shiro.authc.AuthenticationException;

import org.apache.shiro.authc.AuthenticationInfo;

import org.apache.shiro.authc.AuthenticationToken;

import org.apache.shiro.realm.Realm;

public class MyRealm implements Realm {

    public AuthenticationInfo getAuthenticationInfo(AuthenticationToken arg0) throws AuthenticationException {

        // TODO Auto-generated method stub

        return null;

    }

    public String getName() {

        // TODO Auto-generated method stub

        return null;

    }

    public boolean supports(AuthenticationToken arg0) {

        // TODO Auto-generated method stub

        return false;

    }

}
这里采用咱不实现具体的接口的方式。
3.3)在webcontent下添加页面
添加页面login.jsp,list.jsp,unauthorized.jsp
测试
此时访问网址:

其他任何页面都不允许访问。
Java-Shiro(三):Shiro与Spring MVC集成的更多相关文章
- Spring MVC集成slf4j-logback
转自: Spring MVC集成slf4j-logback 1. Spring MVC集成slf4j-log4j 关于slf4j和log4j的相关介绍和用法,网上有很多文章可供参考,但是关于logb ...
- spring mvc集成velocity使用
目前流行的三大页面视图神器是:老牌大哥jsp.后起之秀freemarker和velocity.这里不详细比较这三者的优劣,总体来说,jsp是标配,但后面两个更严格的执行了视图与业务的分离,页面里是不允 ...
- spring mvc集成freemarker使用
freemarker作为视图技术出现的比velocity早,想当年struts风靡一时,freemarker作为视图层也风光了一把.但现在velocity作为后起之秀的轻量级模板引擎,更容易得到青睐. ...
- spring mvc 集成freemarker模板
主要使用到的jar 文件:spring mvc +freemarker.jar 第一步:spring mvc 集成 freemarker <!-- 定义跳转的文件的前后缀 ,视图模式配置--&g ...
- Spring Boot 2.X(三):使用 Spring MVC + MyBatis + Thymeleaf 开发 web 应用
前言 Spring MVC 是构建在 Servlet API 上的原生框架,并从一开始就包含在 Spring 框架中.本文主要通过简述 Spring MVC 的架构及分析,并用 Spring Boot ...
- 【Java Web开发学习】Spring MVC异常统一处理
[Java Web开发学习]Spring MVC异常统一处理 文采有限,若有错误,欢迎留言指正. 转载:https://www.cnblogs.com/yangchongxing/p/9271900. ...
- Java-Spring MVC:JAVA之常用的一些Spring MVC的路由写法以及参数传递方式
ylbtech-Java-Spring MVC:JAVA之常用的一些Spring MVC的路由写法以及参数传递方式 1.返回顶部 1. 常用的一些Spring MVC的路由写法以及参数传递方式. 这是 ...
- 【Java Web开发学习】Spring MVC 使用HTTP信息转换器
[Java Web开发学习]Spring MVC 使用HTTP信息转换器 转载:https://www.cnblogs.com/yangchongxing/p/10186429.html @Respo ...
- 【Java Web开发学习】Spring MVC添加自定义Servlet、Filter、Listener
[Java Web开发学习]Spring MVC添加自定义Servlet.Filter.Listener 转载:https://www.cnblogs.com/yangchongxing/p/9968 ...
- 【Java Web开发学习】Spring MVC 拦截器HandlerInterceptor
[Java Web开发学习]Spring MVC 拦截器HandlerInterceptor 转载:https://www.cnblogs.com/yangchongxing/p/9324119.ht ...
随机推荐
- android依据区域高度切割文本问题
android字体显示涉及例如以下參数:1. 基准点是baseline:2. Ascent是baseline之上至字符最高处的距离:3. Descent是baseline之下至字符最低处的距离.4. ...
- kettle的基本介绍
Kettle 主要内容: 一.ETL介绍 二.Kettle介绍 三.Java调用Kettle API 一.ETL介绍 1. ETL是什么? 1).ETL分别是“Extract”.“ Transform ...
- AI 实验--v_JULY_v
http://blog.csdn.net/v_JULY_v http://www.julyedu.com/
- Why I Left the .NET Framework
The .NET Framework was good. Really good. Until it wasn't. Why did I leave .NET? In short, it constr ...
- MORMOT的数据序列
MORMOT的数据序列 mormot服务器回复客户端通过Ctxt.OutContent属性. 此属性的类型是:SockString. // property OutContent: SockStr ...
- C#编程(十二)----------函数
类和结构 类和结构实际上都是创建对象的模板 ,每 个对象都包含数据 ,并 提供了处理和访问数据的方法. 类定义了类的每个对象 (称 为实例 )可 以包含什么数据和功能 . 例如 ,如 果 一 个类表示 ...
- 缩放到被选择的部分: ICommand Cmd = new ControlsZoomToSelectedCommandClass();
AddItem("esriControls.ControlsZoomToSelectedCommand"); //ICommand Cmd = new ControlsZoomTo ...
- 【Devops】【docker】【CI/CD】关于jenkins构建成功后一步,执行的shell命令详解+jenkins容器运行宿主机shell命令的实现方法
1.展示这段shell命令 +详解 #================================================================================= ...
- python测试开发django-27.表单提交之post修改密码
前言 跟账号相关的功能一般是注册,登录,修改密码,密码找回功能,前面实现了登录和注册功能,本篇讲下修改密码功能实现 修改密码html <!DOCTYPE html> <html la ...
- 纸牌屋第一季/全集House of Cards迅雷下载
纸牌屋 第一季 House of Cards Season 1 (2013) 本季看点:经过数轮激烈角逐,新一届美国总统加勒特·沃克(迈克·吉尔 Michael Gill 饰)诞生,自称水管工的众议院 ...