编译安装基于 fastcgi 模式的多虚拟主机的wordpress和discuz的LAMP架构
实现CentOS 7 编译安装基于 fastcgi 模式的多虚拟主机的wordpress和discuz的LAMP架构
准备环境:
两台主机:

    一台主机:httpd+php(fastcgi模式)

    一台主机:mariadb 服务器
准备软件版本:
mariadb-10.2.27-linux-x86_64.tar.gz 通用二进制格式

apr-1.7.0.tar.bz2

apr-util-1.6.1.tar.bz2

httpd-2.4.41.tar.gz

php-7.4.0.tar.xz

wordpress-5.3-zh_CN.tar.gz

Discuz_X3.4_SC_UTF8【20190917】.zip
主机名修改用以区分
# 作为httpd和php服务器使用

[root@centos7 ~]$hostname websrv

[root@centos7 ~]$exit

[root@websrv ~]$
# 作为数据库使用

[root@centos7 ~]$hostname mysql

[root@centos7 ~]$exit

[root@mysql ~]$
数据库服务器
实现数据库二进制安装(并加上LAMP需要的配置)
- 准备好二进制mariadb安装包
[root@centos7 data]$ll

total 449668

-rw-r--r-- 1 root root 460459738 Sep 12 09:08 mariadb-10.2.27-linux-x86_64.tar.gz
- 解压安装包
[root@centos7 data]$tar xvf mariadb-10.2.27-linux-x86_64.tar.gz

[root@centos7 data]$ll

total 449668

drwxrwxr-x 12 yang yang       282 Sep 10 02:02 mariadb-10.2.27-linux-x86_64

-rw-r--r--  1 root root 460459738 Sep 12 09:08 mariadb-10.2.27-linux-x86_64.tar.gz
- 把解压后的数据库目录移动到usr/local下统一管理
[root@centos7 data]$mv mariadb-10.2.27-linux-x86_64 /usr/local/  # 移动

[root@centos7 local]$ln -s /usr/local/mariadb-10.2.27-linux-x86_64/ /usr/local/mysql  # 创建软连接

[root@centos7 local]$ll /usr/local/mysql

lrwxrwxrwx 1 root root 40 Dec 15 14:44 /usr/local/mysql -> /usr/local/mariadb-10.2.27-linux-x86_64/
- 创建服务用户,并修改mysql目录下的权限。
[root@centos7 data]$useradd -s /sbin/nologin -d /data/mysql -r -u 306 mysql   # 创建服务用户

[root@centos7 local]$chown -R root.root mysql/*   # 修改为root

[root@centos7 local]$ll mysql/

total 176

drwxrwxr-x  2 root root  4096 Aug 14 02:55 bin

-rw-r--r--  1 root root 17987 Sep  8 21:25 COPYING

-rw-r--r--  1 root root  2354 Sep  8 21:25 CREDITS

drwxrwxr-x  3 root root    18 Sep 10 02:02 data

-rw-r--r--  1 root root  8245 Sep  8 21:25 EXCEPTIONS-CLIENT

drwxrwxr-x  3 root root    19 Sep 10 02:02 include

-rw-r--r--  1 root root  8694 Sep  8 21:25 INSTALL-BINARY

drwxrwxr-x  5 root root   335 Aug 14 02:55 lib

drwxrwxr-x  4 root root    30 Sep 10 02:02 man

drwxrwxr-x 11 root root  4096 Sep 10 02:02 mysql-test

-rw-r--r--  1 root root  2843 Sep  8 21:25 README.md

-rw-r--r--  1 root root 19477 Sep  8 21:25 README-wsrep

drwxrwxr-x  2 root root    30 Sep 10 02:02 scripts

drwxrwxr-x 32 root root  4096 Sep 10 02:02 share

drwxrwxr-x  4 root root  4096 Sep 10 02:02 sql-bench

drwxrwxr-x  3 root root   275 Sep 10 02:02 support-files

-rw-r--r--  1 root root 86263 Sep  8 21:25 THIRDPARTY
- 创建数据库
[root@centos7 mysql]$/usr/local/mysql/scripts/mysql_install_db --datadir=/data/mysql --user=mysql

Installing MariaDB/MySQL system tables in '/data/mysql' ...

./bin/mysqld: error while loading shared libraries: libaio.so.1: cannot open shared object file: No such file or directory

# 创建数据库时缺少包(libaio)

[root@centos7 mysql]$yum install libaio -y  # 下载依赖包

[root@centos7 mysql]$/usr/local/mysql/scripts/mysql_install_db --datadir=/data/mysql --user=mysql  # 创建数据库(/data下没有这个目录会自动创建)

[root@centos7 mysql]$ll /data/

total 449668

-rw-r--r-- 1 root  root 460459738 Sep 12 09:08 mariadb-10.2.27-linux-x86_64.tar.gz

drwx------ 5 mysql root       181 Dec 15 14:55 mysql       # 数据库创建成功

[root@centos7 mysql]$ll /data/mysql/   # 查看用户和所属组

total 110620

-rw-rw---- 1 mysql mysql    16384 Dec 15 14:55 aria_log.00000001

-rw-rw---- 1 mysql mysql       52 Dec 15 14:55 aria_log_control

-rw-rw---- 1 mysql mysql      938 Dec 15 14:55 ib_buffer_pool

-rw-rw---- 1 mysql mysql 12582912 Dec 15 14:55 ibdata1

-rw-rw---- 1 mysql mysql 50331648 Dec 15 14:55 ib_logfile0

-rw-rw---- 1 mysql mysql 50331648 Dec 15 14:55 ib_logfile1

drwx------ 2 mysql mysql     4096 Dec 15 14:55 mysql

drwx------ 2 mysql mysql       20 Dec 15 14:55 performance_schema

drwx------ 2 mysql mysql       20 Dec 15 14:55 test
- 准备配置文件(指明数据库路径)
[root@centos7 ~]$cp /usr/local/mysql/support-files/my-huge.cnf /etc/my.cnf -b  # 找到解压目录下的配置文件替换掉/etc下的配置文件并备份

cp: overwrite ‘/etc/my.cnf’? y

# 原系统/etc下就有一个my.cnf的配置文件但是需要改配置

[root@centos7 mysql]$vim /etc/my.cnf

[mysqld]

datadir=/data/mysql   # 加上这一行就够了 (需要启用二进制日志啊之类的根据需要启动)
如果上一步cp没做直接用的自带的文件,注意sock路经。(服务可能起不来是因为启动过一次之后系统建立了一个sock路径但是用的是系统自带的配置文件建立的路径。你在拷贝配置文件过去后一定要确保没有启动过服务。如果启动过请重启电脑或删掉旧的配置文件建立的sock文件再启动服务)

6. 制作启动服务(类似于centos6的启动脚本)
[root@centos7 mysql]$cp /usr/local/mysql/support-files/mysql.server /etc/init.d/mysqld  # 拷贝目录下的server启动脚本到

[root@centos7 mysql]$chkconfig --list    # 查看注册了哪些服务

Note: This output shows SysV services only and does not include native

      systemd services. SysV configuration data might be overridden by native

      systemd configuration.

      If you want to list systemd services use 'systemctl list-unit-files'.

      To see services enabled on particular target use

      'systemctl list-dependencies [target]'.

netconsole     	0:off	1:off	2:off	3:off	4:off	5:off	6:off

network        	0:off	1:off	2:on	3:on	4:on	5:on	6:off

[root@centos7 mysql]$chkconfig --add mysqld   # 添加服务

[root@centos7 mysql]$chkconfig --list   # 再次查看

Note: This output shows SysV services only and does not include native

      systemd services. SysV configuration data might be overridden by native

      systemd configuration.

      If you want to list systemd services use 'systemctl list-unit-files'.

      To see services enabled on particular target use

      'systemctl list-dependencies [target]'.

mysqld         	0:off	1:off	2:on	3:on	4:on	5:on	6:off

netconsole     	0:off	1:off	2:off	3:off	4:off	5:off	6:off

network        	0:off	1:off	2:on	3:on	4:on	5:on	6:off   # 添加上了
- 添加PATH变量
[root@centos7 ~]$echo "PATH=/usr/local/mysql/bin:$PATH" > /etc/profile.d/mysql.sh

[root@centos7 ~]$. /etc/profile.d/mysql.sh
- 创建部署软件需要的数据库和用户并授权
# 创建数据库
MariaDB [(none)]> create database wordpress;
Query OK, 1 row affected (0.00 sec)
MariaDB [(none)]> create database discuz;
Query OK, 1 row affected (0.01 sec)
MariaDB [(none)]> show databases;
+--------------------+
| Database |
+--------------------+
| discuz |
| information_schema |
| mysql |
| performance_schema |
| test |
| wordpress |
+--------------------+
6 rows in set (0.00 sec)
# 创建用户并授权
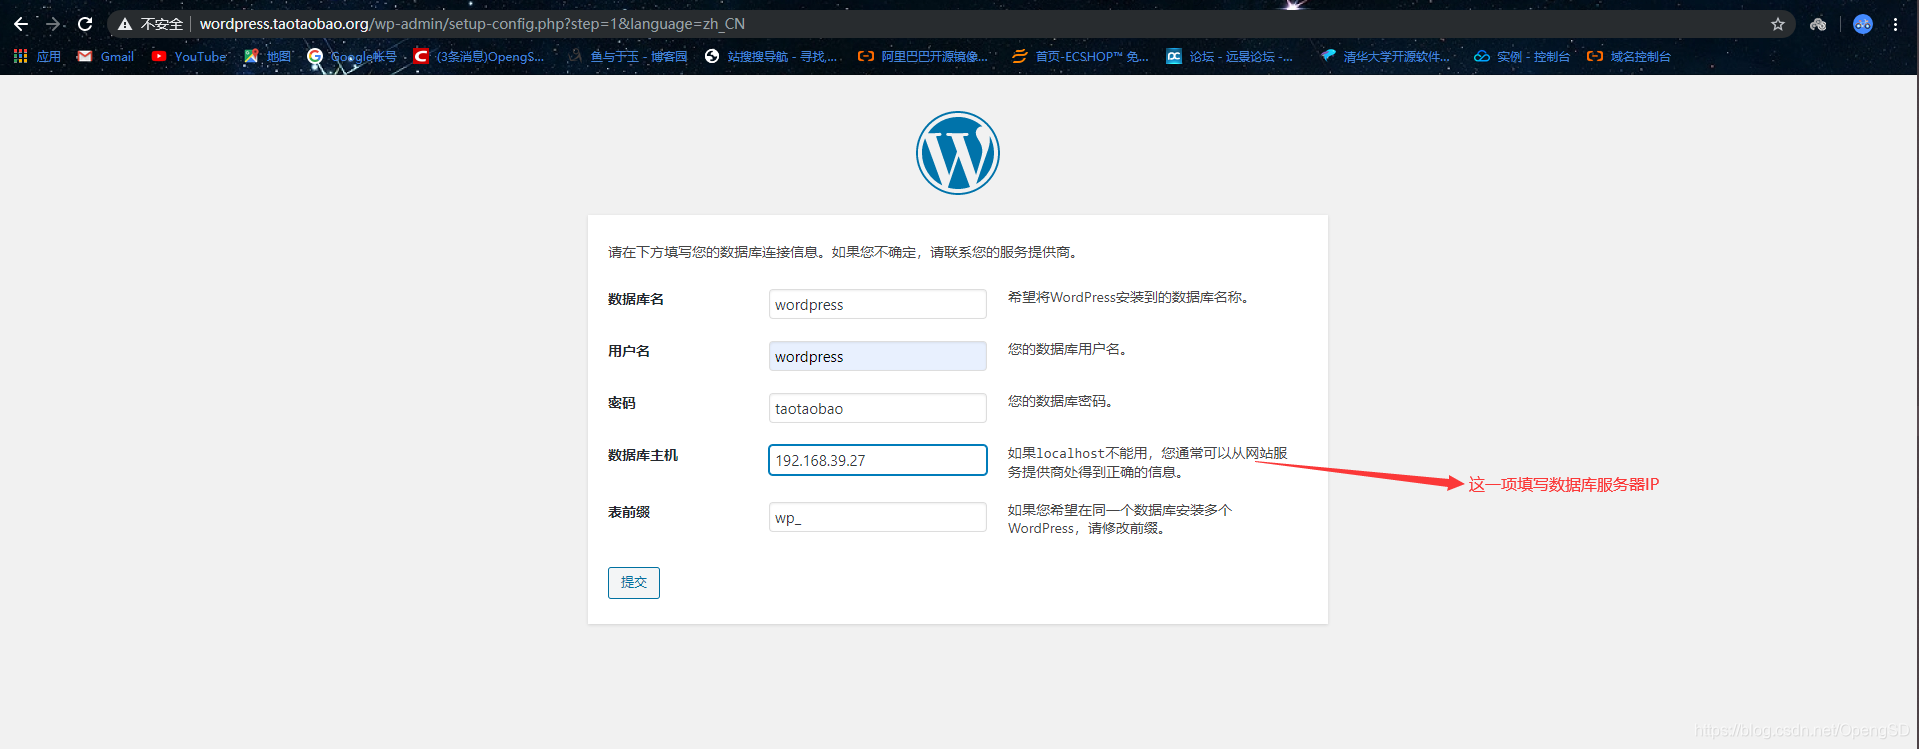
MariaDB [(none)]> grant all on wordpress.* to wordpress@'192.168.39.%' identified by 'taotaobao';
Query OK, 0 rows affected (0.00 sec)
MariaDB [(none)]> grant all on discuz.* to discuz@'192.168.39.%' identified by 'taotaobao';
Query OK, 0 rows affected (0.00 sec)
MariaDB [(none)]> select user,host,password from mysql.user; # 查看创建的账户
+-----------+--------------+-------------------------------------------+
| user | host | password |
+-----------+--------------+-------------------------------------------+
| root | localhost | |
| root | centos7 | |
| root | 127.0.0.1 | |
| root | ::1 | |
| | localhost | |
| | centos7 | |
| wordpress | 192.168.39.% | *114893F4494D9D1D5AE2BCCACDD663C08715DA05 |
| discuz | 192.168.39.% | *114893F4494D9D1D5AE2BCCACDD663C08715DA05 |
+-----------+--------------+-------------------------------------------+
8 rows in set (0.00 sec)
数据库需要的基本配置完毕
websrv服务器端
- websrv端需要的包
[root@centos7 ~]$ll

total 43984

-rw-r--r--  1 root root   872238 May 14  2019 apr-1.7.0.tar.bz2

-rw-r--r--  1 root root   428595 May 14  2019 apr-util-1.6.1.tar.bz2

-rw-r--r--  1 root root 11800498 Dec 12 14:57 Discuz_X3.4_SC_UTF8【20191201】.zip

-rw-r--r--  1 root root  9267917 Oct  8 15:10 httpd-2.4.41.tar.gz

-rw-r--r--  1 root root 10232208 Dec 14 08:30 php-7.4.0.tar.xz

-rw-r--r--  1 root root 12423575 Dec 12 14:18 wordpress-5.3-zh_CN.tar.gz
编译安装httpd
- 解压httpd和apr包
[root@centos7 data]$ll

total 10324

-rw-r--r-- 1 root root  872238 May 14  2019 apr-1.7.0.tar.bz2

-rw-r--r-- 1 root root  428595 May 14  2019 apr-util-1.6.1.tar.bz2

-rw-r--r-- 1 root root 9267917 Oct  8 15:10 httpd-2.4.41.tar.gz

[root@centos7 data]$tar xvf apr-1.7.0.tar.bz2   # 最小化安装缺少包

tar (child): cannot run bzip2: No such file or directory

tar (child): trying lbzip2

tar (child): lbzip2: Cannot exec: No such file or directory

tar (child): Error is not recoverable: exiting now

tar: Child returned status 2

tar: Error is not recoverable: exiting now

[root@centos7 data]$yum install bzip2 # 下载解压需要的包

# 解压

[root@centos7 data]$tar xvf apr-1.7.0.tar.bz2

[root@centos7 data]$tar xvf apr-util-1.6.1.tar.bz2

[root@centos7 data]$tar xvf httpd-2.4.41.tar.gz

[root@centos7 data]$ll

total 10336

drwxr-xr-x 27 1001 1001    4096 Apr  2  2019 apr-1.7.0

-rw-r--r--  1 root root  872238 May 14  2019 apr-1.7.0.tar.bz2

drwxr-xr-x 20 1001 1001    4096 Oct 18  2017 apr-util-1.6.1

-rw-r--r--  1 root root  428595 May 14  2019 apr-util-1.6.1.tar.bz2

drwxr-sr-x 11 root   40    4096 Aug  9 21:36 httpd-2.4.41

-rw-r--r--  1 root root 9267917 Oct  8 15:10 httpd-2.4.41.tar.gz
- 合并三个目录一起编译
[root@centos7 data]$mv apr-1.7.0 httpd-2.4.41/srclib/apr

[root@centos7 data]$mv apr-util-1.6.1 httpd-2.4.41/srclib/apr-util
- 下载相关依赖包
[root@centos7 data]$yum install gcc pcre-devel openssl-devel expat-devel -y
- 进入目录下进行编译安装
[root@centos7 data]$cd httpd-2.4.41/  # 进入目录

[root@centos7 httpd-2.4.41]$./configure \

> --prefix=/app/httpd24 \

> --enable-so \

> --enable-ssl \

> --enable-cgi \

> --enable-rewrite \

> --with-zlib \

> --with-pcre \

> --with-included-apr \

> --enable-modules=most \

> --enable-mpms-shared=all \

> --with-mpm=prefork

[root@centos7 httpd-2.4.41]$make -j 4 && make install   # 制作安装
- 准备PATH变量
[root@centos7 httpd-2.4.41]$echo 'PATH=/app/httpd24/bin:$PATH' > /etc/profile.d/lamp.sh  # 添加变量

[root@centos7 httpd-2.4.41]$. /etc/profile.d/lamp.sh   # 加载变量

[root@centos7 httpd-2.4.41]$echo $PATH  # 查看变量

/app/httpd24/bin:/usr/local/sbin:/usr/local/bin:/usr/sbin:/usr/bin:/root/bin
- 创建apache账户
# 工作中最好指明UID,UID要统一.

[root@centos7 httpd-2.4.41]$useradd -s /sbin/nologin -r -u 88 apache
- 修改httpd配置文件
[root@centos7 httpd-2.4.41]$vim /app/httpd24/conf/httpd.conf

<IfModule unixd_module>

#

# If you wish httpd to run as a different user or group, you must run

# httpd as root initially and it will switch.

#

# User/Group: The name (or #number) of the user/group to run httpd as.

# It is usually good practice to create a dedicated user and group for

# running httpd, as with most system services.

#

User apache   # 默认为daemon监管改为apache

Group apache  # 同上

</IfModule>

# 网站主页面定义为/data/(随自己需求)

DocumentRoot "/data/"

<Directory "/data/">
- 启动服务
[root@centos7 httpd-2.4.41]$apachectl restart

AH00558: httpd: Could not reliably determine the server's fully qualified domain name, using fe80::20c:29ff:feac:5484%eth0. Set the 'ServerName' directive globally to suppress this message

httpd not running, trying to start

[root@centos7 httpd-2.4.41]$ss -ntlup

Netid State      Recv-Q Send-Q                                               Local Address:Port                                                              Peer Address:Port

tcp   LISTEN     0      128                                                              *:22                                                                           *:*                   users:(("sshd",pid=6461,fd=3))

tcp   LISTEN     0      100                                                      127.0.0.1:25                                                                           *:*                   users:(("master",pid=6581,fd=13))

tcp   LISTEN     0      128                                                             :::80                                                                          :::*                   users:(("httpd",pid=49496,fd=4),("httpd",pid=49495,fd=4),("httpd",pid=49494,fd=4),("httpd",pid=49493,fd=4),("httpd",pid=49492,fd=4),("httpd",pid=49491,fd=4))

tcp   LISTEN     0      128                                                             :::22                                                                          :::*                   users:(("sshd",pid=6461,fd=4))

tcp   LISTEN     0      100                                                            ::1:25                                                                          :::*                   users:(("master",pid=6581,fd=14))
- 修改ServerName配置不在提示
[root@centos7 httpd-2.4.41]$vim /app/httpd24/conf/httpd.conf

# If your host doesn't have a registered DNS name, enter its IP address here.

#

ServerName www.example.com:80   # 这一行取消注释,名字是什么都可以。

[root@centos7 httpd-2.4.41]$apachectl restart   # 不在提示

[root@centos7 httpd-2.4.41]$
- 修改为event模式
[root@centos7 httpd-2.4.41]$vim /app/httpd24/conf/httpd.conf

#  默认centos7为prefork模式,所以需要修改

LoadModule mpm_event_module modules/mod_mpm_event.so    # 取消注释启用

#LoadModule mpm_prefork_module modules/mod_mpm_prefork.so # 加上注释禁用

#LoadModule mpm_worker_module modules/mod_mpm_worker.so

[root@centos7 httpd-2.4.41]$apachectl restart
- 可以根据需求调节这些配置对应生产调到生产中最大值
[root@centos7 httpd-2.4.41]$vim /app/httpd24/conf/extra/httpd-mpm.conf

# event MPM

# StartServers: initial number of server processes to start

# MinSpareThreads: minimum number of worker threads which are kept spare

# MaxSpareThreads: maximum number of worker threads which are kept spare

# ThreadsPerChild: constant number of worker threads in each server process

# MaxRequestWorkers: maximum number of worker threads

# MaxConnectionsPerChild: maximum number of connections a server process serves

#                         before terminating

<IfModule mpm_event_module>

    StartServers             3

    MinSpareThreads         75

    MaxSpareThreads        250

    ThreadsPerChild         25

    MaxRequestWorkers      400

    MaxConnectionsPerChild   0

</IfModule>
现在httpd服务已经可以访问了!
web界面测试访问(it works! 是默认显示)

编译安装fastcgi 方式的 php7.3
- php7.3和php7.4依赖包稍有差别
#安装相关包,依赖EPEL源

#php 7.3 相关包

yum install gcc libxml2-devel bzip2-devel libmcrypt-devel

#php 7.4 相关包

yum install gcc libxml2-devel bzip2-devel libmcrypt-devel sqlite-devel

oniguruma-devel
- 安装依赖包
[root@centos7 data]$yum install gcc libxml2-devel bzip2-devel libmcrypt-devel sqlite-devel oniguruma-devel
- 解压php编译安装包
[root@centos7 data]$tar xvf php-7.4.0.tar.xz

[root@centos7 data]$ll

total 20328

-rw-r--r--  1 root root   872238 May 14  2019 apr-1.7.0.tar.bz2

-rw-r--r--  1 root root   428595 May 14  2019 apr-util-1.6.1.tar.bz2

drwxr-sr-x 12 root   40     4096 Dec 15 16:14 httpd-2.4.41

-rw-r--r--  1 root root  9267917 Oct  8 15:10 httpd-2.4.41.tar.gz

drwxrwxr-x 16 root root     4096 Nov 27 04:13 php-7.4.0     # 解压完的目录

-rw-r--r--  1 root root 10232208 Dec 14 08:30 php-7.4.0.tar.xz
- 进入php目录下进行编译
# 7.4编译方式

[root@centos7 data]$cd php-7.4.0/

[root@centos7 data]$./configure \

--prefix=/app/php74 \

--enable-mysqlnd \

--with-mysqli=mysqlnd \

--with-pdo-mysql=mysqlnd \

--with-openssl \

--with-zlib \

--with-config-file-path=/etc \

--with-config-file-scan-dir=/etc/php.d \

--enable-mbstring \

--enable-xml \

--enable-sockets \

--enable-fpm \

--enable-maintainer-zts \

--disable-fileinfo

[root@centos7 data]$make -j 4 && make install

[root@centos7 php-7.4.0]$/app/php74/bin/php --version   # 查看版本号

PHP 7.4.0 (cli) (built: Dec 15 2019 17:15:08) ( ZTS )

Copyright (c) The PHP Group

Zend Engine v3.4.0, Copyright (c) Zend Technologies   # 这行是引擎版本

# 7.3编译方式

./configure --prefix=/app/php73 \

--enable-mysqlnd \

--with-mysqli=mysqlnd \

--with-pdo-mysql=mysqlnd \

--with-openssl \

--with-freetype-dir \

--with-jpeg-dir \

--with-png-dir \

--with-zlib \

--with-libxml-dir=/usr \

--with-config-file-path=/etc \

--with-config-file-scan-dir=/etc/php.d \

--enable-mbstring \

--enable-xml \

--enable-sockets \

--enable-fpm \

--enable-maintainer-zts \

--disable-fileinfo
- 准备PATH变量
# 修改之前准备好的变量

[root@centos7 php-7.4.0]$vim /etc/profile.d/lamp.sh

PATH=/app/httpd24/bin:/app/php/bin/:$PATH

[root@centos7 php-7.4.0]$. /etc/profile.d/lamp.sh
- 准备php配置文件
[root@centos7 php-7.4.0]$cp php.ini-production /etc/php.ini
- 准本fastcgi(fpm)主配置文件(改名=启用)
[root@centos7 php-7.4.0]$cd /app/php74/etc/

[root@centos7 etc]$cp php-fpm.conf.default php-fpm.conf

[root@centos7 etc]$ll

total 16

-rw-r--r-- 1 root root 5357 Dec 15 17:28 php-fpm.conf

-rw-r--r-- 1 root root 5357 Dec 15 17:15 php-fpm.conf.default

drwxr-xr-x 2 root root   30 Dec 15 17:15 php-fpm.d
- 子配置文件fpm改名
[root@centos7 etc]$cd php-fpm.d/

[root@centos7 php-fpm.d]$ll

total 20

-rw-r--r-- 1 root root 19602 Dec 15 17:15 www.conf.default

[root@centos7 php-fpm.d]$cp www.conf.default www.conf
- 修改fpm子配置文件
[root@centos7 php-fpm.d]$vim www.conf

# 修改为apache,以apache的身份来创建fastcgi的进程

user = apache

group = apache

# 开启状态页

; Default Value: not set

pm.status_path = /status

# 开启ping测试

; Default Value: not set

ping.path = /ping
- 准备启动脚本
# 查找一下启动脚本

[root@centos7 php74]$updatedb

[root@centos7 php74]$locate php-fpm

/app/php74/etc/php-fpm.conf

/app/php74/etc/php-fpm.conf.default

/app/php74/etc/php-fpm.d

/app/php74/etc/php-fpm.d/www.conf

/app/php74/etc/php-fpm.d/www.conf.default

/app/php74/php/man/man8/php-fpm.8

/app/php74/sbin/php-fpm

/data/php-7.4.0/sapi/fpm/init.d.php-fpm

/data/php-7.4.0/sapi/fpm/init.d.php-fpm.in

/data/php-7.4.0/sapi/fpm/php-fpm

/data/php-7.4.0/sapi/fpm/php-fpm.8

/data/php-7.4.0/sapi/fpm/php-fpm.8.in

/data/php-7.4.0/sapi/fpm/php-fpm.conf

/data/php-7.4.0/sapi/fpm/php-fpm.conf.in

/data/php-7.4.0/sapi/fpm/php-fpm.service

/data/php-7.4.0/sapi/fpm/php-fpm.service.in

# 拷贝过去作为启动文件

[root@centos7 php74]$cp /data/php-7.4.0/sapi/fpm/php-fpm.service /usr/lib/system

d/system

# 重新加载服务

[root@centos7 php74]$systemctl daemon-reload
- 修改配置httpd 支持php-fpm
# 启用代理

#LoadModule remoteip_module modules/mod_remoteip.so

LoadModule proxy_module modules/mod_proxy.so    # 启用

#LoadModule proxy_connect_module modules/mod_proxy_connect.so

#LoadModule proxy_ftp_module modules/mod_proxy_ftp.so

#LoadModule proxy_http_module modules/mod_proxy_http.so

LoadModule proxy_fcgi_module modules/mod_proxy_fcgi.so  # 启用

# 添加index.php

<IfModule dir_module>

    DirectoryIndex index.php index.html

</IfModule>

# 添加这三行

AddType application/x-httpd-php .php

    AddType application/x-httpd-php-source .phps

    ProxyRequests Off

# 多虚拟主机和status启用

<virtualhost *:80>

servername wordpress.atotaobao.org

documentroot /data/wordpress

<directory /data/wordpress>

require all granted

</directory>

ProxyPassMatch ^/(.*\.php)$ fcgi://127.0.0.1:9000/data/wordpress/$1

ProxyPassMatch ^/(status|ping)$ fcgi://127.0.0.1:9000/$1

CustomLog "logs/access_wordpress_log" common

</virtualhost>

<virtualhost *:80>

servername discuz.taotaobao.org

documentroot /data/discuz

<directory /data/discuz/>

require all granted

</directory>

ProxyPassMatch ^/(.*\.php)$ fcgi://127.0.0.1:9000/data/discuz/$1

CustomLog "logs/access_discuz_log" common

</virtualhost>
- 创建部署软件需要的目录并建立一个测试php文件测试使用
[root@centos7 php74]$mkdir /data/wordpress

[root@centos7 php74]$mkdir /data/discuz

[root@centos7 php74]$vim /data/discuz/test.php

<?php

phpinfo();

?>

[root@centos7 php74]$cp /data/discuz/test.php /data/wordpress/
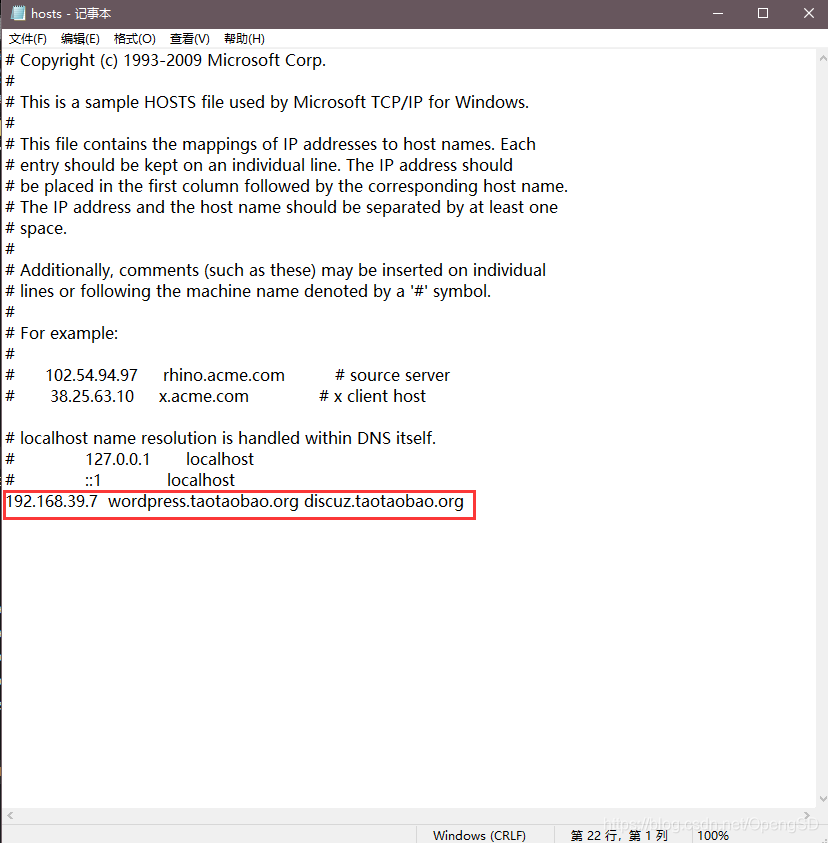
- windows更改host文件
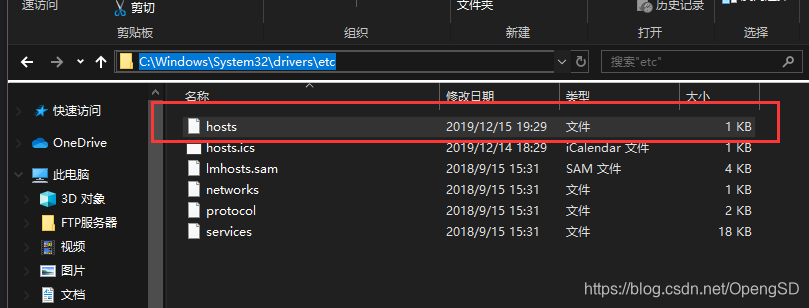
- 添加这一行对应虚拟主机的域名和虚拟机ip
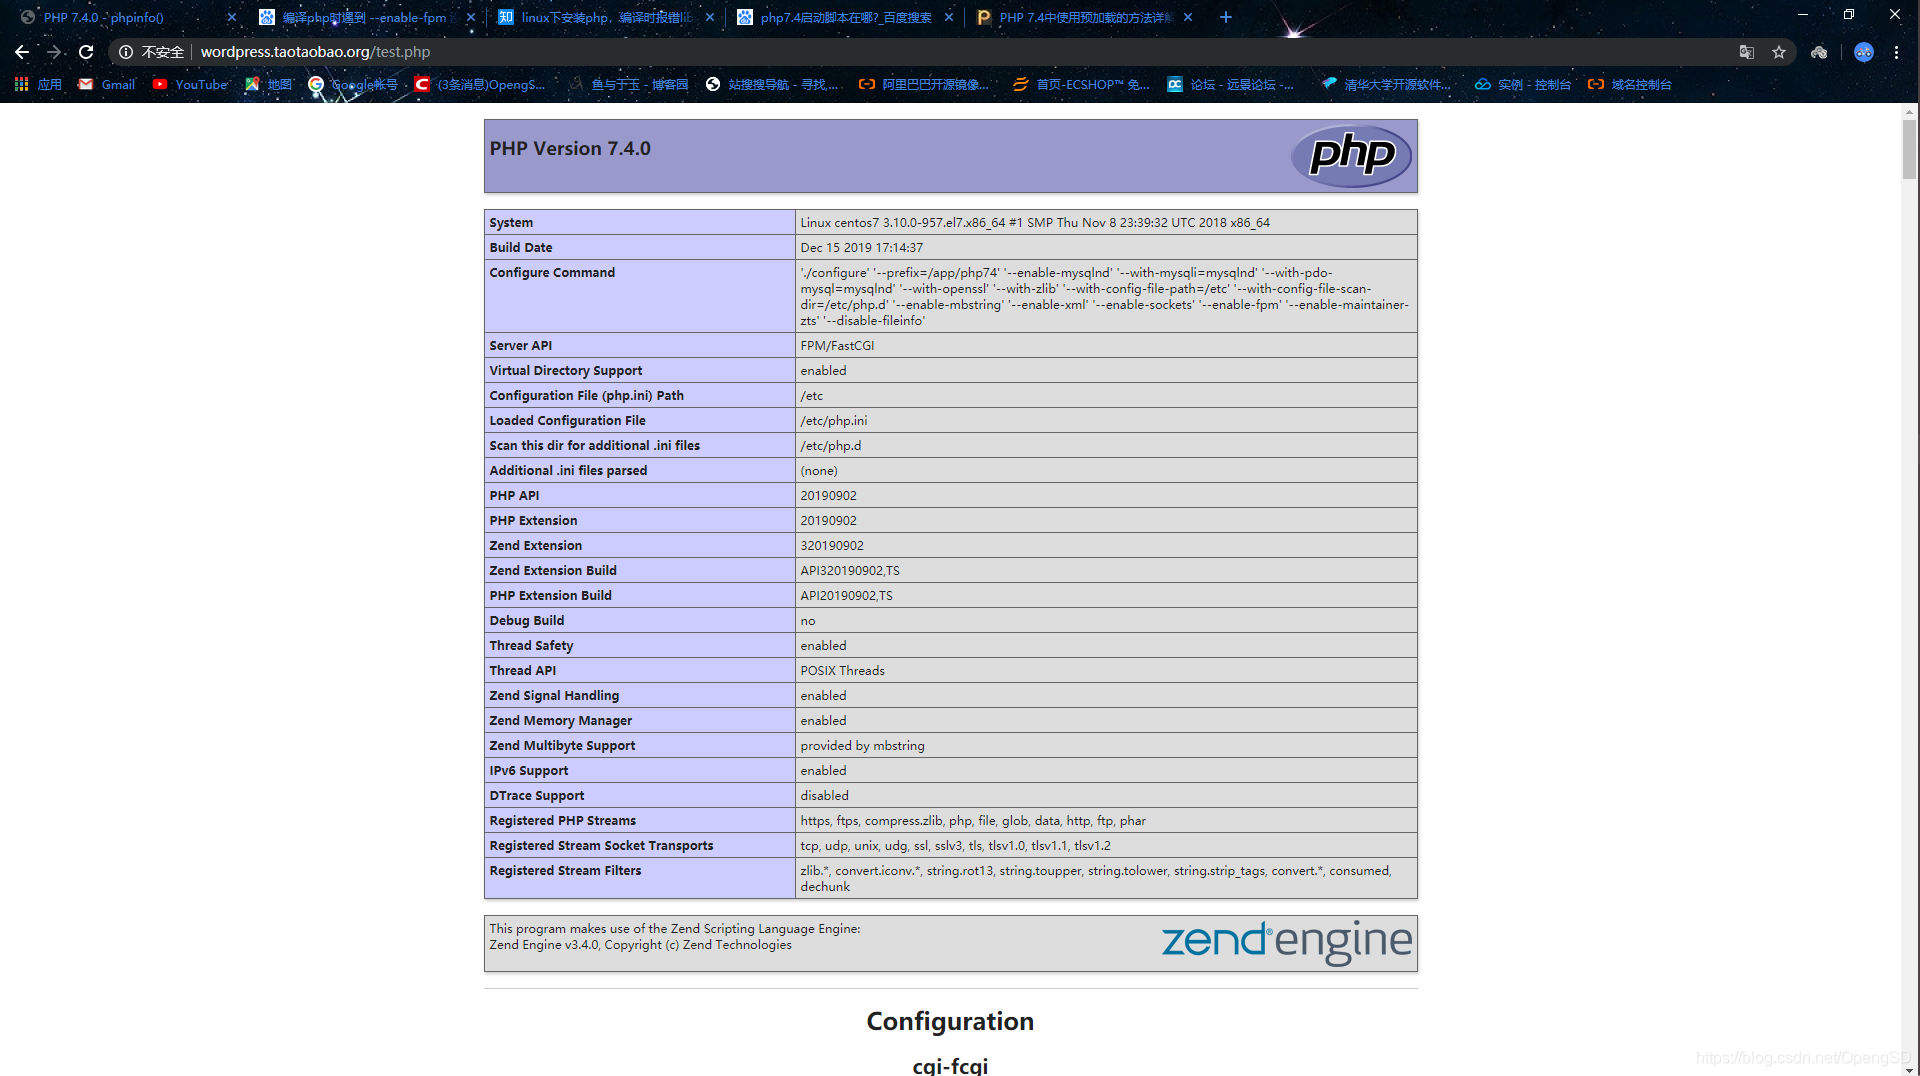
- web界面测试
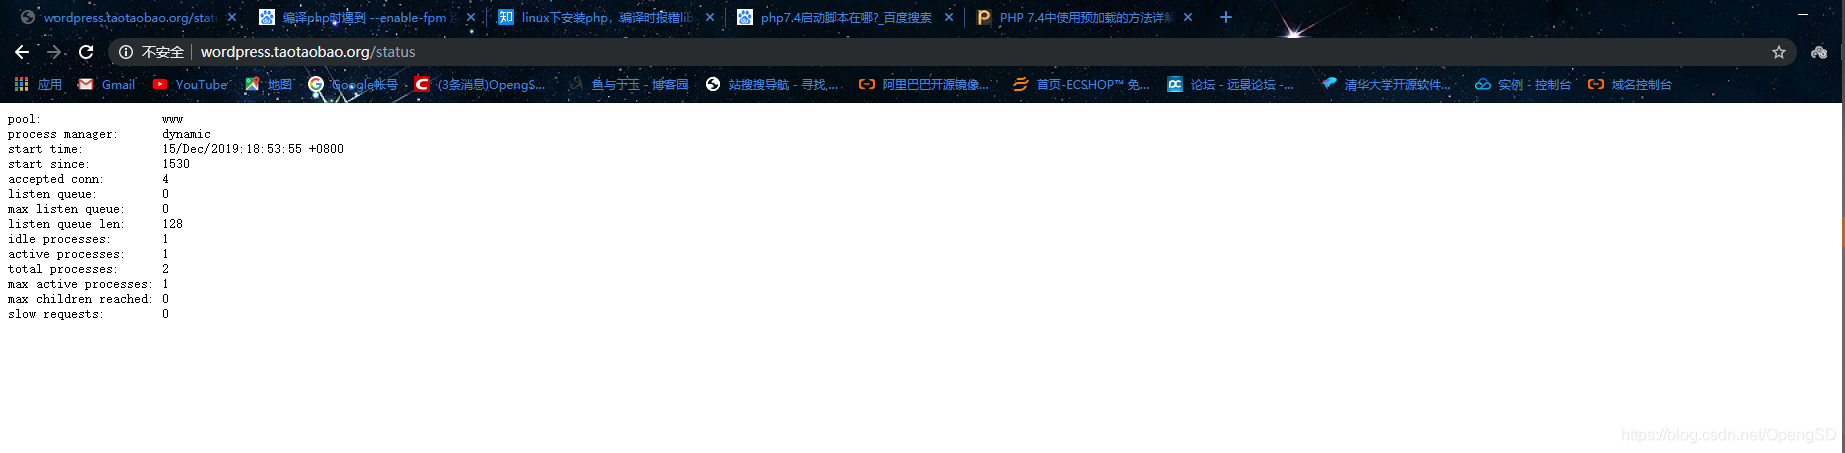
- web状态页测试
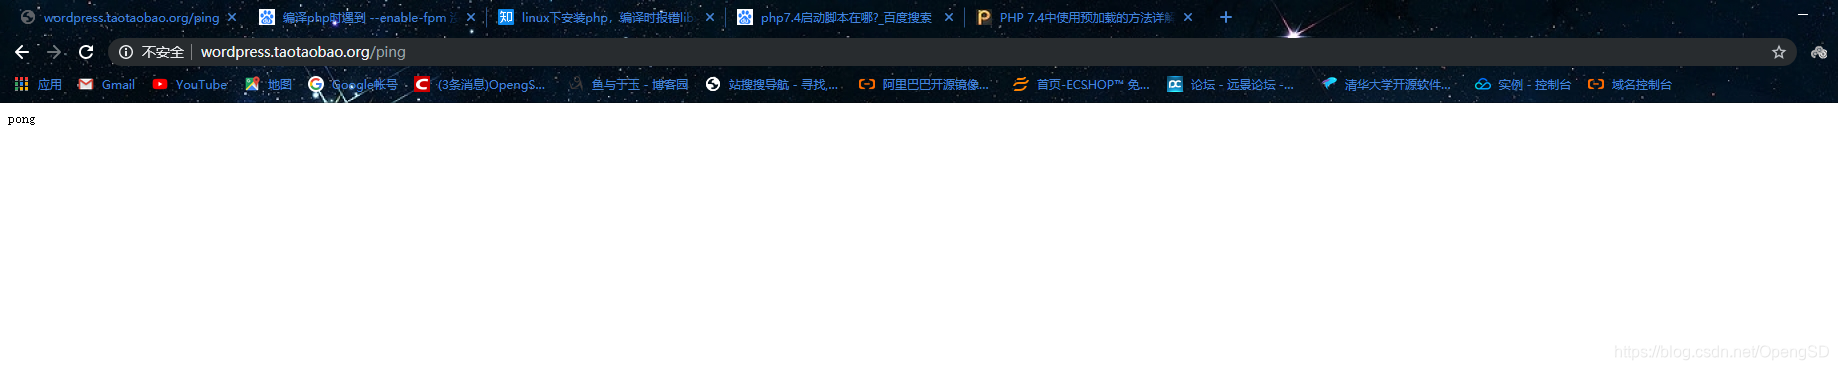
- web界面ping测试
- 准备opcache加速
- 查找opcache.so模块路径
[root@centos7 wordpress]$locate opcache.so

/app/php74/lib/php/extensions/no-debug-zts-20190902/opcache.so   # 这个是opcache加速模块

/data/php-7.4.0/ext/opcache/.libs/opcache.so

/data/php-7.4.0/modules/opcache.so

# 这三个文件是一样的只是在不同目录里作用不同

[root@centos7 wordpress]$ll /app/php74/lib/php/extensions/no-debug-zts-20190902/opcache.so

-rwxr-xr-x 1 root root 2491984 Dec 15 17:15 /app/php74/lib/php/extensions/no-debug-zts-20190902/opcache.so

[root@centos7 wordpress]$ll /data/php-7.4.0/ext/opcache/.libs/opcache.so

-rwxr-xr-x 1 root root 2491984 Dec 15 17:15 /data/php-7.4.0/ext/opcache/.libs/opcache.so

[root@centos7 wordpress]$ll /data/php-7.4.0/modules/opcache.so

-rwxr-xr-x 1 root root 2491984 Dec 15 17:15 /data/php-7.4.0/modules/opcache.so
- 准备加速插件文件(用来加速php处理动态资源)
[root@centos7 wordpress]$mkdir /etc/php.d/

[root@centos7 wordpress]$vim /etc/php.d/opcache.ini

[opcache]

zend_extension=opcache.so

#zend_extension=/app/php74/lib/php/extensions/no-debug-zts-20190902/opcache.so

opcache.enable=1   # 1 启用   0 关闭

# 路径以写全也可以只写模块名都可以找到。

[root@centos7 wordpress]$systemctl restart php-fpm.service  # 重启服务
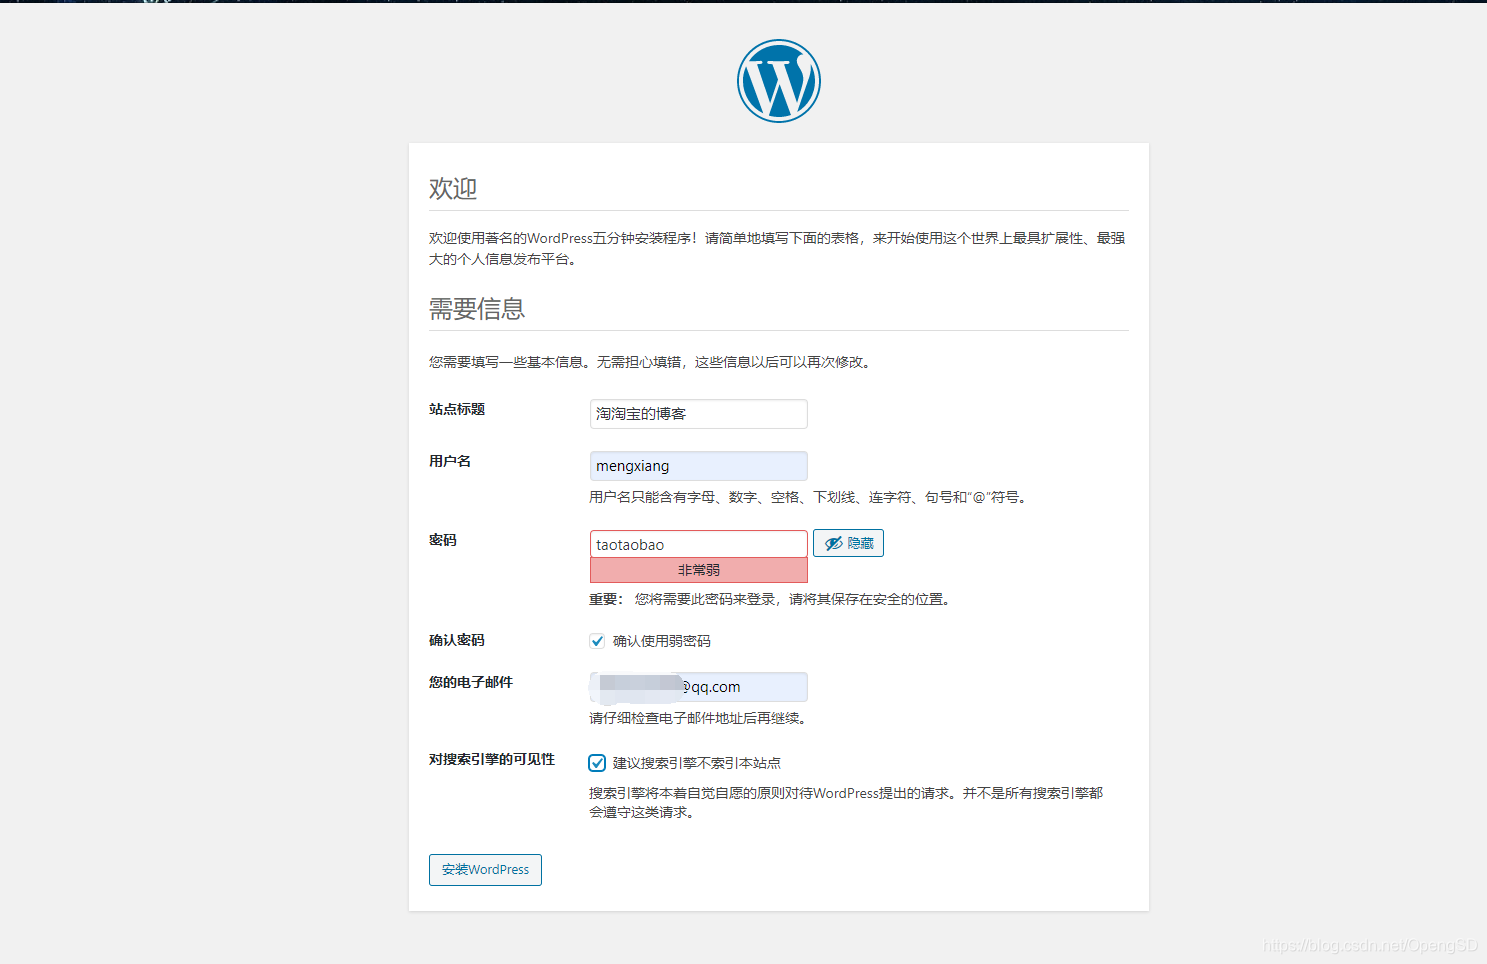
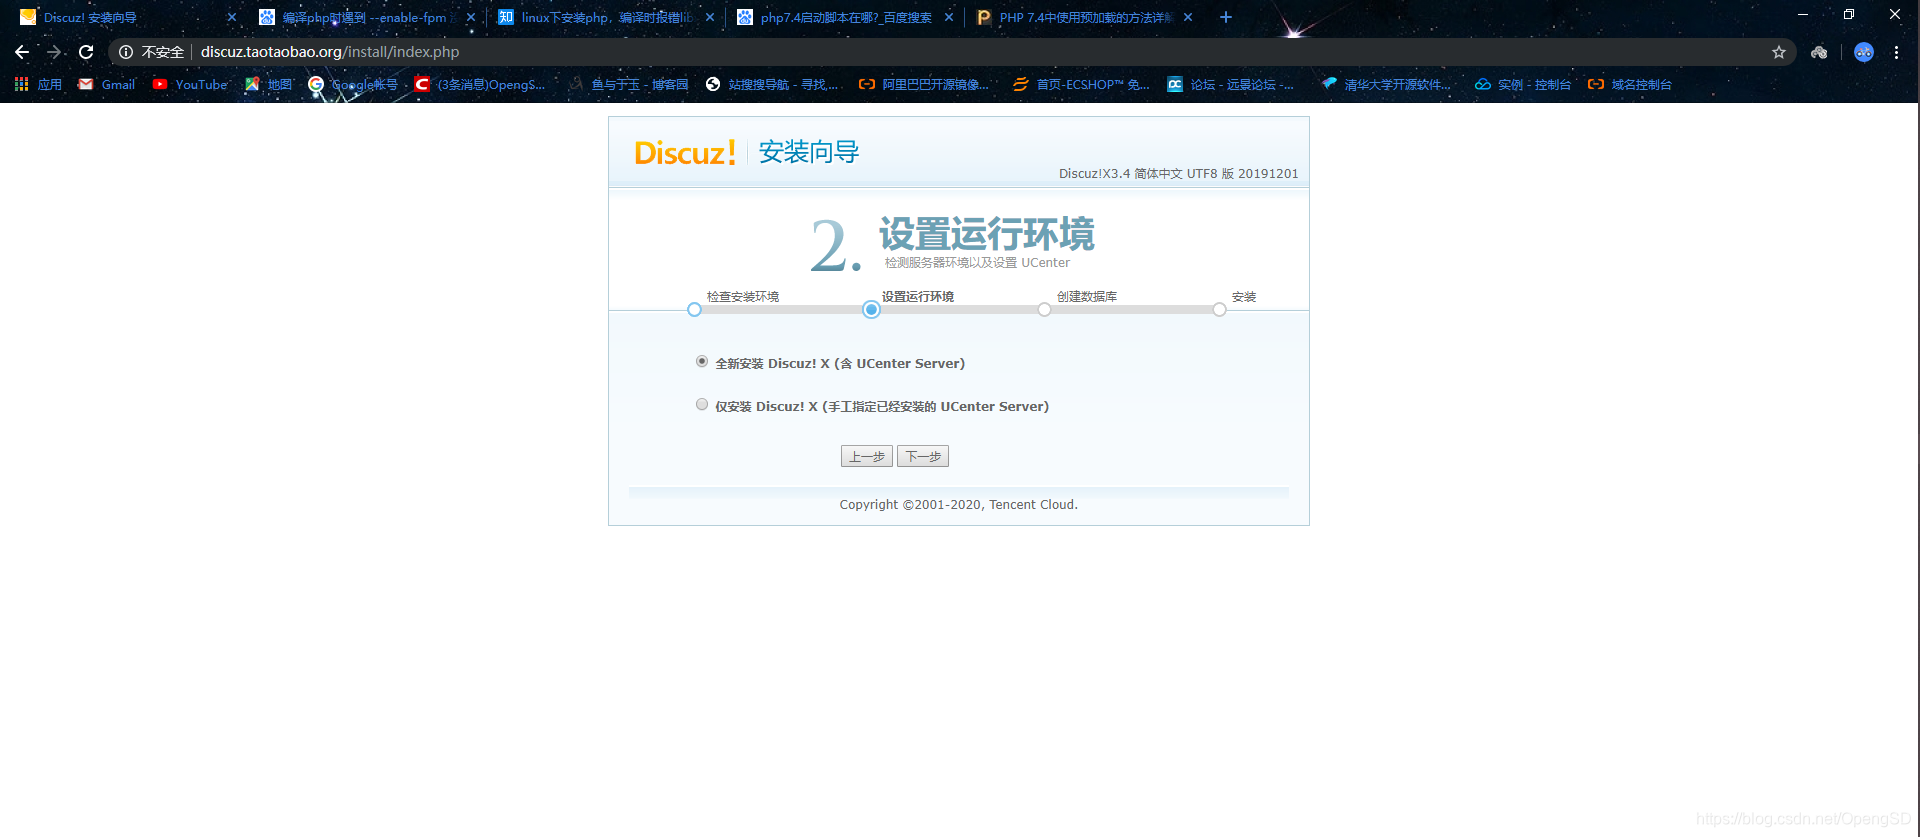
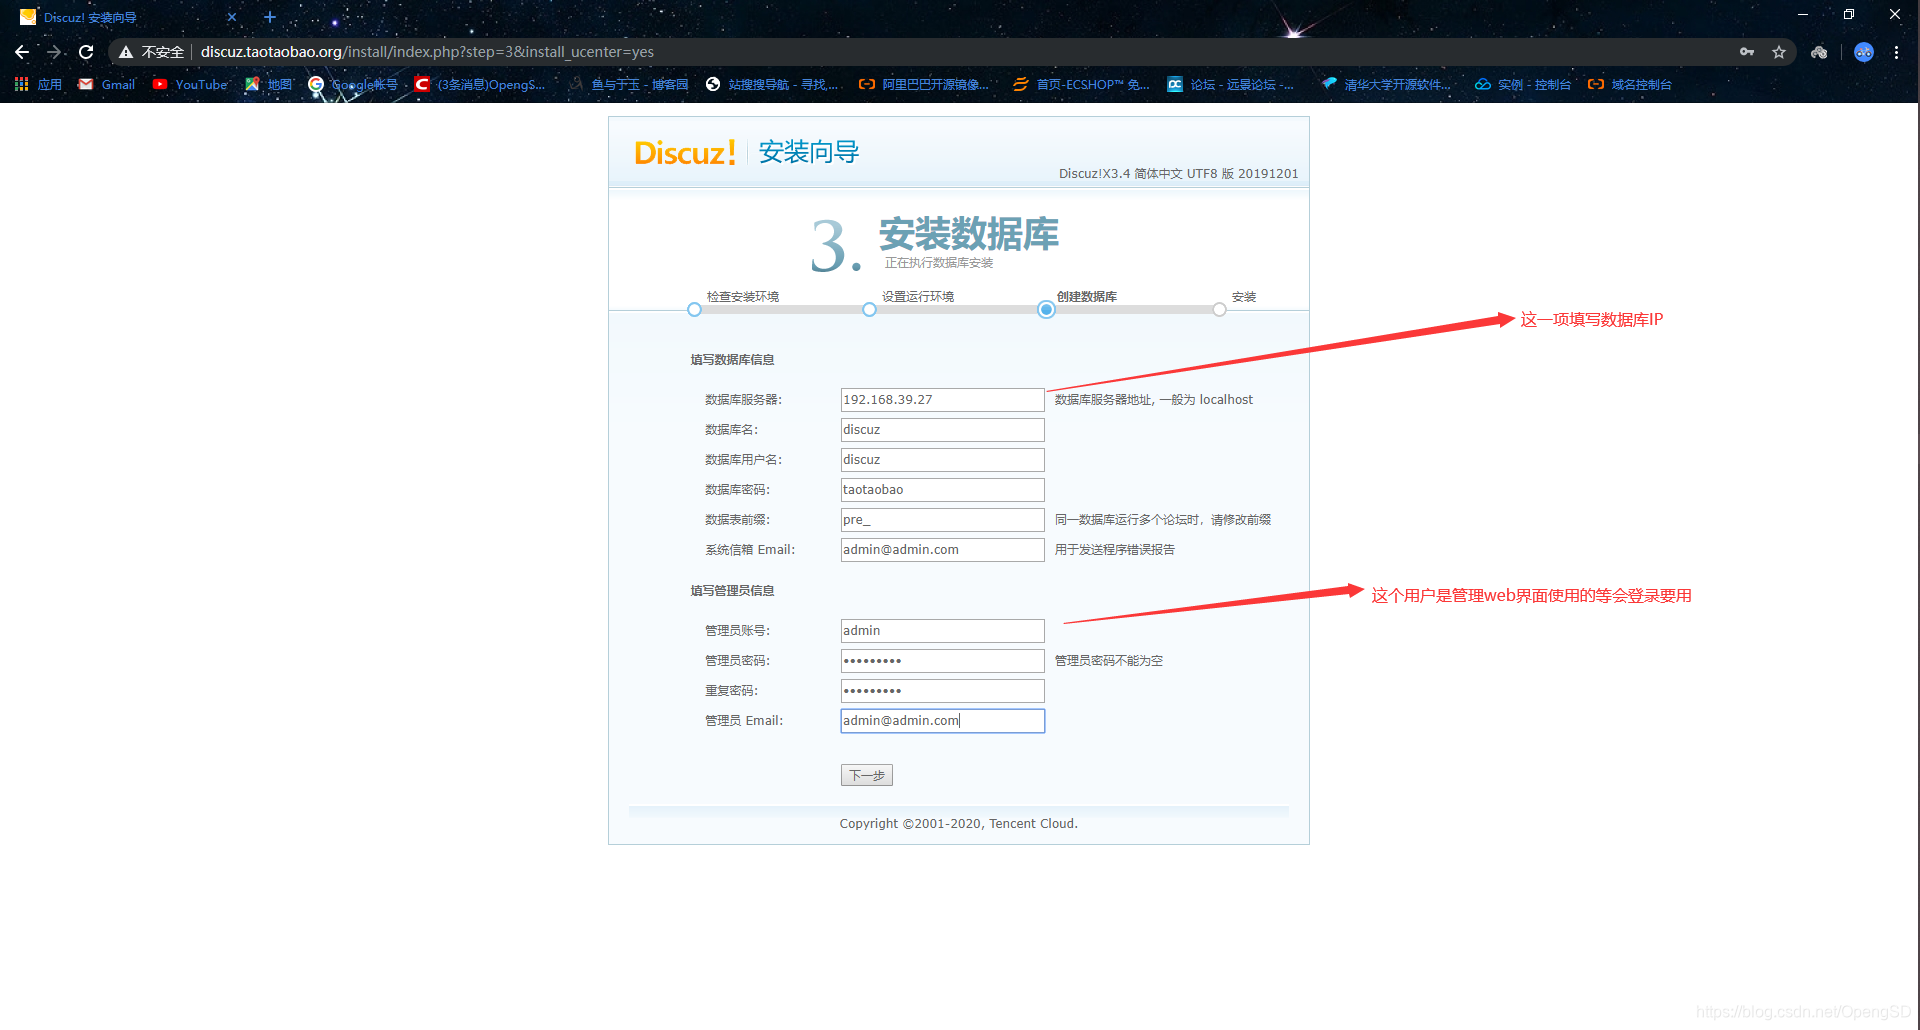
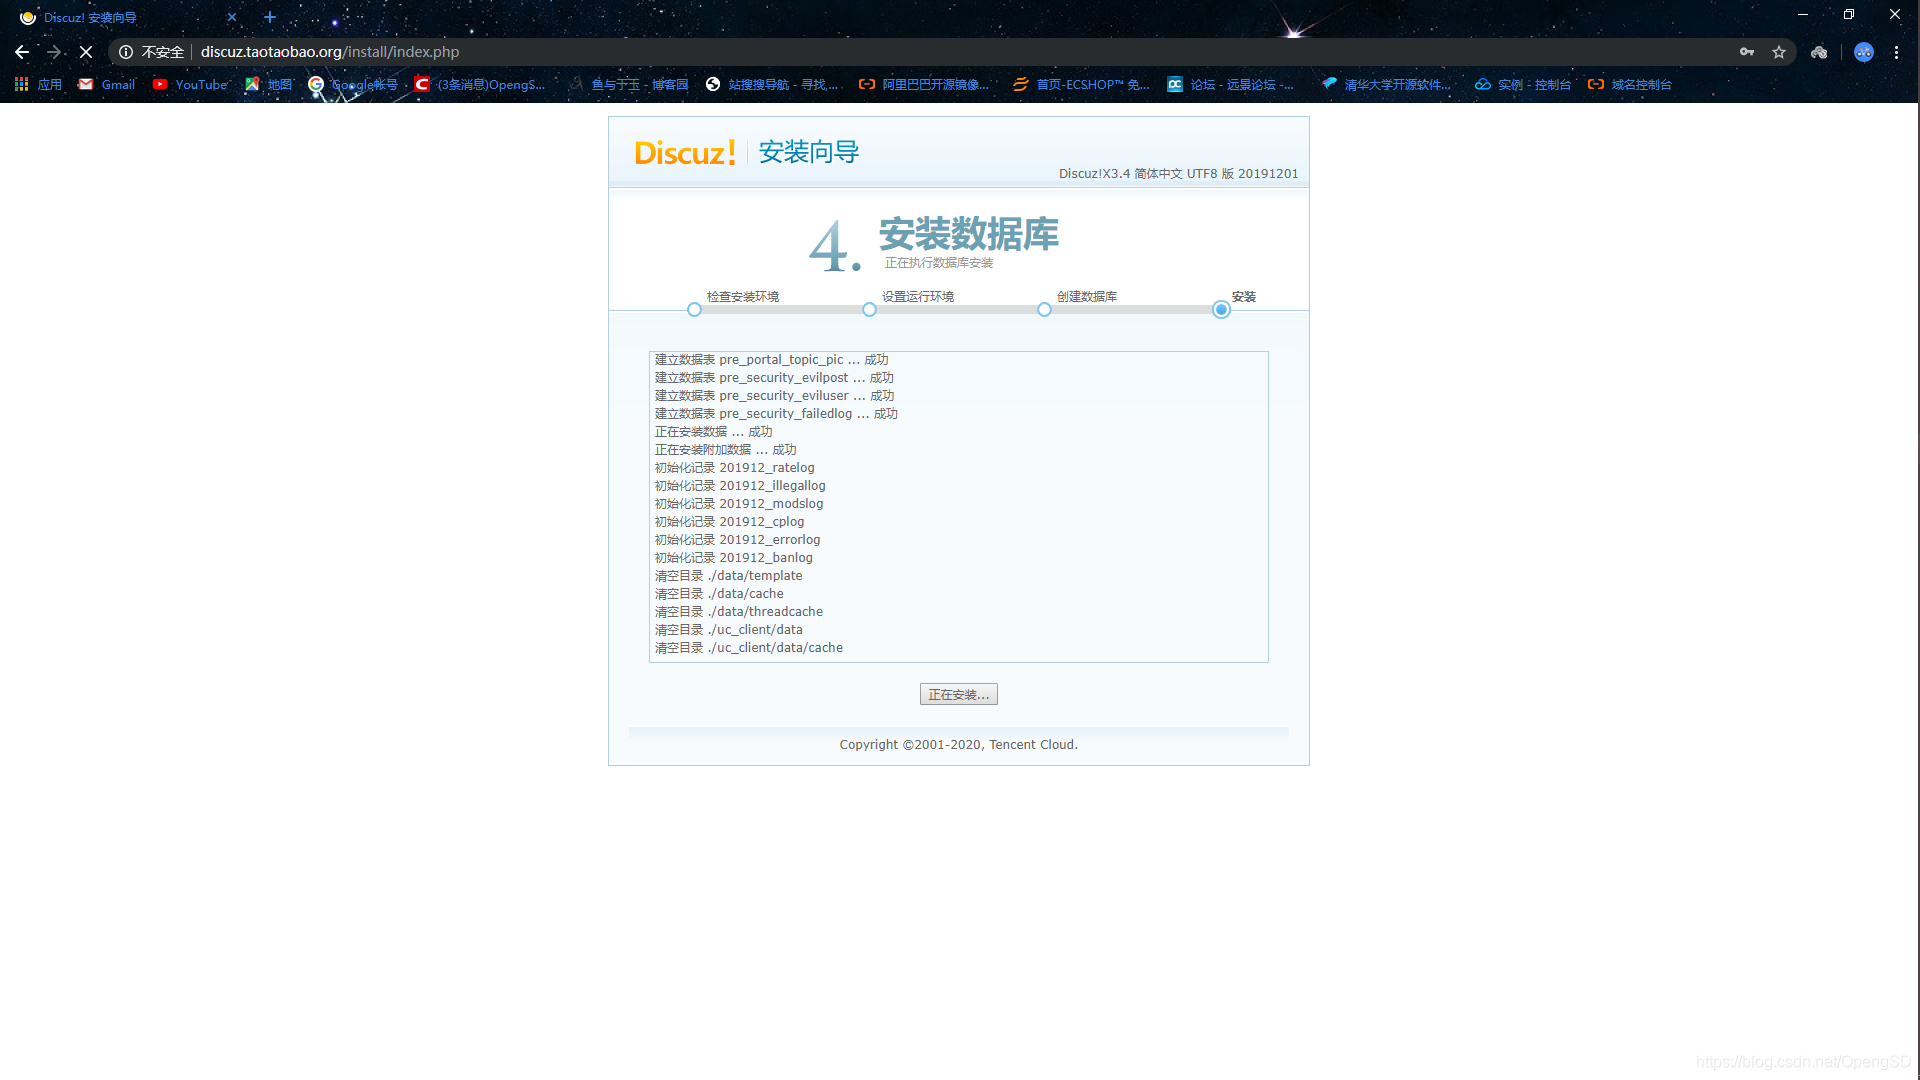
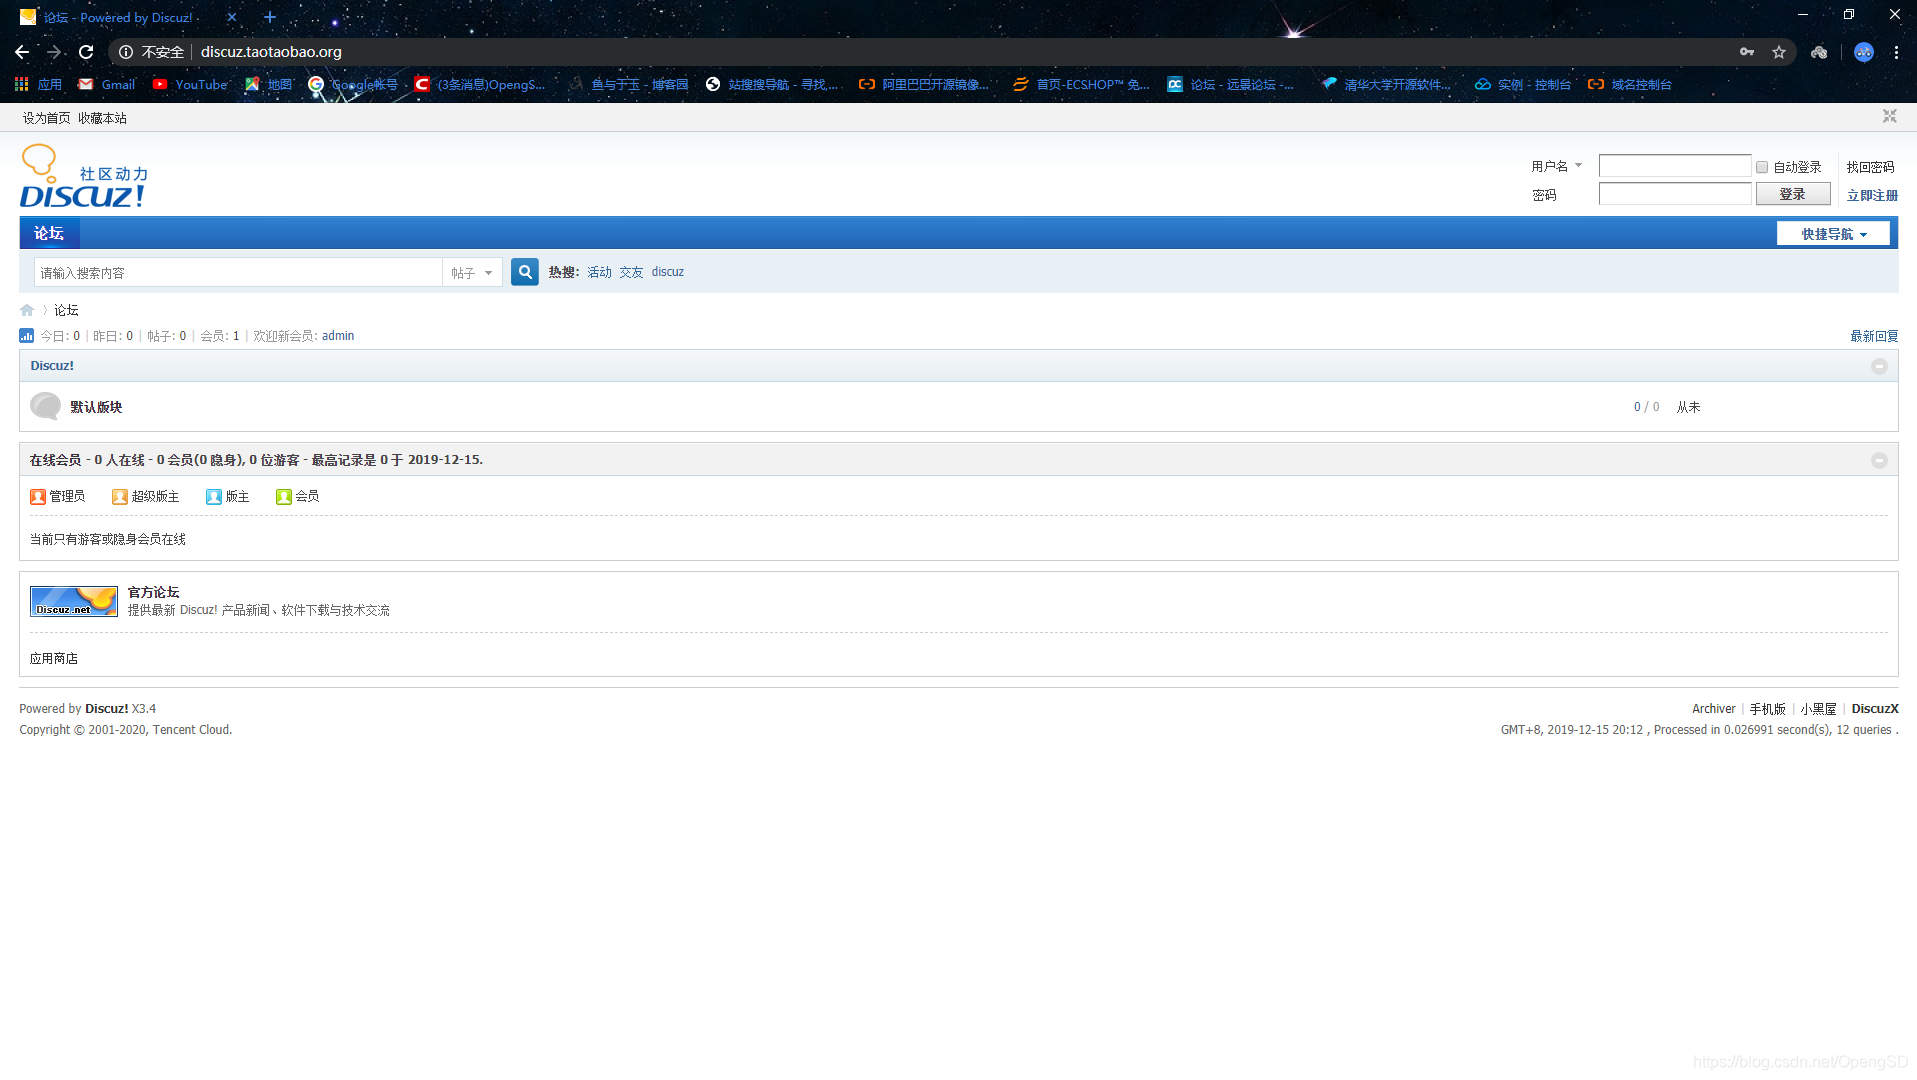
部署wordpress和discuz
- 解压wordpress
[root@centos7 wordpress]$rm -rf /data/wordpress/   # wordpress 不用准备目录里面的所有文件都需要

[root@centos7 data]$ll

total 32464

-rw-r--r--  1 root root   872238 May 14  2019 apr-1.7.0.tar.bz2

-rw-r--r--  1 root root   428595 May 14  2019 apr-util-1.6.1.tar.bz2

drwxr-xr-x  2 root root       22 Dec 15 18:23 discuz

drwxr-sr-x 12 root   40     4096 Dec 15 16:14 httpd-2.4.41

-rw-r--r--  1 root root  9267917 Oct  8 15:10 httpd-2.4.41.tar.gz

drwxrwxr-x 19 root root     4096 Dec 15 17:11 php-7.4.0

-rw-r--r--  1 root root 10232208 Dec 14 08:30 php-7.4.0.tar.xz

-rw-r--r--  1 root root 12423575 Dec 12 14:18 wordpress-5.3-zh_CN.tar.gz

[root@centos7 data]$tar xvf wordpress-5.3-zh_CN.tar.gz  # 解压

[root@centos7 data]$ll

total 32468

-rw-r--r--  1 root root   872238 May 14  2019 apr-1.7.0.tar.bz2

-rw-r--r--  1 root root   428595 May 14  2019 apr-util-1.6.1.tar.bz2

drwxr-xr-x  2 root root       22 Dec 15 18:23 discuz

drwxr-sr-x 12 root   40     4096 Dec 15 16:14 httpd-2.4.41

-rw-r--r--  1 root root  9267917 Oct  8 15:10 httpd-2.4.41.tar.gz

drwxrwxr-x 19 root root     4096 Dec 15 17:11 php-7.4.0

-rw-r--r--  1 root root 10232208 Dec 14 08:30 php-7.4.0.tar.xz

drwxr-xr-x  5 1006 1006     4096 Nov 14 09:00 wordpress

-rw-r--r--  1 root root 12423575 Dec 12 14:18 wordpress-5.3-zh_CN.tar.gz
- 解压discuz
[root@centos7 data]$unzip wordpress-5.3-zh_CN.tar.gz   # 解压没有这个解压软件

-bash: unzip: command not found

[root@centos7 data]$yum install unzip    # 下载解压软件

[root@centos7 ~]$unzip Discuz_X3.4_SC_UTF8【20191201】.zip -d /opt  # 指定目录安装因为有的东西不能放在网站主页目录下

[root@centos7 ~]$rm -f /data/discuz/test.php   # 删除之前的测试文件

[root@centos7 ~]$mv /opt/upload/* /data/discuz/  # 把upload下的所有文件移动到discuz目录下
- 修改权限
[root@centos7 ~]$cd /data/

[root@centos7 data]$chown -R apache.apache discuz/ wordpress
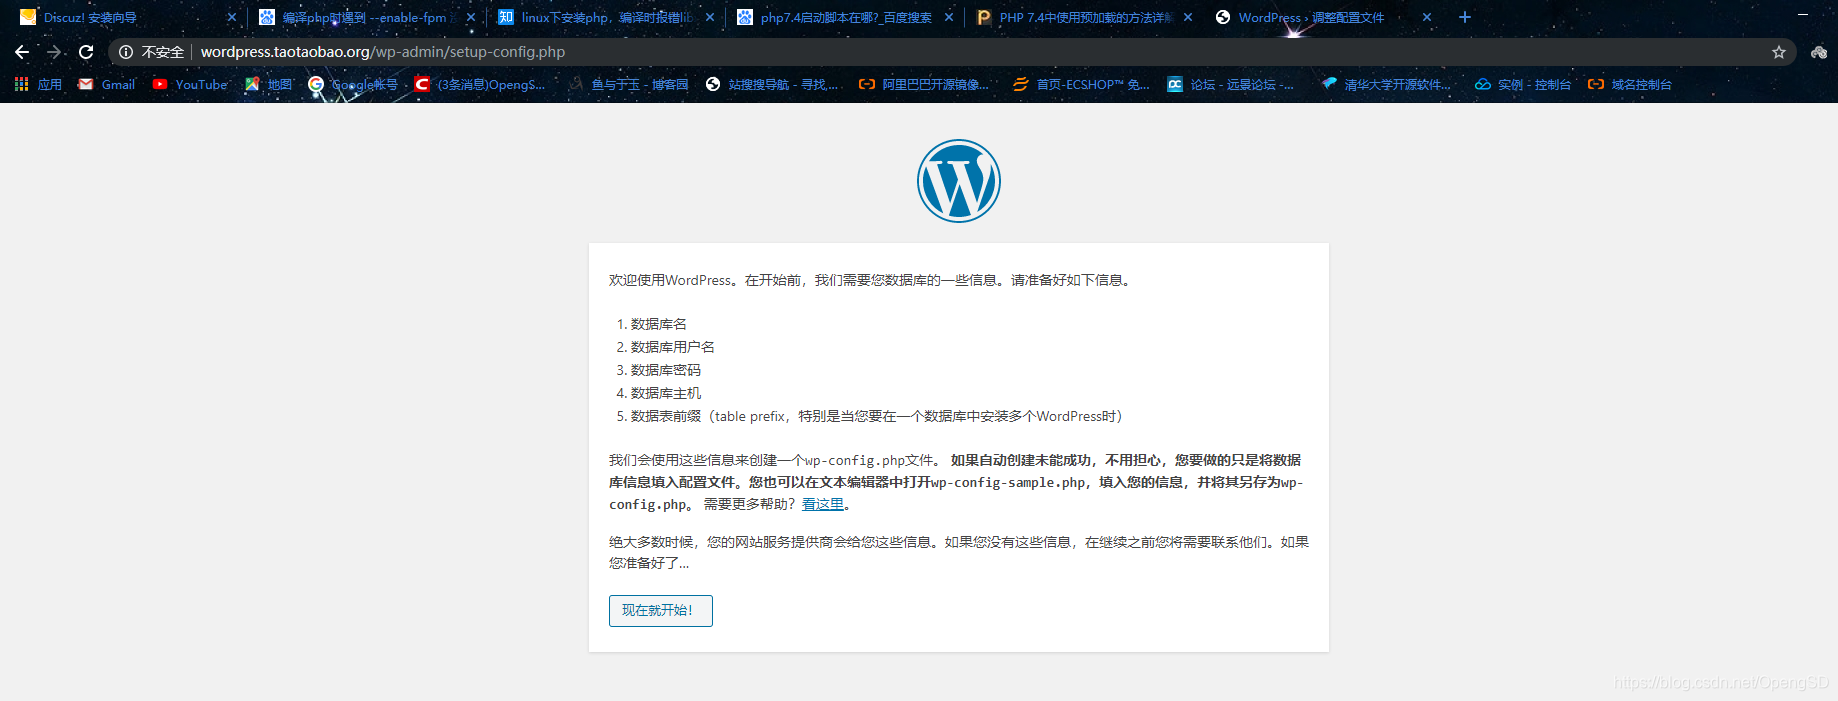
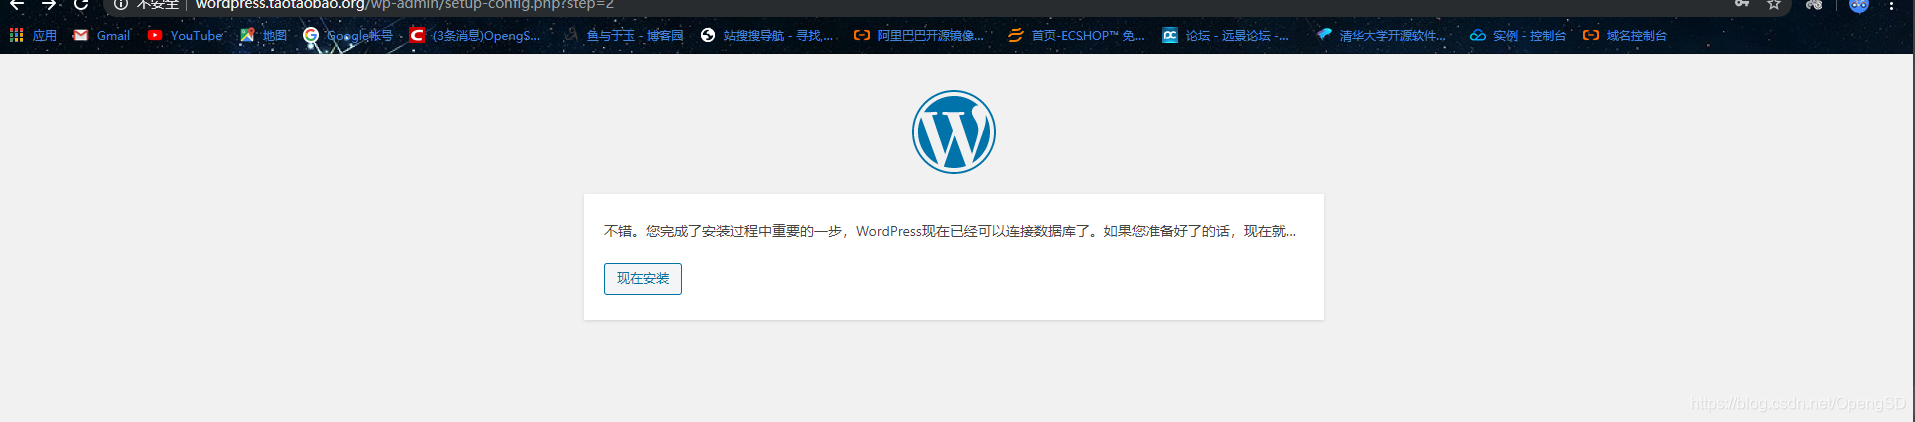
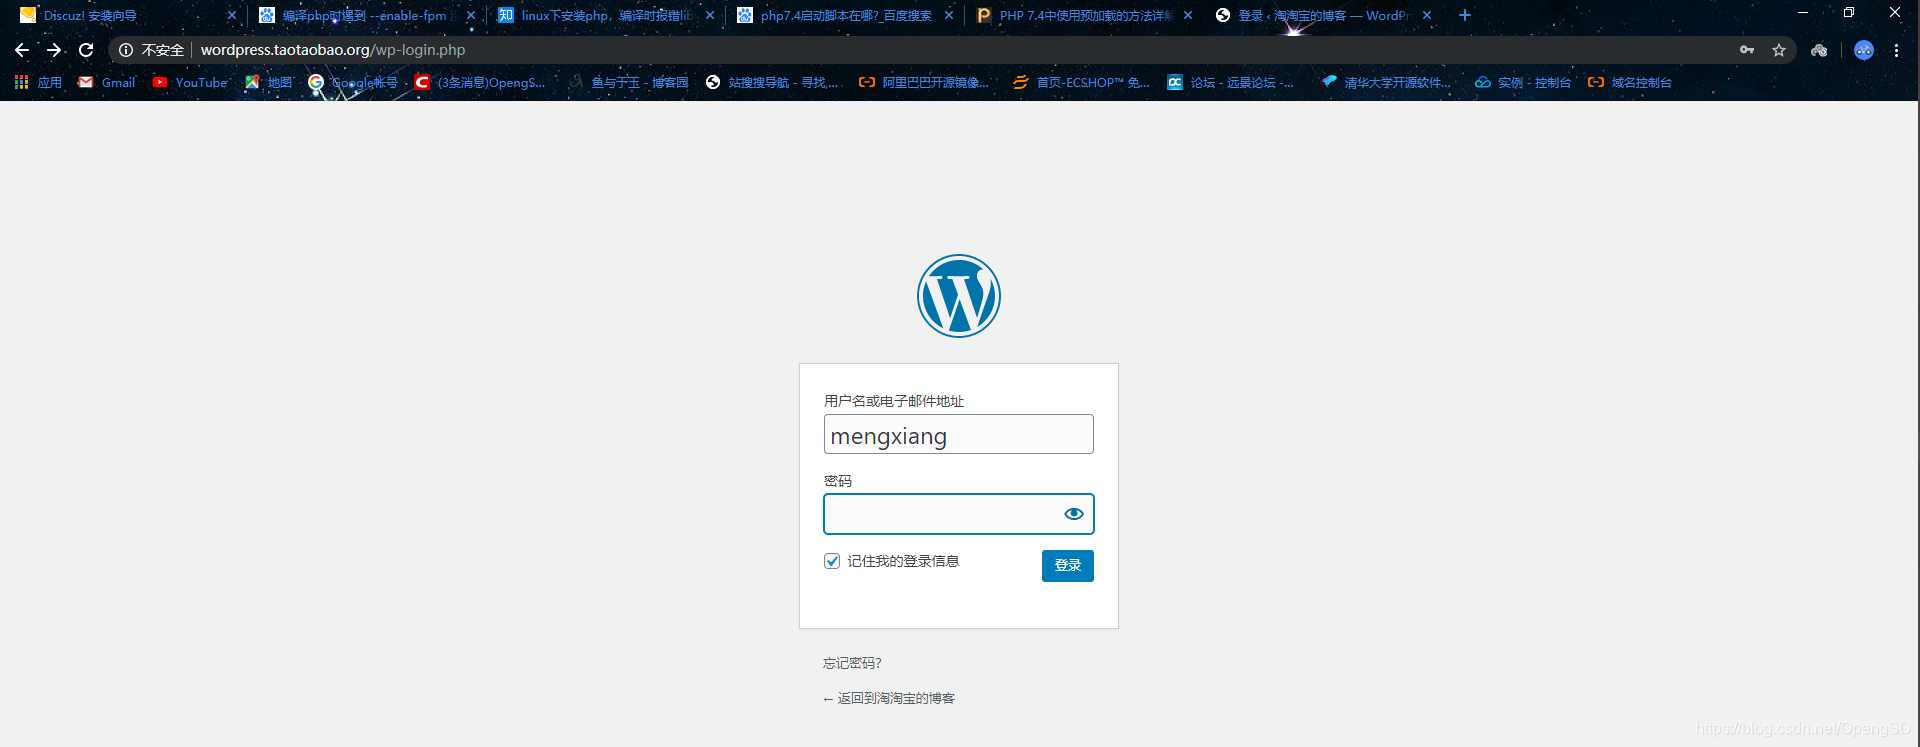
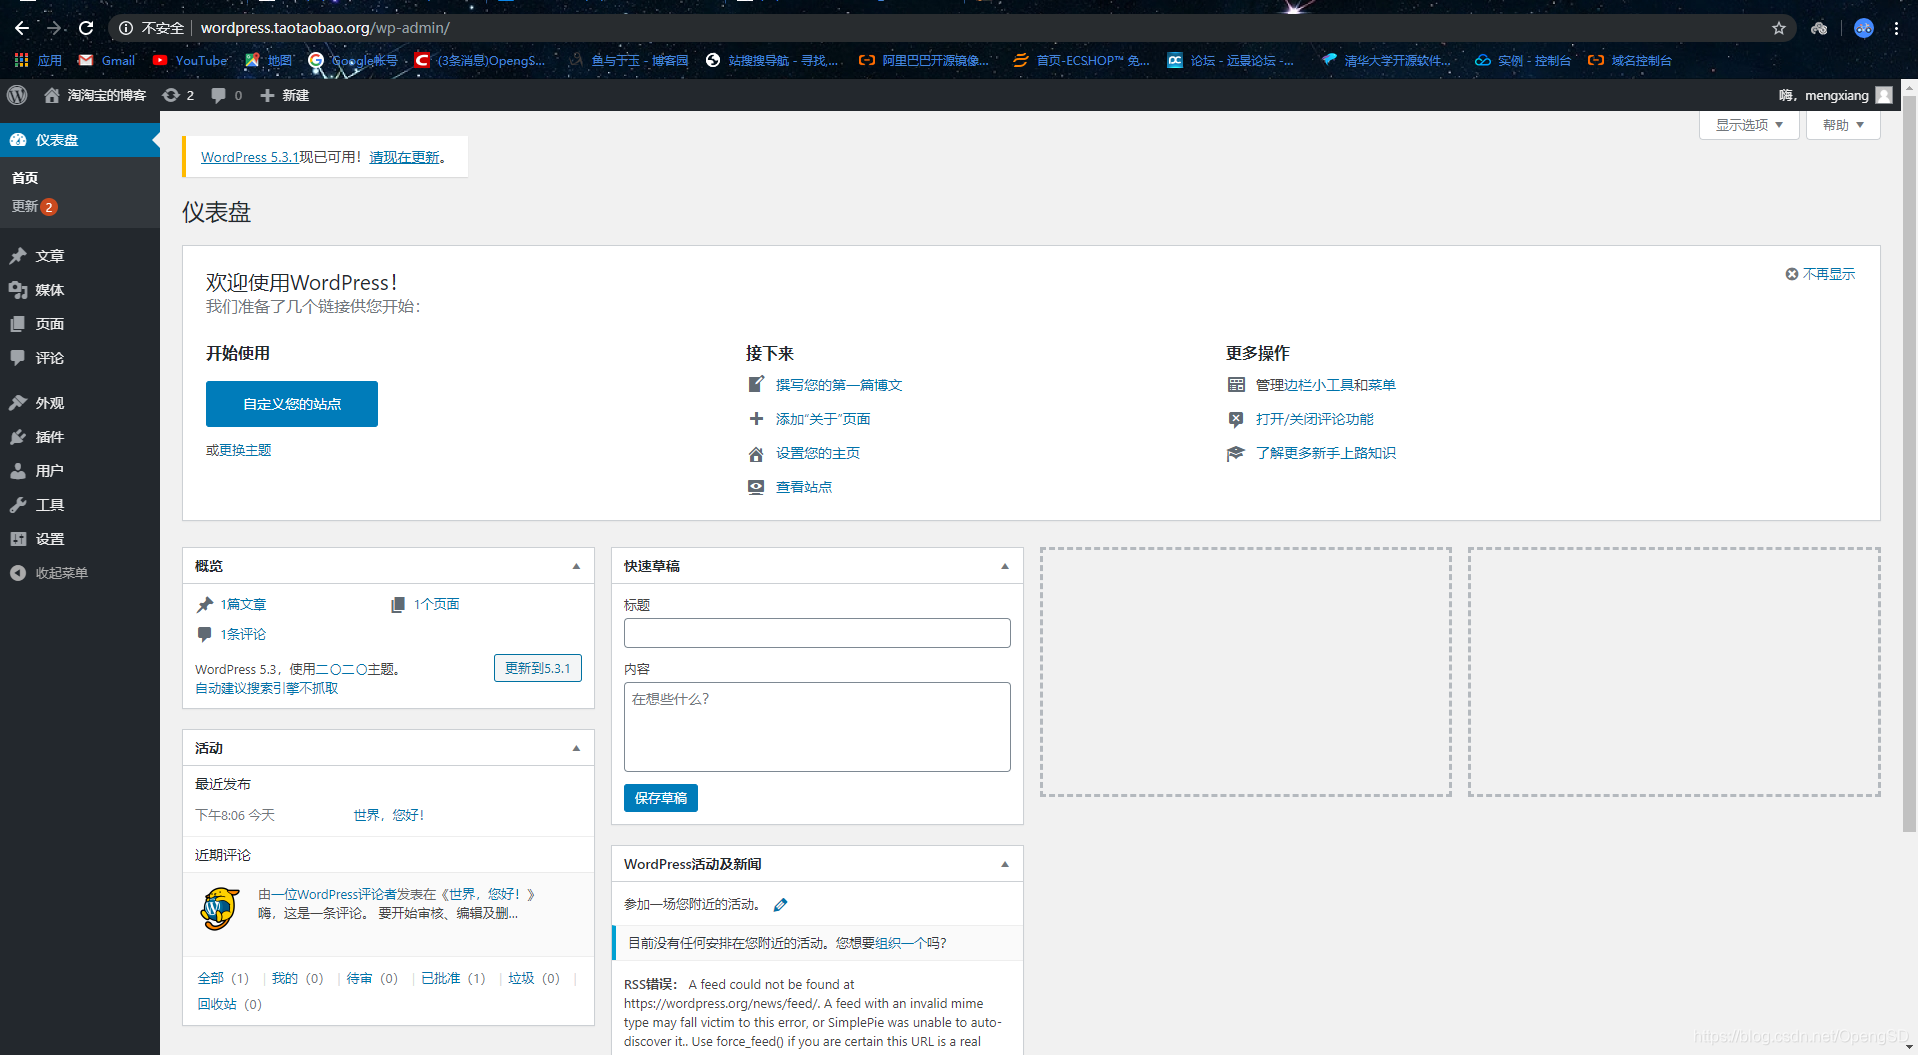
web界面测试wordpress
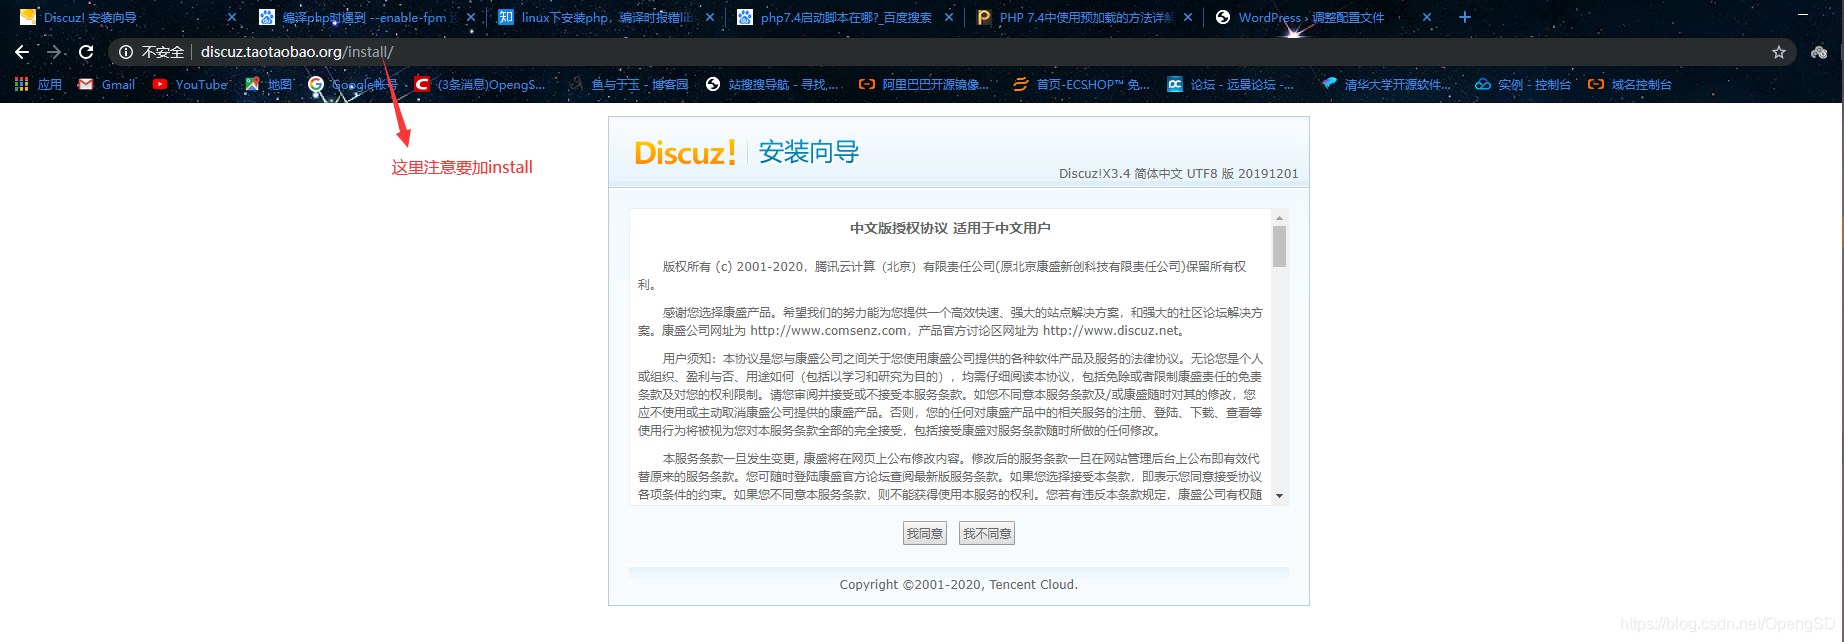
web界面测试discuz


测试性能
- 找一台虚拟机当客户端,现在客户端添加主机头解析。
[root@centos ~]# vim /etc/hosts

127.0.0.1   localhost localhost.localdomain localhost4 localhost4.localdomain4

::1         localhost localhost.localdomain localhost6 localhost6.localdomain6

192.168.39.7 wordpress.taotaobao.org discuz.taotaobao.org  # 添加这一行就行了
- 使用ab命令测试
# 如果没有这个命令下载这个包

[root@centos ~]# yum install httpd-tools

[root@centos ~]# ab -c 10 -n 100 http://wordpress.taotaobao.org/  # 测试

This is ApacheBench, Version 2.3 <$Revision: 1430300 $>

Copyright 1996 Adam Twiss, Zeus Technology Ltd, http://www.zeustech.net/

Licensed to The Apache Software Foundation, http://www.apache.org/

Benchmarking wordpress.taotaobao.org (be patient)...^[[A..done

Server Software:        Apache/2.4.41

Server Hostname:        wordpress.taotaobao.org

Server Port:            80

Document Path:          /

Document Length:        27338 bytes

# 第一次测试

Concurrency Level:      10

Time taken for tests:   1.936 seconds

Complete requests:      100

Failed requests:        0

Write errors:           0

Total transferred:      2759700 bytes

HTML transferred:       2733800 bytes

Requests per second:    51.66 [#/sec] (mean)   # 主要看这行多测试几遍取平均值

Time per request:       193.561 [ms] (mean)

Time per request:       19.356 [ms] (mean, across all concurrent requests)

Transfer rate:          1392.34 [Kbytes/sec] received

# 第二次测试

Concurrency Level:      10

Time taken for tests:   1.117 seconds

Complete requests:      100

Failed requests:        0

Write errors:           0

Total transferred:      2759700 bytes

HTML transferred:       2733800 bytes

Requests per second:    89.51 [#/sec] (mean)

Time per request:       111.724 [ms] (mean)

Time per request:       11.172 [ms] (mean, across all concurrent requests)

Transfer rate:          2412.21 [Kbytes/sec] received

# 第三次测试

Concurrency Level:      10

Time taken for tests:   0.840 seconds

Complete requests:      100

Failed requests:        0

Write errors:           0

Total transferred:      2759700 bytes

HTML transferred:       2733800 bytes

Requests per second:    119.09 [#/sec] (mean)

Time per request:       83.967 [ms] (mean)

Time per request:       8.397 [ms] (mean, across all concurrent requests)

Transfer rate:          3209.61 [Kbytes/sec] received
- 关闭opcache加速,测试。
# websrv服务端修改

[root@centos7 ~]$vim /etc/php.d/opcache.ini

opcache.enable=0   # 这一项修改为0

[root@centos7 ~]$systemctl restart php-fpm.service # 重启服务或重新加载

# 测试第一次

Concurrency Level:      10

Time taken for tests:   3.421 seconds

Complete requests:      100

Failed requests:        0

Write errors:           0

Total transferred:      2759700 bytes

HTML transferred:       2733800 bytes

Requests per second:    29.23 [#/sec] (mean)

Time per request:       342.077 [ms] (mean)

Time per request:       34.208 [ms] (mean, across all concurrent requests)

Transfer rate:          787.84 [Kbytes/sec] received

# 测试第二次

Concurrency Level:      10

Time taken for tests:   2.786 seconds

Complete requests:      100

Failed requests:        0

Write errors:           0

Total transferred:      2759700 bytes

HTML transferred:       2733800 bytes

Requests per second:    35.89 [#/sec] (mean)

Time per request:       278.639 [ms] (mean)

Time per request:       27.864 [ms] (mean, across all concurrent requests)

Transfer rate:          967.21 [Kbytes/sec] received

# 测试第三次

Concurrency Level:      10

Time taken for tests:   2.806 seconds

Complete requests:      100

Failed requests:        0

Write errors:           0

Total transferred:      2759700 bytes

HTML transferred:       2733800 bytes

Requests per second:    35.64 [#/sec] (mean)

Time per request:       280.607 [ms] (mean)

Time per request:       28.061 [ms] (mean, across all concurrent requests)

Transfer rate:          960.43 [Kbytes/sec] received
结论:加速与不加速性能可能相差三倍编译安装基于 fastcgi 模式的多虚拟主机的wordpress和discuz的LAMP架构的更多相关文章
- 编译安装基于fastcgi模式的多虚拟主机的wordpress和discuz的LAMP架构
一.环境准备 两台主机: httpd+php(fastcgi模式) mariadb 服务器 软件版本: mariadb-10.2.40-linux-x86_64.tar.gz apr-1.7.0.ta ...
- nginx篇最初级用法之三种虚拟主机基于域名\基于端口\基于IP地址端口的虚拟主机
在nginx中虚拟主机的类型与apache一样也有三种 1.基于域名的虚拟主机 2.基于端口的虚拟主机 3.基于IP地址端口的虚拟主机 在nginx配置文件中每一个server为一个虚拟主机如果需要多 ...
- 源码编译安装LAMP环境及配置基于域名访问的多虚拟主机
实验环境及软件版本: CentOS版本: 6.6(2.6.32.-504.el6.x86_64) apache版本: apache2.2.27 mysql版本: Mysql-5.6.23 php版本 ...
- 源码编译安装LNMP环境及配置基于域名访问的多虚拟主机
实验环境及软件版本: CentOS版本: 6.6(2.6.32.-504.el6.x86_64) nginx版本: nginx-1.6.2 mysql版本: Mysql-5.6.23 php版本: ...
- 编译安装基于nginx与lua的高性能web平台-openresty
1.首先编译安装nginx(不多说) 2.开始安装openresty cd /usr/local/src wget https://openresty.org/download/openresty-1 ...
- centos 6.5 安装 tomcat8 及性能优化_虚拟主机
Tomcat服务器是一个免费的开放源代码的Web应用服务器,属于轻量级应用服务器,在中小型系统和并发访问用户不是很多的场合下被普遍使用,是开发和调试JSP程序的首选. Tomcat和Nginx.Apa ...
- nginx笔记 安装nginx 配置 反向代理 多虚拟主机
1,检测linux上是否 通过yum安装了nginxrpm -qi nginx 2.安装nginx之前的依赖包yum install gcc patch libffi-devel python- ...
- Nginx网络架构实战学习笔记(一):Nginx简介、安装、信号控制、nginx虚拟主机配置、日志管理、location 语法、Rewrite语法详解
文章目录 nginx简介 nginx安装 nginx信号控制 nginx虚拟主机配置 日志管理 location 语法 精准匹配的一般匹配 正则匹配 总结 Rewrite语法详解 nginx简介 Ng ...
- centos7 安装 iRedmail 后 给nginx添加虚拟主机
iRedmail安装参考官方文档和 https://ywnz.com/linuxyffq/4563.html 准备工作 更新操作系统 yum update -y 安装必要组件 yum install ...
随机推荐
- 在Kubernetes上运行有状态应用:从StatefulSet到Operator
一开始Kubernetes只是被设计用来运行无状态应用,直到在1.5版本中才添加了StatefulSet控制器用于支持有状态应用,但它直到1.9版本才正式可用.本文将介绍有状态和无状态应用,一个通过K ...
- SpringMVC 请求参数绑定
什么是请求参数绑定 请求参数格式 默认是key/value格式,比如:http:xxxx?id=1&type=2 请求参数值的数据类型 都是字符串类型的各种值 请求参数值要绑定的目标类型 Co ...
- Idea创建maven项目,报错xxx already exists in VFS
1.问题描述: 我打算在父级maven项目中创建子级project,但是一直报错如下: 2.stackover flow中找到了问题的答案, 地址:https://stackoverflow.com/ ...
- VMware中linux虚拟机的安装
打开安装的VMware 15,点击新建虚拟机 2.选择典型即可,点击下一步 3.选择“稍后安装操作系统”,点击下一步 4.选择想安的版本,点击下一步 5.设置虚拟机名称及安装位置(路径必须全英文!) ...
- 重启testjenkins的步骤
在linux下编译caffe的过程中,发生错误,导致linux系统蹦了,没办法,重启linux系统. 之前安装在docker下的jenkins也停掉了. 先启动jenkins的步骤如下: 1.先启动d ...
- pyecharts实现星巴克门店分布可视化分析
项目介绍 使用pyecharts对星巴克门店分布进行可视化分析: 全球门店分布/拥有星巴克门店最多的10个国家或地区: 拥有星巴克门店最多的10个城市: 门店所有权占比: 中国地区门店分布热点图. 数 ...
- java访问数据库被拒绝,不能连接数据库ERROR 1045 (28000): Access denied for user 'root'@'localhost' (using password: YES)
错误原因:mysql数据库只允许本地ip访问: 解决方法:修改mysql表设置所有ip都可以访问: 登录数据库 使用以下命令: use mysql; grant all privileges on * ...
- OC 与js 互相调用
参考文章 iOS开发-基于原生JS与OC方法互相调用并传值(附HTML代码) 参考文章 http://www.jianshu.com/p/fd378c6d70c0 利用苹果原生的JavaScriptC ...
- SDCycleScrollView-简单的循环
cocoapods 导入SDCycleScrollView1 记得使用 SDWebImage 2 SDCycleScrollViewDelegate _cycleScrollerView = [SDC ...
- iOS开发笔试面试- KVC/KVO简单使用
转自:http://my.oschina.net/caijunrong/blog/510701 一.对于KVC模式(Key Value Coding): 1.其实在实际开发中用得比较多得就是:接收到j ...