Gitlab触发jenkins并获取项目post参数
jenkins -- Generic Webhook Trigger插件
此插件是git webhook的高阶应用,安装后会暴露出来一个公共API,GWT插件接收到 JSON 或 XML 的 HTTP POST 请求后,根据我们配置的规则决定触发哪个Jenkins项目。
定义需要的变量
此插件有两种配置方式
1.图形界面配置-创建流水线任务在触发器中配置(本文不采用此法)

2.pipeline 脚本中配置-注意此方法需要手动触发一次构建任务生成 Generic Webhook Trigger配置
jenkins配置
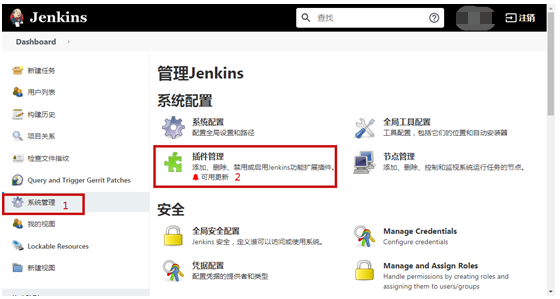
1.安装插件

勾选Generic Webhook Trigger后,点击【Install without restart】安装插件。


2.创建Jenkins任务
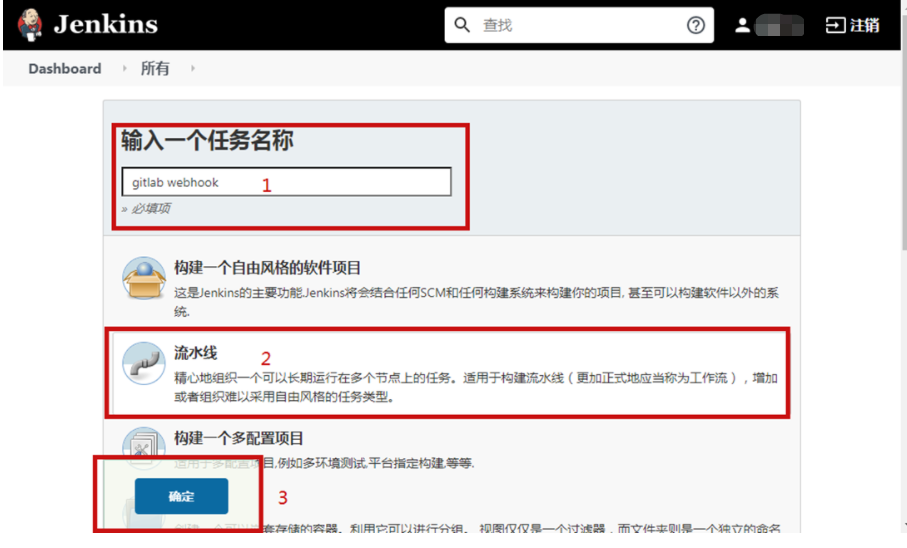
在Jenkins Dashboard中,点击【新建任务】

输入任务名称,选择流水线类型后,点击确定创建任务。

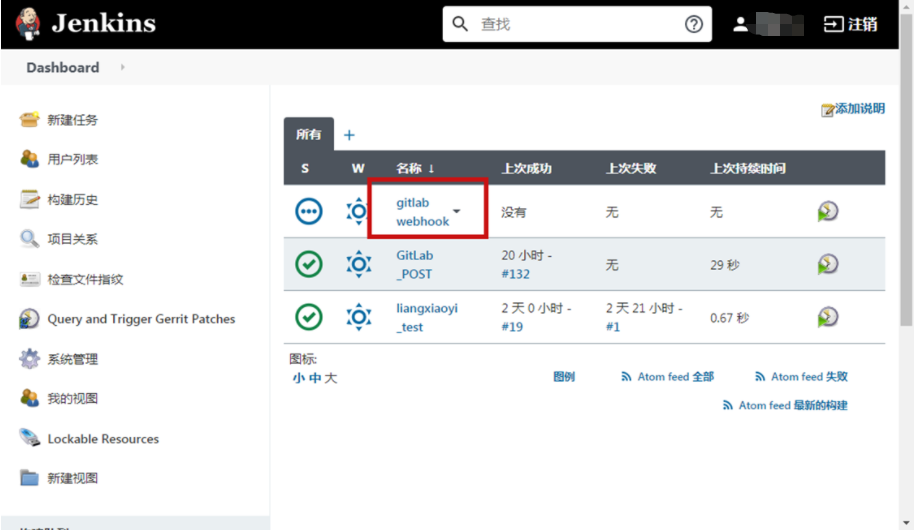
点击刚才创建好的任务。

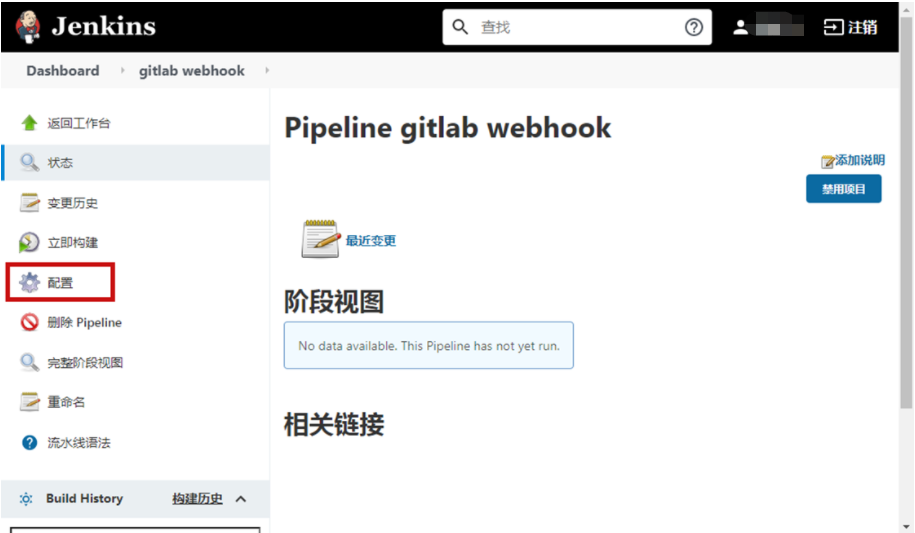
点击【配置】。

选择【流水线】。

3.pipeline内容
pipeline {

    agent any

    riggers{

        GenericTrigger(

            genericVariables:[

                [key:'event_name',value:'$.event_name'],   //触发动作  pubat or tag_pubat

                [key:'user_email',value:'$.user_email'],   //GitLab公共邮箱需要自行配置否则获取不到

                [key:'project_name',value:'$.project.name'],      //项目名称 DevOps_Test

                [key:'git_url',value:'$.project.git_http_url'],    //git_url http://xxx.xxx.xxx/devops/DevOps_Test.git

                [key:'ref',value:'$.ref'],                 //分支或tag信息

                [key:'group_name',value:'$.project.namespace'], //GITLAB_GROUP

                [key:'commits_id',value:'$.commits[0].id'] //gitlab commits id

            ],

            token:"qazwsx",   //gitlab webhook触发token 多个任务配置同一个token会一起触发

            causeString:'Triggered on $ref',

            printContributedVariables:true,

            printPostContent:true

        )

    }

    stages {

        stage('Hello') {

            steps {

                echo 'Hello World'

            }

        }

    }

}
gitlab传递的post数据是json格式
{

  "object_kind": "push",

  "event_name": "push",

  "before": "a2e3c8d96b30967da1fa9579096d52c2b3757d2a",

  "after": "9ff547f1010f40c54aefe693d32c026cfc7d8f4d",

  "ref": "refs/heads/master",

  "checkout_sha": "9ff547f1010f40c54aefe693d32c026cfc7d8f4d",

  "message": null,

  "user_id": 324,

  "user_name": "h_y",

  "user_username": "h_y",

  "user_email": "",

  "user_avatar": null,

  "project_id": 3199,

  "project": {

    "id": 3199,

    "name": "hello",

    "description": "",

    "web_url": "http://gitlab.example.com/h_y/hello",

    "avatar_url": null,

    "git_ssh_url": "git@gitlab.example.com:h_y/hello.git",

    "git_http_url": "http://gitlab.example.com/h_y/hello.git",

    "namespace": "h_y",

    "visibility_level": 0,

    "path_with_namespace": "h_y/hello",

    "default_branch": "master",

    "ci_config_path": null,

    "homepage": "http://gitlab.example.com/h_y/hello",

    "url": "git@gitlab.example.com:h_y/hello.git",

    "ssh_url": "git@gitlab.example.com:h_y/hello.git",

    "http_url": "http://gitlab.example.com/h_y/hello.git"

  },

  "commits": [

    {

      "id": "9ff547f1010f40c54aefe693d32c026cfc7d8f4d",

      "message": "type\n",

      "title": "type",

      "timestamp": "2020-05-28T15:09:37+08:00",

      "url": "http://gitlab.example.com/h_y/hello/-/commit/9ff547f1010f40c54aefe693d32c026cfc7d8f4d",

      "author": {

        "name": "h_y",

        "email": "h_y@example.com"

      },

      "added": [

      ],

      "modified": [

        "Jenkinsfile"

      ],

      "removed": [

      ]

    },

    {

      "id": "a49de07609ad97132c0c42aca35c75694ab80085",

      "message": "type\n",

      "title": "type",

      "timestamp": "2020-05-28T15:08:47+08:00",

      "url": "http://gitlab.example.com/h_y/hello/-/commit/a49de07609ad97132c0c42aca35c75694ab80085",

      "author": {

        "name": "h_y",

        "email": "h_y@example.com"

      },

      "added": [

      ],

      "modified": [

        "Jenkinsfile"

      ],

      "removed": [

      ]

    },

    {

      "id": "a2e3c8d96b30967da1fa9579096d52c2b3757d2a",

      "message": "type\n",

      "title": "type",

      "timestamp": "2020-05-28T15:07:58+08:00",

      "url": "http://gitlab.example.com/h_y/hello/-/commit/a2e3c8d96b30967da1fa9579096d52c2b3757d2a",

      "author": {

        "name": "h_y",

        "email": "h_y@example.com"

      },

      "added": [

      ],

      "modified": [

        "Jenkinsfile"

      ],

      "removed": [

      ]

    }

  ],

  "total_commits_count": 3,

  "push_options": {

  },

  "repository": {

    "name": "hello",

    "url": "git@gitlab.example.com:h_y/hello.git",

    "description": "",

    "homepage": "http://gitlab.example.com/h_y/hello",

    "git_http_url": "http://gitlab.example.com/h_y/hello.git",

    "git_ssh_url": "git@gitlab.example.com:h_y/hello.git",

    "visibility_level": 0

  }

}
创建完成手动触发一次构建生成插件配置文件

gitlb配置

http://jenkinsserver:8080//generic-webhook-trigger/invoke?token=qazwsx


集成测试

Gitlab触发jenkins并获取项目post参数的更多相关文章
- 持续集成之④:GitLab触发jenkins构建项目
持续集成之④:GitLab触发jenkins构建项目 一:目的为在公司的测试环境当中一旦开发向gitlab仓库提交成功代码,gitlab通知jenkins进行构建项目.代码质量测试然后部署至测试环境, ...
- Jenkins教程(八)实现 GitLab 触发 Jenkins 自动按模块发布前端
楔子 上篇文章解决了提交/合并请求自动触发的需求,但所有前端模块都在同一个代码仓库里,如何获取变更文件路径确定要发布哪个模块呢?本文将带你解决这个问题. 思路 分别解决 3 个问题: 获取变更的文件列 ...
- Jenkins 实现Gitlab事件自动触发Jenkins构建及钉钉消息推送
实现Gitlab事件自动触发Jenkins构建及钉钉消息推送 实践环境 GitLab Community Edition 12.6.4 Jenkins 2.284 Post build task 1. ...
- gitlab与jenkins结合构建持续集成
Jenkins是java编写,需要安装JDK,这里采用 yum 安装,对版本有需求的,可以到 oracle 官网下载 JDK. yum install -y java-1.8.0-openjdk 一. ...
- jenkins发布普通项目、配置自动上线自动部署
1.以root用户运行jenkins是不专业的 刚开始用jenkins时用jenkins这个普通用户运行程序,始终无法连接到gitlab,报错如下: 先是把修改jenkins上的git路径,将git修 ...
- KubeSphere CI/CD+GitLab+Harbor将Spring Boot项目部署至Kubernetes
上一篇文章分享了如何在 KubeSphere 对公共的代码仓库 GitHub 和镜像仓库 DockerHub 创建流水线,本文将继续使用 KubeSphere,基于 Harbor 和 GitLab 创 ...
- Gitlab自动触发Jenkins构建项目
Gitlab自动触发Jenkins构建项目 一.前提 Gitlab已安装配置好. Jenkins已安装Gitlab plugin. 二.配置jenkins中Job 1.勾选触发器下的gitlab触发器 ...
- 如何创建一个项目,让gitlab自动触发jenkins进行构建
前进是:你已经配置好jenkins+gitlab自动化布置了,这里只是常规构建新的项目时,需要做的配置,记录下来,以免忘了又着急 参考这篇博客: https://www.jianshu.com/p/e ...
- 【linux】【jenkins】自动化运维四 整合gitlab、docker发布java项目
jenkins发布java项目 过程参考发布vue项目.https://www.cnblogs.com/jxd283465/p/11543431.html 大同小异. vue建立的是Freestyle ...
随机推荐
- jQ的四类基本选择器
jQuery的四种选择器 jQ选择器与css选择器本质上相差不大,但是在使用容易混淆格式或属性 1.基础选择器 $('#id名') $('.类名') $('.类名1 .类名2') $('标签名.类名' ...
- [bug] maven“1.5不支持diamond运算符,请使用source 7或更高版本以启用diamond运算符”
原因 maven打包默认采用jdk 1.5,无法识别<> 解决 在pom.xml中加入: <properties> <maven.compiler.source>1 ...
- 查看报错原因 sshd -t
b for ssh.service failed because the control process exited with error code. See "systemctl sta ...
- 上,打开SSH服务的配置文件:/etc/ssh/sshd_config 加上如下两行: ClientAliveInterval 120 ClientAliveCountMax 720 第一行,表示每隔120秒向客户端
SSH的默认过一段时间会超时,有时候正在执行着脚本,出去一会回来就断开了,输出信息都看不到了... 禁止SSH自动超时最简单的办法就是,每隔一段时间在客户端和服务器之间发送一个"空包&quo ...
- 创建第一个django工程
一.环境搭建 使用anaconda + pycharm的环境. 1.创建虚拟环境并安装django1.8的包 # 创建虚拟环境 conda create -n django python=3.6 # ...
- Java--反射机制——反射 API(Day_04)
生活中迷茫感的产生,往往源之于坚持一件事放弃的那一刻,因为从那一刻起,你开始变得无聊,变得没有方向感. 运行环境 JDK8 + IntelliJ IDEA 2018.3 本文中使用的jar包链接 h ...
- 云原生ASP.NET Core程序的可监测性和可观察性
分布式应用程序很复杂,给开发人员调试和修复生产问题带来了一系列挑战.尽管微服务架构可帮助维持一支规模较小,可以自主工作并专注于独立业务团队,但由于其分布式性质,它带来了新的挑战.例如,在业务交易过程中 ...
- 去除HTML中的标签内容
采集后的数据都带有'<>'html标签: <img src="http://i4.hdfimg.com/www/images/giftrans/3d/da/7b/18414 ...
- Go语言流程控制02--选择结构之switch
package main import "fmt" /* @星座诊所2(switch) 根据用户输入的出生月份猜测其星座: ·白羊(4) 金牛(5) 双子(6) 巨蟹(7) 狮子( ...
- 回文词——线性dp
#include<iostream> #include<cstdio> using namespace std; int n,f[5002][5002]; char str1[ ...
