react组件通信那些事儿
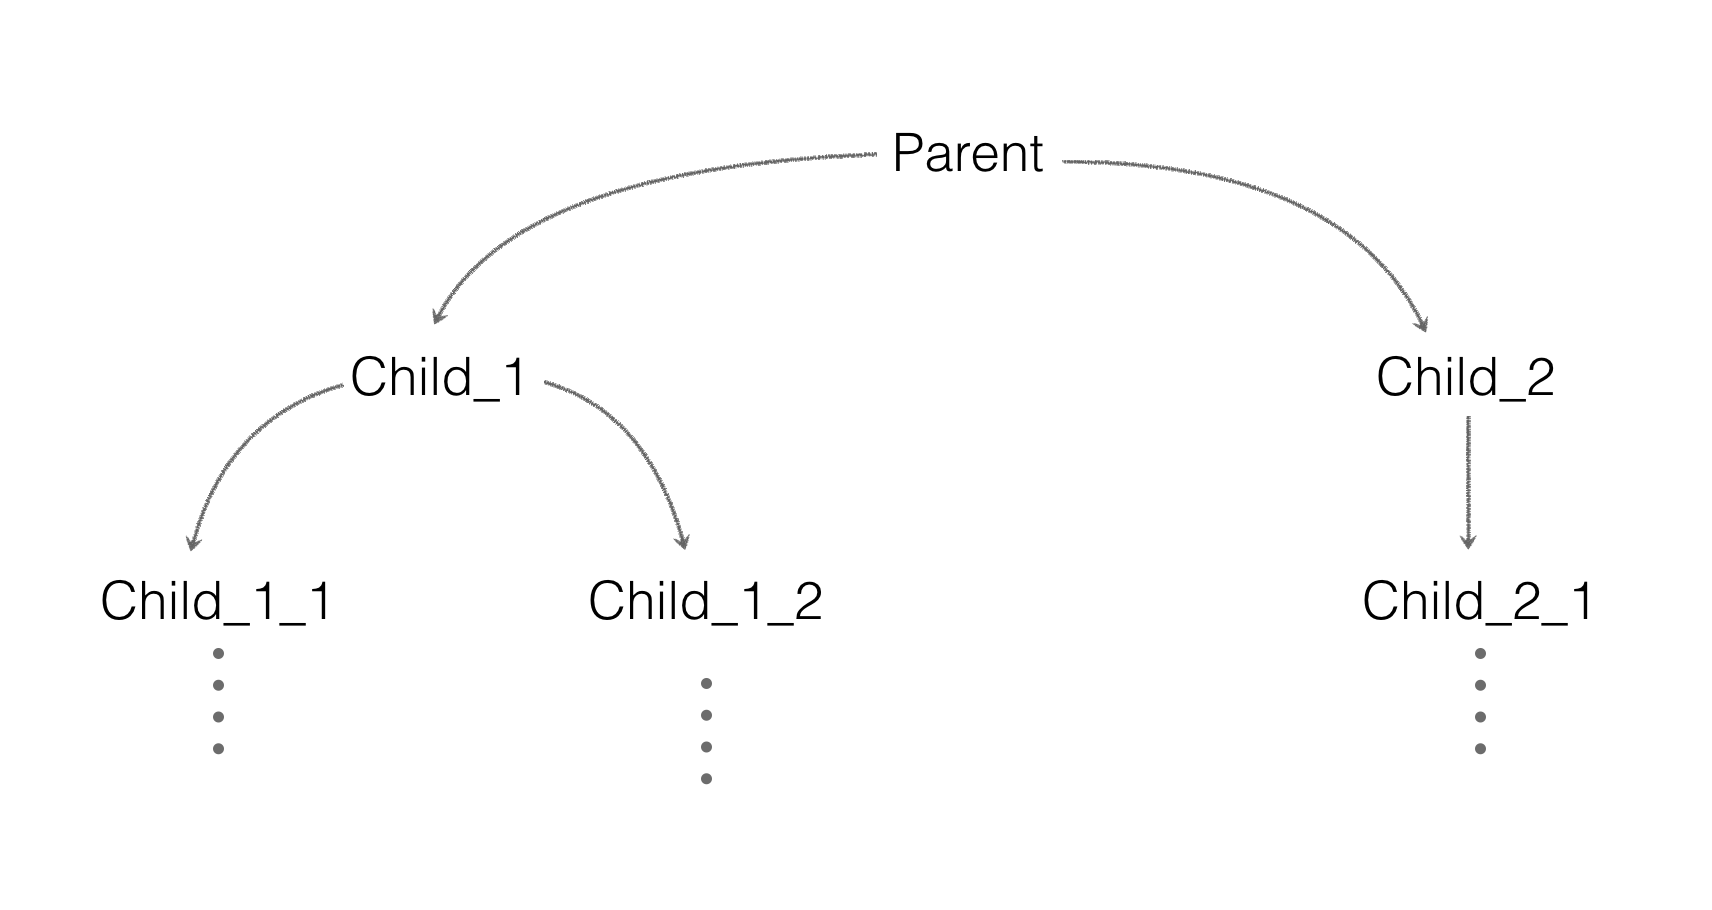
父组件是调用组件的组件。
现在看来,感觉父组件就是一个壳子,定义好壳子里面会有什么,而子组件是一个具体的实现,说明,会用到什么东西,如果有这些东西,会进行什么操作。总之,父组件是材料,有水和泥,子组件告诉你,怎么制作水泥。
父组件给子组件输入什么,子组件就是什么。不同的父组件调用,或许可以呈现不同的输出,前提是在子组件里面要定义不同的接口,属性方法,供不同的父组件使用。

class Parent extends React.Component {
    state = {
        msg: 'start'
    };

    componentDidMount() {
        setTimeout(() => {
            this.setState({
                msg: 'end'
            });
        }, 1000);
    }

    render() {
        return <Child_1 msg={this.state.msg} />;
    }
}

class Child_1 extends React.Component {
    render() {
        return <p>{this.props.msg}</p>;
    }
}
class Parent extends React.Component {
    state = {
        msg: 'start'
    };

    fMsg(msg) {
        this.setState({
            msg
        });
    }

    render() {
        return (
            <div>
                <p>child msg: {this.state.msg}</p>
                <Child_1 transferMsg={msg => this.fMsg(msg)} />
            </div>
        );
    }
}

class Child_1 extends React.Component {
    componentDidMount() {
        setTimeout(() => {
            this.props.transferMsg('end');
        }, 1000);
    }

    render() {
        return (
            <div>
                <p>child_1 component</p>
            </div>
        );
    }
}
class Parent extends React.Component {
    state = {
        msg: 'start'
    };

    fMsg(msg) {
        this.setState({
            msg
        });
    }

    componentDidUpdate() {
        console.log('Parent update');
    }

    render() {
        return (
            <div>
                <Child_1 transferMsg={msg => this.fMsg(msg)} />
                <Child_2 msg={this.state.msg} />
            </div>
        );
    }
}

class Child_1 extends React.Component {
    componentDidMount() {
        setTimeout(() => {
            this.props.transferMsg('end');
        }, 1000);
    }

    componentDidUpdate() {
        console.log('Child_1 update');
    }

    render() {
        return (
            <div>
                <p>child_1 component</p>
            </div>
        )
    }
}

class Child_2 extends React.Component {
    componentDidUpdate() {
        console.log('Child_2 update');
    }

    render() {
        return (
            <div>
                <p>child_2 component: {this.props.msg}</p>
            </div>
        )
    }
}
import eventProxy from '../eventProxy';

class Parent extends React.Component {
    render() {
        return (
            <div>
                <Child_1 />
                <Child_2 />
            </div>
        );
    }
}

class Child_1 extends React.Component {
    componentDidMount() {
        setTimeout(() => {
            // 发布者,发布msg事件
            eventProxy.trigger('msg', 'end');
        }, 1000);
    }
}

class Child_2 extends React.Component {
    state = {
        msg: 'start'
    };

    componentDidMount() {
        // 订阅者,监听msg事件
        eventProxy.on('msg', (msg) => {
            this.setState({
                msg
            });
        });
    }

    render() {
        return (
            <div>
                <p>child_2 component: {this.state.msg}</p>
            </div>
        )
    }
}
// 通过...运算符向Child_1_1传递Parent组件的信息
class Child_1 extends React.Component {
    render() {
        return (
            <div>
                <p>{this.props.msg}</p>
                <Child_1_1 {...this.props} />
            </div>
        )
    }
}

class Child_1_1 extends React.Component {
    render() {
        return <p>{this.props.msg}</p>;
    }
}
class Parent extends React.Component {
    getChildContext() {
        return {
            color: 'red',
            cbFun: this.fCallback.bind(this)
        };
    }

    fCallback(msg) {
        console.log(msg);
    }

    render() {
        return <Child_1 />;
    }
}

Parent.childContextTypes = {
    color: PropTypes.string,
    cbFun: PropTypes.func
}

class Child_1 extends React.Component {
    render() {
        return <Child_1_1 />;
    }
}

class Child_1_1 extends React.Component {
    static contextTypes = {
        color: PropTypes.string,
        cbFun: PropTypes.func
    }

    render() {
        const styles = { color: this.context.color };
        const cb = (msg) => {
            return () => {
                this.context.cbFun(msg);
            }
        }
        return (
            <button style={styles} onClick={cb('子组件向父组件传数据。')}>点击</button>
        )
    }
}
class Parent extends React.Component {
    constructor(props) {
        super(props);
        this.state = {
            color: "red"
        }
    }

    getChildContext() {
        return {
            color: this.state.color,
            cbFun: this.fCallback.bind(this)
        };
    }

    fCallback(color) {
        this.setState({color});
    }

    render() {
        return <Child_1 />;
    }
}

Parent.childContextTypes = {
    color: PropTypes.string,
    cbFun: PropTypes.func
}
class Child_1 extends React.Component {
    render() {
        return <Child_1_1 />;
    }
}

class Child_1_1 extends React.Component {
    static contextTypes = {
        color: PropTypes.string,
        cbFun: PropTypes.func
    }

    render() {
        const styles = { color: this.context.color };
        const cb = (msg) => {
            return () => {
                this.context.cbFun(msg);
            }
        }
        return (
            <button style={styles} onClick={cb('blue')}>点击</button>
        )
    }
}
react组件通信那些事儿的更多相关文章
- react第六单元(react组件通信-父子组件通信-子父组件通信-跨级组件的传参方式-context方式的传参)
第六单元(react组件通信-父子组件通信-子父组件通信-跨级组件的传参方式-context方式的传参) #课程目标 1.梳理react组件之间的关系 2.掌握父子传值的方法 3.掌握子父传值的方法 ...
- 21.react 组件通信
状态属性可以修改 this.setState()中可以写对象,也可以写方法 <script type="text/babel"> class Test extends ...
- React/组件通信
组件通信可以分为以下几种: 父组件向子组件通信 子组件向父组件通信 跨级组件的通信及context 没有嵌套关系的组件通信 父组件向子组件通信 父组件通过props向子组件传递需要的信息. 子 ...
- vue组件通信那些事儿
一.说说通信 通信,简言之,交流信息.交流结束后,把信息放在哪里,这是一个值得思考的问题.vue中保存状态有2种方式,组件内的data属性和组件外的vuex的state属性. 1.用state的场景 ...
- React组件通信技巧
效果图 communication.gif 点击查看Github完整源码 1.父向子通信 直接标签中插入参数即可 //number只是个例子 let _number = this.state.numb ...
- React组件通信
1.父子通信 父 -> 子 props子 -> 父 回调函数,父组件通过props向子组件传递一个函数,子组件调用函数,父组件在回调函数中用setState改变自身状态 2.跨层级通信 1 ...
- 使用reflux进行react组件之间的通信
前言 组件之间为什么要通信?因为有依赖. 那么,作为React组件,怎么通信? React官网说, 进行 父-子 通信,可以直接pass props. 进行 子-父 通信,往父组件传给子组件的函数注入 ...
- React之组件通信
组件通信无外乎,下面这三种父子组件,子父组件,平行组件(也叫兄弟组件)间的数据传输.下面我们来分别说一下: 父子组件: var Demo=React.createClass({ getInitialS ...
- 【JAVASCRIPT】React学习- 数据流(组件通信)
摘要 react 学习包括几个部分: 文本渲染 JSX 语法 组件化思想 数据流 一 组件通信如何实现 父子组件之间不存在继承关系 1.1 父=>子通信 父组件可以通过 this.refs.xx ...
随机推荐
- python并发编程之IO模型,
了解新知识之前需要知道的一些知识 同步(synchronous):一个进程在执行某个任务时,另外一个进程必须等待其执行完毕,才能继续执行 #所谓同步,就是在发出一个功能调用时,在没有得到结果之前,该调 ...
- 第一周学习总结-Java
2018年7月15日 暑假第一周,我从网上找了一些讲Java的视频,学到了一些Java的基础,同时也弥补了一些之前学c/c++的知识漏洞.例如,了解到了原码反码补码和按位取反运算符(~)的运算原理. ...
- easyui 布局之window和panel一起使用时,拉动window宽高时panel不跟随一起变化
项目开发中布局是每一个组件都由最外层的window和内部的至少一个panel组成,其他的细小组件再依次放到panel中. 问题:当拉动外部的window时我们希望内部的panel的宽高也跟着变化,但是 ...
- 滴水穿石-07Java开发中常见的错误
1:使用工具Eclipse 1.1 "语法错误" 仅当源级别为 1.5 时已参数化的类型才可用 设置eclipse,窗口—>java—>编译器—>JDK一致性调到 ...
- Java接口自动化测试之Maven项目的创建(一)
这里使用Idea创建Maven项目, 过程非常简单, 装好JDK和Idea 1. 安装完后,打开Idea, 选择File→New→Project, 如图 2. 选择maven, 点击Next, 如图 ...
- jexus linux x64 [专业版] 安装和配置https
一.环境 操作系统:centOs7-x64 二.准备工作 购买SSL/TLS证书 三.部署 1.首先查看“/lib”或“/usr/lib”等系统库文件夹中是否有SSL库文件的名字,该文件名应该是“li ...
- Windows Server 2008/2012 计划任务配置执行bat
首先Windows Server 2008不同于其他服务器操作系统和Windows Server 2003有着很大的区别,计划任务的名称是“任务计划程序”不在控制面板里,而是在“管理工具”里.由于服务 ...
- [转]MyEclipse 2015优化技巧
http://www.chinahadoop.cn/group/16/thread/1660 http://www.bkjia.com/Javabc/1077158.html 只有不断的学习才能使人充 ...
- 【转】android:paddingLeft与android:layout_marginLeft的区别
http://www.blogjava.net/anchor110/articles/342206.html 当按钮分别设置以上两个属性时,得到的效果是不一样的. android:paddingLef ...
- Flink--3种分区方式
partitionByHash //TODO partitionByHash val data = new mutable.MutableList[(Int, Long, String)] data. ...
