简单SSM配置详解
SSM:spring+springMVC+Mybatis
学习网友的http://www.cnblogs.com/invban/p/5133257.html,并对其进行了详细的解说。
源码下载:http://pan.baidu.com/s/1jGScJ34
第一步,建立一个动态的web项目。
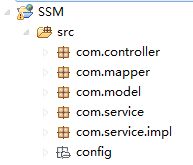
第二步,建立各个包,并导入各种jar包,我是从网上下载的。如下图:
第三步,建立model类吧。我这边建立一个很简单的类,先不进行配置,配置有点头晕。
建立user类,自建get和set方法,并构造方法:
package com.model;

public class User {

    private int id;

    private String username;

    private String age;

    public User() {

        super();

    }

    public User(int id, String username, String age) {

        super();

        this.id = id;

        this.username = username;

        this.age = age;

    }

    public int getId() {

        return id;

    }

    public void setId(int id) {

        this.id = id;

    }

    public String getUsername() {

        return username;

    }

    public void setUsername(String username) {

        this.username = username;

    }

    public String getAge() {

        return age;

    }

    public void setAge(String age) {

        this.age = age;

    }

}
第四步,容我先配置一下mybatis的xml文件。
建一个userMapper.xml(相当于实现类)和UserMapper.java接口文件。
先做一个select * from d_user;
因为数据库是这个样子滴,如下图:

配置代码如下:
package com.mapper;

import java.util.List;

import com.model.User;

public interface UserMapper {

    List<User> findAllUser();

}
userMapper.xml文件如下:
<?xml version="1.0" encoding="UTF-8"?>

<!DOCTYPE mapper PUBLIC "-//mybatis.org//DTD Mapper 3.0//EN"

"http://mybatis.org/dtd/mybatis-3-mapper.dtd">

<mapper namespace="com.mapper.UserMapper">

    <!-- 解决表名与字段不匹配 -->

    <resultMap type="User" id="userResultMap">

        <id property="id" column="user_id"/>

        <result property="username" column="user_name"/>

        <result property="age" column="user_age"/>

    </resultMap>

    <select id="findAllUser" resultMap="userResultMap" resultType="User">

        select * from d_user

    </select>

</mapper>
第五步,配置service。
首先,要看到我们之前建的两个包,一个是com.service和com.service.impl。
在com.service中,要建立一个UserService类。代码如下:
package com.service;

import java.util.List;

import com.model.User;

public interface UserService {

    List<User> findAllUser();

}
UserServiceImpl.java代码如下:
package com.service.impl;

import java.util.List;

import javax.annotation.Resource;

import org.springframework.stereotype.Service;

import org.springframework.transaction.annotation.Transactional;

import com.mapper.UserMapper;

import com.model.User;

import com.service.UserService;

@Service

@Transactional

public class UserServiceImpl implements UserService{

    @Resource

    public UserMapper userMapper;

    @Override

    public List<User> findAllUser() {

        // TODO Auto-generated method stub

        List<User> findAllUser = userMapper.findAllUser();

        return findAllUser;

    }

}
第六步:写一个UserController类吧。
package com.controller;

import java.util.List;

import javax.servlet.http.HttpServletRequest;

import org.springframework.beans.factory.annotation.Autowired;

import org.springframework.stereotype.Controller;

import org.springframework.web.bind.annotation.RequestMapping;

import com.model.User;

import com.service.UserService;

@Controller

@RequestMapping("/user")

public class UserController {

    //@Autowired不需要getter()和setter()方法,Spring也会自动注入

    @Autowired

    private UserService userService;

    @RequestMapping("/findAllUser")

    public String findAllUser(HttpServletRequest request){

        List<User> listUser =  userService.findAllUser();

        request.setAttribute("listUser", listUser);

        return "/allUser";

    }

}
去看他们之间的类,去了解他们之间的关系。我觉得了解很重要。
第七步,开始配置xml文件吧,把文件放在config中。

mybatis-config.xml,配置如下:
<?xml version="1.0" encoding="UTF-8"?>

<!DOCTYPE configuration PUBLIC "-//mybatis.org//DTD Config 3.0//EN"

"http://mybatis.org/dtd/mybatis-3-config.dtd">

<configuration>

    <typeAliases>

        <typeAlias alias="User" type="com.model.User"/>

    </typeAliases>

    <mappers>

        <mapper resource="com/mapper/userMapper.xml" />

    </mappers>

</configuration>
其实,这些代码是在配置mybatis的时候提前敲好的,<mapper resource="com/mapper/userMapper.xml" />这行代码是在写完userMapper.xml去写上的。
然后就是去写spring配置了:spring-common.xml和spring-mvc.xml依次如下。其实代码都是我百度的,然后自己修改一下,谢谢分享。ing-
spring-common.xml
<?xml version="1.0" encoding="UTF-8"?>

<beans xmlns="http://www.springframework.org/schema/beans"

    xmlns:xsi="http://www.w3.org/2001/XMLSchema-instance" xmlns:p="http://www.springframework.org/schema/p"

    xmlns:context="http://www.springframework.org/schema/context" xmlns:tx="http://www.springframework.org/schema/tx"

    xsi:schemaLocation="

        http://www.springframework.org/schema/beans

        http://www.springframework.org/schema/beans/spring-beans-4.0.xsd

        http://www.springframework.org/schema/context

        http://www.springframework.org/schema/context/spring-context-4.0.xsd

        http://www.springframework.org/schema/tx

        http://www.springframework.org/schema/tx/spring-tx-4.0.xsd">

    <!-- 1. 数据源 : DriverManagerDataSource -->

    <bean id="dataSource"

        class="org.springframework.jdbc.datasource.DriverManagerDataSource">

        <property name="driverClassName" value="com.mysql.jdbc.Driver" />

        <property name="url" value="jdbc:mysql://localhost:3306/mybatis" />

        <property name="username" value="root" />

        <property name="password" value="root" />

    </bean>

    <!--

        2. mybatis的SqlSession的工厂: SqlSessionFactoryBean dataSource:引用数据源        MyBatis定义数据源,同意加载配置

    -->

    <bean id="sqlSessionFactory" class="org.mybatis.spring.SqlSessionFactoryBean">

        <property name="dataSource" ref="dataSource"></property>

        <!-- 制定Mybatis的配置 -->

        <property name="configLocation" value="classpath:config/mybatis-config.xml" />

        <!-- 指定实体类映射文件,可以指定同时指定某一包以及子包下面的所有配置文件,mapperLocations和configLocation有一个即可,

            当需要为实体类指定别名时,可指定configLocation属性,再在mybatis总配置文件中采用mapper引入实体类映射文件 -->

        <!-- <property  name="mapperLocations"  value="classpath*:com/mapper/*.xml"/>  -->

    </bean>

    <!--

        3. mybatis自动扫描加载Sql映射文件/接口 : MapperScannerConfigurer sqlSessionFactory         basePackage:指定sql映射文件/接口所在的包(自动扫描)

    -->

    <bean class="org.mybatis.spring.mapper.MapperScannerConfigurer">

        <property name="basePackage" value="com.mapper"></property>

        <property name="sqlSessionFactory" ref="sqlSessionFactory"></property>

    </bean>

    <!--

        4. 事务管理 : DataSourceTransactionManager dataSource:引用上面定义的数据源

    -->

    <bean id="txManager"

        class="org.springframework.jdbc.datasource.DataSourceTransactionManager">

        <property name="dataSource" ref="dataSource"></property>

    </bean>

    <!-- 5. 使用声明式事务

         transaction-manager:引用上面定义的事务管理器

     -->

    <tx:annotation-driven transaction-manager="txManager" />

</beans>
spring-mvc.xml
<?xml version="1.0" encoding="UTF-8"?>

<beans xmlns="http://www.springframework.org/schema/beans"

    xmlns:xsi="http://www.w3.org/2001/XMLSchema-instance" xmlns:context="http://www.springframework.org/schema/context"

    xmlns:mvc="http://www.springframework.org/schema/mvc"

    xsi:schemaLocation="http://www.springframework.org/schema/beans

    http://www.springframework.org/schema/beans/spring-beans.xsd

    http://www.springframework.org/schema/context

    http://www.springframework.org/schema/context/spring-context-4.0.xsd

    http://www.springframework.org/schema/mvc

    http://www.springframework.org/schema/mvc/spring-mvc-4.0.xsd">

    <!-- 一般使用<context:component-scan/>来代替 <context:annotation-config/>,因为前者不仅配置扫描包路径选项还自动注入了下述processor的功能。

        详解:

        <context:annotation-config/>向 Spring 容器注册AutowiredAnnotationBeanPostProcessor、CommonAnnotationBeanPostProcessor、

        PersistenceAnnotationBeanPostProcessor、 RequiredAnnotationBeanPostProcessor 这 4 个BeanPostProcessor。目的是为了你的系统能够识别相应的注解。

        例如:@Autowired注解,对应 AutowiredAnnotationBeanPostProcessor的Bean。传统声明方式如下<bean class="org.springframework.beans.factory.annotation.AutowiredAnnotationBeanPostProcessor "/>

            @Resource 、@PostConstruct、@PreDestroy对应CommonAnnotationBeanPostProcessor

            @PersistenceContext对应PersistenceAnnotationBeanPostProcessor的Bean。

            @Required对应RequiredAnnotationBeanPostProcessor的Bean。

        一般来说,这些注解我们还是比较常用,尤其是Antowired的注解,在自动注入的时候更是经常使用,所以如果总是需要按照传统的方式一条一条配置显得有些繁琐和没有必要,

        于是spring给我们提供<context:annotation-config/>的简化配置方式,自动帮你完成声明。 不过,呵呵,我们使用注解一般都会配置扫描包路径选项

        <context:component-scan base-package=”XX.XX”/>该配置项其实也包含了自动注入上述processor的功能,因此当使用 <context:component-scan/> 后,就可以将 <context:annotation-config/> 移除了。

     -->

    <!-- 注解扫描包 -->

    <context:component-scan base-package="com" />

    <!-- 开启注解 -->

    <!-- 会自动注册DefaultAnnotationHandlerMapping与AnnotationMethodHandlerAdapter 两个bean,是spring MVC为@Controllers分发请求所必须的。

        并提供了:数据绑定支持,@NumberFormatannotation支持,@DateTimeFormat支持,@Valid支持,读写XML的支持(JAXB),读写JSON的支持(Jackson)。

        后面,我们处理响应ajax请求时,就使用到了对json的支持。

        后面,对action写JUnit单元测试时,要从spring IOC容器中取DefaultAnnotationHandlerMapping与AnnotationMethodHandlerAdapter 两个bean,来完成测试,

            取的时候要知道是<mvc:annotation-driven />这一句注册的这两个bean。

     -->

    <mvc:annotation-driven />

    <!--

        配置静态资源,直接映射到对应的文件夹,不被DispatcherServlet拦截而出现404找不到图片的问题,3.04新增功能,需要重新设置spring-mvc-3.0.xsd

    -->

    <mvc:resources mapping="/img/**" location="/img/" />

    <mvc:resources mapping="/js/**" location="/js/" />

    <mvc:resources mapping="/css/**" location="/css/" />

    <mvc:resources mapping="/html/**" location="/html/" />
  <!-- 当上面要访问的静态资源不包括在上面的配置中时,则根据此配置来访问 -->
  <mvc:default-servlet-handler/>
    <!-- 定义跳转的文件的前后缀 ,视图模式配置-->

    <bean id="viewResolver"

        class="org.springframework.web.servlet.view.InternalResourceViewResolver">

        <!-- 这里的配置我的理解是自动给后面action的方法return的字符串加上前缀和后缀,变成一个 可用的url地址 -->

        <property name="prefix" value="/WEB-INF/jsp/" />

        <property name="suffix" value=".jsp" />

    </bean>

</beans>
第八步,web.xml文件
<?xml version="1.0" encoding="UTF-8"?>

<web-app version="2.5" xmlns="http://java.sun.com/xml/ns/javaee"

    xmlns:xsi="http://www.w3.org/2001/XMLSchema-instance"

    xsi:schemaLocation="http://java.sun.com/xml/ns/javaee

    http://java.sun.com/xml/ns/javaee/web-app_2_5.xsd">

    <!-- 加载Spring容器配置 -->

    <listener>

        <listener-class>org.springframework.web.context.ContextLoaderListener</listener-class>

    </listener>

    <!-- 设置Spring容器加载所有的配置文件的路径 ,默认加载的是web-inf下的applicationcontext.xml文件,此处是自定义-->

    <context-param>

        <param-name>contextConfigLocation</param-name>

        <param-value>classpath*:config/spring-*.xml</param-value>

    </context-param>

    <!-- 配置SpringMVC核心控制器 -->

    <servlet>

        <servlet-name>springMVC</servlet-name>

        <servlet-class>org.springframework.web.servlet.DispatcherServlet</servlet-class>

        <!-- 默认加载的是wen-inf下的XXX-servlet.xml(springMVC-servlet.xml)文件,此处自定义 -->

        <init-param>

            <param-name>contextConfigLocation</param-name>

            <param-value>classpath*:config/spring-mvc.xml</param-value>

        </init-param>

        <!-- 启动加载一次 -->

        <load-on-startup>1</load-on-startup>

    </servlet>

    <!--为DispatcherServlet建立映射 -->

    <servlet-mapping>

        <servlet-name>springMVC</servlet-name>

        <!-- 此处可以可以配置成*.do -->

        <url-pattern>/</url-pattern>

    </servlet-mapping>

    <!-- 防止Spring内存溢出监听器 -->

    <listener>

        <listener-class>org.springframework.web.util.IntrospectorCleanupListener</listener-class>

    </listener>

    <!-- 解决工程编码过滤器 -->

    <filter>

        <filter-name>encodingFilter</filter-name>

        <filter-class>org.springframework.web.filter.CharacterEncodingFilter</filter-class>

        <init-param>

            <param-name>encoding</param-name>

            <param-value>UTF-8</param-value>

        </init-param>

        <init-param>

            <param-name>forceEncoding</param-name>

            <param-value>true</param-value>

        </init-param>

    </filter>

    <filter-mapping>

        <filter-name>encodingFilter</filter-name>

        <url-pattern>/*</url-pattern>

    </filter-mapping>

    <welcome-file-list>

        <welcome-file>index.jsp</welcome-file>

    </welcome-file-list>

</web-app>
第九步,写一个jsp文件吧,因为才controller中,return的是allUser。就写一个allUser文件吧。
<%@ page language="java" import="java.util.*" pageEncoding="utf-8"%>

<%

String path = request.getContextPath();

String basePath = request.getScheme()+"://"+request.getServerName()+":"+request.getServerPort()+path+"/";

%>

<%@ taglib uri="http://java.sun.com/jsp/jstl/core" prefix="c"%>

<!DOCTYPE HTML PUBLIC "-//W3C//DTD HTML 4.01 Transitional//EN">

<html>

  <head>

    <base href="<%=basePath%>">

    <title>ssm</title>

    <meta http-equiv="pragma" content="no-cache">

    <meta http-equiv="cache-control" content="no-cache">

    <meta http-equiv="expires" content="0">

    <meta http-equiv="keywords" content="keyword1,keyword2,keyword3">

    <meta http-equiv="description" content="This is my page">

    <!--

    <link rel="stylesheet" type="text/css" href="styles.css">

    -->

  </head>

  <body>

   <table border="1">

        <tbody>

            <tr>

                <th>姓名</th>

                <th>年龄</th>

            </tr>

            <c:if test="${!empty listUser }">

                <c:forEach items="${listUser}" var="list">

                    <tr>

                        <td>${list.username }</td>

                        <td>${list.age }</td>

                    </tr>

                </c:forEach>

            </c:if>

        </tbody>

    </table>

  </body>

</html>
第十步,执行吧,开启tomcat服务器,输入:
http://localhost:8080/SSM/user/findAllUser
得到的如下图:
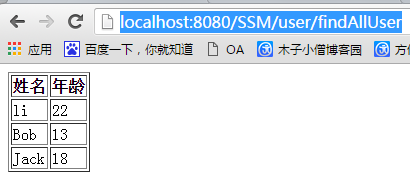
把数据库的数据都显示出来了。
简单SSM配置详解的更多相关文章
- maven pom文件简单模板和配置详解
https://blog.csdn.net/earbao/article/details/49924943 maven pom文件简单模板和配置详解
- 转载 Spring、Spring MVC、MyBatis整合文件配置详解
Spring.Spring MVC.MyBatis整合文件配置详解 使用SSM框架做了几个小项目了,感觉还不错是时候总结一下了.先总结一下SSM整合的文件配置.其实具体的用法最好还是看官方文档. ...
- Log4j配置详解(转)
一.Log4j简介 Log4j有三个主要的组件:Loggers(记录器),Appenders (输出源)和Layouts(布局).这里可简单理解为日志类别,日志要输出的地方和日志以何种形式输出.综合使 ...
- [转]阿里巴巴数据库连接池 druid配置详解
一.背景 java程序很大一部分要操作数据库,为了提高性能操作数据库的时候,又不得不使用数据库连接池.数据库连接池有很多选择,c3p.dhcp.proxool等,druid作为一名后起之秀,凭借其出色 ...
- Log4J日志配置详解
一.Log4j简介 Log4j有三个主要的组件:Loggers(记录器),Appenders (输出源)和Layouts(布局).这里可简单理解为日志类别,日志要输出的地方和日志以何种形式输出.综合使 ...
- 【转】logback 常用配置详解(序)logback 简介
原创文章,转载请指明出处:http://aub.iteye.com/blog/1101222, 尊重他人即尊重自己 详细整理了logback常用配置, 不是官网手册的翻译版,而是使用总结,旨在更快更透 ...
- 深入浅出Mybatis系列(四)---配置详解之typeAliases别名(mybatis源码篇)
上篇文章<深入浅出Mybatis系列(三)---配置详解之properties与environments(mybatis源码篇)> 介绍了properties与environments, ...
- Log.properties配置详解
一.Log4j简介 Log4j有三个主要的组件:Loggers(记录器),Appenders (输出源)和Layouts(布局).这里可简单理解为日志类别,日志要输出的地方和日志以何种形式输出.综合使 ...
- JSHint配置详解
Also available on Github JSHint配置详解 增强参数(Enforcing Options) 本类参数设为true,JSHint会产生更多告警. bitwise 禁用位运算符 ...
随机推荐
- Empire C:Basic 3
首先我们定义一个表示年龄的指针: int* page: 这就是定义了一个指针,和定义普通变量就多了一个*符号而已. 为什么变量名用了p开头,这里引用了英文pointer(指向),表示它是一个指针,而非 ...
- C#中 MD5和SHA1加密代码
Pwd = FormsAuthentication.HashPasswordForStoringInConfigFile(entity.Pwd, "MD5"); Pwd = For ...
- 引入RequireJS(一)
例子 http://www.utlcenter.com/user/index.aspx 一.文件引用 <script src="Js/require.js" defer as ...
- Django model '__week_day'与python datetime的weekday()
上周出了个bug,按星期几查询数据的时候,发现查到的数据与显示的星期几并不相符,后来发现代码中按星期几查询,有的地方用的是Django QuerySet提供的'__week_day',有的地方用的是p ...
- 调用java rest ful 接口实例
HttpWebRequest request = WebRequest.Create("http://192.168.0.99:8080/wzh-webservice/rest/login? ...
- Velocity(9)——宏
定义宏和使用宏 #macro指令用于定义一个VTL模板的重复代码块——宏.下面是一个简单的定义宏的例子: #macro( d ) <tr><td></td>< ...
- Java之美[从菜鸟到高手演变]之Spring源码学习 - 环境搭建
准备工作 1.下载安装STS(Spring Tool Suite),在eclipse market里直接搜索.下载.安装.2.下载安装gradle, Spring源码使用gradle构建,下载后解压到 ...
- Jquery入门指南教程
林炳文Evankaka原创作品.转载请注明出处http://blog.csdn.net/evankaka jQuery,顾名思义,也就是JavaScript和查询(Query),即是辅助JavaScr ...
- CEUtils---我在Unity中使用的一些小类库(不断更新中)
项目地址: http://git.oschina.net/eran/CEUtils
- C++之路进阶——codevs1362(网络扩容)
1362 网络扩容 省队选拔赛 时间限制: 2 s 空间限制: 128000 KB 题目等级 : 大师 Master 题目描述 Description 给定一张有向图,每条边都有一个容量 ...