React-redux及异步获取数据20分钟快速入门
一, 写在前面
1. 前面我写过一个vuex10分钟入门 传送门
2. React-redux网上有好多文档,又臭又长,明明很简单的问题,硬是让新人更晕了~, 我写这个文章的目的是让新人在20分钟之内明白这是怎么回事.
3. 创建你的react环境, 推荐你使用creat-react-app,我已将代码放到gitHub,所以你可以直接clone下来,感觉不错可以给我一个star. https://github.com/yurizhang/react-reduc-webpack
二,开始
1.我们的项目目录:
.

├── src                 #开发目录

|   |

|   ├──action          #action的文件

|   |

|   ├──components       #展示组件

|   |

|   ├──containers       #容器组件,主页

|   |

|   ├──reducers         #reducer文件

|   |

|   |——routes           #路由文件,容器组件

|   |

|   |——static           #静态文件

|   |

|   ├──stores           #store配置文件

|   |

|   |

|   └──index.js          #入口文件

|

├── build                #发布目录

├── node_modules        #包文件夹

├── .gitignore

├── .jshintrc

├── package.json        #环境配置

└── README.md           #使用说明

依赖的package.json
....
三。代码文件:
// index.js 入口文件

import React from 'react'

import ReactDOM from 'react-dom'

import { createStore } from 'redux'

import { Provider } from 'react-redux'

//import { Button,Alert } from 'element-react';

import 'element-theme-default';

import App,{SubComponent} from './containers/app.js'; //容器组件

import counter_SubComponent from './reducers/index.js';  // reducers createStore(counter),counter_SubComponent

// 生成Store

const store = createStore(counter_SubComponent)

ReactDOM.render(

  <Provider store={store}>

    <div>

    <App />

    <SubComponent />

    </div>

  </Provider>,

  document.getElementById('root')

)

/*

* `store` 由 Redux 的 `createStore(reducer)` 生成

* `state` 通过 `store.getState()` 获取,本质上一般是一个存储着整个应用状态的**对象**

* `action` 本质上是一个包含 `type` 属性的普通**对象**,由 Action Creator (**函数**) 产生

* 改变 `state` 必须 `dispatch` 一个 `action`

* `reducer` 本质上是根据 `action.type` 来更新 `state` 并返回 `nextState` 的**函数**

* `reducer` 必须返回值,否则 `nextState` 即为 `undefined`

* 实际上,**`state` 就是所有 `reducer` 返回值的汇总**(本教程只有一个 `reducer`,主要是应用场景比较简单)

> Action Creator => `action` => `store.dispatch(action)` => `reducer(state, action)` => ~~`原 state`~~ `state = nextState`

 */
Action
/*

 * action cretae 这个在action\actions.js

 */

// Action

// export const increaseAction = { type: 'increase' }

// export const decreaseAction = { type: 'decrease' }

// export const subTest = { type: 'test' }

export const increaseAction = (text) => {

  return { type: 'increase', text }

}

export const decreaseAction = (text) => {

  return { type: 'decrease', text }

}

export const subTest = (text) => {

  return { type: 'test', text }

}

//返回一个action对象,用来关联对应的reducer,将data保存到store。

export const saveReducer = (data) => ({

    type: 'SAVE_REDUCER',

    data

})
2个显示组件
components\Counter.js 计数器组件
import React, { Component } from 'react'

import PropTypes from 'prop-types'

import { Button } from 'element-react';

// React component

class Counter extends Component {

  render() {

    ////从组件的props属性中导入2个方法和一个变量

    const { value, onIncreaseClick, onDecreaseClick } = this.props;

    console.log('主组件里this.props:');

    console.log(this.props);

    return (

      <div>

        <span>{value}</span>

        <Button type="primary" onClick={onIncreaseClick}>增加数据</Button>

        <Button type="primary" onClick={onDecreaseClick}>减少数据</Button>

      </div>

    )

  }

}

Counter.propTypes = {

  value: PropTypes.number.isRequired,

  onIncreaseClick: PropTypes.func.isRequired,

  onDecreaseClick: PropTypes.func.isRequired

}

export default Counter
components\SubComponent.js 异步加载数据组件
import React, { Component } from 'react'

// import PropTypes from 'prop-types'

import { Alert, Button,Table } from 'element-react';

export default class SubComponent extends Component {

    constructor(){

        super();

        this.state ={

           title:''

        }

    }

    componentWillMount() {

        let id = 9999;

        this.props.getTest(id) //发送get请求,然后数据 自动写到state里

  }

  render() {

    console.log('另一个组件里的: this.props:');

    console.log(this.props);

    const { test="--", testData, onTest } = this.props;

    let columnName=[

      {

        label: "标题",

        prop: "title",

        width: 180

      },

      {

        label: "年份",

        prop: "year",

      }

    ];

    return (

        <div>

            <Alert title={test} type="info" />

            <Button type="primary" onClick={onTest}>Change</Button>

            <Table

                    style={{width: '100%'}}

                    columns={columnName}

                    maxHeight={200}

                    data={testData.movies}

            />

        </div>

    )

  }

}
容器组件 container\App.js
/*容器组件 */

/* mapStateToProps, mapDispatchToProps把这个各自放到Counter和subCounter各自的组件里会不会更好? */

import { getData} from '../plugs/fetchData'

import { Message } from 'element-react';

import { connect } from 'react-redux'

import {increaseAction, decreaseAction, subTest, saveReducer} from '../action/actions.js';

import Counter from '../components/Counter.js';  //UI组件

import subCounter from '../components/subCounter.js';

// Map Redux state to component props

function mapStateToProps(state) {

  console.log('主容器组件里app:state:');

  console.log(state);

  return {

    value: state.counter.count,

   // test: state.SubComponent.test,

    //testData: state.SubComponent.testData

  }

}

//mapStateToProps会订阅 Store,每当state更新的时候,就会自动执行,重新计算 UI 组件的参数,从而触发 UI 组件的重新渲染。

// Map Redux actions to component props

function mapDispatchToProps(dispatch) {

  return {

    onIncreaseClick: () => {

        dispatch(increaseAction());

        Message('你刚做了Add的操作');

    },  //调用Reducer

    onDecreaseClick: () => {

      dispatch(decreaseAction());

      Message('你刚做了减少的操作');

    }

  }

}

//如果mapDispatchToProps是一个函数,会得到dispatch和ownProps(容器组件的props对象)两个参数。

//这里建议的函数,组件可以通过 this.prop读取

// Map Redux state to component props

function mapSubStateToProps(state) {

  console.log('子容器组件里app:state:');

  console.log(state);

  return {

    //value: state.counter.count,

    test: state.SubComponent.test,

    testData: state.SubComponent.testData

  }

}

function mapSubCounterDispatchToProps(dispatch) {

  return {

    onTest: () => {

      dispatch(subTest());

      Message('你刚做了subTest的操作');

    },  //调用Reducer

    getTest:(id)=> {

        try {

            getData(`/facebook/react-native/master/docs/MoviesExample.json`,{id:id}).then(response=>{

             //axios返回的数据是用response.data包括的,和jquery不一样

              console.log(response.data);

              dispatch(saveReducer(response.data));

           })

            // let response = await getData(`/facebook/react-native/master/docs/MoviesExample.json?id=${id}`)

            // await dispatch(saveReducer(response.data))

        } catch (error) {

            console.log('error: ', error)

        }

    }

  }

}

// Connected Component

export const SubComponent= connect(

  mapSubStateToProps,

  mapSubCounterDispatchToProps

)(subCounter)

const App= connect(

  mapStateToProps,

  mapDispatchToProps

)(Counter)

export default App

//连接 UI组件Counter 生成一个容器组件App

//connect方法接受两个参数:mapStateToProps和mapDispatchToProps。

//它们定义了 UI 组件的业务逻辑。

//前者负责输入逻辑,即将state映射到 UI 组件的参数(props), mapStateToProps会订阅 Store,每当state更新的时候,就会自动执行,重新计算 UI 组件的参数,从而触发 UI 组件的重新渲染。

//后者负责输出逻辑,即将用户对 UI 组件的操作映射成 Action。
recuders recuders\index.js
import { combineReducers } from 'redux'

// Action

// const increaseAction = { type: 'increase' }

// const decreaseAction = { type: 'decrease' }

// Reducer

 function counter(state = { count: 0 }, action) {

  const count = state.count

  switch (action.type) {

    case 'increase':

      return { count: count + 1 }

    case 'decrease':

      return { count: count - 1 }

    default:

      return state

  }

}

let initState = {

    testData: [],

    test: 'default'

}

 function SubComponent(state = initState, action) {

  switch (action.type) {

    case 'test':

      return { ...state, test: 'test12345' }

    case 'SAVE_REDUCER':

      return {

          ...state,

          testData: action.data

      }

    default:

      return state

  }

}

//以后的业务里 这些reducers拆分成多个,这里分别导入进来

const counter_SubComponent = combineReducers({

  counter,

  SubComponent

})

export default counter_SubComponent;

//合并reducers让 const store = createStore(counter_SubComponent)生成一个状态
封装一些插件
plugs\fetchData.js
import axios from 'axios'

//BASE_URL是默认的url地址,如果你安装了webpack,可以在webpack配置全局变量

//axios.defaults.baseURL = BASE_URL;

//如果没有安装webpack,就使用下面这种写法

axios.defaults.baseURL = "https://raw.githubusercontent.com/"

export const getData = (url, param) => {

    return (

        axios.get(`${url}`, {params:param})

    );

}

export const postData = (url, param) => {

    return (

        axios.post(`${url}`, param)

    );

}
先RUN起来,后面我们来一个一个告诉这些代码是什么意思
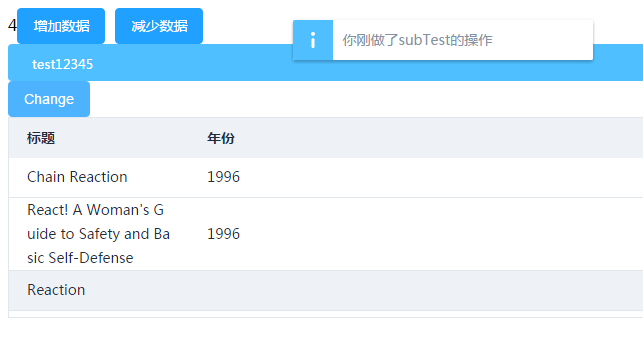
这样的一片黑是什么东西?
React-redux及异步获取数据20分钟快速入门的更多相关文章
- 用redux-thunk异步获取数据
概述 最近学习redux,打算用redux-thunk给todo添加异步获取数据组件.记录下来,供以后开发时参考,相信对其他人也有用. 注意: 在todo下方,我异步获取我的react博客的标题,点击 ...
- nettyclient异步获取数据
源代码见,以下主要是做个重要代码记录 http://download.csdn.net/detail/json20080301/8180351 NETTYclient获取数据採用的方式是异步获取数据, ...
- IOS开发---菜鸟学习之路--(十二)-利用ASIHTTPRequest进行异步获取数据
想要实现异步获取的话我这边了解过来有两个非常简单的方式 一个是利用ASIHTTPRequest来实现异步获取数据 另一个则是利用MBProgressHUD来实现异步获取数据 本章就先来讲解如何利用AS ...
- ajax异步获取数据后动态向表格中添加数据(行)
因为某些原因,项目中突然需要做自己做个ajax异步获取数据后动态向表格中添加数据的页面,网上找了半天都没有 看到现成的,决定自己写个例子 1.HTML页面 <!doctype html> ...
- MVC—实现ajax+mvc异步获取数据
之前写过ajax和一般处理程序的结合实现前后台的数据交换的博客,如今做系统用到了MVC,同一时候也用到了异步获取数据. ajax+一般处理程序与MVC+ajax原理是一样的在"URL&quo ...
- node 创建静态web服务器(下)(处理异步获取数据的两种方式)
接上一章. 上一章我们说创建的静态web服务器只能识别html,css,js文件,功能较为单一,且图片格式为text/html,这是不合理的. 本章,我们将解决该问题. 这里,我们先准备好一个json ...
- datatables异步获取数据、简单实用
IKC项目总结 一.认证难题管理模块 1. 如何使用datatables进行获取数据内容 datatables简介:Datatables是一款jquery表格插件.它是一个高度灵活的工具,可以将任何H ...
- Vue Router路由守卫妙用:异步获取数据成功后再进行路由跳转并传递数据,失败则不进行跳转
问题引入 试想这样一个业务场景: 在用户输入数据,点击提交按钮后,这时发起了ajax请求,如果请求成功, 则跳转到详情页面并展示详情数据,失败则不跳转到详情页面,只是在当前页面给出错误消息. 难点所在 ...
- 一分钟快速入门openstack
一.它是什么,能干什么想认识一个事物,必须先弄明白它是什么,能干什么.首先说一下,openstack是一个搭建云平台的一个解决方案,说他不是个软件,但是我觉得说是一个软件,能够让大家认识更清晰些.op ...
随机推荐
- UVA-12293(组合游戏)
题意: 有两个相同的盒子,一个盒子里面有n个球,另一个盒子里面有1个球,每次清空球较少的那个盒子,然后从另外的一个盒子里拿到空盒子里使得操作后两个盒子至少有一个球,判断是先手还是后者胜; 思路: 跟每 ...
- 注销ie中的ActiveX插件
最新在C#下开发ActiveX控件,遇到一个问题,就是在调试的时候,ActiveX就已经注册在了调试目录下,这样即使安装这个插件,也无法注册到ActiveX的安装目录下.为了解决这个问题,需要注销下调 ...
- Visual Studio 2017 本地调试 Chrome浏览器自动退出
在使用VS 2017(15..6 .15.7)对.NET Core MVC应用程序进行本地调试的时候,选择使用Chrome浏览器.但输入中文 就自动关闭Chrome浏览器,随后结束调试.但复制.粘贴中 ...
- java读取文件:二进制文件
FileWriter只能接受字符串形式的参数,也就是说只能把内容存到文本文件.相对于文本文件,采用二进制格式的文件存储更省空间 InputStream用于按字节从输入流读取数据.其中的int read ...
- 【Linux学习】Linux文件系统3—文件操作命令
Linux文件系统3-文件操作命令 Linux文件操作命令主要有: cd: 改变目录位置 pwd: 显示当前目录的绝对路径 ls: 显示文件名称.属性等 -a 列出全部文件 -l 列出 ...
- 【Data Structure & Algorithm】字符串全排列
字符串全排列 题目:输入一个字符串,打印出该字符串的所有排列.例如输入字符串abc,则输出由字符a.b.c所能排列出来的所有字符串abc.acb.bac.bca.cab.cba. 分析:考察对递归的理 ...
- 15.oauth2 + oidc 实现 server部分
OAuth主要做授权. OpenIdConnect简历在OAuth2.0基础之上的,相结合 客户端.授权中心.Resource Owner用户本身(资源的拥有者).Resource Server 通过 ...
- HDU - 4535 ZZULI 1867: 礼上往来【错位排序】
1867: 礼上往来 Time Limit: 1 Sec Memory Limit: 128 MBSubmit: 216 Solved: 65 SubmitStatusWeb Board Desc ...
- 洛谷1601 A+B Problem(高精) 解题报告
洛谷1601 A+B Problem(高精) 本题地址:http://www.luogu.org/problem/show?pid=1601 题目背景 无 题目描述 高精度加法,x相当于a+b pro ...
- HDU4801【DFS】
参考:大牛博客 题意: 给你一个2阶魔方,给你24个数代表颜色,然后让你求在<=n次操作里面最多能搞出几面是一样的. 思路: 就是一个DFS嘛,就是怎么转搞出来: 上面: 22 23 4 0 ...