springboot与shiro和mybatis和mysql
测试项目已上传到GitHub:https://github.com/xiaostudy/springboot_shiro_test1
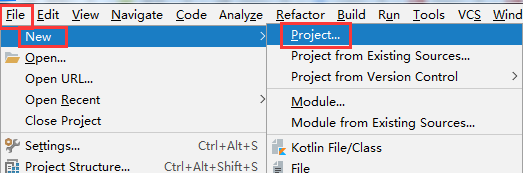
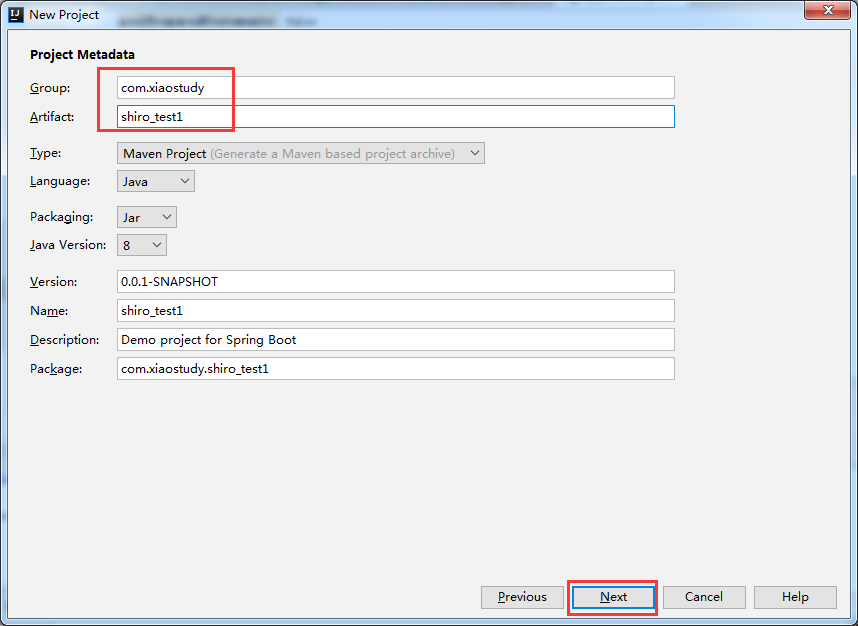
1、创建springboot项目


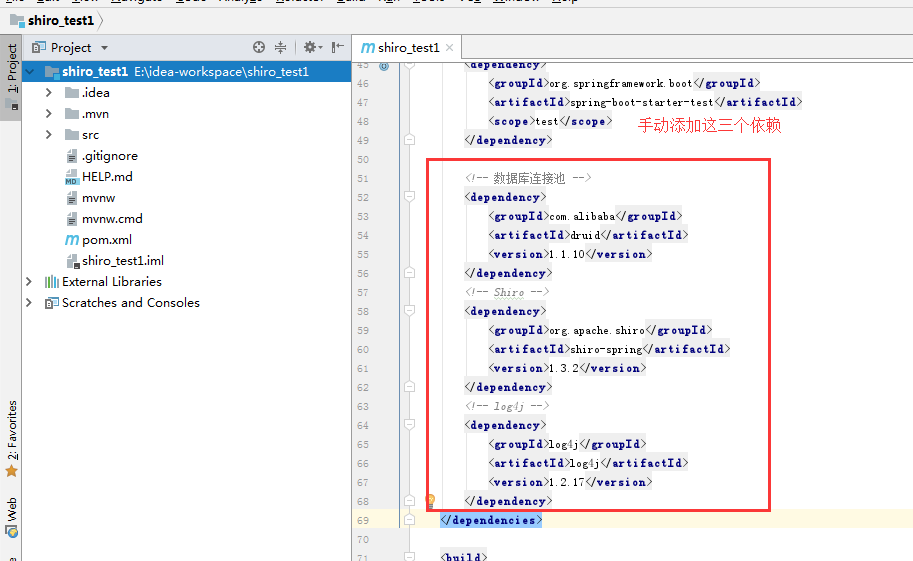
 <!-- 数据库连接池 -->

 <dependency>

     <groupId>com.alibaba</groupId>

     <artifactId>druid</artifactId>

     <version>1.1.10</version>

 </dependency>

 <!-- Shiro -->

 <dependency>

     <groupId>org.apache.shiro</groupId>

     <artifactId>shiro-spring</artifactId>

     <version>1.3.2</version>

 </dependency>

 <!-- log4j -->

 <dependency>

     <groupId>log4j</groupId>

     <artifactId>log4j</artifactId>

     <version>1.2.17</version>

 </dependency>
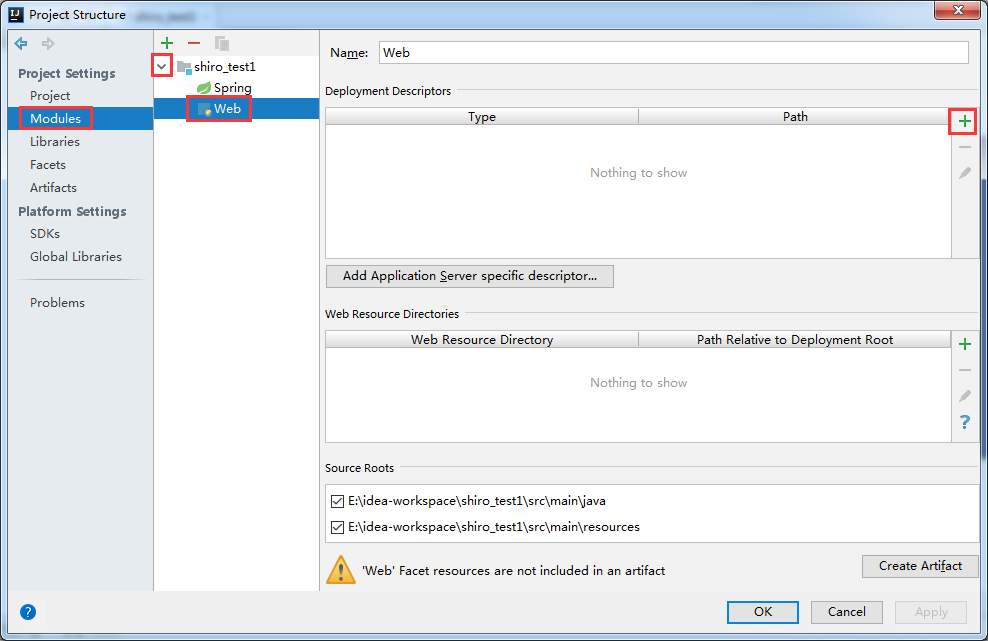
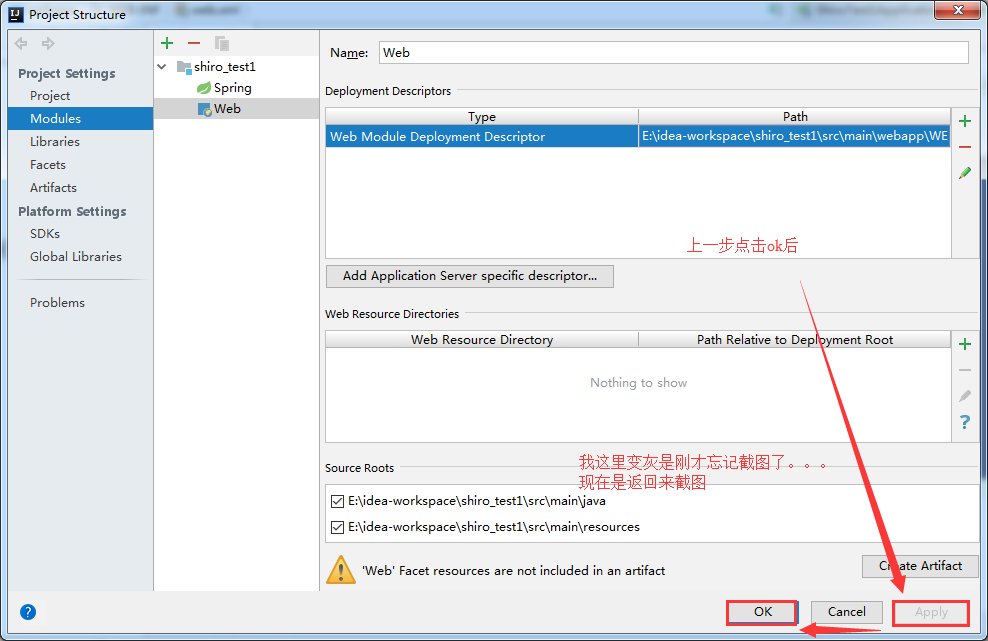
src\main\webapp\
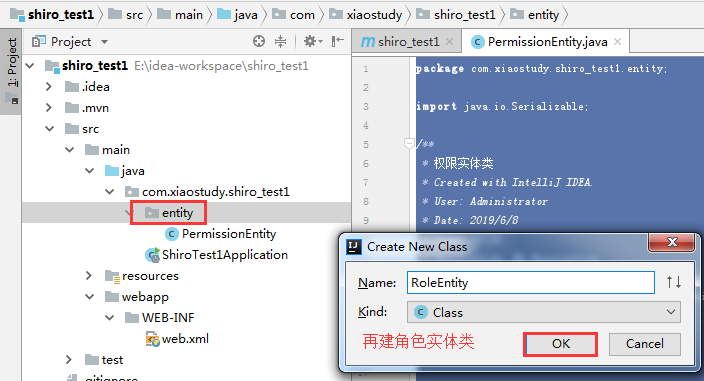
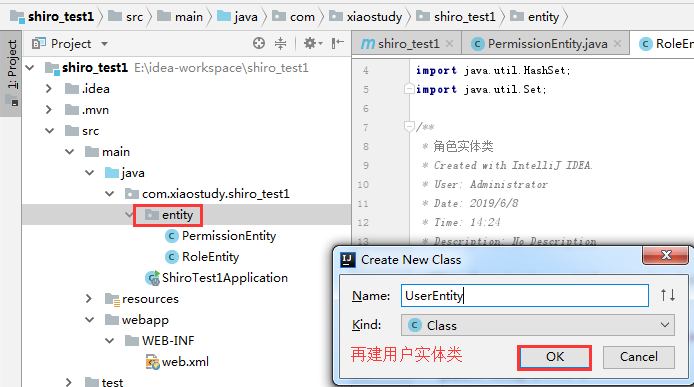
2、创建实体类
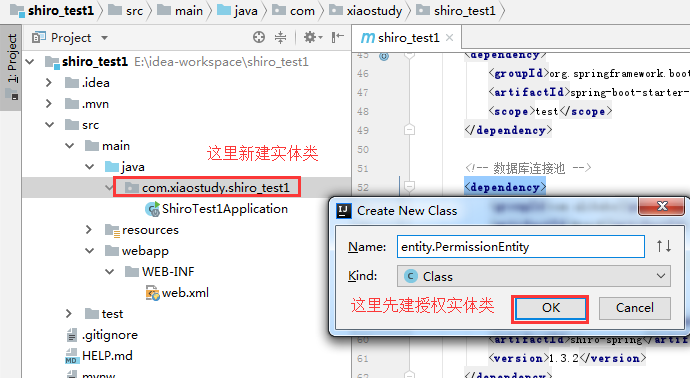
PermissionEntity.java
 package com.xiaostudy.shiro_test1.entity;

 import java.io.Serializable;

 /**

  * 权限实体类

  * Created with IntelliJ IDEA.

  * User: Administrator

  * Date: 2019/6/8

  * Time: 14:21

  * Description: No Description

  */

 public class PermissionEntity implements Serializable {

     private String id;

     private String name;

     private String url;

     public String getId() {

         return id;

     }

     public void setId(String id) {

         this.id = id;

     }

     public String getName() {

         return name;

     }

     public void setName(String name) {

         this.name = name;

     }

     public String getUrl() {

         return url;

     }

     public void setUrl(String url) {

         this.url = url;

     }

 }
 package com.xiaostudy.shiro_test1.entity;

 import java.io.Serializable;

 import java.util.HashSet;

 import java.util.Set;

 /**

  * 角色实体类

  * Created with IntelliJ IDEA.

  * User: Administrator

  * Date: 2019/6/8

  * Time: 14:24

  * Description: No Description

  */

 public class RoleEntity implements Serializable {

     private String id;

     private String name;

     private Set<PermissionEntity> permissions = new HashSet<>();

     public String getId() {

         return id;

     }

     public void setId(String id) {

         this.id = id;

     }

     public String getName() {

         return name;

     }

     public void setName(String name) {

         this.name = name;

     }

     public Set<PermissionEntity> getPermissions() {

         return permissions;

     }

     public void setPermissions(Set<PermissionEntity> permissions) {

         this.permissions = permissions;

     }

 }
 package com.xiaostudy.shiro_test1.entity;

 import java.io.Serializable;

 import java.util.HashSet;

 import java.util.Set;

 /**

  * 用户实体类

  * Created with IntelliJ IDEA.

  * User: Administrator

  * Date: 2019/6/8

  * Time: 14:26

  * Description: No Description

  */

 public class UserEntity implements Serializable {

     private String id;

     private String name;

     private String password;

     private Set<RoleEntity> roles = new HashSet<>();

     public String getId() {

         return id;

     }

     public void setId(String id) {

         this.id = id;

     }

     public String getName() {

         return name;

     }

     public void setName(String name) {

         this.name = name;

     }

     public String getPassword() {

         return password;

     }

     public void setPassword(String password) {

         this.password = password;

     }

     public Set<RoleEntity> getRoles() {

         return roles;

     }

     public void setRoles(Set<RoleEntity> roles) {

         this.roles = roles;

     }

 }
实体类entity,也可以叫bean、domain,具体叫什可以根据自己的喜欢选取
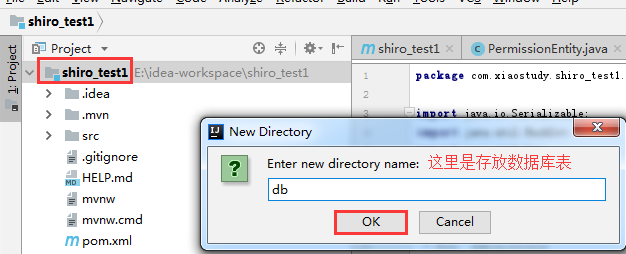
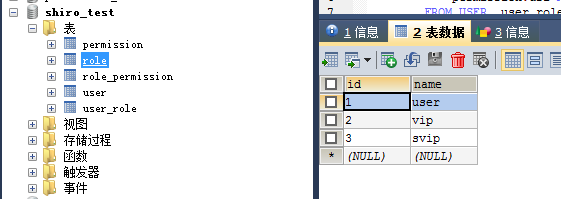
3、数据库创建表和添加数据

DROP TABLE IF EXISTS `role_permission`;
DROP TABLE IF EXISTS `permission`;
DROP TABLE IF EXISTS `user_role`;
DROP TABLE IF EXISTS `role`;
DROP TABLE IF EXISTS `user`; CREATE TABLE `user` (
`id` VARCHAR(255) PRIMARY KEY,
`name` VARCHAR(255),
`password` VARCHAR(255)
) engine = InnoDB default charset = utf8 comment = '用户表'; CREATE TABLE `role` (
`id` VARCHAR(255) PRIMARY KEY,
`name` VARCHAR(255)
) engine = InnoDB default charset = utf8 comment = '角色表'; CREATE TABLE `user_role` (
`id` VARCHAR(255) PRIMARY KEY,
`user_id` VARCHAR(255),
`role_id` VARCHAR(255),
FOREIGN KEY (`user_id`) REFERENCES `user`(id),
FOREIGN KEY (`role_id`) REFERENCES `role`(id)
) engine = InnoDB default charset = utf8 comment = '用户与角色多对多表'; CREATE TABLE `permission` (
`id` VARCHAR(255) PRIMARY KEY,
`name` VARCHAR(255),
`url` VARCHAR(255)
) engine = InnoDB default charset = utf8 comment = '权限表'; CREATE TABLE `role_permission` (
`id` VARCHAR(255) PRIMARY KEY,
`role_id` VARCHAR(255),
`permission_id` VARCHAR(255),
FOREIGN KEY (`role_id`) REFERENCES `role`(id),
FOREIGN KEY (`permission_id`) REFERENCES `permission`(id)
) engine = InnoDB default charset = utf8 comment = '角色与权限多对多表'; insert into `user` (`id`, `name`, `password`) values('','admin','');
insert into `user` (`id`, `name`, `password`) values('','vip','');
insert into `user` (`id`, `name`, `password`) values('','svip',''); insert into `role` (`id`, `name`) values('','user');
insert into `role` (`id`, `name`) values('','vip');
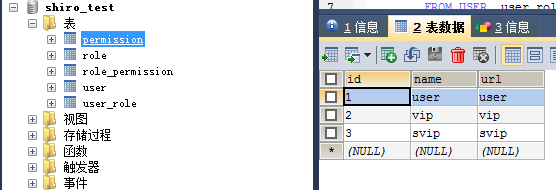
insert into `role` (`id`, `name`) values('','svip'); insert into `permission` (`id`, `name`, `url`) values('','user','user');
insert into `permission` (`id`, `name`, `url`) values('','vip','vip');
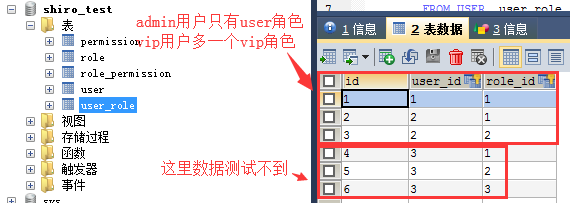
insert into `permission` (`id`, `name`, `url`) values('','svip','svip'); insert into `user_role` (`id`, `user_id`, `role_id`) values('','','');
insert into `user_role` (`id`, `user_id`, `role_id`) values('','','');
insert into `user_role` (`id`, `user_id`, `role_id`) values('','','');
insert into `user_role` (`id`, `user_id`, `role_id`) values('','','');
insert into `user_role` (`id`, `user_id`, `role_id`) values('','','');
insert into `user_role` (`id`, `user_id`, `role_id`) values('','',''); insert into `role_permission` (`id`, `role_id`, `permission_id`) values('','','');
insert into `role_permission` (`id`, `role_id`, `permission_id`) values('','','');
insert into `role_permission` (`id`, `role_id`, `permission_id`) values('','','');
insert into `role_permission` (`id`, `role_id`, `permission_id`) values('','','');
insert into `role_permission` (`id`, `role_id`, `permission_id`) values('','','');
insert into `role_permission` (`id`, `role_id`, `permission_id`) values('','','');
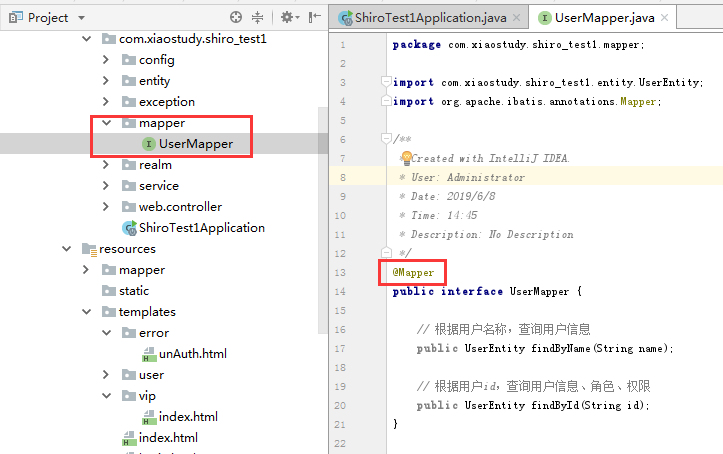
4、接下来写mapper,也叫dao
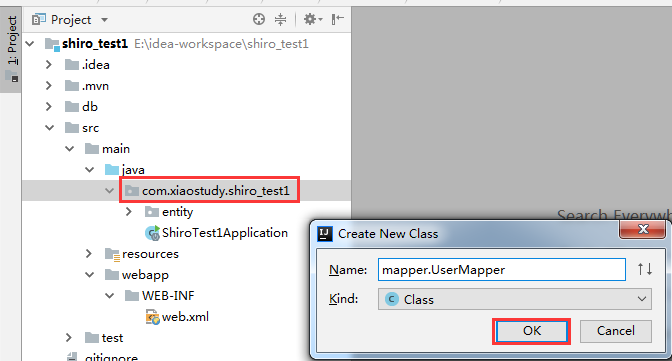
 package com.xiaostudy.shiro_test1.mapper;

 import com.xiaostudy.shiro_test1.entity.UserEntity;

 import org.apache.ibatis.annotations.Mapper;

 /**

  * Created with IntelliJ IDEA.

  * User: Administrator

  * Date: 2019/6/8

  * Time: 14:45

  * Description: No Description

  */

 @Mapper

 public interface UserMapper {

     // 根据用户名称,查询用户信息

     public UserEntity findByName(String name);

     // 根据用户id,查询用户信息、角色、权限

     public UserEntity findById(String id);

 }
@Mapper后面再讲,这里也可以不用@Mapper

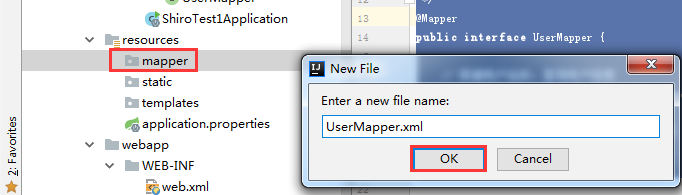
 <?xml version="1.0" encoding="UTF-8"?>

 <!DOCTYPE mapper PUBLIC "-//mybatis.org//DTD Mapper 3.0//EN" "http://mybatis.org/dtd/mybatis-3-mapper.dtd">

 <mapper namespace="com.xiaostudy.shiro_test1.mapper.UserMapper">

     <resultMap id="userMap" type="com.xiaostudy.shiro_test1.entity.UserEntity">

         <id property="id" column="id"/>

         <result property="name" column="name"/>

         <result property="password" column="password"/>

         <collection property="roles" ofType="com.xiaostudy.shiro_test1.entity.RoleEntity">

             <id property="id" column="roleId"/>

             <result property="name" column="roleName"/>

             <collection property="permissions" ofType="com.xiaostudy.shiro_test1.entity.PermissionEntity">

                 <id property="id" column="permissionId"/>

                 <result property="name" column="permissionName"/>

                 <result property="url" column="permissionUrl"/>

             </collection>

         </collection>

     </resultMap>

     <select id="findByName" parameterType="java.lang.String" resultType="com.xiaostudy.shiro_test1.entity.UserEntity">

       SELECT id, name, password

         FROM user

           WHERE name = #{name}

     </select>

     <select id="findById" parameterType="java.lang.String" resultMap="userMap">

       SELECT user.id, user.name, user.password,

             role.id as roleId, role.name as roleName,

             permission.id as permissionId,

             permission.name as permissionName,

             permission.url as permissionUrl

         FROM user, user_role, role, role_permission, permission

           WHERE user.id = #{id}

             AND user.id = user_role.user_id

             AND user_role.role_id = role.id

             AND role.id = role_permission.role_id

             AND role_permission.permission_id = permission.id

     </select>

 </mapper>
5、下面写service
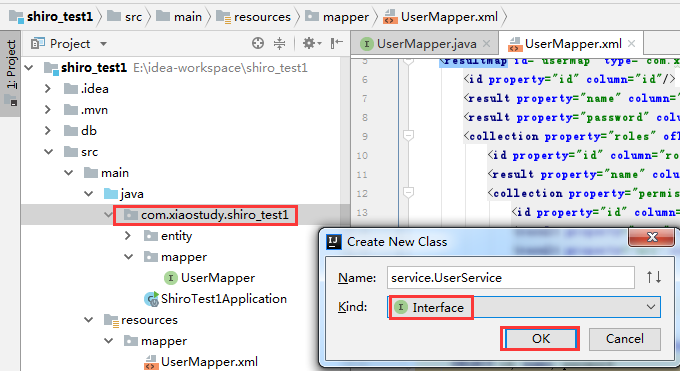
 package com.xiaostudy.shiro_test1.service;

 import com.xiaostudy.shiro_test1.entity.UserEntity;

 /**

  * Created with IntelliJ IDEA.

  * User: Administrator

  * Date: 2019/6/8

  * Time: 14:55

  * Description: No Description

  */

 public interface UserService {

     UserEntity findByName(String name);

     UserEntity findById(String id);

 }
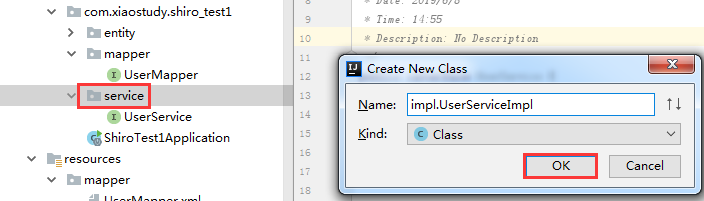
 package com.xiaostudy.shiro_test1.service.impl;

 import com.xiaostudy.shiro_test1.entity.UserEntity;

 import com.xiaostudy.shiro_test1.mapper.UserMapper;

 import com.xiaostudy.shiro_test1.service.UserService;

 import org.springframework.beans.factory.annotation.Autowired;

 import org.springframework.stereotype.Service;

 /**

  * Created with IntelliJ IDEA.

  * User: Administrator

  * Date: 2019/6/8

  * Time: 14:56

  * Description: No Description

  */

 @Service

 public class UserServiceImpl implements UserService {

     @Autowired

     private UserMapper userMapper;

     @Override

     public UserEntity findByName(String name) {

         return userMapper.findByName(name);

     }

     @Override

     public UserEntity findById(String id) {

         return userMapper.findById(id);

     }

 }
6、下面写自定义Realm的UserRealm.java
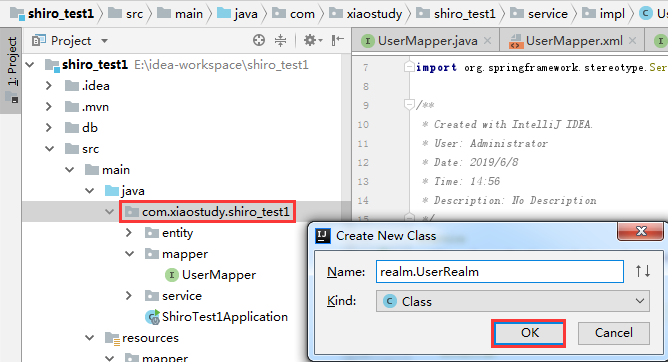
 package com.xiaostudy.shiro_test1.realm;

 import com.xiaostudy.shiro_test1.entity.PermissionEntity;

 import com.xiaostudy.shiro_test1.entity.RoleEntity;

 import com.xiaostudy.shiro_test1.entity.UserEntity;

 import com.xiaostudy.shiro_test1.service.UserService;

 import org.apache.shiro.SecurityUtils;

 import org.apache.shiro.authc.*;

 import org.apache.shiro.authz.AuthorizationInfo;

 import org.apache.shiro.authz.SimpleAuthorizationInfo;

 import org.apache.shiro.realm.AuthorizingRealm;

 import org.apache.shiro.subject.PrincipalCollection;

 import org.apache.shiro.subject.Subject;

 import org.apache.shiro.util.ByteSource;

 import org.springframework.beans.factory.annotation.Autowired;

 import java.util.Collection;

 import java.util.HashSet;

 import java.util.Set;

 /**

  * 自定义Realm,实现授权与认证

  * Created with IntelliJ IDEA.

  * User: Administrator

  * Date: 2019/6/8

  * Time: 15:01

  * Description: No Description

  */

 public class UserRealm extends AuthorizingRealm {

     @Autowired

     private UserService userService;

     /**

      * 用户授权

      **/

     @Override

     protected AuthorizationInfo doGetAuthorizationInfo(

             PrincipalCollection principalCollection) {

         System.out.println("===执行授权===");

         Subject subject = SecurityUtils.getSubject();

         UserEntity user = (UserEntity)subject.getPrincipal();

         if(user != null){

             SimpleAuthorizationInfo info = new SimpleAuthorizationInfo();

             // 角色字符串集合

             Collection<String> rolesCollection = new HashSet<>();

             // 权限字符串集合

             Collection<String> premissionCollection = new HashSet<>();

             // 读取并赋值用户角色与权限

             Set<RoleEntity> roles = user.getRoles();

             for(RoleEntity role : roles){

                 rolesCollection.add(role.getName());

                 Set<PermissionEntity> permissions = role.getPermissions();

                 for (PermissionEntity permission : permissions){

                     // 权限名称为PermissionEntity为字段url

                     premissionCollection.add(permission.getUrl());

                 }

                 info.addStringPermissions(premissionCollection);

             }

             info.addRoles(rolesCollection);

             return info;

         }

         return null;

     }

     /**

      * 用户认证

      **/

     @Override

     protected AuthenticationInfo doGetAuthenticationInfo(

             AuthenticationToken authenticationToken) throws AuthenticationException {

         System.out.println("===执行认证===");

         UsernamePasswordToken token = (UsernamePasswordToken)authenticationToken;

         UserEntity bean = userService.findByName(token.getUsername());

         if(bean == null){

             // 用户不存在

             throw new UnknownAccountException();

         } else {

             bean = userService.findById(bean.getId());

             if(null == bean) {

                 // 认证失败

                 throw new AuthenticationException();

             }

         }

         ByteSource credentialsSalt = ByteSource.Util.bytes(bean.getName());

         return new SimpleAuthenticationInfo(bean, bean.getPassword(),

                 credentialsSalt, getName());

     }

 }
7、下面写shiro配置类
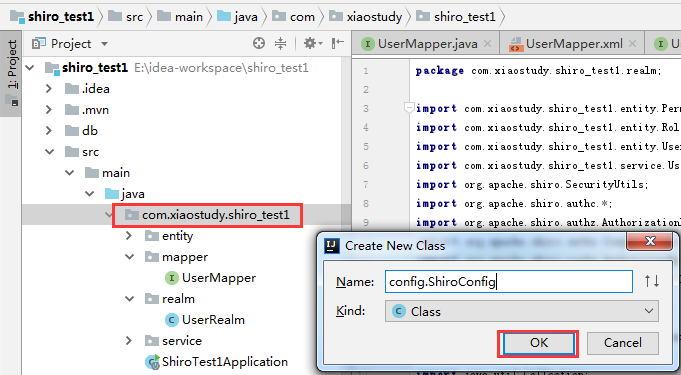
 package com.xiaostudy.shiro_test1.config;

 import com.xiaostudy.shiro_test1.realm.UserRealm;

 import org.apache.shiro.spring.security.interceptor.AuthorizationAttributeSourceAdvisor;

 import org.apache.shiro.spring.web.ShiroFilterFactoryBean;

 import org.apache.shiro.web.mgt.DefaultWebSecurityManager;

 import org.springframework.aop.framework.autoproxy.DefaultAdvisorAutoProxyCreator;

 import org.springframework.boot.autoconfigure.condition.ConditionalOnMissingBean;

 import org.springframework.context.annotation.Bean;

 import org.springframework.context.annotation.Configuration;

 import java.util.HashMap;

 import java.util.Map;

 /**

  * Shiro配置类

  * Created with IntelliJ IDEA.

  * User: Administrator

  * Date: 2019/6/8

  * Time: 15:06

  * Description: No Description

  */

 @Configuration

 public class ShiroConfig {

     // 创建自定义 realm

     @Bean

     public UserRealm userRealm() {

         UserRealm userRealm = new UserRealm();

         return userRealm;

     }

     // 创建 SecurityManager 对象

     @Bean

     public DefaultWebSecurityManager securityManager() {

         DefaultWebSecurityManager securityManager = new DefaultWebSecurityManager();

         securityManager.setRealm(userRealm());

         return securityManager;

     }

     // Filter工厂,设置对应的过滤条件和跳转条件

     @Bean

     public ShiroFilterFactoryBean shiroFilterFactoryBean(DefaultWebSecurityManager securityManager) {

         ShiroFilterFactoryBean shiroFilterFactoryBean = new ShiroFilterFactoryBean();

         shiroFilterFactoryBean.setSecurityManager(securityManager);

         /**

          * anon:匿名用户可访问

          * authc:认证用户可访问

          * user:使用rememberMe可访问

          * perms:对应权限可访问

          * role:对应角色权限可访问

          */

         Map<String, String> map = new HashMap<>();

         // 开放登录接口

         map.put("/login", "anon");

 //        map.put("/login", "authc");

         // 对登录跳转接口进行释放

         map.put("/error", "anon");

         // 对所有用户认证

         map.put("/**", "authc");

         // 登出

         map.put("/logout", "logout");

         // 登录

         // 注意:这里配置的 /login 是指到 @RequestMapping(value="/login")中的 /login

         shiroFilterFactoryBean.setLoginUrl("/login");

         // 首页

         shiroFilterFactoryBean.setSuccessUrl("/index");

         // 错误页面,认证不通过跳转

         shiroFilterFactoryBean.setUnauthorizedUrl("/error/unAuth");

         shiroFilterFactoryBean.setFilterChainDefinitionMap(map);

         return shiroFilterFactoryBean;

     }

     // 加入注解的使用,不加这个,注解不生效

     @Bean

     public AuthorizationAttributeSourceAdvisor authorizationAttributeSourceAdvisor(DefaultWebSecurityManager securityManager) {

         AuthorizationAttributeSourceAdvisor authorizationAttributeSourceAdvisor = new AuthorizationAttributeSourceAdvisor();

         authorizationAttributeSourceAdvisor.setSecurityManager(securityManager);

         return authorizationAttributeSourceAdvisor;

     }

     // 跟上面的注解配置搭配使用,有时候加了上面的配置后注解不生效,需要加入下面的配置

     @Bean

     @ConditionalOnMissingBean

     public DefaultAdvisorAutoProxyCreator defaultAdvisorAutoProxyCreator() {

         DefaultAdvisorAutoProxyCreator app = new DefaultAdvisorAutoProxyCreator();

         app.setProxyTargetClass(true);

         return app;

     }

 }
8、下面写没有权限异常处理类

 package com.xiaostudy.shiro_test1.exception;

 import org.apache.shiro.authz.AuthorizationException;

 import org.apache.shiro.authz.UnauthorizedException;

 import org.springframework.stereotype.Component;

 import org.springframework.web.bind.annotation.ControllerAdvice;

 import org.springframework.web.bind.annotation.ExceptionHandler;

 import org.springframework.web.bind.annotation.ResponseBody;

 /**

  * Created with IntelliJ IDEA.

  * User: Administrator

  * Date: 2019/6/8

  * Time: 15:13

  * Description: No Description

  */

 @ControllerAdvice

 public class NoPermissionException {

     // 授权失败,就是说没有该权限

     @ExceptionHandler(UnauthorizedException.class)

     public String handleShiroException(Exception ex) {

         return "/error/unAuth";

     }

     @ResponseBody

     @ExceptionHandler(AuthorizationException.class)

     public String AuthorizationException(Exception ex) {

         return "权限认证失败";

     }

 }
9、下面写controller
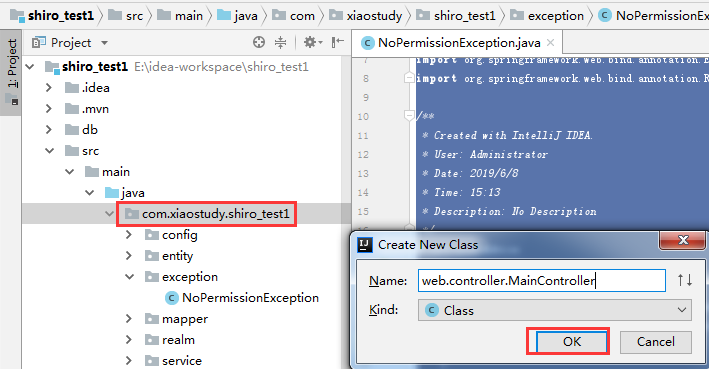
package com.xiaostudy.shiro_test1.web.controller; import org.apache.shiro.SecurityUtils;
import org.apache.shiro.authc.AuthenticationException;
import org.apache.shiro.authc.IncorrectCredentialsException;
import org.apache.shiro.authc.UnknownAccountException;
import org.apache.shiro.authc.UsernamePasswordToken;
import org.apache.shiro.subject.Subject;
import org.springframework.stereotype.Controller;
import org.springframework.web.bind.annotation.RequestMapping; import javax.servlet.http.HttpServletRequest;
import javax.servlet.http.HttpServletResponse; /**
* 用户登录、登出、错误页面跳转控制器
* Created with IntelliJ IDEA.
* User: Administrator
* Date: 2019/6/8
* Time: 15:15
* Description: No Description
*/
@Controller
public class MainController { @RequestMapping("/index")
public String index(HttpServletRequest request, HttpServletResponse response){
response.setHeader("root", request.getContextPath());
return "index";
} @RequestMapping("/login")
public String login(HttpServletRequest request, HttpServletResponse response){
response.setHeader("root", request.getContextPath());
String userName = request.getParameter("username");
String password = request.getParameter("password"); // 等于null说明用户没有登录,只是拦截所有请求到这里,那就直接让用户去登录页面,就不认证了。
// 如果这里不处理,那个会返回用户名不存在,逻辑上不合理,用户还没登录怎么就用户名不存在?
if(null == userName) {
return "login";
} // 1.获取Subject
Subject subject = SecurityUtils.getSubject();
// 2.封装用户数据
UsernamePasswordToken token = new UsernamePasswordToken(userName, password);
// 3.执行登录方法
try{
subject.login(token);
return "redirect:/index";
} catch (UnknownAccountException e){
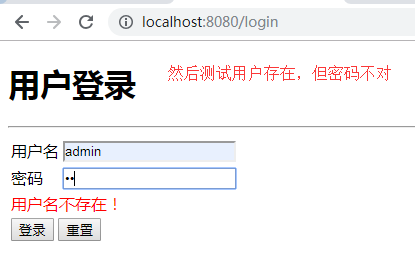
// 这里是捕获自定义Realm的用户名不存在异常
request.setAttribute("msg","用户名不存在!");
} catch (IncorrectCredentialsException e){
request.setAttribute("userName",userName);
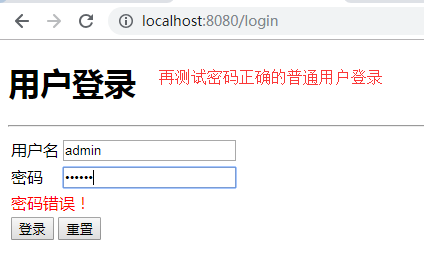
request.setAttribute("msg","密码错误!");
} catch (AuthenticationException e) {
// 这里是捕获自定义Realm的认证失败异常
request.setAttribute("msg","认证失败!");
} return "login";
} @RequestMapping("/logout")
public String logout(){
Subject subject = SecurityUtils.getSubject();
if (subject != null) {
subject.logout();
}
// return "redirect:/main";
return "login";
} @RequestMapping("/error/unAuth")
public String unAuth(){
return "/error/unAuth";
} @RequestMapping("/err")
public String err(){
return "/error/unAuth";
}
}
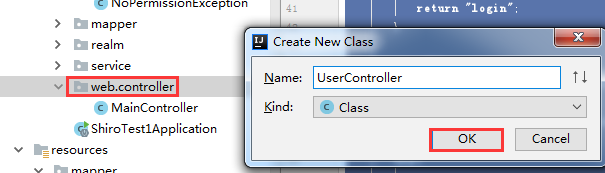
package com.xiaostudy.shiro_test1.web.controller; import com.xiaostudy.shiro_test1.entity.UserEntity;
import org.apache.shiro.SecurityUtils;
import org.apache.shiro.authz.annotation.RequiresPermissions;
import org.springframework.stereotype.Controller;
import org.springframework.web.bind.annotation.RequestMapping; import javax.servlet.http.HttpServletRequest; /**
* 用户页面跳转
* Created with IntelliJ IDEA.
* User: Administrator
* Date: 2019/6/8
* Time: 15:21
* Description: No Description
*/
@Controller
public class UserController { /**
* 个人中心,需认证可访问
*/
@RequestMapping("/user/index")
@RequiresPermissions(value = "user")// 这里的user,就是对应权限实体类PermissionEntity的字段url,自定义Realm类UserRealm里是用这个字段
public String add(HttpServletRequest request){
UserEntity bean = (UserEntity) SecurityUtils.getSubject().getPrincipal();
request.setAttribute("userName", bean.getName());
return "/user/index";
} /**
* 会员中心,需认证且角色为vip可访问
*/
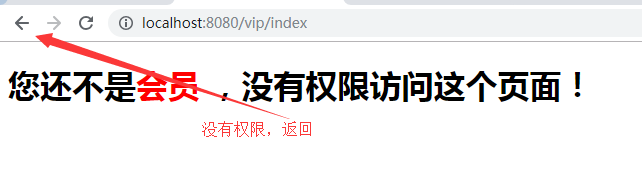
@RequestMapping("/vip/index")
@RequiresPermissions(value = "vip")
public String update(){
return "/vip/index";
}
}
10、下面写spring-mvc.xml

 <?xml version="1.0" encoding="UTF-8"?>

 <beans xmlns="http://www.springframework.org/schema/beans"

        xmlns:mvc="http://www.springframework.org/schema/mvc"

        xmlns:aop="http://www.springframework.org/schema/aop"

        xmlns:tx="http://www.springframework.org/schema/tx"

        xmlns:context="http://www.springframework.org/schema/context"

        xmlns:xsi="http://www.w3.org/2001/XMLSchema-instance"

        xsi:schemaLocation="http://www.springframework.org/schema/beans

                         http://www.springframework.org/schema/beans/spring-beans-3.2.xsd

                         http://www.springframework.org/schema/mvc

                         http://www.springframework.org/schema/mvc/spring-mvc-3.2.xsd

                         http://www.springframework.org/schema/context

                         http://www.springframework.org/schema/context/spring-context-3.2.xsd

                         http://www.springframework.org/schema/aop

                         http://www.springframework.org/schema/aop/spring-aop-3.2.xsd

                         http://www.springframework.org/schema/tx

                         http://www.springframework.org/schema/tx/spring-tx-3.2.xsd">

     <!-- 把Controller交给spring管理 -->

     <context:component-scan base-package="com.xiaostudy"/>

     <!-- 配置注解处理器映射器 功能:寻找执行类Controller -->

     <bean class="org.springframework.web.servlet.mvc.method.annotation.RequestMappingHandlerMapping"/>

     <!-- 配置注解处理器适配器 功能:调用controller方法,执行controller -->

     <bean class="org.springframework.web.servlet.mvc.method.annotation.RequestMappingHandlerAdapter"/>

     <!-- 配置sprigmvc视图解析器:解析逻辑试图

          后台返回逻辑试图:index

         视图解析器解析出真正物理视图:前缀+逻辑试图+后缀====/WEB-INF/index.jsp -->

     <!--<bean class="org.springframework.web.servlet.view.InternalResourceViewResolver">

         <property name="prefix" value="/WEB-INF/"/>

         <property name="suffix" value=".jsp"/>

     </bean>-->

 </beans>
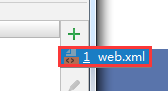
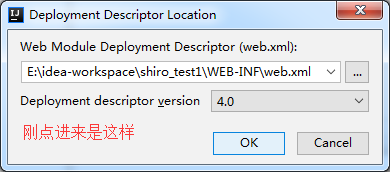
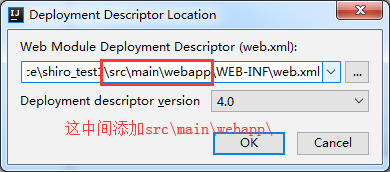
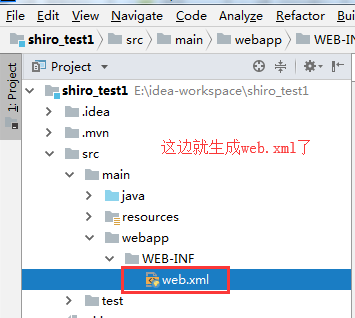
11、下面写web.xml
 <?xml version="1.0" encoding="UTF-8"?>

 <web-app xmlns="http://xmlns.jcp.org/xml/ns/javaee"

          xmlns:xsi="http://www.w3.org/2001/XMLSchema-instance"

          xsi:schemaLocation="http://xmlns.jcp.org/xml/ns/javaee http://xmlns.jcp.org/xml/ns/javaee/web-app_4_0.xsd"

          version="4.0">

     <display-name>Archetype Created Web Application</display-name>

     <!--请求编码设置-->

     <filter>

         <filter-name>encodingFilter</filter-name>

         <filter-class>org.springframework.web.filter.CharacterEncodingFilter</filter-class>

         <init-param>

             <param-name>encoding</param-name>

             <param-value>UTF-8</param-value>

         </init-param>

         <init-param>

             <param-name>forceEncoding</param-name>

             <param-value>true</param-value>

         </init-param>

     </filter>

     <filter-mapping>

         <filter-name>encodingFilter</filter-name>

         <url-pattern>/*</url-pattern>

     </filter-mapping>

     <listener>

         <listener-class>org.springframework.web.context.ContextLoaderListener</listener-class>

     </listener>

     <listener>

         <listener-class>org.springframework.web.util.IntrospectorCleanupListener</listener-class>

     </listener>

     <servlet>

         <servlet-name>SpringMVC</servlet-name>

         <servlet-class>org.springframework.web.servlet.DispatcherServlet</servlet-class>

         <init-param>

             <param-name>contextConfigLocation</param-name>

             <param-value>classpath:spring-mvc.xml</param-value>

         </init-param>

         <load-on-startup>1</load-on-startup>

         <async-supported>true</async-supported>

     </servlet>

     <servlet-mapping>

         <servlet-name>SpringMVC</servlet-name>

         <url-pattern>/</url-pattern>

     </servlet-mapping>

     <welcome-file-list>

         <welcome-file>/index</welcome-file>

     </welcome-file-list>

 </web-app>
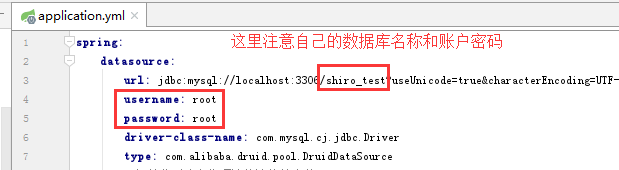
12、下面写application.yml
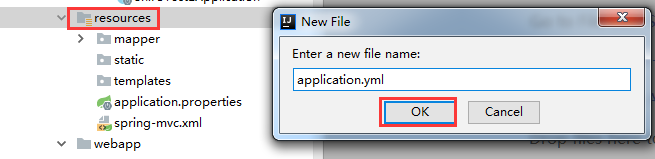
 spring:

     datasource:

         url: jdbc:mysql://localhost:3306/shiro_test?useUnicode=true&characterEncoding=UTF-8&useJDBCCompliantTimezoneShift=true&useLegacyDatetimeCode=false&serverTimezone=UTC

         username: root

         password: root

         driver-class-name: com.mysql.cj.jdbc.Driver

         type: com.alibaba.druid.pool.DruidDataSource

         # 初始化时建立物理连接连接的个数

         initialSize: 5

         # 最小连接池数量

         minIdle: 5

         # 最大连接池数量

         maxActive: 20

         # 获取连接时最大等待时间(ms),即60s

         maxWait: 60000

         # 1.Destroy线程会检测连接的间隔时间;2.testWhileIdle的判断依据

         timeBetweenEvictionRunsMillis: 60000

         # 最小生存时间ms

         minEvictableIdleTimeMillis: 600000

         maxEvictableIdleTimeMillis: 900000

         # 用来检测连接是否有效的sql

         validationQuery: SELECT 1 FROM DUAL

         # 申请连接时执行validationQuery检测连接是否有效,启用会降低性能

         testOnBorrow: false

         # 归还连接时执行validationQuery检测连接是否有效,启用会降低性能

         testOnReturn: false

         # 申请连接的时候检测,如果空闲时间大于timeBetweenEvictionRunsMillis,

         # 执行validationQuery检测连接是否有效,不会降低性能

         testWhileIdle: true

         # 是否缓存preparedStatement,mysql建议关闭

         poolPreparedStatements: false

         # 配置监控统计拦截的filters,去掉后监控界面sql无法统计,'wall'用于防火墙

         filters: stat,wall,log4j

     thymeleaf:

         suffix: .html

         charset: utf-8

     mvc:

         # 配置静态资源映射路径,/public、/resources路径失效

         static-path-pattern: templates/**

 mybatis:

     mapper-locations: classpath:mapper/*.xml

 #    mapperLocations: classpath:mapper/*.xml

     # 虽然可以配置这项来进行pojo包扫描,但其实我更倾向于在mapper.xml写全类名

 #    type-aliases-package: com.xiaostudy.shiro_test1.entity

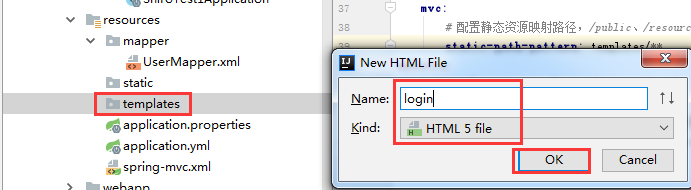
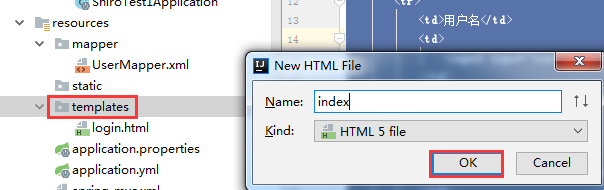
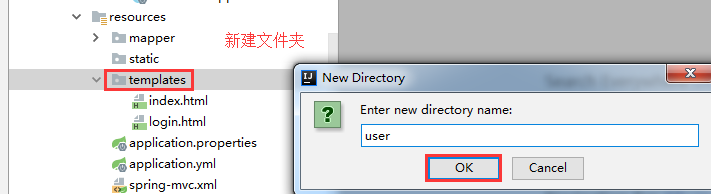
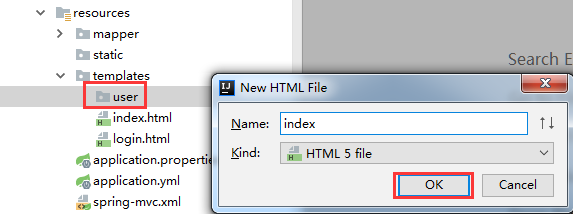
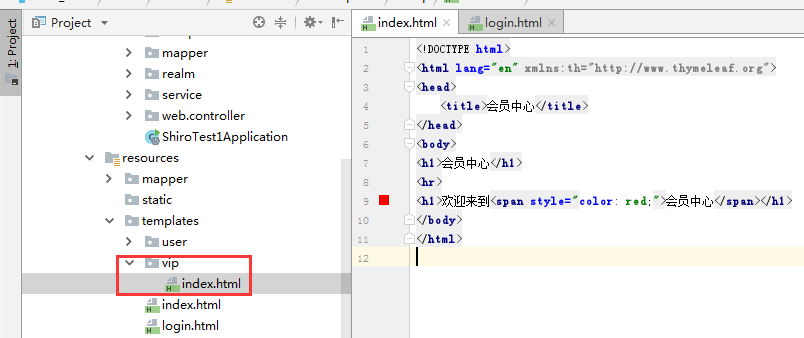
13、下面写html
 <!DOCTYPE html>

 <html lang="en" xmlns:th="http://www.thymeleaf.org">

 <head>

     <meta charset="UTF-8">

     <title>登录</title>

 </head>

 <body>

 <h1>用户登录</h1>

 <hr>

 <form id="from" action="/login" method="post">

     <table>

         <tr>

             <td>用户名</td>

             <td>

                 <input type="text" name="username" placeholder="请输入账户名" value="" th:value="${userName }"/>

             </td>

         </tr>

         <tr>

             <td>密码</td>

             <td>

                 <input type="password" name="password" placeholder="请输入密码"/>

             </td>

         </tr>

         <tr>

             <td colspan="2">

                 <span style="color: red;">[[${msg }]]</span>

             </td>

         </tr>

         <tr>

             <td colspan="2">

                 <input type="submit" value="登录"/>

                 <input type="reset" value="重置"/>

             </td>

         </tr>

     </table>

 </form>

 </body>

 </html>
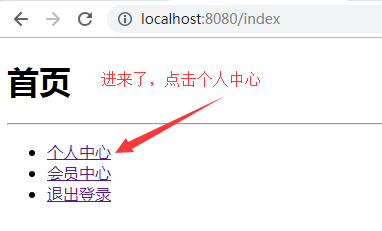
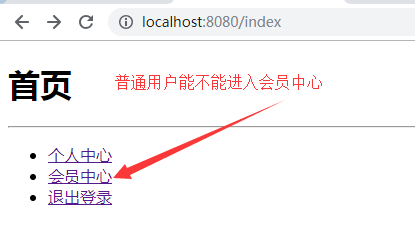
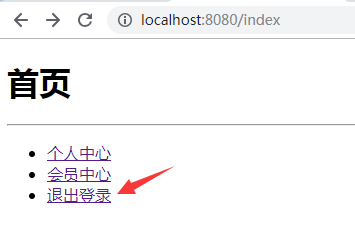
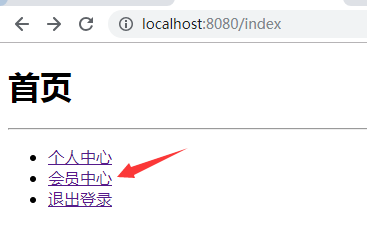
 <!DOCTYPE html>

 <html lang="en">

 <head>

     <title>首页</title>

 </head>

 <body>

 <h1>首页</h1>

 <hr>

 <ul>

     <li><a href="user/index">个人中心</a></li>

     <li><a href="vip/index">会员中心</a></li>

     <li><a href="logout">退出登录</a></li>

 </ul>

 </body>

 </html>
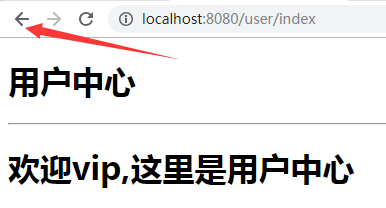
 <!DOCTYPE html>

 <html lang="en" xmlns:th="http://www.thymeleaf.org">

 <head>

     <title>用户中心</title>

 </head>

 <body>

 <h1>用户中心</h1>

 <hr>

 <h1>欢迎[[${userName }]],这里是用户中心</h1>

 </body>

 </html>
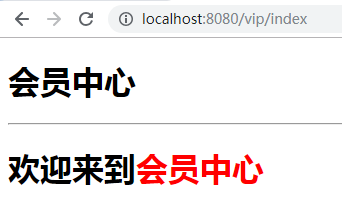
 <!DOCTYPE html>

 <html lang="en" xmlns:th="http://www.thymeleaf.org">

 <head>

     <title>会员中心</title>

 </head>

 <body>

 <h1>会员中心</h1>

 <hr>

 <h1>欢迎来到<span style="color: red;">会员中心</span></h1>

 </body>

 </html>
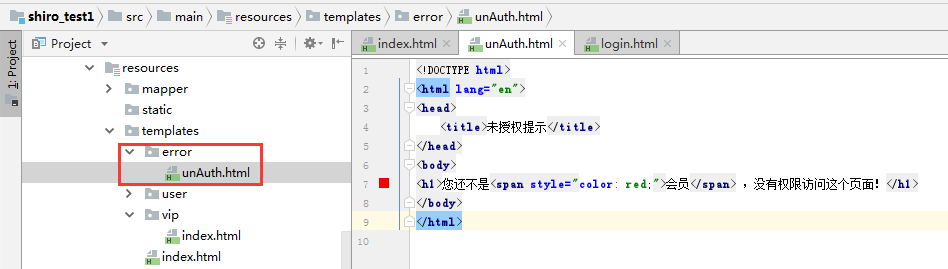
 <!DOCTYPE html>

 <html lang="en">

 <head>

     <title>未授权提示</title>

 </head>

 <body>

 <h1>您还不是<span style="color: red;">会员</span> ,没有权限访问这个页面!</h1>

 </body>

 </html>
下面讲一下@Mapper与@MapperScan这个注解
@Mapper是放在具体的*Mapper.java类上面的,告诉springboot,这是mapper类
而@MapperScan是让springboot去扫描指定包下的mapper类,就不用每个mapper自己添加一个@Mapper注解了,这种方式比较好,因为这里测试只有一个mapper类,就直接用@Mapper了,两个一起用会不会冲突,这里没有测试。

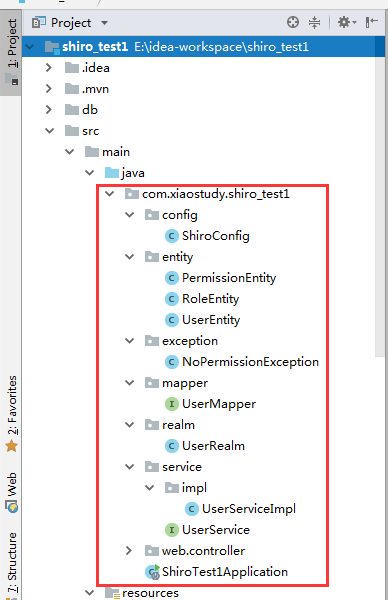
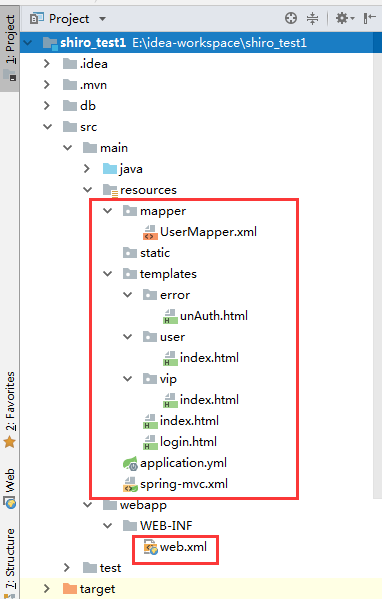
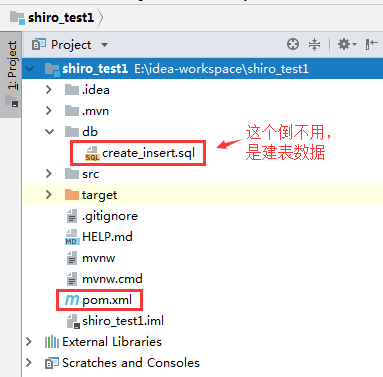
整体目录
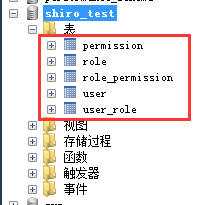
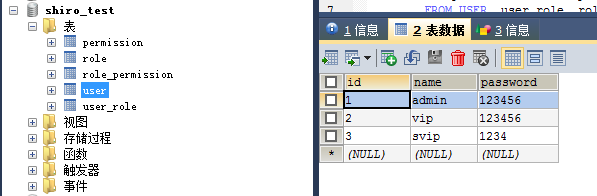
先看一下数据库表

下面是启动测试


参考文章:https://blog.csdn.net/qq_34802416/article/details/84959457
thymeleaf
springboot与shiro和mybatis和mysql的更多相关文章
- SpringBoot框架:使用mybatis连接mysql数据库完成数据访问(二)
一.导入依赖包 1.在创建项目时勾选: 勾选SQL中的JDBC API.MyBatis Framework.MySQL Driver,创建项目后就会自动配置和引入这些包. 2.在pom.xml文件中添 ...
- springboot与shiro在html中使用shiro标签
上一章讲环境搭建 springboot与shiro和mybatis和mysql 现在讲html中怎么使用shiro标签,这里是基于上一章讲的 在pom文件引入依赖 <dependency> ...
- SpringBoot整合Shiro 三:整合Mybatis
搭建环境见: SpringBoot整合Shiro 一:搭建环境 shiro配置类见: SpringBoot整合Shiro 二:Shiro配置类 整合Mybatis 添加Maven依赖 mysql.dr ...
- Java逆向工程SpringBoot + Mybatis Generator + MySQL
Java逆向工程SpringBoot+ Mybatis Generator + MySQL Meven pop.xml文件添加引用: <dependency> <groupId> ...
- SpringBoot 集成Mybatis 连接Mysql数据库
记录SpringBoot 集成Mybatis 连接数据库 防止后面忘记 1.添加Mybatis和Mysql依赖 <dependency> <groupId>org.mybati ...
- 如何用IDEA创建springboot(maven)并且整合mybatis连接mysql数据库和遇到的问题
一.New->Project 二.点击next 三.在Group栏输入组织名,Artifact就是项目名.选择需要的java版本,点击next 四.添加需要的依赖 在这里我们也可以添加sql方面 ...
- 小白的springboot之路(三)、集成mybatis与MySQL
0.前言 mybatis属于半自动的ORM,相比hibernate这种全自动的ORM,兼顾了性能与易用:目前企业项目中,基本都是mybatis的天下:今天就来整合mybatis与MySQL: 1.整合 ...
- 【时区问题】SpringBoot+mybatis查询mysql的datetime类型数据时间差14小时
[时区问题]MyBatis查询MySQL的datetime类型数据时间差14小时 故障解决方式 与数据库连接时,定义时区,避免mybatis框架从mysql获取时区.在连接上加上 serverTime ...
- spring-boot+mybatisPlus+shiro的集成demo 我用了5天
spring-boot + mybatis-plus + shiro 的集成demo我用了五天 关于shiro框架,我还是从飞机哪里听来的,就连小贱都知道,可我母鸡啊.简单百度了下,结论很好上手,比s ...
随机推荐
- mount available
Mount (computing), the process of making a file system accessible mount (Unix), the utility in Unix- ...
- 在Qt Creator中创建C++工程并使用CMake构建项目
创建完毕后,若电脑上没有安装CMake,则无法构建工程, 我用的是绿色版,官网下载地址:https://cmake.org/files/v3.10/cmake-3.10.1-win64-x64.zip ...
- java之异常的捕获及处理
在java中程序的错误主要是语法错误和语义错误(也就是逻辑错误). java中异常处理语句的格式: try{ //有可能出现异常的语句 }catch(异常类 异常对象){ //编写异常的处理语句 }c ...
- mac svn命令 linux同样适用
1.将文件checkout到本地目录svn checkout path(path是服务器上的目录)例如:svn checkout svn://192.168.1.1/pro/domain简写:svn ...
- ios 使用json
1.从https://github.com/stig/json-framework/中下载json框架:json-framework 2.解压下载的包,将class文件夹下的所有文件导入到当前工程下. ...
- poj图论解题报告索引
最短路径: poj1125 - Stockbroker Grapevine(多源最短路径,floyd) poj1502 - MPI Maelstrom(单源最短路径,dijkstra,bellman- ...
- Linux_基于Docker快速搭建个人博客网站
时间:2017年04月28日星期五 说明:基于docker技术,使用jpress开源框架搭建个人博客网站.特别感谢jpress开源项目.系统版本:CentOS 7.2-64bit. 步骤一:准备Doc ...
- 烂笔头——JAVA/JSP
学艺不精,一些小零头放这里备忘 Object[] obj = (Object[])list.get(i);//取list的某个项目 jsp中出现out.println( )和System.out.pr ...
- FFmpeg+FFserver流媒体服务器介绍
ffmpeg和ffserver配合使用可以实现实时的流媒体服务. 一.理解 里边主要有如下四个东西,搞清楚他们之间的关系就差不多明白了. 1. ffmpeg 2. ffserver 3. ...
- codevs-1203
1203 判断浮点数是否相等 题目描述 Description 给出两个浮点数,请你判断这两个浮点数是否相等 输入描述 Input Description 输入仅一行,包含两个浮点数 输出描述 ...