【Dalston】【第一章】 服务治理(Eureka)
Spring Cloud是一系列框架的集合,其基于Spring Boot的开发便利性巧妙地简化了分布式系统基础设施的开发,构建了服务治理(发现注册)、配置中心、消息总线、负载均衡、断路器、数据监控、分布式会话和集群状态管理等功能,为我们提供一整套企业级分布式云应用的完美解决方案。
Spring Cloud包含了多个子项目(针对分布式系统中涉及的多个不同开源产品),比如:Spring Cloud Config、Spring Cloud Netflix、Spring Cloud CloudFoundry、Spring Cloud AWS、Spring Cloud Security、Spring Cloud Commons、Spring Cloud Zookeeper、Spring Cloud CLI等项目。这些项目是Spring将目前各家公司开发的比较成熟、经得起实际考验的服务框架组合起来,通过Spring Boot风格进行再封装屏蔽掉了复杂的配置和实现原理,最终给我们开发者留出了一套简单易懂、易部署和易维护的分布式系统开发工具包。
Spring Cloud 具有特性,以及适用于哪些场景等包含:
- 基于版本的分布式配置管理
- 服务注册与发现
- 路由
- 服务之间调用(依赖)
- 负载均衡
- 断路器
- 全局锁(分布式锁)
- 选主以及集群状态管理
- 分布式消息服务
Spring Cloud的核心是服务治理。而服务治理主要通过整合Netflix的相关产品来实现这方面的功能,也就是Spring Cloud Netflix,在该项目中包括用于服务注册和发现的Eureka,调用断路器Hystrix,调用端负载均衡Ribbon,Rest客户端Feign,智能服务路由Zuul,用于监控数据收集和展示的Spectator、Servo、Atlas,用于配置读取的Archaius和提供Controller层Reactive封装的RxJava。除此之外,针对Feign和RxJava并不是Netiflix的产品,但也被整合到了Spring Cloud Netflix中。
接下来的几篇我将从Spring Cloud Netflix开始讲解如何搭建我们的分布式开发架构。
1. Hello, Spring Cloud!示例工程
我们所要搭建的Hello, Spring Cloud!系统架构图如下:

从结构图上可以看出有一下我们所构建的工程中有三种角色:
- Eureka Server: 服务注册中心,负责服务列表的注册、维护和查询等功能;
- Service Provider: 服务提供方,同时也是一个
Eureka Client,负责将所提供的服务向Eureka Server进行注册、续约和注销等操作。注册时所提供的主要数据包括服务名、机器ip、端口号、域名等,从而能够使服务消费方能够找到; - Service Consumer: 服务消费方,同时也是一个
Eureka Client,同样也会向Eureka Server注册本身所提供的服务。但在本示例工程中更多的是从Eureka Server中获取相应的服务列表,以便能够发起服务调用。
Service Provider(服务提供方)和Service Consumer(服务消费方)并不是一个严格的概念,往往服务消费方也是一个服务提供方,同时服务提供方也可能会调用其它服务方所提供的服务。当然在我们进行微服务构建时还是需要遵守业务层级之间的划分,尽量避免服务之间的循环依赖。
工程结构如下:
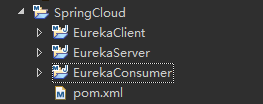
Ok! 既然工程结构和系统架构都清楚了,下面让我们开始撸起袖子写代码。
2. 构建parent工程
笔者在构建项目的时候喜欢先构建一个parent工程,该工程仅用来定义一个pom文件,后续工程的pom文件的皆继承该pom。在该pom中我们将定义各工程所共同使用的第三方依赖及相应版本定义,比如我们接下来的各工程中对Spring Cloud的依赖等。这样我们就可以统一对第三方依赖及基础信息定义进行管理,后续当我们需要升级第三方依赖时,只需要修改一个地方就可以了。
parent pom文件中的内容如下:
<project xmlns="http://maven.apache.org/POM/4.0.0" xmlns:xsi="http://www.w3.org/2001/XMLSchema-instance" xsi:schemaLocation="http://maven.apache.org/POM/4.0.0 http://maven.apache.org/xsd/maven-4.0.0.xsd">
    <modelVersion>4.0.0</modelVersion>
    <groupId>com.sunny</groupId>
    <artifactId>SpringCloud</artifactId>
    <version>0.0.1-SNAPSHOT</version>
    <packaging>pom</packaging>

    <parent>
        <groupId>org.springframework.boot</groupId>
        <artifactId>spring-boot-starter-parent</artifactId>
        <version>1.5.2.RELEASE</version>
    </parent>

    <modules>
        <module>EurekaServer</module>
        <module>EurekaClient</module>
        <module>EurekaConsumer</module>
    </modules>

    <properties>
        <project.build.sourceEncoding>UTF-8</project.build.sourceEncoding>
    </properties>

    <dependencyManagement>
        <dependencies>
            <dependency>
                <groupId>org.springframework.cloud</groupId>
                <artifactId>spring-cloud-dependencies</artifactId>
                <version>Dalston.SR1</version>
                <type>pom</type>
                <scope>import</scope>
            </dependency>
        </dependencies>
    </dependencyManagement>

    <dependencies>
        <dependency>
            <groupId>org.springframework.boot</groupId>
            <artifactId>spring-boot-starter-test</artifactId>
            <scope>test</scope>
        </dependency>
    </dependencies>

    <build>
        <plugins>
            <plugin>
                <groupId>org.apache.maven.plugins</groupId>
                <artifactId>maven-compiler-plugin</artifactId>
                <configuration>
                    <source>1.8</source>
                    <target>1.8</target>
                </configuration>
            </plugin>
        </plugins>
    </build>

</project>
在本系列文章中我们使用的Spring Cloud的版本为:Dalston.SR1,Spring Boot则是1.5.2.RELEASE。
关于
Spring Cloud的命名:由于Spring Cloud是诸多子项目集合的综合项目,原则上由其子项目维护自己的发布版本号,也就是我们常用的版本号,如:1.2.3.RELEASE、1.1.4.RELEASE等。因此Spring Cloud为了避免版本号与其子项目的版本号混淆,所以没有采用版本号的方式,而是采用命名的方式。这些版本名称采用了伦敦地铁站的名字,根据字母表的顺序来对应版本时间顺序。比如,最早的Release版本名称为Angel,第二个Release版本的名称为Brixton,以此类推……。而我们在本系列文章所使用的版本名称为:Dalston.SR1,也就是最新版本。后续版本名称根据项目中公布的分别为:Edgware和Finchley。另,
Dalston.SR1中的SR是service releases的简写,而1则是该版本名称中的第1个版本。具体关于
Spring Cloud版本的命名说明可以参考这里.
3. 构建Eureka Server
3.1 编写pom.xml文件
我们将继承parent项目的pom.xml,并把artifactId定义为:service-discovery。
<project xmlns="http://maven.apache.org/POM/4.0.0" xmlns:xsi="http://www.w3.org/2001/XMLSchema-instance"
    xsi:schemaLocation="http://maven.apache.org/POM/4.0.0 http://maven.apache.org/xsd/maven-4.0.0.xsd">
    <modelVersion>4.0.0</modelVersion>
    <parent>
        <groupId>com.sunny</groupId>
        <artifactId>SpringCloud</artifactId>
        <version>0.0.1-SNAPSHOT</version>
    </parent>
    <artifactId>EurekaServer</artifactId>

    <dependencies>
        <dependency>
            <groupId>org.springframework.cloud</groupId>
            <artifactId>spring-cloud-starter-eureka-server</artifactId>
        </dependency>
    </dependencies>

    <build>
        <plugins>
            <plugin>
                <groupId>org.springframework.boot</groupId>
                <artifactId>spring-boot-maven-plugin</artifactId>
            </plugin>
        </plugins>
    </build>

</project>
这里我们直接继承
parent项目中的pom,所以只需要声明我们需要的新增的spring-cloud-starter-eureka-server依赖即可。
3.2 编写启动类
package com.product;

import org.springframework.boot.autoconfigure.SpringBootApplication;
import org.springframework.boot.builder.SpringApplicationBuilder;
import org.springframework.cloud.netflix.eureka.server.EnableEurekaServer;

@EnableEurekaServer
@SpringBootApplication
public class Application {

    public static void main(String[] args) {
        new SpringApplicationBuilder(Application.class).web(true).run(args);
    }

}
说明: 这里核心就是在启动类上添加
@EnableEurekaServer,声明这是一个Eureka服务器。
3.3 编写配置文件
配置文件在resources目录下,默认名称为:application.properties(本系列中将采用properties文件格式,你也可以使用另外一种格式:yml)。
server.port=8260

eureka.instance.hostname=localhost
eureka.client.register-with-eureka=false
eureka.client.fetch-registry=false
eureka.client.service-url.defaultZone=http://${eureka.instance.hostname}:${server.port}/eureka
这里为什么这么配,暂时先不解释,后续我会进行相关配置参数的解释。
3.4 启动服务器
接下来你可以在你的IDE中启动该服务。当然你也可以将该服务器打包成一个Fat Jar,然后通过java -jar的命令启动,如:
java -jar service-discovery-1.0.0-SNAPSHOT.jar
说明: 如果需要打包成一个Fat Jar你需要修改pom.xml中的配置,增加如下内容:
<build>
    <plugins>
        <plugin>
            <groupId>org.springframework.boot</groupId>
            <artifactId>spring-boot-maven-plugin</artifactId>
        </plugin>
    </plugins>
</build>
增加一个Spring Boot打包插件。这样编译出来的Jar包就可以通过上述命令直接运行。
3.5 查看服务器
你可以直接在浏览器中输入以下地址http://localhost:8260,在笔者的笔记本中界面如下:
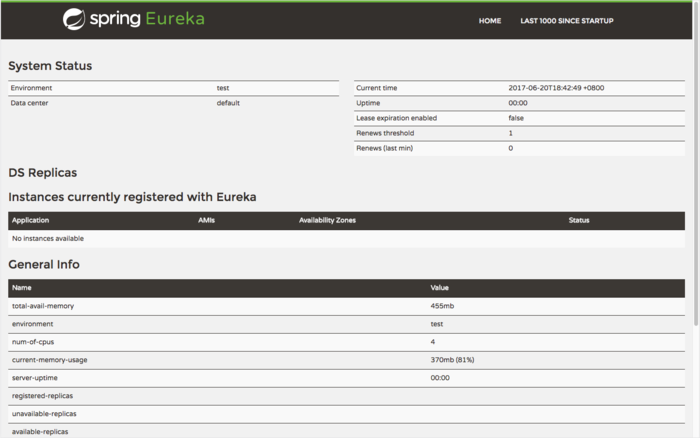
在Instance currently registered with Eureka部分可以看到现在尚未有任何实例注册进来。
4. 构建Eureka Client
Eureka服务器我们已经编写好了,接下来我们就可以编写一个Eureka的客户端了。这个客户端可能是一个服务提供者,也可能是一个服务消费者,甚至两者都是。
我们先编写一个简单的Eureka Client,该客户端提供一个简单的服务,就是调用/hello服务端点(EndPoint)时返回一个字符串Hello, Spring Cloud!。
4.1 编写pom.xml文件
同样,我们继承自parent项目的pom.xml,这里将artifactId定义为:service-hello,也就是提供Hello服务。
<project xmlns="http://maven.apache.org/POM/4.0.0" xmlns:xsi="http://www.w3.org/2001/XMLSchema-instance"
    xsi:schemaLocation="http://maven.apache.org/POM/4.0.0 http://maven.apache.org/xsd/maven-4.0.0.xsd">
    <modelVersion>4.0.0</modelVersion>
    <parent>
        <groupId>com.sunny</groupId>
        <artifactId>SpringCloud</artifactId>
        <version>0.0.1-SNAPSHOT</version>
    </parent>
    <artifactId>EurekaClient</artifactId>

    <dependencies>
        <dependency>
            <groupId>org.springframework.boot</groupId>
            <artifactId>spring-boot-starter-web</artifactId>
        </dependency>
        <dependency>
            <groupId>org.springframework.cloud</groupId>
            <artifactId>spring-cloud-starter-eureka</artifactId>
        </dependency>
    </dependencies>

    <build>
        <plugins>
            <plugin>
                <groupId>org.springframework.boot</groupId>
                <artifactId>spring-boot-maven-plugin</artifactId>
            </plugin>
        </plugins>
    </build>

</project>
4.2 编写启动类
package com.product;

import org.springframework.boot.SpringApplication;
import org.springframework.boot.autoconfigure.SpringBootApplication;
import org.springframework.cloud.client.discovery.EnableDiscoveryClient;

@EnableDiscoveryClient
@SpringBootApplication
public class Application {

    public static void main(String[] args) {
        SpringApplication.run(Application.class, args);
    }

}
说明: 这里与service-discovery的唯一区别就是启动类上注解变成了@EnableDiscoveryClient,声明这是一个Eureka Client。
4.3 编写一个简单的API服务
package com.product.controller;

import org.slf4j.Logger;
import org.slf4j.LoggerFactory;
import org.springframework.beans.factory.annotation.Autowired;
import org.springframework.beans.factory.annotation.Value;
import org.springframework.web.bind.annotation.RequestMapping;
import org.springframework.web.bind.annotation.RequestMethod;
import org.springframework.web.bind.annotation.RestController;

import com.netflix.appinfo.EurekaInstanceConfig;

@RestController
public class HelloEndPoint {
    protected Logger logger = LoggerFactory.getLogger(HelloEndPoint.class);

    @Autowired
    private EurekaInstanceConfig eurekaInstanceConfig;
    @Value("${server.port}")
    private int serverPort = 0;

    @RequestMapping(value = "/hello", method = RequestMethod.GET)
    public String hello() {
        this.logger.info("/hello, instanceId:{}, host:{}", eurekaInstanceConfig.getInstanceId(), eurekaInstanceConfig.getHostName(false));
        return "Hello, Spring Cloud! My port is " + String.valueOf(serverPort);
    }
}
该服务仅提供一个/hello服务端点,调用该服务后将返回一个字符串Hello, Spring Cloud!。
4.4 编写配置文件
server.port=2100

spring.application.name=SERVICE-HELLO

eureka.client.service-url.defaultZone=http://localhost:8260/eureka
spring.application.name必须要设置,服务消费者将通过该名称调用所提供的服务。 eureka.client.service-url也必须设置,表示我们要向那些Eureka服务器进行服务注册,这里可以声明多个Eureka服务器,具体我们将在后面关于Eureka高可用相关章节中进行详细说明。4.5 启动服务器
同样启动该服务器。启动成功后,我们将在控制台上看到这么一句日志:
[DiscoveryClient-InstanceInfoReplicator-0] INFO c.netflix.discovery.DiscoveryClient - DiscoveryClient_SERVICE-HELLO/192.168.0.105:SERVICE-HELLO:2100 - registration status: 204
这时候我们回到浏览器,刷新http://localhost:8260,将会看到如下界面:

说明我们的服务已经在Eureka服务器上注册成功。
5. 构建服务消费者
到上一小节其实一个最简单的Eureka服务器和客户端就已经构建完毕了。为了让我们更能够体会到Eureka所发挥的作用,我们下面来构建一个服务消费者,该服务消费者将调用SERVICE-HELLO所提供的服务。
5.1 编写pom.xml文件
同样,我们继承自parent项目的pom.xml,这里将artifactId定义为:consumer-hello,也就是Hello服务消费者。
<project xmlns="http://maven.apache.org/POM/4.0.0" xmlns:xsi="http://www.w3.org/2001/XMLSchema-instance"
    xsi:schemaLocation="http://maven.apache.org/POM/4.0.0 http://maven.apache.org/xsd/maven-4.0.0.xsd">
    <modelVersion>4.0.0</modelVersion>
    <parent>
        <groupId>com.sunny</groupId>
        <artifactId>SpringCloud</artifactId>
        <version>0.0.1-SNAPSHOT</version>
    </parent>
    <artifactId>EurekaConsumer</artifactId>

    <dependencies>
        <dependency>
            <groupId>org.springframework.boot</groupId>
            <artifactId>spring-boot-starter-web</artifactId>
        </dependency>
        <dependency>
            <groupId>org.springframework.cloud</groupId>
            <artifactId>spring-cloud-starter-eureka</artifactId>
        </dependency>
        <dependency>
            <groupId>org.springframework.cloud</groupId>
            <artifactId>spring-cloud-starter-ribbon</artifactId>
        </dependency>
    </dependencies>

</project>
这里需要注意的是我们除了依赖spring-cloud-starter-eureka,还依赖了Spring Cloud中的另外一个子项目spring-cloud-starter-ribbon,该子项目提供客户端负载均衡功能,可以自动从Eureka服务器中获取服务提供者的地址列表,从而能够发起相应的调用。这个后面我们将详细进行说明,这里先引入进来就可以了。
5.2 编写启动类
package com.product;

import org.springframework.boot.SpringApplication;
import org.springframework.boot.autoconfigure.SpringBootApplication;
import org.springframework.cloud.client.discovery.EnableDiscoveryClient;
import org.springframework.cloud.client.loadbalancer.LoadBalanced;
import org.springframework.context.annotation.Bean;
import org.springframework.web.client.RestTemplate;

@EnableDiscoveryClient
@SpringBootApplication
public class Application {

    @Bean
    @LoadBalanced
    RestTemplate restTemplate() {
        return new RestTemplate();
    }

    public static void main(String[] args) {
        SpringApplication.run(Application.class, args);
    }

}
同Service-Hello一样在启动类上注解了@EnableDiscoveryClient,说明这也是一个Eureka Client。
5.3 编写服务调用
package com.product.controller;

import org.springframework.beans.factory.annotation.Autowired;
import org.springframework.web.bind.annotation.RequestMapping;
import org.springframework.web.bind.annotation.RequestMethod;
import org.springframework.web.bind.annotation.RestController;
import org.springframework.web.client.RestTemplate;

@RestController
public class HelloController {
    @Autowired
    private RestTemplate restTemplate;

    @RequestMapping(value = "/hello", method = RequestMethod.GET)
    public String hello() {
        return restTemplate.getForEntity("http://SERVICE-HELLO/hello", String.class).getBody();
    }
}
该服务调用时一个标准的controller,hello()方法将通过restTemplate调用SERVICE-HELLO/hello服务并返回。
5.4 编写配置文件
server.port=8800

spring.application.name=consumer-hello

eureka.client.service-url.defaultZone=http://localhost:8260/eureka
5.5 启动服务器
启动成功后,同样我们将在控制台上看到这么一句日志:
[DiscoveryClient-InstanceInfoReplicator-0] INFO c.netflix.discovery.DiscoveryClient - DiscoveryClient_CONSUMER-HELLO/192.168.0.105:consumer-hello:8080 - registration status: 204
然后我们回到浏览器,刷新http://localhost:8260,将会看到如下界面:

说明我们的两个服务都已经在Eureka服务器上注册成功。
5.6 验证服务调用
在浏览器中,我们输入http://localhost:8800/hello,也就是该服务所定义的端口server.port=8800,将会看到如下界面:

同时在Service-Hello的控制台中会打印下面一句日志:
[http-nio-2100-exec-1] INFO i.t.c.s.hello.api.HelloEndpoint - /hello, instanceId:cd826dembp.lan:SERVICE-HELLO:2100, host:192.168.1.75
Ok,到这里为止,我们的Hello, Spring Cloud!示例工程搭建完毕。
【Dalston】【第一章】 服务治理(Eureka)的更多相关文章
- 老板让我重构项目,我想首先应该服务治理---eureka服务治理深入浅出
目录 什么是服务治理 Eureka调用过程 Eureka单机注册 Eureka 单机启动 单机注册 集群注册 客户调用 Eureka集群注册 idea 如何同一个项目启动多次 Eureka自我保护 为 ...
- 第三章 服务治理:Spring Cloud Eureka
Spring Cloud Eureka是Spring Cloud Netflix 微服务套件中的一部分,它基于Netflix Eureka做了二次封装,主要负责完成微服务架构中的服务治理功能.Spri ...
- 第三章 服务治理: Spring Cloud Eureka
Spring Cloud Eureka是 Spring Cloud Netflix微服务套件中的一部分,它基于Netflix Eureka做了二次封装,主要负责完成微服务架构中的服务治理功能 服务治理 ...
- SpringCloud微服务实战——第三章服务治理
Spring Cloud Eureka 服务治理 是微服务架构中最核心最基本的模块.用于实现各个微服务实例的自动化注册与发现. 服务注册: 在服务治理框架中,都会构建一个注册中心,每个服务单元向注册中 ...
- springcloud2 (三) 服务治理Eureka及其实现原理
代码地址:https://gitlab.com/showkawa/architect/tree/master/microservice/eurake 基于springcloud2分析eurake知识点 ...
- SpringCloud开发学习总结(三)—— 服务治理Eureka
在最初开始构建微服务系统的时候可能服务并不多,我们可以通过做一些静态配置来完成服务的调用.比如,有两个服务A和B,其中服务A需要调用服务B来完成一个业务操作时,为了实现服务B的高可用,不论采用服务端负 ...
- spring cloud 服务治理 - Eureka
前言 在分布式系统领域有个著名的CAP定理: C——数据一致性: A——服务可用性: P——服务对网络分区故障的容错性. 这三个特性在任何分布式系统中不能同时满足,最多同时满足两个. Zookeepe ...
- springcolud 的学习(四)服务治理. Eureka
什么是服务治理在传统rpc远程调用中,服务与服务依赖关系,管理比较复杂,所以需要使用服务治理,管理服务与服务之间依赖关系,可以实现服务调用.负载均衡.容错等,实现服务发现与注册.服务注册与发现 在服务 ...
- 《Spring Cloud》学习(一) 服务治理!
前言:之前网上学习过Spring Cloud,对于工作上需要是足够了,总归对于一些方面一知半解,最近难得有些闲暇时间,有幸读了崔永超先生的<Spring Cloud 微服务实战>,一方面记 ...
随机推荐
- 三 js语句
/** * Created by Administrator on 2017/12/24. * 1.顺序语句 * 2.选择语句 if else swtich case * 3.循环语句 for whi ...
- 31网络通信之Select模型
多路复用并发模型 -- select #include<sys/select.h> #include<sys/time.h> int select(int maxfd, f ...
- Applegate 方法使用
1. - (void)application:(UIApplication *)application didRegisterUserNotificationSettings:(UIUserNotif ...
- isIos
function IsIOS() { if (/(iPhone|iPad|iPod|iOS)/i.test(navigator.userAgent)) { return true } else { r ...
- Django后端项目----RESTful API
一. 什么是RESTful REST与技术无关,代表的是一种软件架构风格,REST是Representational State Transfer的简称,中文翻译为“表征状态转移” REST从资源的角 ...
- css相关知识点
一.CSS的引入方式 1.1 css的介绍 HTML:超文本标记语言.从语义的角度描述页面结构. CSS:层叠样式表.从审美的角度负责页面样式. JS:JavaScript .从交互的角度描述页面行为 ...
- JS笔记—03(DOM编程)
1. 动态体现:HTML代码加载到浏览器,代码运行后改变文档(DOM树)增删改查节点.例如:ajax(不是新技术,是几个技术的合体js+http后台操作)就是这样的原理 2.js对象(浏览器对象.脚本 ...
- QQ项目
QQ第一部分: 1.数据库 每一个QQ账户必须有 a. state:是否上线的状态 b. IP:正在上线的主机的IP c. port:UDP端口号(用这个和别的好友通讯) 注:TCP连接时,在 ...
- 计算概论(A)/基础编程练习2(8题)/6:数组逆序重放
#include<stdio.h> int main() { // 输入n个整数 ; scanf("%d", &n); // 循环读入元素 while(scan ...
- 通过数组和枚举简化GPIO操作编码(转)
源: 通过数组和枚举简化GPIO操作编码