Spark源码执行逻辑分析【基于案例SparkPi】

一.案例SparkPi代码
- package scala
- import org.apache.spark.sql.SparkSession
- import scala.math.random
- /** Computes an approximation to pi */
- object SparkPi {
- def main(args: Array[String]) {
- val spark = SparkSession
- .builder
- .appName("Spark Pi")
- .master("local[2]")
- .getOrCreate()
- val slices = if (args.length > 0) args(0).toInt else 2
- val n = math.min(100000L * slices, Int.MaxValue).toInt // avoid overflow
- val count = spark.sparkContext.parallelize(1 until n, slices).map { i =>
- val x = random * 2 - 1
- val y = random * 2 - 1
- if (x*x + y*y <= 1) 1 else 0
- }.reduce(_ + _)
- println(s"Pi is roughly ${4.0 * count / (n - 1)}")
- spark.stop()
- }
- }
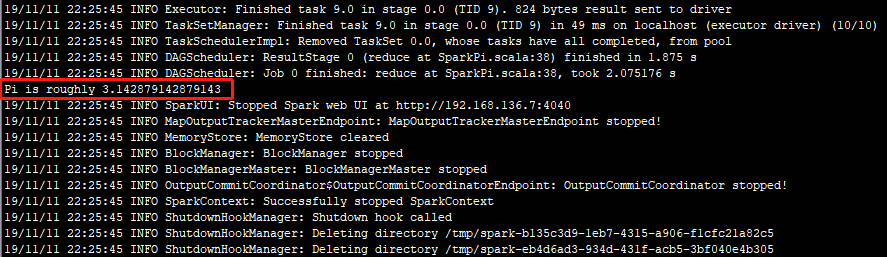
二.执行结果
三.日志分析
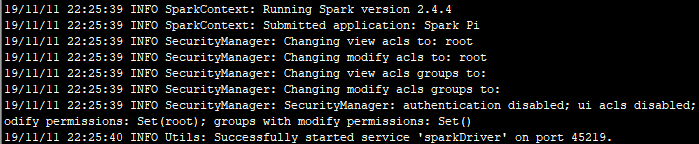
1.在使用提交命令./run-example SparkPi 10执行案例SparkPi时,根据警告信息可知,因为是local【本地模式】,Spark会先检查本地IP。

2.其次,Spark会检测是否配置本地Hadoop及相关log4j等配置,配置会优先加载用户指定的Hadoop,无配置则使用自带的默认Hadoop.

3.基本信息检查完之后,开始启动Spark任务,向服务器注册该任务,启动可视化组件acls,开启服务sparkDriver
4.Spark开始注册任务调度器和资源管理器

5.创建本地临时目录,根据缓存模式缓存数据

6.SparkUI开启成功

7.开启Spark自带的netty web服务器

8.执行计算

9.执行成功,关闭SparkUI、任务调度器、资源管理器

四.源码分析
1.创建SparkSession程序执行入口
val spark = SparkSession.builder.appName("Spark Pi").master("local[2]").getOrCreate()
该程序首先调用对象SparkSession,指定应用的名称,运行方式【集群or单机】以及一些类如使用内存大小,核数等配置。在这个过程中会检测IP【仅限单机模式】和Hadoop配置。对应日志中的1、2、3。
源码如下:
- object SparkSession extends Logging {
- /**
- * Builder for [[SparkSession]].
- */
- @InterfaceStability.Stable
- class Builder extends Logging {
- private[this] val options = new scala.collection.mutable.HashMap[String, String]
- private[this] val extensions = new SparkSessionExtensions
- private[this] var userSuppliedContext: Option[SparkContext] = None
- private[spark] def sparkContext(sparkContext: SparkContext): Builder = synchronized {
- userSuppliedContext = Option(sparkContext)
- this
- }
- /**
- * Sets a name for the application, which will be shown in the Spark web UI.
- * If no application name is set, a randomly generated name will be used.
- *
- * @since 2.0.0
- */
- def appName(name: String): Builder = config("spark.app.name", name)
- /**
- * Sets a config option. Options set using this method are automatically propagated to
- * both `SparkConf` and SparkSession's own configuration.
- *
- * @since 2.0.0
- */
- def config(key: String, value: String): Builder = synchronized {
- options += key -> value
- this
- }
- /**
- * Sets the Spark master URL to connect to, such as "local" to run locally, "local[4]" to
- * run locally with 4 cores, or "spark://master:7077" to run on a Spark standalone cluster.
- *
- * @since 2.0.0
- */
- def master(master: String): Builder = config("spark.master", master)
- /**
- * Enables Hive support, including connectivity to a persistent Hive metastore, support for
- * Hive serdes, and Hive user-defined functions.
- *
- * @since 2.0.0
- */
- def enableHiveSupport(): Builder = synchronized {
- if (hiveClassesArePresent) {
- config(CATALOG_IMPLEMENTATION.key, "hive")
- } else {
- throw new IllegalArgumentException(
- "Unable to instantiate SparkSession with Hive support because " +
- "Hive classes are not found.")
- }
- }
- /**
- * Gets an existing [[SparkSession]] or, if there is no existing one, creates a new
- * one based on the options set in this builder.
- *
- * This method first checks whether there is a valid thread-local SparkSession,
- * and if yes, return that one. It then checks whether there is a valid global
- * default SparkSession, and if yes, return that one. If no valid global default
- * SparkSession exists, the method creates a new SparkSession and assigns the
- * newly created SparkSession as the global default.
- *
- * In case an existing SparkSession is returned, the config options specified in
- * this builder will be applied to the existing SparkSession.
- *
- * @since 2.0.0
- */
- def getOrCreate(): SparkSession = synchronized {
- assertOnDriver()
- // Get the session from current thread's active session.
- var session = activeThreadSession.get()
- if ((session ne null) && !session.sparkContext.isStopped) {
- options.foreach { case (k, v) => session.sessionState.conf.setConfString(k, v) }
- if (options.nonEmpty) {
- logWarning("Using an existing SparkSession; some configuration may not take effect.")
- }
- return session
- }
- // Global synchronization so we will only set the default session once.
- SparkSession.synchronized {
- // If the current thread does not have an active session, get it from the global session.
- session = defaultSession.get()
- if ((session ne null) && !session.sparkContext.isStopped) {
- options.foreach { case (k, v) => session.sessionState.conf.setConfString(k, v) }
- if (options.nonEmpty) {
- logWarning("Using an existing SparkSession; some configuration may not take effect.")
- }
- return session
- }
- // No active nor global default session. Create a new one.
- val sparkContext = userSuppliedContext.getOrElse {
- val sparkConf = new SparkConf()
- options.foreach { case (k, v) => sparkConf.set(k, v) }
- // set a random app name if not given.
- if (!sparkConf.contains("spark.app.name")) {
- sparkConf.setAppName(java.util.UUID.randomUUID().toString)
- }
- SparkContext.getOrCreate(sparkConf)
- // Do not update `SparkConf` for existing `SparkContext`, as it's shared by all sessions.
- }
- // Initialize extensions if the user has defined a configurator class.
- val extensionConfOption = sparkContext.conf.get(StaticSQLConf.SPARK_SESSION_EXTENSIONS)
- if (extensionConfOption.isDefined) {
- val extensionConfClassName = extensionConfOption.get
- try {
- val extensionConfClass = Utils.classForName(extensionConfClassName)
- val extensionConf = extensionConfClass.newInstance()
- .asInstanceOf[SparkSessionExtensions => Unit]
- extensionConf(extensions)
- } catch {
- // Ignore the error if we cannot find the class or when the class has the wrong type.
- case e @ (_: ClassCastException |
- _: ClassNotFoundException |
- _: NoClassDefFoundError) =>
- logWarning(s"Cannot use $extensionConfClassName to configure session extensions.", e)
- }
- }
- session = new SparkSession(sparkContext, None, None, extensions)
- options.foreach { case (k, v) => session.initialSessionOptions.put(k, v) }
- setDefaultSession(session)
- setActiveSession(session)
- // Register a successfully instantiated context to the singleton. This should be at the
- // end of the class definition so that the singleton is updated only if there is no
- // exception in the construction of the instance.
- sparkContext.addSparkListener(new SparkListener {
- override def onApplicationEnd(applicationEnd: SparkListenerApplicationEnd): Unit = {
- defaultSession.set(null)
- }
- })
- }
- return session
- }
- }
- }
2.程序计算逻辑执行
- val count = spark.sparkContext.parallelize(1 until n, slices).map { i =>
val x = random * 2 - 1
val y = random * 2 - 1
if (x*x + y*y <= 1) 1 else 0
}.reduce(_ + _)
首先,程序调用SparkContext对象的parallelize函数,把数据转换为RDD并执行计算。对应日志中的步骤8。
源码如下:
- /** Distribute a local Scala collection to form an RDD.
- *
- * @note Parallelize acts lazily. If `seq` is a mutable collection and is altered after the call
- * to parallelize and before the first action on the RDD, the resultant RDD will reflect the
- * modified collection. Pass a copy of the argument to avoid this.
- * @note avoid using `parallelize(Seq())` to create an empty `RDD`. Consider `emptyRDD` for an
- * RDD with no partitions, or `parallelize(Seq[T]())` for an RDD of `T` with empty partitions.
- * @param seq Scala collection to distribute
- * @param numSlices number of partitions to divide the collection into
- * @return RDD representing distributed collection
- */
- def parallelize[T: ClassTag](
- seq: Seq[T],
- numSlices: Int = defaultParallelism): RDD[T] = withScope {
- assertNotStopped()
- new ParallelCollectionRDD[T](this, seq, numSlices, Map[Int, Seq[String]]())
- }
其中,比较重要的调用是withScope,该函数可以实现执行传入的函数体,以使在该主体中创建的所有RDD具有相同的作用域。
源码如下:
- /**
- * Execute the given body such that all RDDs created in this body will have the same scope.
- * The name of the scope will be the first method name in the stack trace that is not the
- * same as this method's.
- *
- * Note: Return statements are NOT allowed in body.
- */
- private[spark] def withScope[T](
- sc: SparkContext,
- allowNesting: Boolean = false)(body: => T): T = {
- val ourMethodName = "withScope"
- val callerMethodName = Thread.currentThread.getStackTrace()
- .dropWhile(_.getMethodName != ourMethodName)
- .find(_.getMethodName != ourMethodName)
- .map(_.getMethodName)
- .getOrElse {
- // Log a warning just in case, but this should almost certainly never happen
- logWarning("No valid method name for this RDD operation scope!")
- "N/A"
- }
- withScope[T](sc, callerMethodName, allowNesting, ignoreParent = false)(body)
- }
- /**
- * Execute the given body such that all RDDs created in this body will have the same scope.
- *
- * If nesting is allowed, any subsequent calls to this method in the given body will instantiate
- * child scopes that are nested within our scope. Otherwise, these calls will take no effect.
- *
- * Additionally, the caller of this method may optionally ignore the configurations and scopes
- * set by the higher level caller. In this case, this method will ignore the parent caller's
- * intention to disallow nesting, and the new scope instantiated will not have a parent. This
- * is useful for scoping physical operations in Spark SQL, for instance.
- *
- * Note: Return statements are NOT allowed in body.
- */
- private[spark] def withScope[T](
- sc: SparkContext,
- name: String,
- allowNesting: Boolean,
- ignoreParent: Boolean)(body: => T): T = {
- // Save the old scope to restore it later
- val scopeKey = SparkContext.RDD_SCOPE_KEY
- val noOverrideKey = SparkContext.RDD_SCOPE_NO_OVERRIDE_KEY
- val oldScopeJson = sc.getLocalProperty(scopeKey)
- val oldScope = Option(oldScopeJson).map(RDDOperationScope.fromJson)
- val oldNoOverride = sc.getLocalProperty(noOverrideKey)
- try {
- if (ignoreParent) {
- // Ignore all parent settings and scopes and start afresh with our own root scope
- sc.setLocalProperty(scopeKey, new RDDOperationScope(name).toJson)
- } else if (sc.getLocalProperty(noOverrideKey) == null) {
- // Otherwise, set the scope only if the higher level caller allows us to do so
- sc.setLocalProperty(scopeKey, new RDDOperationScope(name, oldScope).toJson)
- }
- // Optionally disallow the child body to override our scope
- if (!allowNesting) {
- sc.setLocalProperty(noOverrideKey, "true")
- }
- body
- } finally {
- // Remember to restore any state that was modified before exiting
- sc.setLocalProperty(scopeKey, oldScopeJson)
- sc.setLocalProperty(noOverrideKey, oldNoOverride)
- }
- }
Spark源码执行逻辑分析【基于案例SparkPi】的更多相关文章
- Spark源码剖析 - SparkContext的初始化(二)_创建执行环境SparkEnv
2. 创建执行环境SparkEnv SparkEnv是Spark的执行环境对象,其中包括众多与Executor执行相关的对象.由于在local模式下Driver会创建Executor,local-cl ...
- Spark 源码分析 -- task实际执行过程
Spark源码分析 – SparkContext 中的例子, 只分析到sc.runJob 那么最终是怎么执行的? 通过DAGScheduler切分成Stage, 封装成taskset, 提交给Task ...
- spark 源码分析之二十一 -- Task的执行流程
引言 在上两篇文章 spark 源码分析之十九 -- DAG的生成和Stage的划分 和 spark 源码分析之二十 -- Stage的提交 中剖析了Spark的DAG的生成,Stage的划分以及St ...
- spark源码分析以及优化
第一章.spark源码分析之RDD四种依赖关系 一.RDD四种依赖关系 RDD四种依赖关系,分别是 ShuffleDependency.PrunDependency.RangeDependency和O ...
- Apache Spark源码剖析
Apache Spark源码剖析(全面系统介绍Spark源码,提供分析源码的实用技巧和合理的阅读顺序,充分了解Spark的设计思想和运行机理) 许鹏 著 ISBN 978-7-121-25420- ...
- Spark源码的编译过程详细解读(各版本)
说在前面的话 重新试多几次.编译过程中会出现下载某个包的时间太久,这是由于连接网站的过程中会出现假死,按ctrl+c,重新运行编译命令. 如果出现缺少了某个文件的情况,则要先清理maven(使用命 ...
- 《Apache Spark源码剖析》
Spark Contributor,Databricks工程师连城,华为大数据平台开发部部长陈亮,网易杭州研究院副院长汪源,TalkingData首席数据科学家张夏天联袂力荐1.本书全面.系统地介绍了 ...
- Spark源码的编译过程详细解读(各版本)(博主推荐)
不多说,直接上干货! 说在前面的话 重新试多几次.编译过程中会出现下载某个包的时间太久,这是由于连接网站的过程中会出现假死,按ctrl+c,重新运行编译命令. 如果出现缺少了某个文件的情况,则要 ...
- Spark 源码解析:TaskScheduler的任务提交和task最佳位置算法
上篇文章< Spark 源码解析 : DAGScheduler中的DAG划分与提交 >介绍了DAGScheduler的Stage划分算法. 本文继续分析Stage被封装成TaskSet, ...
随机推荐
- python-下载网页链接
from urllib.request import urlretrieve url = 'http://images.jupiterimages.com/common/detail/27/68/22 ...
- opencv归一化图像
cv::normalize(src, dst, 0.0, 255.0, cv::NORM_MINMAX);
- Mysql基础知识--概述和索引
一.Mysql概述 MySQL原来隶属于MySQL公司,总部位于瑞典 2008.1.16MySQL被SUN公司收购 2009年SUN公司被Oracle公司收购 常见的软件版本 GA(general A ...
- C++中#define与typedefine的区别
原文链接:https://www.cnblogs.com/fengfengqingqingyangyang/p/3270432.html (1)typedef是用来定义关键字/标识符的别名,并未分配内 ...
- 0x01 Wechall writeup
目录 0x01 Wechall writeup Limited Access Training: Crypto - Caesar II Impossible n'est pas français Tr ...
- 【LG5171】Earthquake
[LG5171Earthquake] 题面 洛谷 题解 本题需要用到类欧几里得算法. 前置知识:类欧几里得 就是求函数\[\varphi (a,b,c,n)=\sum_{i=0}^n \left\lf ...
- asp.net core 3.0 身份认证 替换为自已的提供程序 AuthenticationStateProvider replace to SelfAuthenticationStateProvider
public void ConfigureServices(IServiceCollection services) { // 添加身份验证服务 services.AddAuthorizationCo ...
- FutureTask源码
FutureTask可用于异步获取执行结果或取消执行任务的场景.通过传入Runnable或者Callable的任务给FutureTask,直接调用其run方法或者放入线程池执行,之后可以在外部通过Fu ...
- mysql的简介和使用
mysql简介 数据的所有存储,检索,管理和处理实际上是由数据库软件--DBMS(数据库管理系统)完成的 mysql是一种DBMS,即它是一种数据库软件 mysql工具 mysql是一个客户机-服务器 ...
- Let's Encrypt之acme.sh
前言 Let's Encrypt 是一个证书颁发机构(CA).是由互联网安全研究小组(ISRG,Internet Security Research Group)主导并开发的一个新型数字证书认证机构( ...