安装最新版本的kubernets(+安装插件dashboard)
一、安装docker

// 安装系统工具:

sudo yum install -y yum-utils device-mapper-persistent-data lvm2


// 添加docker yum repo信息:

sudo yum-config-manager --add-repo http://mirrors.aliyun.com/docker-ce/linux/centos/docker-ce.repo


// 更新并安装 docker:

sudo yum makecache fast

sudo yum -y install docker-ce


// 开启docker服务并设置开机启动:

sudo systemctl start docker

sudo systemctl enable docker


// 设置docker:

sudo mkdir -p /etc/docker

cat /etc/docker/daemon.json

{

  "exec-opts": ["native.cgroupdriver=systemd"],  ##这一步一定要有,否则在初始化kubectl的时候很可能会报错

  "bip": "10.20.0.1/16",

  "fixed-cidr": "10.20.0.0/16",

  "mtu": 1500,

  "insecure-registries": ["harbor.eainc.com"]

}


// 重启 docker

sudo systemctl daemon-reload

sudo systemctl restart docker
// 关闭swap,否则会导致kubectl服务启动失败
sudo swapoff -a
二、安装kubelet、kubeadm、kubectl

// 设置kubernetes软件源

cat /etc/yum.repos.d/kubrenetes.repo

 [kubernetes]

 name=Kubernetes Repo

 baseurl=https://mirrors.aliyun.com/kubernetes/yum/repos/kubernetes-el7-x86_64/

 gpgcheck=0

 gpgkey=https://mirrors.aliyun.com/kubernetes/yum/doc/yum-key.gpg


// 安装 kubelet kubeadm kubectl 服务
yum install -y kubelet kubeadm kubectl

// 查看kubectl(很重要)
# kubectl version
 Client Version: version.Info{Major:"1", Minor:"15", GitVersion:"v1.15.0", GitCommit:"e8462b5b5dc2584fdcd18e6bcfe9f1e4d970a529", GitTreeState:"clean", BuildDate:"2019-06-19T16:40:16Z", GoVersion:"go1.12.5", Compiler:"gc", Platform:"linux/amd64"}

// kubectl 的版本是 1.15.0 ,后面docker拉取的kube- 服务也要为1.15.0
三、安装基础镜像
docker pull mirrorgooglecontainers/kube-apiserver:v1.15.0

docker pull mirrorgooglecontainers/kube-controller-manager:v1.15.0

docker pull mirrorgooglecontainers/kube-scheduler:v1.15.0

docker pull mirrorgooglecontainers/kube-proxy:v1.15.0

docker pull mirrorgooglecontainers/pause:3.1

docker pull mirrorgooglecontainers/etcd:3.3.

docker pull coredns/coredns:1.3.

docker pull docker.io/dockerofwj/flannel

docker tag mirrorgooglecontainers/kube-apiserver:v1.15.0 k8s.gcr.io/kube-apiserver:v1.15.0

docker tag mirrorgooglecontainers/kube-controller-manager:v1.15.0 k8s.gcr.io/kube-controller-manager:v1.15.0

docker tag mirrorgooglecontainers/kube-scheduler:v1.15.0 k8s.gcr.io/kube-scheduler:v1.15.0

docker tag mirrorgooglecontainers/kube-proxy:v1.15.0 k8s.gcr.io/kube-proxy:v1.15.0

docker tag mirrorgooglecontainers/pause:3.1 k8s.gcr.io/pause:3.1

docker tag mirrorgooglecontainers/etcd:3.3. k8s.gcr.io/etcd:3.3.

docker tag coredns/coredns:1.3. k8s.gcr.io/coredns:1.3.

docker tag docker.io/dockerofwj/flannel quay.io/coreos/flannel:v0.10.0-amd64

docker image rm mirrorgooglecontainers/kube-apiserver:v1.15.0

docker image rm mirrorgooglecontainers/kube-controller-manager:v1.15.0

docker image rm mirrorgooglecontainers/kube-scheduler:v1.15.0

docker image rm mirrorgooglecontainers/kube-proxy:v1.15.0

docker image rm mirrorgooglecontainers/pause:3.1

docker image rm mirrorgooglecontainers/etcd:3.3.

docker image rm coredns/coredns:1.3.

docker image rm docker.io/dockerofwj/flannel
四、k8s初始化
# kubeadm init --kubernetes-version=v1.15.0 --apiserver-advertise-address=192.168.37.49 --pod-network-cidr=10.10.0.0/16 --ignore-preflight-errors=swap
  ............................
 Your Kubernetes control-plane has initialized successfully!  ### 看到这一行说明初始化成功

To start using your cluster, you need to run the following as a regular user:

  mkdir -p $HOME/.kube

  sudo cp -i /etc/kubernetes/admin.conf $HOME/.kube/config

  sudo chown $(id -u):$(id -g) $HOME/.kube/config

You should now deploy a pod network to the cluster.

Run "kubectl apply -f [podnetwork].yaml" with one of the options listed at:

  https://kubernetes.io/docs/concepts/cluster-administration/addons/

Then you can join any number of worker nodes by running the following on each as root:

kubeadm join 192.168.3.4:6443 --token 21k4ls.cdne6rd3p8p31gpy \

    --discovery-token-ca-cert-hash sha256:dc5a8012c92dae38cedb7581153552d7f8b589bf670b67cb131da144eff83124
### 最后两行很重要,关系到node节点的设置
// 设置环境变量
mkdir -p $HOME/.kube
sudo cp -i /etc/kubernetes/admin.conf $HOME/.kube/config
sudo chown $(id -u):$(id -g) $HOME/.kube/config
// 配置 kubectl并验证
echo "export KUBECONFIG=/etc/kubernetes/admin.conf" >> /etc/profile
source /etc/profile
echo $KUBECONFIG #查看是否输出正确内容
// 设置系统参数
sysctl net.bridge.bridge-nf-call-iptables=1
五、Master安装Pod网络
// Pod网络用于Pod之间进行通信。这里我们选用flannel网络方案
vim kube-flannel.yaml

#添加以下内容

kind: ClusterRole

apiVersion: rbac.authorization.k8s.io/v1beta1

metadata:

  name: flannel

rules:

  - apiGroups:

      - ""

    resources:

      - pods

    verbs:

      - get

  - apiGroups:

      - ""

    resources:

      - nodes

    verbs:

      - list

      - watch

  - apiGroups:

      - ""

    resources:

      - nodes/status

    verbs:

      - patch

---

kind: ClusterRoleBinding

apiVersion: rbac.authorization.k8s.io/v1beta1

metadata:

  name: flannel

roleRef:

  apiGroup: rbac.authorization.k8s.io

  kind: ClusterRole

  name: flannel

subjects:

- kind: ServiceAccount

  name: flannel

  namespace: kube-system

---

apiVersion: v1

kind: ServiceAccount

metadata:

  name: flannel

  namespace: kube-system

---

kind: ConfigMap

apiVersion: v1

metadata:

  name: kube-flannel-cfg

  namespace: kube-system

  labels:

    tier: node

    app: flannel

data:

  cni-conf.json: |

    {

      "name": "cbr0",

      "plugins": [

        {

          "type": "flannel",

          "delegate": {

            "hairpinMode": true,

            "isDefaultGateway": true

          }

        },

        {

          "type": "portmap",

          "capabilities": {

            "portMappings": true

          }

        }

      ]

    }

  net-conf.json: |

    {

      "Network": "10.10.0.0/16",

      "Backend": {

        "Type": "vxlan"

      }

    }

---

apiVersion: extensions/v1beta1

kind: DaemonSet

metadata:

  name: kube-flannel-ds-amd64

  namespace: kube-system

  labels:

    tier: node

    app: flannel

spec:

  template:

    metadata:

      labels:

        tier: node

        app: flannel

    spec:

      hostNetwork: true

      nodeSelector:

        beta.kubernetes.io/arch: amd64

      tolerations:

      - operator: Exists

        effect: NoSchedule

      serviceAccountName: flannel

      initContainers:

      - name: install-cni

        image: quay.io/coreos/flannel:v0.10.0-amd64

        command:

        - cp

        args:

        - -f

        - /etc/kube-flannel/cni-conf.json

        - /etc/cni/net.d/-flannel.conflist

        volumeMounts:

        - name: cni

          mountPath: /etc/cni/net.d

        - name: flannel-cfg

          mountPath: /etc/kube-flannel/

      containers:

      - name: kube-flannel

        image: quay.io/coreos/flannel:v0.10.0-amd64

        command:

        - /opt/bin/flanneld

        args:

        - --ip-masq

        - --kube-subnet-mgr

        resources:

          requests:

            cpu: "100m"

            memory: "50Mi"

          limits:

            cpu: "100m"

            memory: "50Mi"

        securityContext:

          privileged: true

        env:

        - name: POD_NAME

          valueFrom:

            fieldRef:

              fieldPath: metadata.name

        - name: POD_NAMESPACE

          valueFrom:

            fieldRef:

              fieldPath: metadata.namespace

        volumeMounts:

        - name: run

          mountPath: /run

        - name: flannel-cfg

          mountPath: /etc/kube-flannel/

      volumes:

        - name: run

          hostPath:

            path: /run

        - name: cni

          hostPath:

            path: /etc/cni/net.d

        - name: flannel-cfg

          configMap:

            name: kube-flannel-cfg

---

apiVersion: extensions/v1beta1

kind: DaemonSet

metadata:

  name: kube-flannel-ds-arm64

  namespace: kube-system

  labels:

    tier: node

    app: flannel

spec:

  template:

    metadata:

      labels:

        tier: node

        app: flannel

    spec:

      hostNetwork: true

      nodeSelector:

        beta.kubernetes.io/arch: arm64

      tolerations:

      - operator: Exists

        effect: NoSchedule

      serviceAccountName: flannel

      initContainers:

      - name: install-cni

        image: quay.io/coreos/flannel:v0.10.0-arm64

        command:

        - cp

        args:

        - -f

        - /etc/kube-flannel/cni-conf.json

        - /etc/cni/net.d/-flannel.conflist

        volumeMounts:

        - name: cni

          mountPath: /etc/cni/net.d

        - name: flannel-cfg

          mountPath: /etc/kube-flannel/

      containers:

      - name: kube-flannel

        image: quay.io/coreos/flannel:v0.10.0-arm64

        command:

        - /opt/bin/flanneld

        args:

        - --ip-masq

        - --kube-subnet-mgr

        resources:

          requests:

            cpu: "100m"

            memory: "50Mi"

          limits:

            cpu: "100m"

            memory: "50Mi"

        securityContext:

          privileged: true

        env:

        - name: POD_NAME

          valueFrom:

            fieldRef:

              fieldPath: metadata.name

        - name: POD_NAMESPACE

          valueFrom:

            fieldRef:

              fieldPath: metadata.namespace

        volumeMounts:

        - name: run

          mountPath: /run

        - name: flannel-cfg

          mountPath: /etc/kube-flannel/

      volumes:

        - name: run

          hostPath:

            path: /run

        - name: cni

          hostPath:

            path: /etc/cni/net.d

        - name: flannel-cfg

          configMap:

            name: kube-flannel-cfg

---

apiVersion: extensions/v1beta1

kind: DaemonSet

metadata:

  name: kube-flannel-ds-arm

  namespace: kube-system

  labels:

    tier: node

    app: flannel

spec:

  template:

    metadata:

      labels:

        tier: node

        app: flannel

    spec:

      hostNetwork: true

      nodeSelector:

        beta.kubernetes.io/arch: arm

      tolerations:

      - operator: Exists

        effect: NoSchedule

      serviceAccountName: flannel

      initContainers:

      - name: install-cni

        image: quay.io/coreos/flannel:v0.10.0-arm

        command:

        - cp

        args:

        - -f

        - /etc/kube-flannel/cni-conf.json

        - /etc/cni/net.d/-flannel.conflist

        volumeMounts:

        - name: cni

          mountPath: /etc/cni/net.d

        - name: flannel-cfg

          mountPath: /etc/kube-flannel/

      containers:

      - name: kube-flannel

        image: quay.io/coreos/flannel:v0.10.0-arm

        command:

        - /opt/bin/flanneld

        args:

        - --ip-masq

        - --kube-subnet-mgr

        resources:

          requests:

            cpu: "100m"

            memory: "50Mi"

          limits:

            cpu: "100m"

            memory: "50Mi"

        securityContext:

          privileged: true

        env:

        - name: POD_NAME

          valueFrom:

            fieldRef:

              fieldPath: metadata.name

        - name: POD_NAMESPACE

          valueFrom:

            fieldRef:

              fieldPath: metadata.namespace

        volumeMounts:

        - name: run

          mountPath: /run

        - name: flannel-cfg

          mountPath: /etc/kube-flannel/

      volumes:

        - name: run

          hostPath:

            path: /run

        - name: cni

          hostPath:

            path: /etc/cni/net.d

        - name: flannel-cfg

          configMap:

            name: kube-flannel-cfg

---

apiVersion: extensions/v1beta1

kind: DaemonSet

metadata:

  name: kube-flannel-ds-ppc64le

  namespace: kube-system

  labels:

    tier: node

    app: flannel

spec:

  template:

    metadata:

      labels:

        tier: node

        app: flannel

    spec:

      hostNetwork: true

      nodeSelector:

        beta.kubernetes.io/arch: ppc64le

      tolerations:

      - operator: Exists

        effect: NoSchedule

      serviceAccountName: flannel

      initContainers:

      - name: install-cni

        image: quay.io/coreos/flannel:v0.10.0-ppc64le

        command:

        - cp

        args:

        - -f

        - /etc/kube-flannel/cni-conf.json

        - /etc/cni/net.d/-flannel.conflist

        volumeMounts:

        - name: cni

          mountPath: /etc/cni/net.d

        - name: flannel-cfg

          mountPath: /etc/kube-flannel/

      containers:

      - name: kube-flannel

        image: quay.io/coreos/flannel:v0.10.0-ppc64le

        command:

        - /opt/bin/flanneld

        args:

        - --ip-masq

        - --kube-subnet-mgr

        resources:

          requests:

            cpu: "100m"

            memory: "50Mi"

          limits:

            cpu: "100m"

            memory: "50Mi"

        securityContext:

          privileged: true

        env:

        - name: POD_NAME

          valueFrom:

            fieldRef:

              fieldPath: metadata.name

        - name: POD_NAMESPACE

          valueFrom:

            fieldRef:

              fieldPath: metadata.namespace

        volumeMounts:

        - name: run

          mountPath: /run

        - name: flannel-cfg

          mountPath: /etc/kube-flannel/

      volumes:

        - name: run

          hostPath:

            path: /run

        - name: cni

          hostPath:

            path: /etc/cni/net.d

        - name: flannel-cfg

          configMap:

            name: kube-flannel-cfg

---

apiVersion: extensions/v1beta1

kind: DaemonSet

metadata:

  name: kube-flannel-ds-s390x

  namespace: kube-system

  labels:

    tier: node

    app: flannel

spec:

  template:

    metadata:

      labels:

        tier: node

        app: flannel

    spec:

      hostNetwork: true

      nodeSelector:

        beta.kubernetes.io/arch: s390x

      tolerations:

      - operator: Exists

        effect: NoSchedule

      serviceAccountName: flannel

      initContainers:

      - name: install-cni

        image: quay.io/coreos/flannel:v0.10.0-s390x

        command:

        - cp

        args:

        - -f

        - /etc/kube-flannel/cni-conf.json

        - /etc/cni/net.d/-flannel.conflist

        volumeMounts:

        - name: cni

          mountPath: /etc/cni/net.d

        - name: flannel-cfg

          mountPath: /etc/kube-flannel/

      containers:

      - name: kube-flannel

        image: quay.io/coreos/flannel:v0.10.0-s390x

        command:

        - /opt/bin/flanneld

        args:

        - --ip-masq

        - --kube-subnet-mgr

        resources:

          requests:

            cpu: "100m"

            memory: "50Mi"

          limits:

            cpu: "100m"

            memory: "50Mi"

        securityContext:

          privileged: true

        env:

        - name: POD_NAME

          valueFrom:

            fieldRef:

              fieldPath: metadata.name

        - name: POD_NAMESPACE

          valueFrom:

            fieldRef:

              fieldPath: metadata.namespace

        volumeMounts:

        - name: run

          mountPath: /run

        - name: flannel-cfg

          mountPath: /etc/kube-flannel/

      volumes:

        - name: run

          hostPath:

            path: /run

        - name: cni

          hostPath:

            path: /etc/cni/net.d

        - name: flannel-cfg

          configMap:

            name: kube-flannel-cfg
// 创建 flannel 网络
kubectl apply -f kube-flannel.yaml

// 节点加入集群(如果没有部署节点就不需要这一步,执行命令的环境是node节点环境)
kubeadm join 192.168.3.4:6443 --token 21k4ls.cdne6rd3p8p31gpy --discovery-token-ca-cert-hash sha256:dc5a8012c92dae38cedb7581153552d7f8b589bf670b67cb131da144eff83124

六、下载安装Dashboard
// 可以在https://github.com/kubernetes/dashboard/releases上查看最新版本

// 下载dashboard

wget https://raw.githubusercontent.com/kubernetes/dashboard/v1.10.1/src/deploy/recommended/kubernetes-dashboard.yaml

// 修改配置文件

# sed -i 's/k8s.gcr.io/loveone/g' kubernetes-dashboard.yaml

# sed -i '/targetPort:/a\ \ \ \ \ \ nodePort: 30001\n\ \ type: NodePort' kubernetes-dashboard.yaml

// 部署dashboard

# kubectl create -f kubernetes-dashboard.yaml

// 启动相关服务

kubectl get deployment kubernetes-dashboard -n kube-system

kubectl get pods -n kube-system -o wide

kubectl get services -n kube-system

// 查看端口是否启动

netstat -ntlp|grep 30001

七、浏览器测试

由于https证书的问题,暂时只能先通过火狐浏览器增加安全例外的方式访问(亲测,google浏览器不行)

在Firefox浏览器输入Dashboard访问地址:https://192.168.3.4:30001
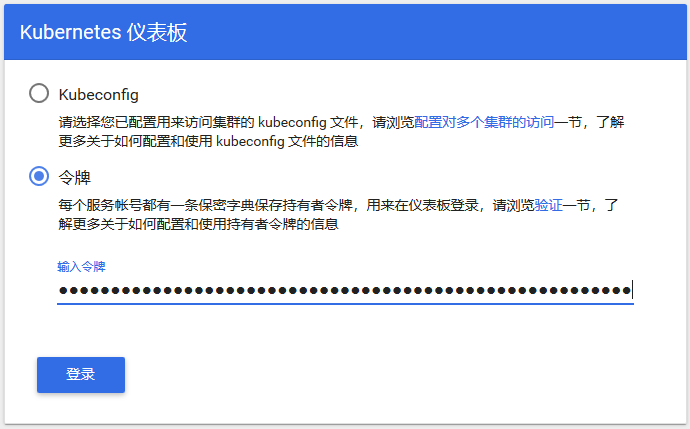
令牌获取方法如下:令牌是token后面的内容
# kubectl create serviceaccount  dashboard-admin -n kube-system

serviceaccount/dashboard-admin created

# kubectl create clusterrolebinding  dashboard-admin --clusterrole=cluster-admin --serviceaccount=kube-system:dashboard-admin

clusterrolebinding.rbac.authorization.k8s.io/dashboard-admin created

# kubectl describe secrets -n kube-system $(kubectl -n kube-system get secret | awk '/dashboard-admin/{print $1}')

Name:         dashboard-admin-token-96mdl

Namespace:    kube-system

Labels:       <none>

Annotations:  kubernetes.io/service-account.name: dashboard-admin

              kubernetes.io/service-account.uid: d70e1d17-94bd--815c-f18dc1c9fd1b

Type:  kubernetes.io/service-account-token

Data

====

ca.crt:      bytes

namespace:   bytes

token:      eyJhbGciOiJSUzI1NiIsImtpZCI6IiJ9.eyJpc3MiOiJrdWJlcm5ldGVzL3NlcnZpY2VhY2NvdW50Iiwia3ViZXJuZXRlcy5pby9zZXJ2aWNlYWNjb3VudC9uYW1lc3BhY2UiOiJrdWJlLXN5c3RlbSIsImt1YmVybmV0ZXMuaW8vc2VydmljZWFjY291bnQvc2VjcmV0Lm5hbWUiOiJkYXNoYm9hcmQtYWRtaW4tdG9rZW4tOTZtZGwiLCJrdWJlcm5ldGVzLmlvL3NlcnZpY2VhY2NvdW50L3NlcnZpY2UtYWNjb3VudC5uYW1lIjoiZGFzaGJvYXJkLWFkbWluIiwia3ViZXJuZXRlcy5pby9zZXJ2aWNlYWNjb3VudC9zZXJ2aWNlLWFjY291bnQudWlkIjoiZDcwZTFkMTctOTRiZC00NzU3LTgxNWMtZjE4ZGMxYzlmZDFiIiwic3ViIjoic3lzdGVtOnNlcnZpY2VhY2NvdW50Omt1YmUtc3lzdGVtOmRhc2hib2FyZC1hZG1pbiJ9.VpiN4MWsZzCPG25m3I77bKq2n4_5b1EnOR5pczlsNpVJC_wDJ6Hjbcm-MzANE2-kVkRTAdYZUAmIOZqadhDePg26ZqV6Z1hOkakyIGHi9h39Y459K2mNYSz9MnWqvRMBRS1qmeZy7jTqP4HwQWR_P0v8RFjyF07-2Y9pDrSVwcmH551WiD-fpoERgLKcSGrb9zYoyMUynWh0peQhIfW8NuDSL3krgY8ZuJ-gHKEAg7nUSt4GNIdCniR-vaCnmT8yC9M0Jv-1vV0dx6f4kTd65dQxuce6K37K_eBZ6mbU9bvqMXBBIurH1w2mly56RxsrONjBiXxluF0uq8GKxDjTfA
认证通过后,登陆dashboard首页如图:

安装最新版本的kubernets(+安装插件dashboard)的更多相关文章
- ubuntu14.04下配置Java环境以及安装最新版本的eclipse
首先是配置JDK 步骤一:下载最新版本的JDK,链接:http://www.oracle.com/technetwork/java/javase/downloads/index.html 步骤二:首先 ...
- 如何安装最新版本的memcached
转载自孟叔的博客: https://learndevops.cn/index.php/2016/06/10/how-to-install-the-latest-version-of-memcache ...
- angular4.0 安装最新版本的nodejs、npm、@angular/cli的方法
在使用ng项目的ui框架时,比如ng-zorro.angular Material,需要安装最新版本的@angular/cli: 配置ng-zorro框架 ng-zorro官网:https://ng. ...
- centos下安装最新版本git(通过master分支下载最新版)
centos6.7下安装最新版本git 本文参考:http://www.01happy.com/centos-install-latest-git/ 按照原博主所提供的思路安装可能会出现下列问题 解决 ...
- Windows7 64位安装最新版本MySQL服务器
Windows7 64位安装最新版本MySQL服务器 近期,一直在研究MySQL数据库,经常修改配置文件,导致MySQL数据库无法使用,不得不反复重装MySQL数据库.以下是在Windows7 64位 ...
- 【工具相关】ionic-通过nmp安装最新版本的 cordova 和 ionic
一,命令行下输入: sudo npm install -g cordova ionic 用来安装最新版本的cordova和ionic. 如下图所示: 二,等待一下,如下图所示. 三,用命令 npm u ...
- 安装最新版本的zabbix
1. 先安装php5.4 最新版本: yum安装php5.4或5.5 https://blog.csdn.net/MarkBoo/article/details/49424183 2. 然后参照官网或 ...
- Ubuntu16.04下安装最新版本的CMake
当前最新版CMake为3.9.1.. Ubuntu中更新cmake到最新版本,过程如下: 1. 卸载已经安装的旧版的CMake[非必需] apt-get autoremove cmake 2. 文 ...
- 【教程】CentOS 7安装 最新版本Docker
博主最近需要安装Docker,步骤如下: Docker安装官方地址:https://docs.docker.com/install/linux/docker-ce/centos/ 以下命令都是在roo ...
随机推荐
- LeetCode 300. 最长上升子序列(Longest Increasing Subsequence)
题目描述 给出一个无序的整形数组,找到最长上升子序列的长度. 例如, 给出 [10, 9, 2, 5, 3, 7, 101, 18], 最长的上升子序列是 [2, 3, 7, 101],因此它的长度是 ...
- golang defer那些坑
defer以下几个特性,使用时需要关注下. 即时的参数传递 调用os.Exit()时defer不会被执行 defer与return的先后顺序 1.即时的参数传递 定义defer时传入的参数,是作为拷贝 ...
- 使用多个fixture和fixture直接互相调用
使用多个fixture 如果用例需要用到多个fixture的返回数据,fixture也可以return一个元组.list或字典,然后从里面取出对应数据. # test_fixture4.py impo ...
- C++编译错误提示 [Error] name lookup of 'i' changed for ISO '
在VC 6 中,i的作用域范围是函数作用域,在for循环外仍能使用变量i 即: for (int i = 0; i < n; ++i) { //…… } cout<< ...
- github局部不同图片合并插件
用于解决游戏开发时,一套图里有局部地区图片不同其他地方相同,导致资源重复过大的问题 地址:https://github.com/Elringus/SpriteDicing
- linux 使用timedatectl 修改时区和时间
使用timedatectl可以进行如下常见操作 1.查看当前时间/日期/时区:timedatectl或者timedatectl status 2.查看所有可用时区:timedatectl list-t ...
- SSM项目——乐淘商城话述1.0
乐淘商城 项目介绍 淘淘网上商城是一个综合性的B2C平台,类似京东商城.天猫商城.会员可以在商城浏览商品.下订单,以及参加各种活动.管理员.运营可以在平台后台管理系统中管理商品.订单.会员等.客服可以 ...
- Shell编程、part5
本节内容 1. 三剑客简介 2. sed命令详解 3. awk命令详解 文本处理三剑客 在 Shell 下使用这些正则表达式处理文本最多的命令有下面几个工具: | 命令 ...
- C++复习练习题:1-1000的完数
一个数如果恰好等于它的因子之和,就被成为完数.例如6的因子为1,2,3,而6=1+2+3,所以6是一个完数.编程找出1-1000之间的所有完数 #include<iostream> usi ...
- 在kali2.0中使用msf图形界面可能会遇到的问题
kali版本:Linux kali 4.9.0-kali3-amd64 #1 SMP Debian 4.9.18-1kali1 (2017-04-04) x86_64 GNU/Linux 编写日期:2 ...