第八讲 shiro 整合 ssm
1、整合ssm并且实现用户登录和菜单权限
2、将shiro整合到ssm中
(1)添加shiro相关jar包
(2)在web.xml中添加shiro配置
     <!-- 新增shiro配置 -->

     <!-- 配置shiroFilter,通过代理来配置,对象由spring容器来创建的,但是交由servlet容器来管理 -->

     <filter>

         <filter-name>shiroFilter</filter-name>

         <filter-class>org.springframework.web.filter.DelegatingFilterProxy</filter-class>

         <init-param>

             <!-- 表示bean的生命周期由servlet管理 -->

             <param-name>targetFilterLifecycle</param-name>

             <param-value>true</param-value>

         </init-param>

         <init-param>

             <!-- 表示在spring容器中bean的id,如果不配置该属性,那么默认和filter的name一致 -->

             <param-name>targetBeanName</param-name>

             <param-value>shiroFilter</param-value>

         </init-param>

     </filter>

     <filter-mapping>

         <filter-name>shiroFilter</filter-name>

         <url-pattern>/*</url-pattern>

     </filter-mapping>

     <!-- shiro结束 -->
(3)添加applicationContext-shiro.xml
<?xml version="1.0" encoding="UTF-8"?>

<beans xmlns="http://www.springframework.org/schema/beans"

    xmlns:xsi="http://www.w3.org/2001/XMLSchema-instance"

    xmlns:context="http://www.springframework.org/schema/context"

    xmlns:aop="http://www.springframework.org/schema/aop"

    xmlns:tx="http://www.springframework.org/schema/tx"

    xsi:schemaLocation="http://www.springframework.org/schema/beans http://www.springframework.org/schema/beans/spring-beans-4.3.xsd

        http://www.springframework.org/schema/context http://www.springframework.org/schema/context/spring-context-4.3.xsd

        http://www.springframework.org/schema/aop http://www.springframework.org/schema/aop/spring-aop-4.3.xsd

        http://www.springframework.org/schema/tx http://www.springframework.org/schema/tx/spring-tx-4.3.xsd">

    <bean id="shiroFilter" class="org.apache.shiro.spring.web.ShiroFilterFactoryBean">

        <!-- 配置securityManager -->

        <property name="securityManager" ref="securityManager"/>

        <!-- 当访问需要认证的资源时,如果没有认证,那么将自动跳转到该url;

        如果不配置该属性,默认情况下货到根路径下的login.jsp -->

        <!-- controller层查看地址配置 -->

        <property name="loginUrl" value="/login"></property>

        <!-- 配置认证成功后,跳转到那个url上,通常不设置,如果不设置,那么默认认证成功后跳转到上一个url -->

        <property name="successUrl" value="/index"></property>

        <!-- 配置用户没有权限访问资源时,跳转的页面     /refuse自定义 -->

        <property name="unauthorizedUrl" value="/refuse"></property>

        <!-- 配置shiro的过滤器链 -->

        <property name="filterChainDefinitions">

            <value>

                <!-- anon表示匿名 -->

                /toLogin=anon

                /login=authc

                /logout=logout
/js/**=anon
/css/**=anon
/images/**=anon
                /**=authc

            </value>

        </property>

    </bean>

    <!-- 配置securityManager -->

    <bean id="securityManager" class="org.apache.shiro.web.mgt.DefaultWebSecurityManager">

        <property name="realm" ref="userRealm"/>

    </bean>

    <bean id="userRealm" class="com.sun123.template.realm.UserRealm"/>

</beans>
(4)修改LoginController中的登录方法
package com.sun123.template.conrtroller;

import javax.servlet.http.HttpServletRequest;

import org.apache.shiro.authc.IncorrectCredentialsException;

import org.apache.shiro.authc.UnknownAccountException;

import org.springframework.stereotype.Controller;

import org.springframework.web.bind.annotation.RequestMapping;

import org.springframework.web.servlet.ModelAndView;

@Controller

public class LoginController {

    @RequestMapping(value = {"/","index"})

    public ModelAndView index() {

        return new ModelAndView("index");

    }

    //去登录页面

    @RequestMapping("/toLogin")

    public ModelAndView toLogin() {

        return new ModelAndView("login");

    }

    //登录

    @RequestMapping("/login")

    public ModelAndView login(HttpServletRequest request) {

        System.out.println("========login=======");

        ModelAndView mv = new ModelAndView("login");

        String className = (String)request.getAttribute("shiroLoginFailure");

        if (UnknownAccountException.class.getName().equals(className)) {

            //抛出自定义异常

            mv.addObject("msg","用户名或密码错误");

        }else if (IncorrectCredentialsException.class.getName().equals(className)) {

            //抛出自定义异常

            mv.addObject("msg","用户名或密码错误");

        } else {

            //抛出自定义异常

            mv.addObject("msg","系统异常");

        }

        return mv;

    }

    //访问被拒绝

    @RequestMapping("/refuse")

    public ModelAndView refuse() {

        return new ModelAndView("refuse");

    }

}
(5)添加自定义Realm:UserRealm.java
package com.sun123.template.realm;

import org.apache.shiro.authc.AuthenticationException;

import org.apache.shiro.authc.AuthenticationInfo;

import org.apache.shiro.authc.AuthenticationToken;

import org.apache.shiro.authc.SimpleAuthenticationInfo;

import org.apache.shiro.authz.AuthorizationInfo;

import org.apache.shiro.realm.AuthorizingRealm;

import org.apache.shiro.subject.PrincipalCollection;

public class UserRealm extends AuthorizingRealm {

    @Override

    public String getName() {

        // TODO Auto-generated method stub

        return "userRealm";

    }

    //获取认证信息

    @Override

    protected AuthenticationInfo doGetAuthenticationInfo(AuthenticationToken token) throws AuthenticationException {

        System.out.println("---------认证----------------");

        String username = token.getPrincipal().toString();

        String pwd = "1111";

        return new SimpleAuthenticationInfo(username,pwd,getName());

    }

    //获取授权信息

    @Override

    protected AuthorizationInfo doGetAuthorizationInfo(PrincipalCollection principal) {

        return null;

    }

}
3、修改UserRealm实现自定义认证
 package com.sun123.template.realm;

 import org.apache.shiro.authc.AuthenticationException;

 import org.apache.shiro.authc.AuthenticationInfo;

 import org.apache.shiro.authc.AuthenticationToken;

 import org.apache.shiro.authc.SimpleAuthenticationInfo;

 import org.apache.shiro.authz.AuthorizationInfo;

 import org.apache.shiro.realm.AuthorizingRealm;

 import org.apache.shiro.subject.PrincipalCollection;

 import org.springframework.beans.factory.annotation.Autowired;

 import com.sun123.template.entity.User;

 import com.sun123.template.service.UserService;

 public class UserRealm extends AuthorizingRealm {

     @Autowired

     private UserService userService;

     @Override

     public String getName() {

         // TODO Auto-generated method stub

         return "userRealm";

     }

     //获取认证信息

     @Override

     protected AuthenticationInfo doGetAuthenticationInfo(AuthenticationToken token) throws AuthenticationException {

         System.out.println("---------认证----------------");

         String username = token.getPrincipal().toString();

         User user = userService.findByUserName(username);

         return new SimpleAuthenticationInfo(user,user.getPassword(),getName());

     }

     //获取授权信息

     @Override

     protected AuthorizationInfo doGetAuthorizationInfo(PrincipalCollection principal) {

         return null;

     }

 }
4、凭证匹配器配置
     <!-- 配置自定义realm -->

     <bean id="userRealm" class="com.sun123.template.realm.UserRealm">

         <property name="credentialsMatcher" ref="credentialsMatcher" />

     </bean>

     <!-- 配置凭证匹配器 -->

     <bean id="credentialsMatcher"

         class="org.apache.shiro.authc.credential.HashedCredentialsMatcher">

         <property name="hashAlgorithmName" value="md5" />

         <!-- 迭代次数 -->

         <property name="hashIterations" value="2" />

     </bean>
UserRealm.java要相应改变
 package com.sun123.template.realm;

 import org.apache.shiro.authc.AuthenticationException;

 import org.apache.shiro.authc.AuthenticationInfo;

 import org.apache.shiro.authc.AuthenticationToken;

 import org.apache.shiro.authc.SimpleAuthenticationInfo;

 import org.apache.shiro.authz.AuthorizationInfo;

 import org.apache.shiro.realm.AuthorizingRealm;

 import org.apache.shiro.subject.PrincipalCollection;

 import org.apache.shiro.util.ByteSource;

 import org.springframework.beans.factory.annotation.Autowired;

 import com.sun123.template.entity.User;

 import com.sun123.template.service.UserService;

 public class UserRealm extends AuthorizingRealm {

     @Autowired

     private UserService userService;

     @Override

     public String getName() {

         // TODO Auto-generated method stub

         return "userRealm";

     }

     //获取认证信息

     @Override

     protected AuthenticationInfo doGetAuthenticationInfo(AuthenticationToken token) throws AuthenticationException {

         System.out.println("---------认证----------------");

         String username = token.getPrincipal().toString();

         User user = userService.findByUserName(username);

         return new SimpleAuthenticationInfo(user,user.getPassword(),ByteSource.Util.bytes(user.getPasswordSalt()),getName());

     }

     //获取授权信息

     @Override

     protected AuthorizationInfo doGetAuthorizationInfo(PrincipalCollection principal) {

         return null;

     }

 }
5、logout配置,默认退出后跳转到根路径下,如果需要改变则需重新配置logout过滤器,过滤器的id不能改变,只能为logout
     <bean id="shiroFilter"

         class="org.apache.shiro.spring.web.ShiroFilterFactoryBean">

         <!-- 配置securityManager -->

         <property name="securityManager" ref="securityManager" />

         <!-- 当访问需要认证的资源时,如果没有认证,那么将自动跳转到该url; 如果不配置该属性,默认情况下货到根路径下的login.jsp -->

         <!-- controller层查看地址配置 -->

         <property name="loginUrl" value="/login"></property>

         <!-- 配置认证成功后,跳转到那个url上,通常不设置,如果不设置,那么默认认证成功后跳转到上一个url -->

         <property name="successUrl" value="/index"></property>

         <!-- 配置用户没有权限访问资源时,跳转的页面 /refuse自定义 -->

         <property name="unauthorizedUrl" value="/refuse"></property>

         <!-- 配置shiro的过滤器链

             logout默认退出后跳转到根路径下,可以重新指定

          -->

         <property name="filterChainDefinitions">

             <value>

                 <!-- anon表示匿名 -->

                 /toLogin=anon

                 /login=authc

                 /logout=logout

                 /js/**=anon

                 /css/**=anon

                 /images/**=anon

                 /**=authc

             </value>

         </property>

     </bean>

     <!-- 配置authc过滤器(用户名和密码不使用默认配置username,password) -->

     <bean id="authc" class="org.apache.shiro.web.filter.authc.FormAuthenticationFilter">

         <property name="usernameParam" value="name"/>

         <property name="passwordParam" value="pwd"/>

     </bean>

     <!-- 配置logout过滤器 -->

     <bean id="logout" class="org.apache.shiro.web.filter.authc.LogoutFilter">

         <property name="redirectUrl" value="/toLogin"/>

     </bean>
6、改变登录时的表单域名称,需要重新配置authc过滤器
     <bean id="shiroFilter"

         class="org.apache.shiro.spring.web.ShiroFilterFactoryBean">

         <!-- 配置securityManager -->

         <property name="securityManager" ref="securityManager" />

         <!-- 当访问需要认证的资源时,如果没有认证,那么将自动跳转到该url; 如果不配置该属性,默认情况下货到根路径下的login.jsp -->

         <!-- controller层查看地址配置 -->

         <property name="loginUrl" value="/login"></property>

         <!-- 配置认证成功后,跳转到那个url上,通常不设置,如果不设置,那么默认认证成功后跳转到上一个url -->

         <property name="successUrl" value="/index"></property>

         <!-- 配置用户没有权限访问资源时,跳转的页面 /refuse自定义 -->

         <property name="unauthorizedUrl" value="/refuse"></property>

         <!-- 配置shiro的过滤器链

             logout默认退出后跳转到根路径下,可以重新指定

          -->

         <property name="filterChainDefinitions">

             <value>

                 <!-- anon表示匿名 -->

                 /toLogin=anon

                 /login=authc

                 /logout=logout

                 /js/**=anon

                 /css/**=anon

                 /images/**=anon

                 /**=authc

             </value>

         </property>

     </bean>

     <!-- 配置authc过滤器(用户名和密码不使用默认配置username,password) -->

     <bean id="authc" class="org.apache.shiro.web.filter.authc.FormAuthenticationFilter">

         <property name="usernameParam" value="name"/>

         <property name="passwordParam" value="pwd"/>

     </bean>
登录页面的改变:
 <form action="login" method="post">

 <!--     username:<input type="text" name="username"><br/>

     password:<input type="password" name="password"><br/> -->

     username:<input type="text" name="name"><br/>

     password:<input type="password" name="pwd"><br/>

     <input type="submit" value="login">

 </form>
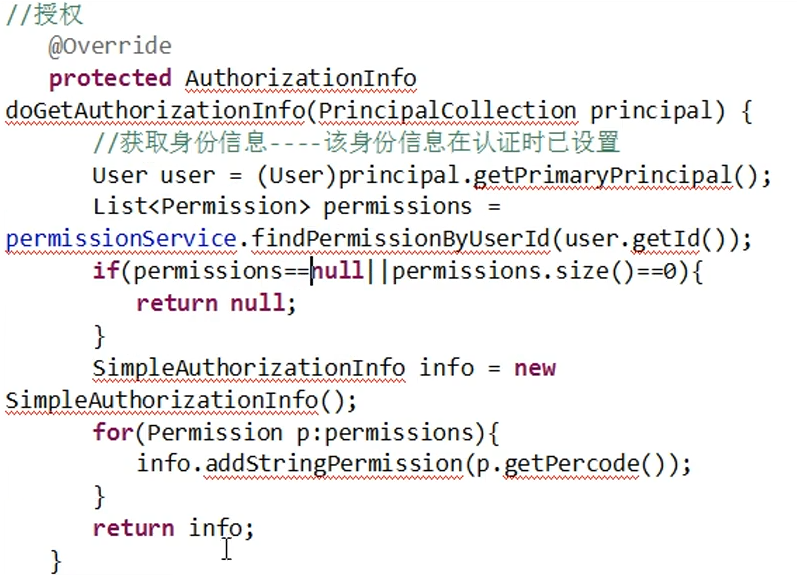
7、授权
(1)修改自定义Realm进行权限检查
(2)在spring-mvc的配置文件中,添加AOP代理,并且添加异常处理
     <!-- 开启AOP代理 -->

     <aop:config proxy-target-class="true"></aop:config>

     <!-- 开启Shiro注解支持 -->

     <bean

         class="org.apache.shiro.spring.security.interceptor.AuthorizationAttributeSourceAdvisor">

         <property name="securityManager" ref="securityManager" />

     </bean>
在controller的处理方法中,添加权限检测的注解

在jsp页面中,添加按钮权限检测,首先需要导入shiro的标签库

在需要检查权限的地方,使用shiro标签

8、缓存
每次检查权限都会到数据库中获取权限,这样效率很低。可以通过设置缓存来解决该问题。Shiro可以和ehcache或者redis集成。这里使用ehcache来缓存数据。
(1)将ehcache,jar导入系统。
(2)shiro默认集成了一个ehcache的配置文件。也可以自己添加一个进行配置,放入resources下。
ehcache.xml:
 <ehcache>

     <diskStore path="java.io.tmpdir/shiro-ehcache"/>

     <defaultCache

             maxElementsInMemory="10000"

             eternal="false"

             timeToIdleSeconds="120"

             timeToLiveSeconds="120"

             overflowToDisk="false"

             diskPersistent="false"

             diskExpiryThreadIntervalSeconds="120"

             />

 </ehcache>
(3)在applicationContext-shiro.xml中,添加cacheManager的配置
     <!-- 配置securityManager -->

     <bean id="securityManager"

         class="org.apache.shiro.web.mgt.DefaultWebSecurityManager">

         <property name="realm" ref="userRealm" />

         <property name="cacheManager" ref="cacheManager"></property>

     </bean>

     <!-- 配置缓存管理器 -->

     <bean id="cacheManager" class="org.apache.shiro.cache.ehcache.EhCacheManager">

         <property name="cacheManagerConfigFile" value="classpath:ehcache.xml"></property>

     </bean>
(4)如果在运行过程中,主体的权限发生了改变,那么应该从spring容器中调用realm中的清理缓存方法,进行清理。
UserRealm.java中添加清理缓存方法
     //清理缓存方法

     protected void clearCache() {

         Subject subject = SecurityUtils.getSubject();

         super.clearCache(subject.getPrincipals());

     }
9、会话管理
     <!-- 配置securityManager -->

     <bean id="securityManager"

         class="org.apache.shiro.web.mgt.DefaultWebSecurityManager">

         <property name="realm" ref="userRealm" />

         <property name="cacheManager" ref="cacheManager"/>

         <property name="sessionManager" ref="sessionManager"/>

     </bean>

     <!-- 配置缓存管理器 -->

     <bean id="cacheManager" class="org.apache.shiro.cache.ehcache.EhCacheManager">

         <property name="cacheManagerConfigFile" value="classpath:ehcache.xml"></property>

     </bean>

     <!-- 配置会话管理器 -->

     <bean id="sessionManager" class="org.apache.shiro.web.session.mgt.DefaultWebSessionManager">

         <!-- 失效时间单位是毫秒 -->

         <property name="globalSessionTimeout" value="300000"/>

         <!-- 删除无效session -->

         <property name="deleteInvalidSessions" value="true"/>

     </bean>
10、记住我
(1)将用户类实现序列化接口,该类的引用类也必须实现序列化接口
(2)设置登录时表单中“记住我”的域名
     <!-- 配置authc过滤器(用户名和密码不使用默认配置username,password) -->

     <bean id="authc" class="org.apache.shiro.web.filter.authc.FormAuthenticationFilter">

         <property name="usernameParam" value="name"/>

         <property name="passwordParam" value="pwd"/>

         <property name="rememberMeParam" value="rememberMe"/>

     </bean>
(3)设置“记住我”管理器
     <!-- 配置securityManager -->

     <bean id="securityManager"

         class="org.apache.shiro.web.mgt.DefaultWebSecurityManager">

         <property name="realm" ref="userRealm" />

         <property name="cacheManager" ref="cacheManager"/>

         <property name="sessionManager" ref="sessionManager"/>

         <property name="rememberMeManager" ref="rememberMeManager"/>

     </bean>

     <!-- 配置缓存管理器 -->

     <bean id="cacheManager" class="org.apache.shiro.cache.ehcache.EhCacheManager">

         <property name="cacheManagerConfigFile" value="classpath:ehcache.xml"></property>

     </bean>

     <!-- 配置会话管理器 -->

     <bean id="sessionManager" class="org.apache.shiro.web.session.mgt.DefaultWebSessionManager">

         <!-- 失效时间单位是毫秒 -->

         <property name="globalSessionTimeout" value="300000"/>

         <!-- 删除无效session -->

         <property name="deleteInvalidSessions" value="true"/>

     </bean>

     <!-- 记住我配置 -->

     <bean id="rememberMeManager" class="org.apache.shiro.web.mgt.CookieRememberMeManager">

         <property name="cookie" ref="rememberMeCookie"></property>

     </bean>

     <bean id="rememberMeCookie" class="org.apache.shiro.web.servlet.SimpleCookie">

         <!-- 设置cookie存活时间    保存7天 -->

         <property name="maxAge" value="604800"/>

         <!-- 设置cookie的名称 -->

         <property name="name" value="rememberMe"/>

     </bean>

     <!-- 记住我配置结束 -->
(4)在过滤器链中配置哪些资源通过记住我就可以再次访问
         <!-- 配置shiro的过滤器链

             logout默认退出后跳转到根路径下,可以重新指定

          -->

         <property name="filterChainDefinitions">

             <value>

                 <!-- anon表示匿名 -->

                 /toLogin=anon

                 /login=authc

                 /logout=logout

                 /js/**=anon

                 /css/**=anon

                 /images/**=anon

                 /easyui/**=anon

  /index=user

                 /**=authc

             </value>

         </property>
(5)jsp页面设置
 <form action="login" method="post">

 <!--     username:<input type="text" name="username"><br/>

     password:<input type="password" name="password"><br/> -->

     username:<input type="text" name="name"><br/>

     password:<input type="password" name="pwd"><br/>

     <input type="checkbox" name="rememberMe">记住我<br/>

     <input type="submit" value="login">

 </form>
第八讲 shiro 整合 ssm的更多相关文章
- shiro权限控制(一):shiro介绍以及整合SSM框架
shiro安全框架是目前为止作为登录注册最常用的框架,因为它十分的强大简单,提供了认证.授权.加密和会话管理等功能 . shiro能做什么? 认证:验证用户的身份 授权:对用户执行访问控制:判断用户是 ...
- shiro框架整合ssm框架
下面我通过一个web的maven项目来讲解如何将shiro整合ssm框架,具体结构如下图 一.引入依赖的jar包 <?xml version="1.0" encoding=& ...
- 快速搭建springboot框架以及整合ssm+shiro+安装Rabbitmq和Erlang、Mysql下载与配置
1.快速搭建springboot框架(在idea中): file–>new project–>Spring Initializr–>next–>然后一直下一步. 然后复制一下代 ...
- Shiro 整合SpringMVC 并且实现权限管理
Apache Shiro是Java的一个安全框架.目前,使用Apache Shiro的人越来越多,因为它相当简单,对比Spring Security,可能没有Spring Security做的功能强大 ...
- Shiro 整合SpringMVC 并且实现权限管理,登录和注销
Apache Shiro是Java的一个安全框架.目前,使用Apache Shiro的人越来越多,因为它相当简单,对比Spring Security,可能没有Spring Security做的功能强大 ...
- Shiro 整合SpringMVC 并实现权限管理,登录和注销
Shiro 整合SpringMVC 并且实现权限管理,登录和注销 Apache Shiro是Java的一个安全框架.目前,使用Apache Shiro的人越来越多,因为它相当简单,对比Spring S ...
- Spring与Shiro整合 加载权限表达式
Spring与Shiro整合 加载权限表达式 作者 : Stanley 罗昊 [转载请注明出处和署名,谢谢!] 如何加载权限表达式 我们在上章内容中画了一张图,里面有三个分项,用户 角色 权限: 那 ...
- Spring与Shiro整合 静态注解授权
Spring与Shiro整合 静态注解授权 作者 : Stanley 罗昊 [转载请注明出处和署名,谢谢!] 使用Shiro的种类 首先,Shiro的授权方式共有三种: 1.编程式授权(不推荐) 2. ...
- Solr基础知识三(整合SSM)
前两篇讲了solr安装和导入数据,这篇讲如何整合到SSM中. 一.整合SSM 1.1 引入依赖 1.2 初始化solr 1.3 写service 1.4 写控制层 1.5 查询 二.IK分词器 2.1 ...
随机推荐
- Springboot 构建http服务,返回的http行是'HTTP/1.1 200' 无状态码描述 客户端解析错误
————————————————————————————————————————— *** 响应的数据格式 HTTP/1.1 200 OK Server: Apache-Coyote/1.1 A ...
- [CSP-S模拟测试]:简单的括号序列(组合数)
题目传送门(内部题82) 输入格式 一行一个字符串$ss$,保证$ss$中只包含$'('$和$')'$. 输出格式 一行一个整数,表示满足要求的子序列数对$10^9+7$的结果. 样例 样例输入1: ...
- Django基础之二(URL路由)
URL路由 简介 对于高质量的web应用来说,使用简洁,优雅的URL路由是一个值得尊重的细节,Django可以随心所欲的设计URL,不受框架的约束 为了给一个应用设计URL,你需要一个Python模块 ...
- centos64位编译32位程序
test.c #include <stdio.h> int main() { printf("sizeof long is %d\n",sizeof(long)); ; ...
- webpack插件之htmlWebpackPlugin
webpack插件之htmlWebpackPlugin webpack插件 自动化 htmlWebpackPlugin 由于webpack已经帮我们处理好js之间的依赖关系,现在我们可以忽略js的加 ...
- 歌手详情数据处理和Song类的封装
我们现在每首歌曲的数据都是这样的 我们需要在这个数据里面去提取我们需要的部分,来构造成我们需要的数据对象 那我们要和创建singer.js一样 同样也要创建song.js类 我们还要获取到每首歌对应 ...
- nginx启动脚本和配置文件
1.编写Nginx启动脚本,并加入系统服务 vim /etc/init.d/nginx并在其中写入如下内容:#!/bin/bash# chkconfig: - 30 21# description: ...
- java 发送 http post 和 get 请求(利用unirest)
调用服务器端的接口在前端调用,但是我们也会经常遇到在服务器后端调用接口的情况,网上的例子大部分都是用 jdk 原生的 URL realUrl = new URL(url); URLConnection ...
- 超详细 SpringMVC @RequestMapping 注解使用技巧
@RequestMapping 是 Spring Web 应用程序中最常被用到的注解之一.这个注解会将 HTTP 请求映射到 MVC 和 REST 控制器的处理方法上. 在这篇文章中,你将会看到 @R ...
- Linux iptables 防火墙常用规则
iptables 安装 yum install iptables iptables 规则清除 iptables -F iptables -X iptables -Z 开放指定的端口允许本地回环接口(即 ...