博客1--tensorflow的图像基本处理操作
话不多,具体内容在开源中国里我的博客:https://my.oschina.net/u/3770644
代码:
#!/usr/bin/env python
# -*- coding:utf-8 -*-
#导入必要包
import matplotlib.pyplot as plt
import tensorflow as tf
#从本地磁盘读取图像数据
image_raw_data = tf.gfile.FastGFile("C:/path/to/picture.jpg", 'rb').read()
#创建会话,使用tf.image.decode_jpeg 解码jpg格式图片 tf.image.decode_png解码png格式图片
with tf.Session() as sess:
img_data = tf.image.decode_jpeg(image_raw_data)
#在神经网络处理图像时,使用的数据都是实数类型,而图片的像素取值为0-255,所以需要先进行0-1值域的转化
img_data1 = tf.image.convert_image_dtype(img_data, dtype=tf.float32)
#调整图片的大小,参数说明:图像,调整大小,使用算法 0-双线性插值法 1-最近邻居法 2-双三次插值法 3-面积插值法
resized1 = tf.image.resize_images(img_data1, [300, 300], method=0)
resized2 = tf.image.resize_images(img_data1, [300, 300], method=1)
resized3 = tf.image.resize_images(img_data1, [300, 300], method=2)
resized4 = tf.image.resize_images(img_data1, [300, 300], method=3)
#以图片的剪裁实现图片大小的调整
croped = tf.image.resize_image_with_crop_or_pad(img_data1, 500, 500)
padded = tf.image.resize_image_with_crop_or_pad(img_data1, 2000, 2000)
#以图像的比例0-1调整图像的大小. 指定区域图像的裁剪、填充tf.image.crop_to_bounding_box \ tf.image.pad_to_bounding_box
central_cropped = tf.image.central_crop(img_data1, 0.5)
#图像翻转
flipped1 = tf.image.flip_up_down(img_data1)
flipped2 = tf.image.flip_left_right(img_data1)
flipped3 = tf.image.transpose_image(img_data1)
#随机概率翻转
flipped4 = tf.image.random_flip_up_down(img_data1)
flipped5 = tf.image.random_flip_left_right(img_data1)
#亮度的调整
adjusted1 = tf.image.adjust_brightness(img_data1, -0.5)
adjusted2 = tf.image.adjust_brightness(adjusted1, 0.8)
adjusted3 = tf.clip_by_value(adjusted2, 0.0, 1.0) #截断,防止亮度调整过度,拉回0-1
#对比度的调整
adjusted4 = tf.image.random_contrast(img_data1, 0.5, 2) #随机0.5-2
#色相的调整
adjusted5 = tf.image.adjust_hue(img_data1, 0.5)
adjusted6 = tf.image.random_hue(img_data1, 0.4) #随机0-0.8
#饱和度调整
adjusted7 = tf.image.adjust_saturation(img_data1, 5)
adjusted8 = tf.image.random_saturation(img_data1, 2, 10)
#标准化
adjusted9 = tf.image.per_image_standardization(img_data1)
#标注框tf.image.draw_bounding_boxes函数需要图像矩阵输入为实数tf.image.convert_image_dtype(img_data),且是一个4维的矩阵batch,所以需要矩阵加一
img_data2 = tf.image.resize_images(img_data1, [250, 150], method=1)
batched = tf.expand_dims(tf.image.convert_image_dtype(img_data2, tf.float32), 0) #数据处理
boxs = tf.constant([[[0.05, 0.05, 0.9, 0.7], [0.35, 0.47, 0.5, 0.56]]]) #定义框的位置--比例定义坐标起止点
result = tf.image.draw_bounding_boxes(batched, boxs)
result = tf.reduce_sum(result, 0) #降维处理
#tf.image.sample_distroted_bounding_box完成随机图像截取
boxes = tf.constant([[[0.05, 0.05, 0.9, 0.7], [0.32, 0.47, 0.5, 0.56]]])
begin, size, bbox_for_draw = tf.image.sample_distorted_bounding_box(tf.shape(img_data2), bounding_boxes=boxes, min_object_covered=0.4) ##框,框中比例
batched1 = tf.expand_dims(tf.image.convert_image_dtype(img_data2, tf.float32), 0)
image_with_box = tf.image.draw_bounding_boxes(batched1, bbox_for_draw)
image_with_box = tf.reduce_sum(image_with_box, 0) #
distorted_image = tf.slice(img_data1, begin, size)
distorted_image = tf.reduce_sum(distorted_image, 0) #
#多张图片在一起打开展示
plt.figure()
plt.subplot(5, 6, 1)
plt.imshow(img_data.eval())
plt.subplot(5, 6, 2)
plt.imshow(resized1.eval())
plt.subplot(5, 6, 3)
plt.imshow(resized2.eval())
plt.subplot(5, 6, 4)
plt.imshow(resized3.eval())
plt.subplot(5, 6, 5)
plt.imshow(resized4.eval())
plt.subplot(5, 6, 6)
plt.imshow(croped.eval())
plt.subplot(5, 6, 7)
plt.imshow(padded.eval())
plt.subplot(5, 6, 8)
plt.imshow(central_cropped.eval())
plt.subplot(5, 6, 9)
plt.imshow(flipped1.eval())
plt.subplot(5, 6, 10)
plt.imshow(flipped2.eval())
plt.subplot(5, 6, 11)
plt.imshow(flipped3.eval())
plt.subplot(5, 6, 12)
plt.imshow(flipped4.eval())
plt.subplot(5, 6, 13)
plt.imshow(flipped5.eval())
plt.subplot(5, 6, 14)
plt.imshow(adjusted1.eval())
plt.subplot(5, 6, 15)
plt.imshow(adjusted2.eval())
plt.subplot(5, 6, 16)
plt.imshow(adjusted3.eval())
plt.subplot(5, 6, 17)
plt.imshow(adjusted4.eval())
plt.subplot(5, 6, 18)
plt.imshow(adjusted5.eval())
plt.subplot(5, 6, 19)
plt.imshow(adjusted6.eval())
plt.subplot(5, 6, 20)
plt.imshow(adjusted7.eval())
plt.subplot(5, 6, 21)
plt.imshow(adjusted8.eval())
plt.subplot(5, 6, 22)
plt.imshow(adjusted9.eval())
plt.show()
plt.figure()
plt.subplot(1, 2, 1)
plt.imshow(result.eval())
plt.subplot(1, 2, 2)
plt.imshow(image_with_box.eval())
plt.show()
代码中有详细的批注,大家可以理解。不懂的可以留言讨论。
其实,这跟书上的略有不同。因为按照书上的代码,进行result的imshow()显示的时候,报了如下的错误:
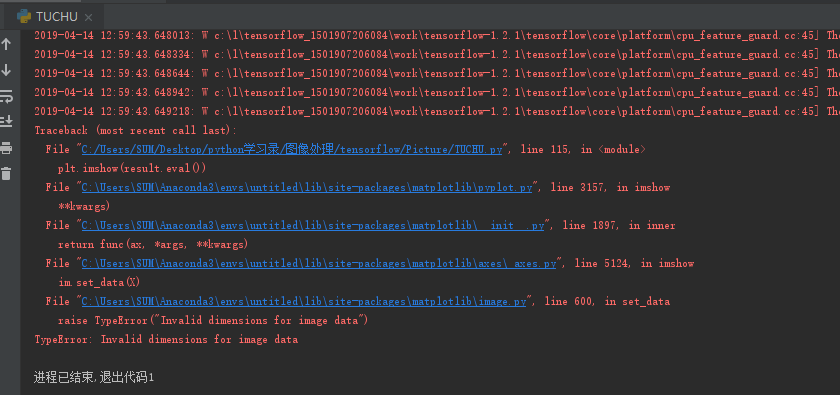
根据错误得提示,我们可以发现,是imshow(result)的时候提示result的维度不匹配的问题。因为我们再处理时对图片的数据进行了加维的操作,就是说result这时候是一个四维的结果,但是呢,imshow()函数能够识别的是二维和三维的数据,所以需要对其进行降维操作。在后面得随机框中是一样的道理。所以使用了reduce_sum(result,0)函数来降维。
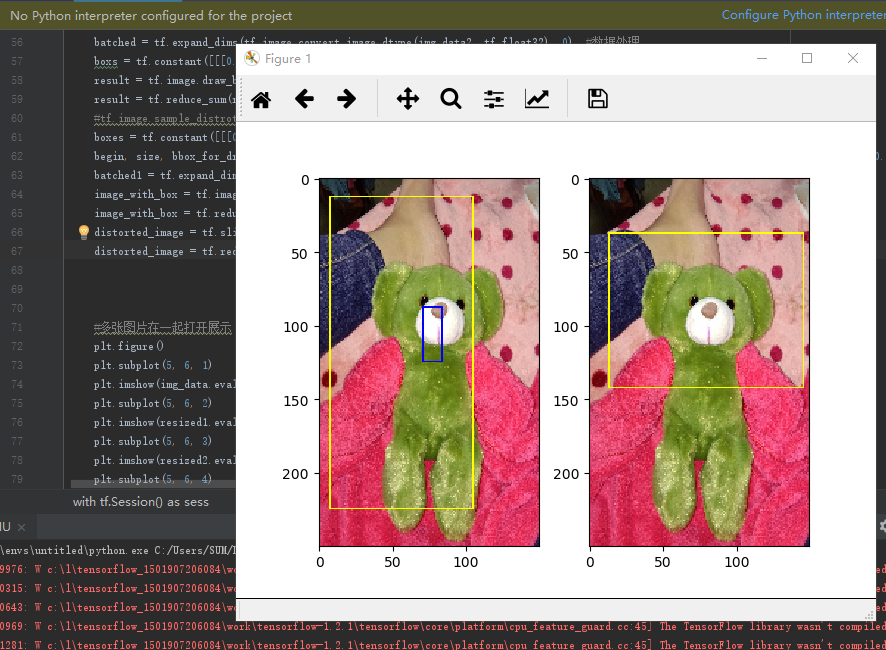
还有一点需要提醒是:在框时,需要提前对图像进行压缩(裁剪)处理,因为小图片的框易于显示,否则你只有将图片拉大后才能看清框在哪,有的时候还会没有。其他的就没有什么需要注意的地方。
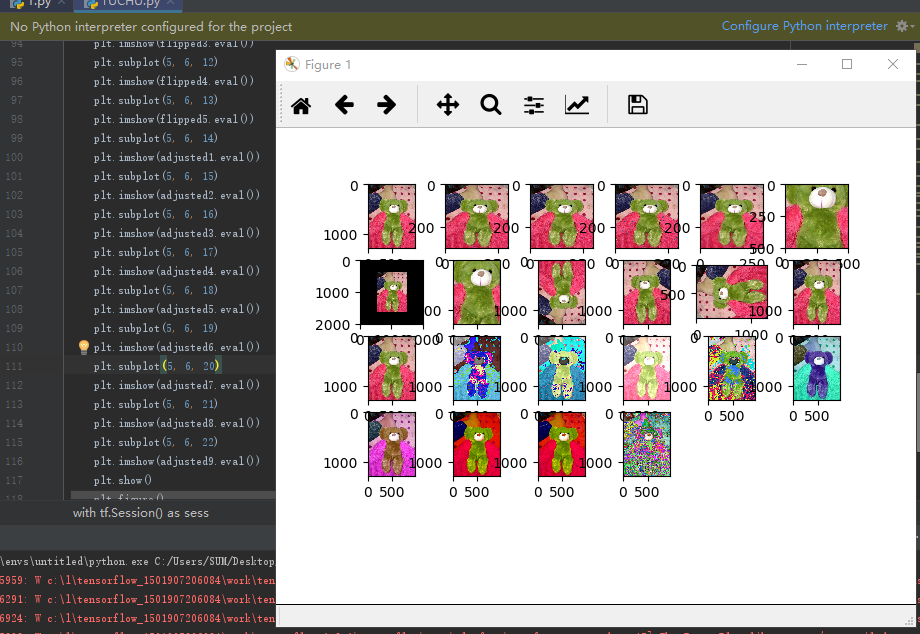
最后来看看我们的运行结果吧,色彩很绚丽哦,个人比较喜欢紫色的呢。
目前还是指定区域框选,那天有兴趣研究下,自动识别轮廓框选,这样是不是就是人脸识别了呢?哈哈哈
博客1--tensorflow的图像基本处理操作的更多相关文章
- 博客六--Tensorflow卷积神经网络的自主搭建
本人较懒也很忙,所以就不重复工作.连接我的开源中国博客查询:https://my.oschina.net/u/3770644/blog/3042523
- 博客存档TensorFlow入门一 1.4编程练习
import tensorflow as tf import numpy import matplotlib.pyplot as plt #from sklearn.model_selecti ...
- 博客三--tensorflow的队列及线程基本操作
连接我的开源中国账号:https://my.oschina.net/u/3770644/blog/3036960查询
- hexo博客更新主题后上传Git操作
克隆主题: git clone https://github.com/SuperKieran/TKL.git _config.yml文件中主题改为新增主题 # Extensions ## Plugin ...
- 买了个vultr的vps,准备把博客转过去,顺便记录一点操作。
1.shadow影子socks梯子已经搭好了,步骤: apt-get install python-pip pip install shadowsocks 任意目录创建配置文件json(ss可以在很多 ...
- 基于开源博客系统(mblog)搭建网站
基于开源博客系统(mblog)搭建网站 上一章讲了基于jpress部署的博客系统,这一章了解一下 mblog这个开源的基于springboot的博客系统,相比与jpress 的热度fork数量要少一些 ...
- Hexo + Github 个人博客设置以及优化
原文地址: Hexo + Github 个人博客设置以及优化 一.博客设置 分类.标签云.关于等页面 在站点目录下分别执行: hexo new page "categories" ...
- 使用Hexo搭建GitHub博客(2018年Mac版)
关于本文 本文仅记录自己学习搭建Hexo博客之时,搭建过程中掉坑的历程总结,对零基础起步的观众朋友可能缺乏某些基础技术的指导,请优先食用下述两篇优质教程: [2018更新]小白独立搭建博客-Githu ...
- Github+Jekyll —— 创建个人免费博客(五)jekyllproject公布到github上
摘要: 本文中我将介绍一下怎样在github上搭建个人Blog(博客),也顺便让我们掌握一下github Pages功能,另外还涉及到Jekyll技术. ======================= ...
- Jekyll搭建个人博客-拓展版
关于Jekyll Jekyll 是一个简单的博客形态的静态站点生产机器.它有一个模版目录,其中包含原始文本格式的文档,通过 Markdown (或者 Textile) 以及 Liquid 转化成一个完 ...
随机推荐
- (error) LOADING Redis is loading the dataset in memory
redis读取/重启之后读取报错:(error) LOADING Redis is loading the dataset in memory 1.redis将之持久化的数据重新写入,等待数据写入完成 ...
- maven dependency的版本冲突问题
在改造一个旧项目中,遇到各种问题. 旧项目有十多个模块,因为没有一个统一的父pom,它们对第三方的jar的版本没有统一. 虽然也存在公共的依赖模块,比如commons.util,但是,我们的模块中,有 ...
- 一行js代码识别Selenium+Webdriver及其应对方案
有不少朋友在开发爬虫的过程中喜欢使用Selenium + Chromedriver,以为这样就能做到不被网站的反爬虫机制发现. 先不说淘宝这种基于用户行为的反爬虫策略,仅仅是一个普通的小网站,使用一行 ...
- thinkPHP nginx无论怎样访问都会访问index方法解决
修改项目配置文件 application/config.php中的 pathinfo_fetch的末尾增加 REQUEST_URI 详情参考:https://www.colabug.com/35205 ...
- vue.js响应式原理解析与实现
vue.js响应式原理解析与实现 从很久之前就已经接触过了angularjs了,当时就已经了解到,angularjs是通过脏检查来实现数据监测以及页面更新渲染.之后,再接触了vue.js,当时也一度很 ...
- 关于在centos6 + grub的旧版本中,如何关闭CPU throttling
由于个人需求,要编译安装ATLAS库,其中就有关闭CPU throttling的步骤, 最常规简单的方法是修改grub /etc/default/grub/ 之后再接一些简单的步骤 + 重启就完成了. ...
- Spring再接触 集合注入
beans.xml <?xml version="1.0" encoding="UTF-8"?> <beans xmlns="htt ...
- java中的编译时常量与运行时常量
常量是程序运行期间恒定不变的量,许多程序设计语言都有某种方式,向编译器告知一块数据是恒定不变的,例如C++中的const和Java中的final. 根据编译器的不同行为,常量又分为编译时常量和运行时常 ...
- 天池医疗AI大赛支持有感
从去年大概11月份开始一直到现在,大部分的精力在天池医疗AI大赛的研发和支持上面,也算深度支持了20几只复赛参赛队伍的复赛进程.总的感觉其实与现在媒体宣传的"中国成为AI大国"ba ...
- elasticsearch批量修改,批量更新某个字段
1.源生API 在这里没有用官方提供的bulk API,而是用的另外一种方式. POST /infomations/infomations/_update_by_query JSON请求格式 { &q ...