第3章—高级装配—配置profile bean
配置profile bean
3.1.@profile注解是spring提供的一个用来标明当前运行环境的注解。
我们正常开发的过程中经常遇到的问题是,开发环境是一套环境,qa测试是一套环境,线上部署又是一套环境。这样从开发到测试再到部署,会对程序中的配置修改多次,尤其是从qa到上线这个环节,让qa的也不敢保证改了哪个配置之后能不能在线上运行。
为了解决上面的问题,我们一般会使用一种方法,就是配置文件,然后通过不同的环境读取不同的配置文件,从而在不同的场景中跑我们的程序。
那么,spring中的@profile注解的作用就体现在这里。在spring使用DI来依赖注入的时候,能够根据当前制定的运行环境来注入相应的bean。最常见的就是使用不同的DataSource了。
下面详细的介绍一下,如何通过spring的@profile注解实现上面的功能。
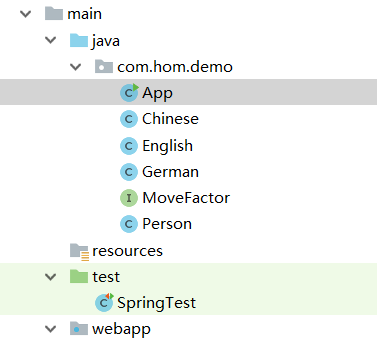
创建一个Maven项目,其中的配置如下:
pom.xml:
<?xml version="1.0" encoding="UTF-8"?>

<project xmlns="http://maven.apache.org/POM/4.0.0" xmlns:xsi="http://www.w3.org/2001/XMLSchema-instance"

  xsi:schemaLocation="http://maven.apache.org/POM/4.0.0 http://maven.apache.org/xsd/maven-4.0.0.xsd">

  <modelVersion>4.0.0</modelVersion>

  <groupId>com.home</groupId>

  <artifactId>ProfileTest</artifactId>

  <version>1.0-SNAPSHOT</version>

  <packaging>war</packaging>

  <name>ProfileTest Maven Webapp</name>

  <!-- FIXME change it to the project's website -->

  <url>http://www.example.com</url>

  <properties>

    <project.build.sourceEncoding>UTF-8</project.build.sourceEncoding>

    <maven.compiler.source>1.7</maven.compiler.source>

    <maven.compiler.target>1.7</maven.compiler.target>

      <springframework.version>4.3.7.RELEASE</springframework.version>

  </properties>

  <dependencies>

    <dependency>

      <groupId>junit</groupId>

      <artifactId>junit</artifactId>

      <version>4.12</version>

      <scope>test</scope>

    </dependency>

    <!-- https://mvnrepository.com/artifact/org.springframework/spring-context -->

    <dependency>

      <groupId>org.springframework</groupId>

      <artifactId>spring-context</artifactId>

      <version>${springframework.version}</version>

    </dependency>

    <!-- https://mvnrepository.com/artifact/org.springframework/spring-test -->

    <dependency>

      <groupId>org.springframework</groupId>

      <artifactId>spring-test</artifactId>

      <version>${springframework.version}</version>

    </dependency>

    <dependency>

      <groupId>junit</groupId>

      <artifactId>junit</artifactId>

      <version>4.11</version>

      <scope>test</scope>

    </dependency>

    <dependency>

      <groupId>org.junit.jupiter</groupId>

      <artifactId>junit-jupiter-api</artifactId>

      <version>RELEASE</version>

      <scope>compile</scope>

    </dependency>

    <dependency>

      <groupId>junit</groupId>

      <artifactId>junit</artifactId>

      <version>4.12</version>

      <scope>compile</scope>

    </dependency>

  </dependencies>

  <build>

    <finalName>ProfileTest</finalName>

    <pluginManagement><!-- lock down plugins versions to avoid using Maven defaults (may be moved to parent pom) -->

      <plugins>

        <plugin>

          <artifactId>maven-clean-plugin</artifactId>

          <version>3.0.0</version>

        </plugin>

        <!-- see http://maven.apache.org/ref/current/maven-core/default-bindings.html#Plugin_bindings_for_war_packaging -->

        <plugin>

          <artifactId>maven-resources-plugin</artifactId>

          <version>3.0.2</version>

        </plugin>

        <plugin>

          <artifactId>maven-compiler-plugin</artifactId>

          <version>3.7.0</version>

        </plugin>

        <plugin>

          <artifactId>maven-surefire-plugin</artifactId>

          <version>2.20.1</version>

        </plugin>

        <plugin>

          <artifactId>maven-war-plugin</artifactId>

          <version>3.2.0</version>

        </plugin>

        <plugin>

          <artifactId>maven-install-plugin</artifactId>

          <version>2.5.2</version>

        </plugin>

        <plugin>

          <artifactId>maven-deploy-plugin</artifactId>

          <version>2.8.2</version>

        </plugin>

      </plugins>

    </pluginManagement>

  </build>

</project>
App:
package com.hom.demo;

import org.springframework.context.ConfigurableApplicationContext;

import org.springframework.context.annotation.AnnotationConfigApplicationContext;

import org.springframework.context.annotation.ComponentScan;

import org.springframework.context.annotation.Configuration;

/**

 * Hello world!

 // */

@Configuration

@ComponentScan(basePackages = {"com.hom.demo"})

public class App {

    public static void main(String[] args) {

        ConfigurableApplicationContext context = new AnnotationConfigApplicationContext(com.hom.demo.App.class);

        Person p = context.getBean(Person.class);

        p.speak();

    }

}
接口MoveFactor:
package com.hom.demo;

public interface MoveFactor {

    void speak();

}
Chines:
package com.hom.demo;

import org.springframework.context.annotation.Configuration;

import org.springframework.context.annotation.Profile;

import org.springframework.stereotype.Component;

@Configuration

@Profile(value = "dev")

@Component

public class Chinese implements MoveFactor {

    @Override

    public void speak() {

        System.out.println("我是中国人");

    }

}
English:
package com.hom.demo;

import org.springframework.context.annotation.Profile;

import org.springframework.stereotype.Component;

@Component

@Profile("qa")

public class English implements MoveFactor{

    @Override

    public void speak() {

        System.out.println("i am an English");

    }

}
German:
package com.hom.demo;

import org.springframework.context.annotation.Profile;

import org.springframework.stereotype.Component;

@Component

@Profile("prod")

public class German implements MoveFactor{

    @Override

    public void speak() {

        System.out.println("i am a German");

    }

}
Person:
package com.hom.demo;

import org.springframework.beans.factory.annotation.Autowired;

import org.springframework.stereotype.Component;

@Component

public class Person {

    @Autowired

    private MoveFactor moveFactor;

    public void speak(){

        moveFactor.speak();

    }

}
SpringTest:
package com.hom.demo;

import org.junit.Test;

import org.junit.runner.RunWith;

import org.springframework.beans.factory.annotation.Autowired;

import org.springframework.test.context.ActiveProfiles;

import org.springframework.test.context.ContextConfiguration;

import org.springframework.test.context.junit4.SpringJUnit4ClassRunner;

@RunWith(SpringJUnit4ClassRunner.class)

@ContextConfiguration(classes = App.class)

@ActiveProfiles("dev")

public class SpringTest {

    @Autowired

    Person p;

    @Test

    public void testProfile(){

        p.speak();

    }

}
运行后的结果如下:

当修改@ActiveProfile中的值时,输出的内容也会随之改变。
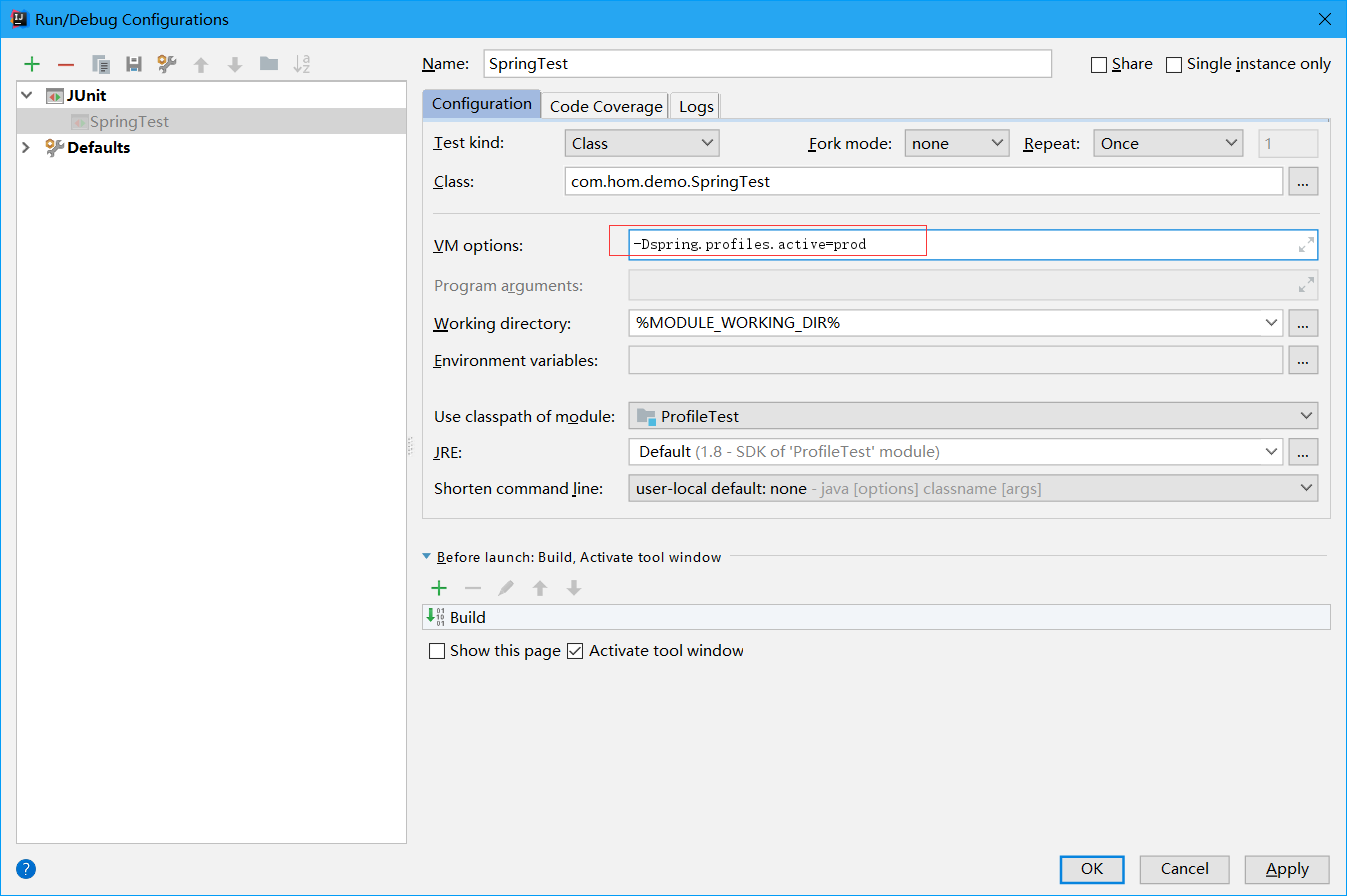
如果使用的是main函数进行真正的开发、测试和上线时,我们需要设置一下运行参数:
-Dspring.profiles.active=prod
3.2.XML中配置profile
application.xml:
<?xml version="1.0" encoding="UTF-8"?>

<beans xmlns="http://www.springframework.org/schema/beans"

       xmlns:xsi="http://www.w3.org/2001/XMLSchema-instance"

       xsi:schemaLocation="http://www.springframework.org/schema/beans

			http://www.springframework.org/schema/beans/spring-beans-4.3.xsd"

           profile="dev">

<bean id="chinese" class="com.hom.demo.Chinese"></bean>

</beans>
我们还可以在<beans>中嵌套定义<beans>元素,而不是为没个环境都创建一个profile.xml
<?xml version="1.0" encoding="UTF-8"?>

<beans xmlns="http://www.springframework.org/schema/beans"

       xmlns:xsi="http://www.w3.org/2001/XMLSchema-instance"

       xsi:schemaLocation="http://www.springframework.org/schema/beans

			http://www.springframework.org/schema/beans/spring-beans-4.3.xsd"

      >

<beans profile="dev"> <!--这里可以指定需要的profile名-->

<bean id="chinese" class="com.hom.demo.Chinese"></bean>

</beans>

<beans profile="qa">

<bean id="english" class="com.hom.demo.English"></bean>

</beans>

</beans>
3.3.激活profile
Spring在确定那个profile处于激活状态时,需要依赖两个独立的属性:
spring.Profile.active(激活的Profile)
spring.Profile.default(默认的Profile)
这里有多种方式来设置这两个属性:
- 作为DispathServlet的初始参数
- 作为Web应用的上下文参数
- 作为JNDI条目
- 作为环境变量
- 作为JVM的系统属性
- 在集成测试类上,使用@ActiveProfile注解设置
我所喜欢的一种方式是使用DispatcherServlet的参数将spring.rpofiles.default设置开发环境的Profile,我会在Servlet上下文中配置,如下所示:
<?xml version="1.0" encoding="UTF-8"?>

<web-app xmlns:xsi="http://www.w3.org/2001/XMLSchema-instance" xmlns="http://java.sun.com/xml/ns/javaee" xsi:schemaLocation="http://java.sun.com/xml/ns/javaee http://java.sun.com/xml/ns/javaee/web-app_3_0.xsd" version="3.0" id="WebApp_1525601902125">

  <display-name>Archetype Created Web Application</display-name>

																				  <context-param>

    <param-name>contextConfigLoacation</param-name>

    <param-value>application.xml</param-value>

  </context-param>

  <!--为上下文设置默认的profile-->

<context-param>

  <param-name>spring.rpofiles.default</param-name>

  <param-value>dev</param-value>

</context-param>

  <listener>

    <listener-class>  org.springframework.web.context.ContextLoaderListener</listener-class>

  </listener>

    <!--为Servlet设置默认的profile-->

<servlet>

    <servlet-name>appServlet</servlet-name>

    <servlet-class>org.springframework.web.servlet.DispatcherServlet</servlet-class>

    <init-param>

        <param-name>spring.rpofiles.default</param-name>

        <param-value>dev</param-value>

    </init-param>

    <load-on-startup>1</load-on-startup>

</servlet>

    <servlet-mapping>

        <servlet-name>appServlet</servlet-name>

        <url-pattern>/</url-pattern>

    </servlet-mapping>

</web-app>
Spring提供了@ActiveProfile注解设置激活状态
第3章—高级装配—配置profile bean的更多相关文章
- Spring高级装配(一) profile
Spring高级装配要学习的内容包括: Spring profile 条件化的bean声明 自动装配与歧义性 bean的作用域 Spring表达式语言 以上属于高级一点的bean装配技术,如果你没有啥 ...
- spring对bean的高级装配之profile机制
最近在读spring实战一书,个人感觉内容通俗易懂,学到了一些之前并不知道的知识,于是打算在博客里记录一下这些知识点便于后期记忆: 今天要记录的就是spring的条件化创建bean,针对条件化创建be ...
- 第3章—高级装配—条件化的Bean
条件化的Bean 通过活动的profile,我们可以获得不同的Bean.Spring 4提供了一个更通用的基于条件的Bean的创建方式,即使用@Conditional注解. @Conditional根 ...
- Spring实战(四)Spring高级装配中的bean profile
profile的原意为轮廓.剖面等,软件开发中可以译为“配置”. 在3.1版本中,Spring引入了bean profile的功能.要使用profile,首先要将所有不同的bean定义整理到一个或多个 ...
- 第3章—高级装配—bean的作用域
bean的作用域 bean的默认作用域 Spring定义了多种作用域,可以基于这些作用域创建bean,包括: 单例(Singleton):在整个应用中,只创建bean的一个实例. 原型(Prototy ...
- 【Spring】高级装配
前言 前面讲解了bean的核心装配技术,其可应付很多中装配情况,但Spring提供了高级装配技术,以此实现更为高级的bean装配功能. 高级装配 配置profile bean 将所有不同bean定义放 ...
- spring学习总结——高级装配学习一(profile与@Conditional)
前言: 在上一章装配Bean中,我们看到了一些最为核心的bean装配技术.你可能会发现上一章学到的知识有很大的用处.但是,bean装配所涉及的领域并不仅仅局限于上一章 所学习到的内容.Spring提供 ...
- Spring高级装配bean
目录 spring profile 条件化的bean声明 自动装配与歧义性 bean的作用域 Spring表达式语言 一.环境与profile 配置profile bean 在软件开发的时候,有一个 ...
- Spring使用笔记(三) 高级装配
高级装配 一.环境与Profile 一)配置profile bean 环境的改变导致配置改变(需求:通过环境决定使用哪个bean),可以通过Spring的Profile解决. Profile可以在程序 ...
随机推荐
- Thrift线程和状态机分析
目录 目录 1 1. 工作线程和IO线程 1 2. TNonblockingServer::TConnection::transition() 2 3. RPC函数被调用过程 3 4. 管道和任务队列 ...
- Understanding String Table Size in HotSpot
In JDK-6962930[2], it requested that string table size be configurable. The resolved date of that b ...
- 23 DesignPatterns学习笔记:C++语言实现 --- 2.6 Facade
23 DesignPatterns学习笔记:C++语言实现 --- 2.6 Facade 2016-07-22 (www.cnblogs.com/icmzn) 模式理解
- 汉诺塔问题的算法分析与实现(Java)
汉诺塔问题是源于印度一个古老传说的益智玩具.要求将圆盘从A柱移动到C柱规定,在小圆盘上不能放大圆盘,在三根柱子之间一次只能移动一个圆盘. 可以先通过3个盘子的hanoi游戏得出其算法步骤如下: if ...
- 寻找最大的K个数(下)
接着昨天的写,里面的代码包含昨天的 #include <iostream> using namespace std; #define N 50 //初始化数组 , , , , , , , ...
- Android ScrollView 去掉 scrollbar 和 阴影
1. 在 layout 里: android:scrollbars="none" android:overScrollMode="never" 2. 代码里 / ...
- Android 音视频开发入门指南
Android 音视频从入门到提高 —— 任务列表 http://blog.51cto.com/ticktick/1956269(以这个学习为基础往下面去学习) Android 音视频开发学习思路-- ...
- php—Smarty-2
一.注释 *注释内容* Html注释显示客户端源文件中 Smarty注释不会发给客户端 Smarty的注释主要给模板设计者来看的 二.模板中的变量 l 由php文件分配 1) 普通变量 2) 数 ...
- @media媒体查询
@media媒体查询 @media screen and (min-width:640px) and (max-width:1920px){/*当屏幕尺寸大于640px时与小于1920时*/ .pub ...
- 弹性盒子模型display:flex
1.div上下左右居中 <!DOCTYPE html> <html lang="en"> <head> <meta charset=&qu ...