Spring(七)之基于注解配置
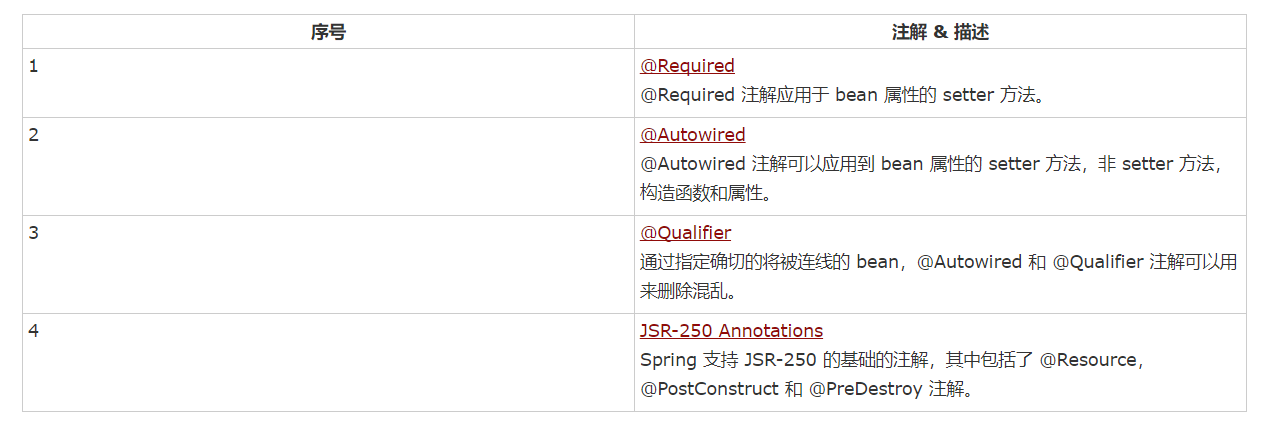
基于注解的配置
从 Spring 2.5 开始就可以使用注解来配置依赖注入。而不是采用 XML 来描述一个 bean 连线,你可以使用相关类,方法或字段声明的注解,将 bean 配置移动到组件类本身。
在 XML 注入之前进行注解注入,因此后者的配置将通过两种方式的属性连线被前者重写。
一、@Required注解
@Required 注解应用于 bean 属性的 setter 方法,它表明受影响的 bean 属性在配置时必须放在 XML 配置文件中,否则容器就会抛出一个 BeanInitializationException 异常。下面显示的是一个使用 @Required 注解的示例。
(1)编写Student.java
package com.tutorialspoint;

import org.springframework.beans.factory.annotation.Required;

public class Student {

   private Integer age;

   private String name;

   @Required

   public void setAge(Integer age) {

      this.age = age;

   }

   public Integer getAge() {

      return age;

   }

   @Required

   public void setName(String name) {

      this.name = name;

   }

   public String getName() {

      return name;

   }

}
(2)编写MainApp.java
package com.tutorialspoint;

import org.springframework.context.ApplicationContext;

import org.springframework.context.support.ClassPathXmlApplicationContext;

public class MainApp {

    public static void main(String[] args) {

          ApplicationContext context = new ClassPathXmlApplicationContext("Beans.xml");

          Student student = (Student) context.getBean("student");

          System.out.println("Name : " + student.getName() );

          System.out.println("Age : " + student.getAge() );

       }}
(3)编写Beans.xml
<?xml version = "1.0" encoding = "UTF-8"?>

<beans xmlns="http://www.springframework.org/schema/beans"

    xmlns:xsi="http://www.w3.org/2001/XMLSchema-instance"

    xmlns:context="http://www.springframework.org/schema/context"

    xsi:schemaLocation="http://www.springframework.org/schema/beans

    http://www.springframework.org/schema/beans/spring-beans-4.0.xsd

    http://www.springframework.org/schema/context

    http://www.springframework.org/schema/context/spring-context-4.0.xsd">

  <context:annotation-config/>

   <!-- Definition for student bean -->

   <bean id="student" class="com.tutorialspoint.Student">

      <property name="name"  value="Zara" />

      <!-- try without passing age and check the result -->

      <property name="age"  value="11"/>

   </bean>

</beans>
(4)运行MainApp.java中的main方法
如图:

这是正常流程
异常流程只需将Beans.xml改成如下,再运行main方法:
<?xml version = "1.0" encoding = "UTF-8"?>

<beans xmlns="http://www.springframework.org/schema/beans"

    xmlns:xsi="http://www.w3.org/2001/XMLSchema-instance"

    xmlns:context="http://www.springframework.org/schema/context"

    xsi:schemaLocation="http://www.springframework.org/schema/beans

    http://www.springframework.org/schema/beans/spring-beans-4.0.xsd

    http://www.springframework.org/schema/context

    http://www.springframework.org/schema/context/spring-context-4.0.xsd">

 <context:annotation-config/>

   <!-- Definition for student bean -->

   <bean id="student" class="com.tutorialspoint.Student">

      <property name="name"  value="Zara" />

      <!-- try without passing age and check the result -->

      <!--<property name="age"  value="11"/>-->

   </bean>

</beans>
控制台最后的结果如下:

我想大家应该明白了,@Required注解的作用,其实这个注解与input中的required属性倒有其相同点,必填不能为空。
二、AutoWired注解
@Autowired 注释对在哪里和如何完成自动连接提供了更多的细微的控制。
@Autowired 注释可以在 setter 方法中被用于自动连接 bean,就像 @Autowired 注释,容器,一个属性或者任意命名的可能带有多个参数的方法。
演示示例:
1.编写TextEditor.java
package com.tutorialspoint;

import org.springframework.beans.factory.annotation.Autowired;

public class TextEditor {

   private SpellChecker spellChecker;

   @Autowired

   public void setSpellChecker( SpellChecker spellChecker ){

      this.spellChecker = spellChecker;

   }

   public SpellChecker getSpellChecker( ) {

      return spellChecker;

   }

   public void spellCheck() {

      spellChecker.checkSpelling();

   }

}
2.编写SpellChecker.java
package com.tutorialspoint;

public class SpellChecker {

   public SpellChecker(){

      System.out.println("Inside SpellChecker constructor." );

   }

   public void checkSpelling(){

      System.out.println("Inside checkSpelling." );

   }

}
3.编写Beans.xml
<?xml version = "1.0" encoding = "UTF-8"?>

<beans xmlns="http://www.springframework.org/schema/beans"

    xmlns:xsi="http://www.w3.org/2001/XMLSchema-instance"

    xmlns:context="http://www.springframework.org/schema/context"

    xsi:schemaLocation="http://www.springframework.org/schema/beans

    http://www.springframework.org/schema/beans/spring-beans-4.0.xsd

    http://www.springframework.org/schema/context

    http://www.springframework.org/schema/context/spring-context-4.0.xsd">

   <context:annotation-config/>

   <!-- Definition for textEditor bean without constructor-arg  -->

   <bean id="textEditor" class="com.tutorialspoint.TextEditor">

   </bean>

   <!-- Definition for spellChecker bean -->

   <bean id="spellChecker" class="com.tutorialspoint.SpellChecker">

   </bean>

</beans>
4.编写MainApp.java
package com.tutorialspoint;

import org.springframework.context.ApplicationContext;

import org.springframework.context.support.ClassPathXmlApplicationContext;

public class MainApp {

   public static void main(String[] args) {

      ApplicationContext context = new ClassPathXmlApplicationContext("Beans.xml");

      TextEditor te = (TextEditor) context.getBean("textEditor");

      te.spellCheck();

   }

}
5.运行MainApp.java中的main方法
结果如下:

@AutoWired 自动装配 它的一个属性叫required,属性值是boolean类型,默认为true,必须,也可以修改为false,非必须。
三、Qualifier注解
可能会有这样一种情况,当你创建多个具有相同类型的 bean 时,并且想要用一个属性只为它们其中的一个进行装配,在这种情况下,你可以使用 @Qualifier 注释和 @Autowired 注释通过指定哪一个真正的 bean 将会被装配来消除混乱。下面显示的是使用 @Qualifier 注释的一个示例。
(1)编写Student.java
package com.tutorialspoint;

public class Student {

   private Integer age;

   private String name;

   public void setAge(Integer age) {

      this.age = age;

   }

   public Integer getAge() {

      return age;

   }

   public void setName(String name) {

      this.name = name;

   }

   public String getName() {

      return name;

   }

}
(2)编写Profile.java
package com.tutorialspoint;

import org.springframework.beans.factory.annotation.Autowired;

import org.springframework.beans.factory.annotation.Qualifier;

public class Profile {

       @Autowired

       @Qualifier("student1")

       private Student student;

       public Profile(){

          System.out.println("Inside Profile constructor." );

       }

       public void printAge() {

          System.out.println("Age : " + student.getAge() );

       }

       public void printName() {

          System.out.println("Name : " + student.getName() );

       }

}
(3)编写MainApp.java
package com.tutorialspoint;

import org.springframework.context.ApplicationContext;

import org.springframework.context.support.ClassPathXmlApplicationContext;

public class MainApp {

     public static void main(String[] args) {

          ApplicationContext context = new ClassPathXmlApplicationContext("Beans.xml");

          Profile profile = (Profile) context.getBean("profile");

          profile.printAge();

          profile.printName();

       }

}
(4)编写Beans.xml
<?xml version = "1.0" encoding = "UTF-8"?>

<beans xmlns="http://www.springframework.org/schema/beans"

    xmlns:xsi="http://www.w3.org/2001/XMLSchema-instance"

    xmlns:context="http://www.springframework.org/schema/context"

    xsi:schemaLocation="http://www.springframework.org/schema/beans

    http://www.springframework.org/schema/beans/spring-beans-4.0.xsd

    http://www.springframework.org/schema/context

    http://www.springframework.org/schema/context/spring-context-4.0.xsd">

   <context:annotation-config/>

   <!-- Definition for profile bean -->

   <bean id="profile" class="com.tutorialspoint.Profile">

   </bean>

   <!-- Definition for student1 bean -->

   <bean id="student1" class="com.tutorialspoint.Student">

      <property name="name"  value="Zara" />

      <property name="age"  value="11"/>

   </bean>

   <!-- Definition for student2 bean -->

   <bean id="student2" class="com.tutorialspoint.Student">

      <property name="name"  value="Nuha" />

      <property name="age"  value="2"/>

   </bean>

</beans>
(5)运行MainApp.java对应的main方法

四、Spring JSR-250 注释
Spring还使用基于 JSR-250 注释,它包括 @PostConstruct, @PreDestroy 和 @Resource 注释。因为你已经有了其他的选择,尽管这些注释并不是真正所需要的,但是关于它们仍然让我给出一个简短的介绍。
@PostConstruct 和 @PreDestroy 注释:
为了定义一个 bean 的安装和卸载,我们使用 init-method 和/或 destroy-method 参数简单的声明一下 。init-method 属性指定了一个方法,该方法在 bean 的实例化阶段会立即被调用。同样地,destroy-method 指定了一个方法,该方法只在一个 bean 从容器中删除之前被调用。
你可以使用 @PostConstruct 注释作为初始化回调函数的一个替代,@PreDestroy 注释作为销毁回调函数的一个替代,其解释如下示例所示。
演示示例:
(1)编写HelloWorld.java
package com.tutorialspoint;

import javax.annotation.*;

public class HelloWorld {

   private String message;

   public void setMessage(String message){

      this.message  = message;

   }

   public String getMessage(){

      System.out.println("Your Message : " + message);

      return message;

   }

   @PostConstruct

   public void init(){

      System.out.println("Bean is going through init.");

   }

   @PreDestroy

   public void destroy(){

      System.out.println("Bean will destroy now.");

   }

}
(2)编写Beans.xml
<?xml version = "1.0" encoding = "UTF-8"?>

<beans xmlns="http://www.springframework.org/schema/beans"

    xmlns:xsi="http://www.w3.org/2001/XMLSchema-instance"

    xmlns:context="http://www.springframework.org/schema/context"

    xsi:schemaLocation="http://www.springframework.org/schema/beans

    http://www.springframework.org/schema/beans/spring-beans-4.0.xsd

    http://www.springframework.org/schema/context

    http://www.springframework.org/schema/context/spring-context-4.0.xsd">

   <context:annotation-config/>

   <bean id="helloWorld"

       class="com.tutorialspoint.HelloWorld"

       init-method="init" destroy-method="destroy">

       <property name="message" value="Hello World!"/>

   </bean>

</beans>
(3)编写MainApp.java并运行对应的main方法
package com.tutorialspoint;

import org.springframework.context.support.AbstractApplicationContext;

import org.springframework.context.support.ClassPathXmlApplicationContext;

public class MainApp {

     public static void main(String[] args) {

          AbstractApplicationContext context =

                              new ClassPathXmlApplicationContext("Beans.xml");

          HelloWorld obj = (HelloWorld) context.getBean("helloWorld");

          obj.getMessage();

          context.registerShutdownHook();

       }

}
结果如图:

Spring(七)之基于注解配置的更多相关文章
- Spring 使用AOP——基于注解配置
首先,使用注解实现AOP是基于AspectJ方式的. 创建包含切点方法的类 package cn.ganlixin.test; import org.aspectj.lang.annotation.P ...
- Unit03: Spring Web MVC简介 、 基于XML配置的MVC应用 、 基于注解配置的MVC应用
Unit03: Spring Web MVC简介 . 基于XML配置的MVC应用 . 基于注解配置的MVC应用 springmvc (1)springmvc是什么? 是一个mvc框架,用来简化基于mv ...
- 使用 Spring 2.5 基于注解驱动的 Spring MVC
http://www.ibm.com/developerworks/cn/java/j-lo-spring25-mvc/ 概述 继 Spring 2.0 对 Spring MVC 进行重大升级后,Sp ...
- 使用 Spring 2.5 基于注解驱动的 Spring MVC--转
概述 继 Spring 2.0 对 Spring MVC 进行重大升级后,Spring 2.5 又为 Spring MVC 引入了注解驱动功能.现在你无须让 Controller 继承任何接口,无需在 ...
- Spring学习之旅(七)基于XML配置与基于AspectJ注解配置的AOP编程比较
本篇博文用一个稍复杂点的案例来对比一下基于XML配置与基于AspectJ注解配置的AOP编程的不同. 相关引入包等Spring AOP编程准备,请参考小编的其他博文,这里不再赘述. 案例要求: 写一 ...
- Spring学习记录(十二)---AOP理解和基于注解配置
Spring核心之二:AOP(Aspect Oriented Programming) --- 面向切面编程,通过预编译方式和运行期动态代理实现程序功能的统一维护的一种技术.AOP是OOP的延续,是软 ...
- Spring IOC之基于注解的容器配置
Spring配置中注解比XML更好吗?基于注解的配置的介绍提出的问题是否这种途径比XML更好.简单来说就是视情况而定. 长一点的答案是每一种方法都有自己的长处也不足,而且这个通常取决于开发者决定哪一种 ...
- 基于注解配置spring
1 对 bean 的标注基于注解方式有3个注解 @Component @Repository 对DAO类进行标注 @Service 对Service类进行标注 @Controller 对Contro ...
- Spring IOC容器装配Bean_基于注解配置方式
bean的实例化 1.导入jar包(必不可少的) 2.实例化bean applicationContext.xml(xml的写法) <bean id="userDao" cl ...
随机推荐
- Linux下一个最简单的不依赖第三库的的C程序(1)
如下代码是一段汇编代码,虽然标题中使用了C语言这个词语,但下面确实是一段汇编代码,弄清楚了这个代码,后续的知识点才会展开. simple_asm.s: #PURPOSE: Simple program ...
- Core.Java.Volume.I.Fundamentals.10th.Edition 14.5.8 Volatile域 中文版 章节勘误
今天重扫了corejava 14 并发的一章,在谈到volatile域代替synchronized 应用于并发更新时,看到如下内容,并发更新可用内部锁的方式但会带来阻塞问题,可用volatile域替代 ...
- 【SSH网上商城项目实战10】商品类基本模块的搭建
转自:https://blog.csdn.net/eson_15/article/details/51354932 前面我们完成了与商品类别相关的业务逻辑,接下来我们开始做具体商品部分. 1. 数据库 ...
- Golang把所有包括底层类库,输出到stderr的内容, 重新定向到一个日志文件里面?
不论应用是如何部署的,我们都期望能扑捉到应用的错误日志, 解决思路: 自己写代码处理异常拦截,甚至直接在main函数中写异常拦截. stderr重定向到某个文件里 使用 syscall.Dup2 第一 ...
- C# 进程通信-命名管道
之前看wcf服务的时候看到wcf有支持管道通信协议,之前不知道,最近刚好有用到这个,这里写个简单实例 .net有已经封装好的pip通信的对象NamedPipeServerStream 和NamedPi ...
- Uncaught TypeError: timeout.close is not a function. when try to use clearInterval
It's because of your IDE! Make sure you have added automatic imports such as import { clearInterval ...
- Angular面试题一
一.ng-show/ng-hide 与 ng-if的区别? 第一点区别是, ng-if 在后面表达式为 true 的时候才创建这个 dom 节点, ng-show 是初始时就创建了,用 display ...
- python oop常用术语 继承 多态 封装
面向对象优点 1.通过封装明确了内外 2.通过继承+多态在语言层面支持了归一化设计 抽象/实现 抽象指对现实世界问题和实体的本质表现,行为和特征建模,建立一个相关的子集,可以用于 绘程序结构,从而实现 ...
- android端的ormlite框架
安卓端有很多优秀的数据库框架来操作sqlite,如ormlite框架,这个框架可以用来实现表到对象的解析和转化. 使用: 首先去官网下载两个jar包,core和android(如果在安卓端开发的话), ...
- MYSQL LOGBIN 数据日志恢复数据库随笔
查看指定的二进制日志中的事件(MYSQL命令行) mysql> show binlog events in 'binlogfullpath'; 查看二进制日志中的事件(MYSQL命令行) mys ...