win7下的nginx小demo
一直大概知道nginx怎么玩,但是不看文档又蒙蔽.在这记录一下,以后好查看
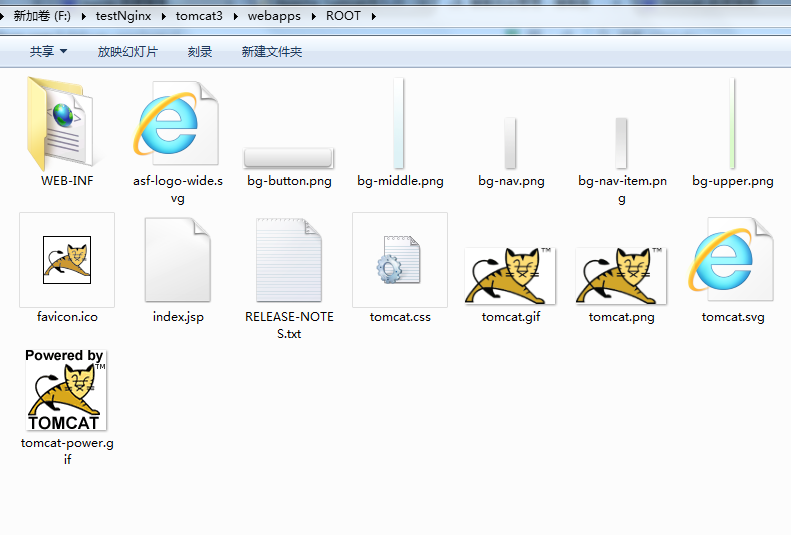
下载tomcat,改index.jsp
http://tomcat.apache.org/download-80.cgi
tomcat9已经出来了,但是自己用了一次,闪退,换tomcat8,开启成功.(tomcat9这个原因有时间在琢磨)
修改tomcat的index.jsp

然后在index.jsp加点标记
<div id="asf-box">
<h1>
tomcat3的session是:
<%=request.getSession().getId()%>
</h1>
<h1>${pageContext.servletContext.serverInfo}</h1>
</div>
然后依次完成三个tomcat
定义nginx
官网下载
http://nginx.org/en/download.html
解压目录,修改nginx.conf
#user nobody;
worker_processes 1;
#error_log logs/error.log;
#error_log logs/error.log notice;
#error_log logs/error.log info;
#pid logs/nginx.pid;
events {
worker_connections 1024;
}
http {
include mime.types;
default_type application/octet-stream;
#log_format main '$remote_addr - $remote_user [$time_local] "$request" '
# '$status $body_bytes_sent "$http_referer" '
# '"$http_user_agent" "$http_x_forwarded_for"';
#access_log logs/access.log main;
sendfile on;
#tcp_nopush on;
#keepalive_timeout 0;
keepalive_timeout 65;
#gzip on;
#设置反向代理的服务器列表
upstream test_ip{
server localhost:8080 weight=1;
server localhost:8081 weight=1;
server localhost:8082 weight=1;
#配置轮询
#ip_hash
}
server {
listen 80;
server_name localhost;
#charset koi8-r;
#access_log logs/host.access.log main;
#配置方向代理的路径
location / {
root html;
proxy_pass http://test_ip;
index index.html index.htm;
}
#error_page 404 /404.html;
# redirect server error pages to the static page /50x.html
#
error_page 500 502 503 504 /50x.html;
location = /50x.html {
root html;
}
# proxy the PHP scripts to Apache listening on 127.0.0.1:80
#
#location ~ \.php$ {
# proxy_pass http://127.0.0.1;
#}
# pass the PHP scripts to FastCGI server listening on 127.0.0.1:9000
#
#location ~ \.php$ {
# root html;
# fastcgi_pass 127.0.0.1:9000;
# fastcgi_index index.php;
# fastcgi_param SCRIPT_FILENAME /scripts$fastcgi_script_name;
# include fastcgi_params;
#}
# deny access to .htaccess files, if Apache's document root
# concurs with nginx's one
#
#location ~ /\.ht {
# deny all;
#}
}
# another virtual host using mix of IP-, name-, and port-based configuration
#
#server {
# listen 8000;
# listen somename:8080;
# server_name somename alias another.alias;
# location / {
# root html;
# index index.html index.htm;
# }
#}
# HTTPS server
#
#server {
# listen 443 ssl;
# server_name localhost;
# ssl_certificate cert.pem;
# ssl_certificate_key cert.key;
# ssl_session_cache shared:SSL:1m;
# ssl_session_timeout 5m;
# ssl_ciphers HIGH:!aNULL:!MD5;
# ssl_prefer_server_ciphers on;
# location / {
# root html;
# index index.html index.htm;
# }
#}
}
标红的字体的upstream的定义表示了访问列表
在location中定义的proxy_pass
开启nginx,tomcat
点击nginx.exe一闪而过
点击三个tomcat的startup.bat
最后,输入localhost在浏览器,访问

最后再次输入local就会发现session值改变了,说明nginx反向代理成了
最后
nginx -s reopen :重新打开日志文件
nginx -t -c /path/to/nginx.conf 测试nginx配置文件是否正确
关闭nginx:
nginx -s stop :快速停止nginx
quit :完整有序的停止nginx
win7下的nginx小demo的更多相关文章
- win7下搭建nginx+php的开发环境
本来在win7下用的是IIS做web服务器,但近来因项目需求的原因,需要在服务器遇到404错误的时候自动做转向(不是在客户端的跳转,而是在服务器收到客户端请求去某目录下读取文件返回时,如果发现目录或目 ...
- win7下搭建nginx+php的开发环境(转)
在win7下用的是IIS做web服务器,但近来因项目需求的原因,需要在服务器遇到404错误的时候自动做转向(不是在客户端的跳转,而是在服务器收到客户端请求去某目录下读取文件返回时,如果发现目录或目录下 ...
- Win7下,nginx默认80端口被System占用,造成nginx启动报错
在win7 32位旗舰版下,启动1.0.8版本nginx,显示如下错误: 2012/04/02 13:55:59 [emerg] 7864#2376: bind() to 0.0.0.0:80 fai ...
- Win7下配置nginx和php5
本文链接:http://www.cnblogs.com/cnscoo/archive/2012/09/03/2668577.html 一.准备工作: OS:Windows7 SP1 Nginx: ng ...
- win7下docker环境搭建nginx+php-fpm+easyswoole+lavarel+mysql开发环境
win7环境基础在上一篇win7下docker环境搭建nginx+php-fpm+easyswoole开发环境中已经详细叙述搭建完成 本篇文章将叙述如何在上述基础上搭建laravel开发环境,这个其实 ...
- 仿百度下拉关键词,和关键词的小demo
自己做项目时用到的仿百度下拉关键词 代码: $(function(){ var oTxt = document.getElementById('search_text'); oTxt.onkeyup ...
- Win7下nginx默认80端口被System占用,造成nginx启动报错的解决方案
Win7下nginx默认80端口被System占用,造成nginx启动报错的解决方案 在win7 32位旗舰版下,启动1.0.8版本nginx,显示如下错误: [plain] 2012/04/0 ...
- go——搭建Win7下的Go开发环境
1.首先需要下载下载go平台安装包 安装程序 下载地址:https://golang.org/dl/ (墙内下载地址http://www.golangtc.com/download),如果是您的系统是 ...
- 新手 gulp+ seajs 小demo
首先,不说废话,它的介绍和作者就不在多说了,网上一百度一大堆: 我在这里只是来写写我这2天抽空对seajs的了解并爬过的坑,和实现的一个小demo(纯属为了实现,高手请绕道); 一.环境工具及安装 1 ...
随机推荐
- npy数据的保存与读取
保存 利用这种方法,保存文件的后缀名字一定会被置为.npy x = numpy.save("data_x.npy",x) 读取 data = numpy.load("da ...
- Linux下C程序进程地址空间布局[转]
我们在学习C程序开发时经常会遇到一些概念:代码段.数据段.BSS段(Block Started by Symbol) .堆(heap)和栈(stack).先看一张教材上的示意图(来源,<UNIX ...
- webpack-dev-middleware插件的使用
我们在使用webpack 编译文件时,每次改动文件都要去重新编译,是不是很麻烦,这时候我们就用到了webpack-dev-middleware 插件,该插件对更改的文件进行监控,编译, 一般和 web ...
- python3 安装turtle tkitnter 报错
导入tkinter模块后,运行出现No module named _tkinter, please install the python-tk package ubuntu运行tkinter错误 ...
- this指向问题(1)
在JS中,this一般有四种绑定的方式,但是在确定到底是哪种绑定之前必须先找到函数的调用位置.接下来先介绍其中的三种: 1.默认绑定 其实所谓的默认绑定就是函数直接调用(前面没有什么东西来点它),在默 ...
- Redux初识
1.定义规则counter 2.根据计算规则生成store let store=createStore(counter); 3.订阅消息(state 发生变化后发送消息) 4.触发规则,使state发 ...
- 【杂题总汇】UVa-1627 Team them up!
[UVa-1627] Team them up! 借鉴了一下hahalidaxin的博客……了解了思路,但是莫名Wa了:最后再找了一篇dwtfukgv的博客才做出来
- oracle数据库 网页管理360浏览器登录不上
使用谷歌浏览器可以登陆,然后在使用360之类的浏览器 就可以登录了
- 简单的for循环实现九九乘法表
PHP for 循环 语法 for (init counter; test counter; increment counter) { code to be executed; } 参数: init ...
- Git版本控制使用方法入门教程
1. 概述 对于软件版本管理工具,酷讯决定摒弃CVS而转向Git了. 为什么要选择Git? 你真正学会使用Git时, 你就会觉得这个问题的回答是非常自然的.然而当真正需要用文字来回答时,却觉得文字好像 ...
