Python之Django rest_Framework框架源码分析
#!/usr/bin/env python
# -*- coding:utf-8 -*-
from rest_framework.views import APIView
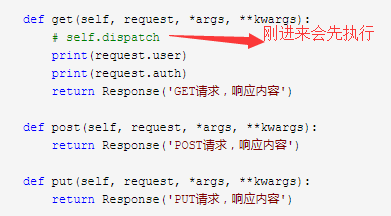
from rest_framework.response import Response class TestView(APIView): def get(self, request, *args, **kwargs):
# self.dispatch
print(request.user)
print(request.auth)
return Response('GET请求,响应内容') def post(self, request, *args, **kwargs):
return Response('POST请求,响应内容') def put(self, request, *args, **kwargs):
return Response('PUT请求,响应内容')
Django rest_Framework的基本流程:请求刚进来,会执行dispatch方法,大概的流程如下:第一步封装request,第二步:版本
第三步:认证->request.user,第三步:权限->self.check_permissions(request),第四步:节流self.check_throttles(request)
以前就是Django rest_Framework的基本流程。
认证的源码如下(只有认证源码流程):
在上面刚开始请求进来,先不执行自己写的方法,如:(get、post、put),它会先执行dispatch方法,如果没有,就回去它的父类去找。
执行它父类的dispach
Django rest framework流程:
原来用CBV的时候它继承from django.views import View中的views方法,在写get,post方法 如:class HostView(view)
如果有Django rest Framework它就不用继承from django.views import View中的views方法,而是:
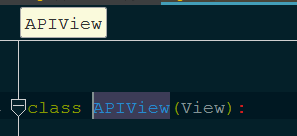
先导入:from rest_framework.views import APIView它就会继承APIView,不在继承django的views如:class AuthView(APIView):
from rest_framework.views import APIView 先导入APIView
from django.shortcuts import render,HttpResponse
class AuthView(APIView):                          继承APIView

    authentication_classes=[]

    def get(self,request):return Response('....’)
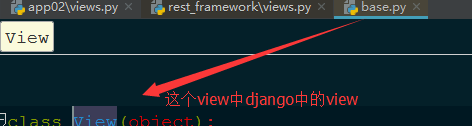
而在class AuthView(APIView)中它继承的APIView,而APIView它有继承了view,view它在rest_framework view 中如下图:
点击view它就会到django的view中,而这个view是以前CBV 中的那个view,如下图:
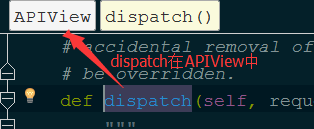
继承的这个类比原来django的这个类跟多了点功能,而它的本质还是和原来的一样先执行dispatch,自己有就执行自己的,没有就执行父类的,父类如果没有它就执行原来的dispatch 。
虽然以前它的本质一样但是现在却发生变化,现在它的request是rest_framework中的request,而原来的request是django中的request,如:
class HostView(APIView):

    def get(self,request,*args,**kwargs):

        # 原来request对象,django.core.handlers.wsgi.WSGIRequest

        # 现在的request对象,rest_framework.request.Request\

        self.dispatch           请求进来先执行dispatch

        print(request.user)

        print(request.auth)

        return Response('主机列表')
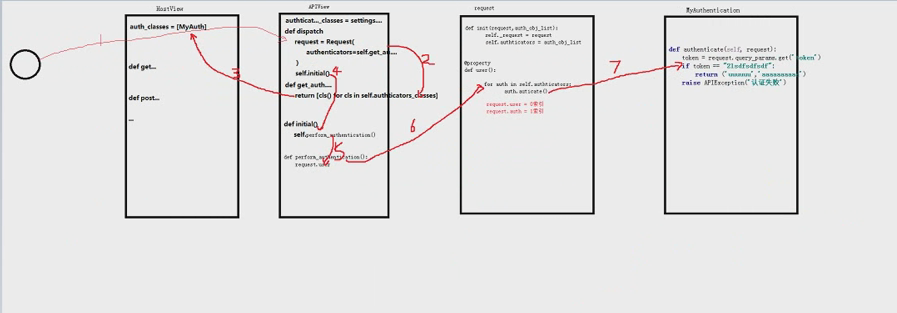
1、请求进来先执行dispatch,而dispatch它在APIView中,dispatch在它里面有,先执行它自己,如果把它先删除它就会先执行默认的那个就是django提供,如下图:
请求进来它源码就是从现在开始如下:
源码的第一步:
    def dispatch(self, request, *args, **kwargs):    请求进来先执行dispatch

        """

        `.dispatch()` is pretty much the same as Django's regular dispatch,

        but with extra hooks for startup, finalize, and exception handling.

        """

        self.args = args                            dispatch先把参数获取到

        self.kwargs = kwargs
        #1、对request进行加工
        '''
源码进来的第一步 1、request对象中(它比原来的类中封装了好多):
         request,
         parsers=self.get_parsers(),
         authenticators=self.get_authenticators(),    这里面放的是两个列的对象
         negotiator=self.get_content_negotiator(),
         parser_context=parser_context
        '''

        request = self.initialize_request(request, *args, **kwargs)      在这执行了这个方法,它返回了request

        self.request = request

        self.headers = self.default_response_headers  # deprecate?

        try:
第二步:2

            self.initial(request, *args, **kwargs)

            # Get the appropriate handler method

            if request.method.lower() in self.http_method_names:
                 #在这执行反射

                handler = getattr(self, request.method.lower(),

                                  self.http_method_not_allowed)

            else:
                #反射后拿到结果

                handler = self.http_method_not_allowed

第三步:3.执行get/post/delete/put等函数

            response = handler(request, *args, **kwargs)        返回结果

        except Exception as exc:

            response = self.handle_exception(exc)

第四步:4、对返回结果再次加工

        self.response = self.finalize_response(request, response, *args, **kwargs)

        return self.response
在执行 request = self.initialize_request(request, *args, **kwargs)时,先去自己写的找,没有再去父类找,上面是自己没有就去父类找,如下图:

上面没有就去拿它的静态字段,如下图:

在这上面执行时request被加工,如下图:

源码执行的第二步:
    def initial(self, request, *args, **kwargs):

        """

        Runs anything that needs to occur prior to calling the method handler.

        """

        self.format_kwarg = self.get_format_suffix(**kwargs)

        # Perform content negotiation and store the accepted info on the request

        neg = self.perform_content_negotiation(request)

        request.accepted_renderer, request.accepted_media_type = neg

        # Determine the API version, if versioning is in use.
         2.1处理版本信息

        version, scheme = self.determine_version(request, *args, **kwargs)

        request.version, request.versioning_scheme = version, scheme

        # Ensure that the incoming request is permitted
          2.2认证授权

        self.perform_authentication(request)
          2.3权限验证

        self.check_permissions(request)
          2.4请求用户限制访问频率

        self.check_throttles(request)
执行源码第二步中的2.2认证授权:
 def initial(self, request, *args, **kwargs):

        """

        Runs anything that needs to occur prior to calling the method handler.

        """

        self.format_kwarg = self.get_format_suffix(**kwargs)

        # Perform content negotiation and store the accepted info on the request

        neg = self.perform_content_negotiation(request)

        request.accepted_renderer, request.accepted_media_type = neg

        # Determine the API version, if versioning is in use.

        version, scheme = self.determine_version(request, *args, **kwargs)

        request.version, request.versioning_scheme = version, scheme

        # Ensure that the incoming request is permitted

        self.perform_authentication(request)   执行这一步,点击就去如下图:

        self.check_permissions(request)

        self.check_throttles(request)
还是先找自己的,没有才执行以下的:
  def perform_authentication(self, request):

        """

        Perform authentication on the incoming request.

        Note that if you override this and simply 'pass', then authentication

        will instead be performed lazily, the first time either

        `request.user` or `request.auth` is accessed.

        """

        request.user    在这里request是传过来的request,不是原来的request
尽接着下一步它就会找user,如下图:
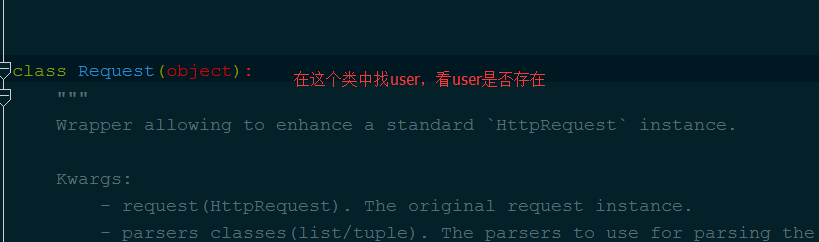
找到user :

def user(self):

        """

        Returns the user associated with the current request, as authenticated

        by the authentication classes provided to the request.

        """

        if not hasattr(self, '_user'):   如果没有user

            self._authenticate()        就会这行self._authenticate()这个方法,在找到这个方法
return self._user
    def _authenticate(self):

        """

        Attempt to authenticate the request using each authentication instance

        in turn.

        """
       循环对象列表

        for authenticator in self.authenticators:  在这里authenticators是那个对象列表,它循环这个对象列表

            try:
             执行每一个对象authenticate方法

                user_auth_tuple = authenticator.authenticate(self)     在这里它返回了两个值

            except exceptions.APIException:   没有验证成功就会报错

                self._not_authenticated()

                raise

            if user_auth_tuple is not None:

                self._authenticator = authenticator

                self.user, self.auth = user_auth_tuple      这里self.auth,self.user,就会有值,验证成功就会通过

                return

        self._not_authenticated()
Python之Django rest_Framework框架源码分析的更多相关文章
- Django搭建及源码分析(三)---+uWSGI+nginx
每个框架或者应用都是为了解决某些问题才出现旦生的,没有一个事物是可以解决所有问题的.如果觉得某个框架或者应用使用很不方便,那么很有可能就是你没有将其使用到正确的地方,没有按开发者的设计初衷来使用它,当 ...
- Django如何启动源码分析
Django如何启动源码分析 启动 我们启动Django是通过python manage.py runsever的命令 解决 这句话就是执行manage.py文件,并在命令行发送一个runsever字 ...
- 介绍开源的.net通信框架NetworkComms框架 源码分析
原文网址: http://www.cnblogs.com/csdev Networkcomms 是一款C# 语言编写的TCP/UDP通信框架 作者是英国人 以前是收费的 售价249英镑 我曾经花了 ...
- Android Small插件化框架源码分析
Android Small插件化框架源码分析 目录 概述 Small如何使用 插件加载流程 待改进的地方 一.概述 Small是一个写得非常简洁的插件化框架,工程源码位置:https://github ...
- YII框架源码分析(百度PHP大牛创作-原版-无广告无水印)
YII 框架源码分析 百度联盟事业部——黄银锋 目 录 1. 引言 3 1.1.Yii 简介 3 1.2.本文内容与结构 3 2.组件化与模块化 4 2.1.框架加载和运行流程 4 ...
- Spark RPC框架源码分析(一)简述
Spark RPC系列: Spark RPC框架源码分析(一)运行时序 Spark RPC框架源码分析(二)运行时序 Spark RPC框架源码分析(三)运行时序 一. Spark rpc框架概述 S ...
- Spark RPC框架源码分析(二)RPC运行时序
前情提要: Spark RPC框架源码分析(一)简述 一. Spark RPC概述 上一篇我们已经说明了Spark RPC框架的一个简单例子,Spark RPC相关的两个编程模型,Actor模型和Re ...
- Spark RPC框架源码分析(三)Spark心跳机制分析
一.Spark心跳概述 前面两节中介绍了Spark RPC的基本知识,以及深入剖析了Spark RPC中一些源码的实现流程. 具体可以看这里: Spark RPC框架源码分析(二)运行时序 Spark ...
- nodejs的Express框架源码分析、工作流程分析
nodejs的Express框架源码分析.工作流程分析 1.Express的编写流程 2.Express关键api的使用及其作用分析 app.use(middleware); connect pack ...
随机推荐
- Use of Deep Learning in Modern Recommendation System: A Summary of Recent Works(笔记)
注意:论文中,很多的地方出现baseline,可以理解为参照物的意思,但是在论文中,我们还是直接将它称之为基线,也 就是对照物,参照物. 这片论文中,作者没有去做实际的实验,但是却做了一件很有意义的事 ...
- centos6.x升级protobuf操作流程.
1.首先卸载protobuf,使用命令如下: sudo yum remove protobuf 2.下载protobuf源,依据自己的需要下载: 2.1下载地址:https://github.com/ ...
- 如何上传webshell后改回原来的webshell的格式
一般后台不给允许上传php,asp格式的东东 所以我们要把木马改为jpg格式 记录下上传的路径 我们上传后木马因为格式不对不能被正确解析,我们可以利用网站的备份数据库模式恢复格式 在备份数据库那填上我 ...
- windows sevser 2012搭建网站
1,首先去服务器配置,从哪里下载iis8.0和asp.net和net.xx和web服务,iis控制,ftp等等服务根据自己的需求安装 安装好后把默认的网站删除掉.或者新建一个网站,把服务端口改为其他端 ...
- Codeforces Round #426 (Div. 2)【A.枚举,B.思维,C,二分+数学】
A. The Useless Toy time limit per test:1 second memory limit per test:256 megabytes input:standard i ...
- tree(并查集)
tree Time Limit: 2000/1000 MS (Java/Others) Memory Limit: 65536/65536 K (Java/Others)Total Submis ...
- RPM包效验
- [数据库] SQL查询语句表行列转换及一行数据转换成两列
原文来自:http://blog.csdn.net/Eastmount/article/details/50559008 本文主要讲述了SQL查询语句表之间的行列转换,同时也包括如何将一行数据转换成两 ...
- MongoDB模拟多文档事务操作
Mongodb不支持多文档原子性操作,因此依据两阶段提交协议(Two Phase Commits protocol)来模拟事务. 以两个银行账户之间的转账行为为例,来说明如何实现多文档间的事务操作. ...
- 电铸3D18K硬金 电铸易熔合金 电铸中空硬金饰品合金
俊霖电铸3DK金易熔合金是要求相互关连,互为条件,缺一不可,是产品完整性和完美性的重要体现. 第一.适用性:电铸3DK金易熔合金的性能应适用于电铸.首饰.K金饰品.摆件等工艺品的易熔合金 ...