吴裕雄 python 神经网络——TensorFlow 图像预处理完整样例
import numpy as np

import tensorflow as tf

import matplotlib.pyplot as plt

def distort_color(image, color_ordering=0):

    if color_ordering == 0:

        image = tf.image.random_brightness(image, max_delta=32./255.)

        image = tf.image.random_saturation(image, lower=0.5, upper=1.5)

        image = tf.image.random_hue(image, max_delta=0.2)

        image = tf.image.random_contrast(image, lower=0.5, upper=1.5)

    else:

        image = tf.image.random_saturation(image, lower=0.5, upper=1.5)

        image = tf.image.random_brightness(image, max_delta=32./255.)

        image = tf.image.random_contrast(image, lower=0.5, upper=1.5)

        image = tf.image.random_hue(image, max_delta=0.2)

    return tf.clip_by_value(image, 0.0, 1.0)

def preprocess_for_train(image, height, width, bbox):

    # 查看是否存在标注框。

    if bbox is None:

        bbox = tf.constant([0.0, 0.0, 1.0, 1.0], dtype=tf.float32, shape=[1, 1, 4])

    if image.dtype != tf.float32:

        image = tf.image.convert_image_dtype(image, dtype=tf.float32)

    # 随机的截取图片中一个块。

    bbox_begin, bbox_size, _ = tf.image.sample_distorted_bounding_box(tf.shape(image), bounding_boxes=bbox, min_object_covered=0.4)

    bbox_begin, bbox_size, _ = tf.image.sample_distorted_bounding_box(tf.shape(image), bounding_boxes=bbox, min_object_covered=0.4)

    distorted_image = tf.slice(image, bbox_begin, bbox_size)

    # 将随机截取的图片调整为神经网络输入层的大小。

    distorted_image = tf.image.resize_images(distorted_image, [height, width], method=np.random.randint(4))

    distorted_image = tf.image.random_flip_left_right(distorted_image)

    distorted_image = distort_color(distorted_image, np.random.randint(2))

    return distorted_image

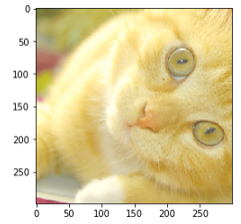
image_raw_data = tf.gfile.FastGFile("F:\\TensorFlowGoogle\\201806-github\\datasets\\cat.jpg", "rb").read()

with tf.Session() as sess:

    img_data = tf.image.decode_jpeg(image_raw_data)

    boxes = tf.constant([[[0.05, 0.05, 0.9, 0.7], [0.35, 0.47, 0.5, 0.56]]])

    for i in range(9):

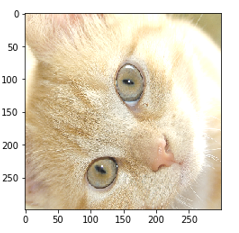
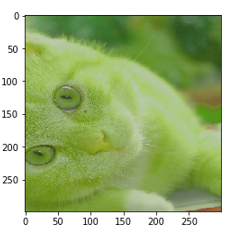
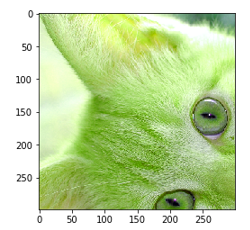
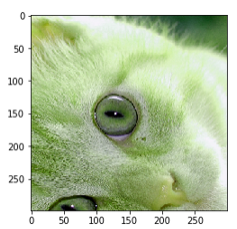
        result = preprocess_for_train(img_data, 299, 299, boxes)

        plt.imshow(result.eval())

        plt.show()




吴裕雄 python 神经网络——TensorFlow 图像预处理完整样例的更多相关文章
- TensorFlow图像预处理完整样例
参考书 <TensorFlow:实战Google深度学习框架>(第2版) 以下TensorFlow程序完成了从图像片段截取,到图像大小调整再到图像翻转及色彩调整的整个图像预处理过程. #! ...
- 吴裕雄 python 神经网络——TensorFlow图片预处理
import numpy as np import tensorflow as tf import matplotlib.pyplot as plt # 使用'r'会出错,无法解码,只能以2进制形式读 ...
- 吴裕雄 python 神经网络——TensorFlow图片预处理调整图片
import numpy as np import tensorflow as tf import matplotlib.pyplot as plt def distort_color(image, ...
- 吴裕雄 python 神经网络TensorFlow实现LeNet模型处理手写数字识别MNIST数据集
import tensorflow as tf tf.reset_default_graph() # 配置神经网络的参数 INPUT_NODE = 784 OUTPUT_NODE = 10 IMAGE ...
- 吴裕雄 python 神经网络——TensorFlow 输入数据处理框架
import tensorflow as tf files = tf.train.match_filenames_once("E:\\MNIST_data\\output.tfrecords ...
- 吴裕雄 python 神经网络——TensorFlow 输入文件队列
import tensorflow as tf def _int64_feature(value): return tf.train.Feature(int64_list=tf.train.Int64 ...
- 吴裕雄 python 神经网络——TensorFlow TFRecord样例程序
import numpy as np import tensorflow as tf from tensorflow.examples.tutorials.mnist import input_dat ...
- 吴裕雄 python 神经网络——TensorFlow 完整神经网络样例程序
import tensorflow as tf from numpy.random import RandomState batch_size = 8 w1= tf.Variable(tf.rando ...
- 吴裕雄 python 神经网络——TensorFlow 数据集高层操作
import tempfile import tensorflow as tf train_files = tf.train.match_filenames_once("E:\\output ...
随机推荐
- alert警告框点击确定后自动提交表单
转载于 :https://zhidao.baidu.com/question/619375120140398412.html 在页面中有多个input type="text"的文 ...
- Hibernate知识点整理
一, Hibernate 介绍: Hibernate 只是一个将持久化类与数据库表相映射的工具,每个持久化类实例均对应于数据库表中的一个数据行而已.用户只需直接使用面向对象的方法操作此持久化类实例,即 ...
- Java学习笔记(八)面向对象---抽象类
当多个类中出现相同功能,但是功能主体不同时,我们可以向上抽取,只抽取功能定义,而不抽取功能主体. 抽象类的特点 抽象方法一定在抽象类中. 抽象方法和抽象类都必须被abstract关键字修饰. 抽象类不 ...
- 神经网路的层数,损失函数(loss)
神经网络的复杂度:可用神经网络的层数和神经网络中待优化参数个数表示 神经网路的层数:一般不计入输入层,层数 = n 个隐藏层 + 1 个输出层 神经网路待优化的参数:神经网络中所有参数 w 的个数 + ...
- casperJs的安装2
通过上面一节,以为能够顺利安装好phantom 没想到,根本没成功. 接着,通过github上下载项目,重新安装: 1.clone项目:[https://github.com/ariya/phanto ...
- 有源汇有上下界最大流 (ZQU1591)
题意:现在的网络有一个源点s和汇点t,求出一个流使得源点的总流出量等于汇点的总流入量,其他的点满足流量守恒,而且每条边的流量满足上界和下界限制. 思路:要满足每一个点的流量守恒,我们可以尝试像无源汇上 ...
- Nuxt 常用的配置项
1:在开发项目时 我们可能会遇到端口被占用或者指定IP的情况, 在Nuxt中 我们可以在page.json 文件中进行配置,例如希望IP配置成125.0.0.1,端口设置1616 "conf ...
- php 裁剪图片并处理png图片背景变黑
/*TODO 图片裁剪*/ function img_cutting($file_old,$file_new,$h,$w){ $image = $file_old; // 原图 $dir = 'xxx ...
- Spring - Spring Boot - Actuator Web 访问开启
1. 概述 打开 Spring Boot Actuator 的 Web 访问 2. 场景 之前看 Spring 的时候, 曾经想了解当时的配置 后来发现, 确实有这么个工具 刚开始发现, 除了 act ...
- Re(正则表达式)库入门
一.正则表达式的概念 正则表达式 "一行胜千言" regular expression regex RE 是用来简洁表达一组字符串的表达式. 'PN' 'PYN' 'PYTN' & ...
