制作一个简易计算器——基于Android Studio实现
一个计算器Android程序的源码部分分为主干和细节两部分。
一、主干
1. 主干的构成
- 计算器的布局
- 事件(即计算器上的按钮、文本框)监听
- 实现计算
2. 详细解释
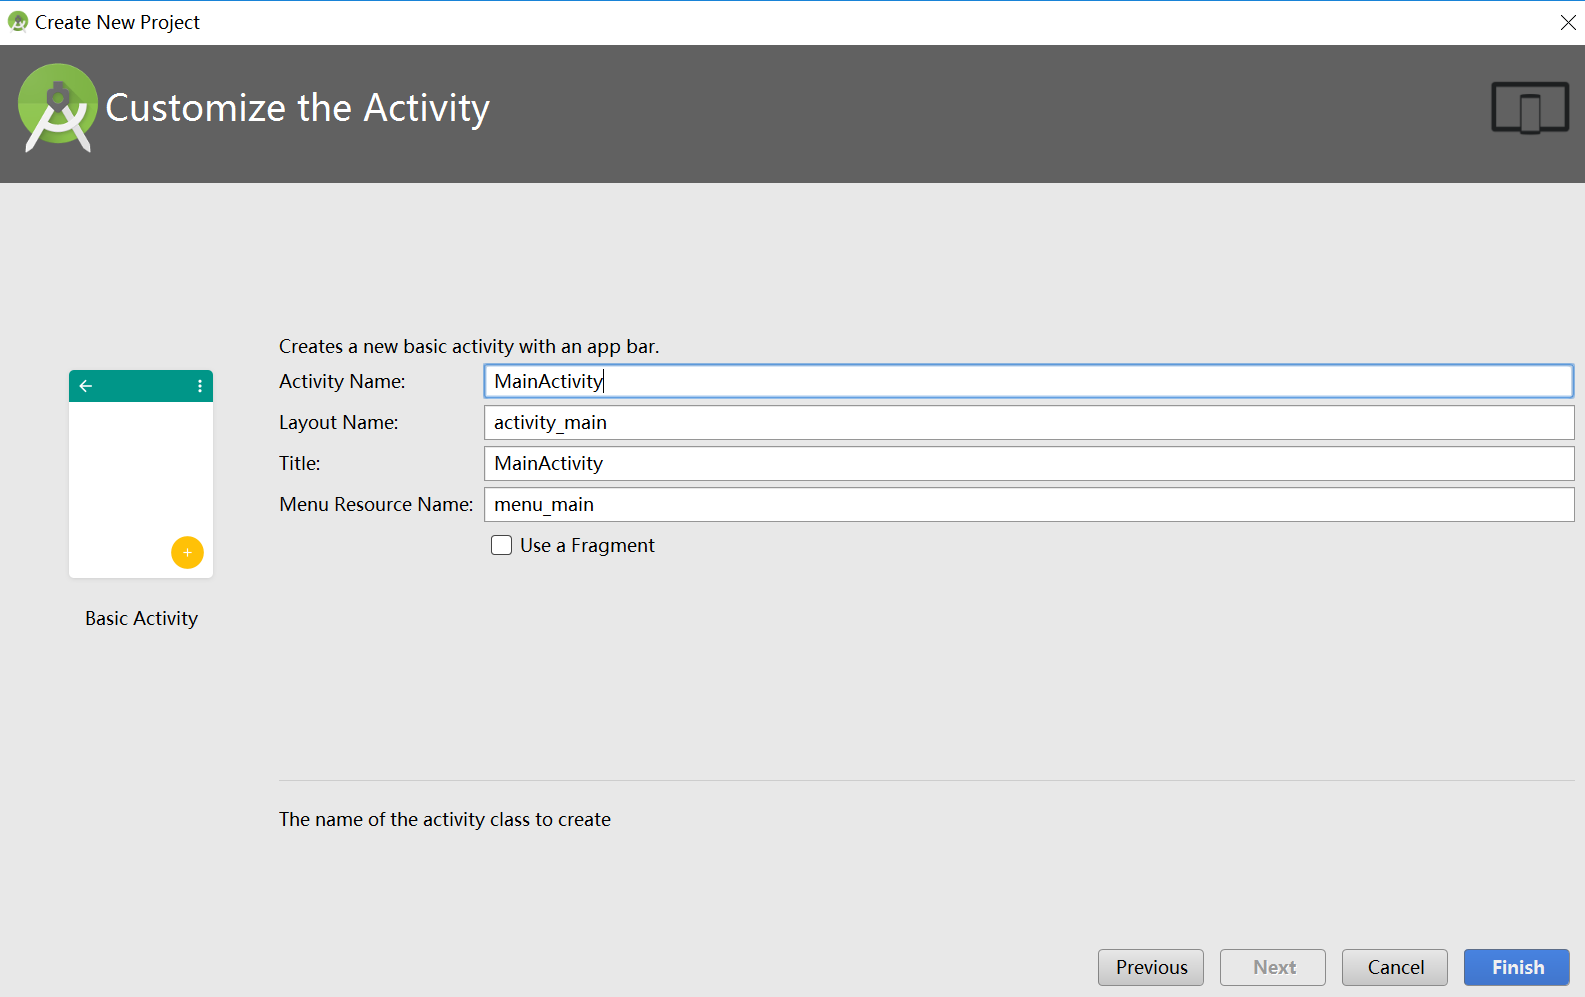
假设我们的项目名为Calculator,而布局名称(Layout Name)为默认的activity_main 。即设置如下图所示:
在这种前提下,有:
- 设置计算器布局的文件:Calculator/app/src/main/res/layout/activity_main.xml
- 事件监听和计算实现在同一个文件里:Calculator/app/src/main/java/下的一个子目录里的MainActivity.java
即如下图所示:

3. 主干代码部分
- 计算器布局代码(写在activity_main.xml文件里):
 <?xml version="1.0" encoding="utf-8"?>

 <ScrollView xmlns:android="http://schemas.android.com/apk/res/android"

     android:layout_width="fill_parent"

     android:layout_height="wrap_content"

     >

     <LinearLayout

         android:layout_width="fill_parent"

         android:layout_height="fill_parent"

         android:orientation="vertical" >

         <EditText

             android:id="@+id/input"

             android:layout_width="fill_parent"

             android:layout_height="wrap_content"

             android:layout_gravity="center"

             android:editable="false"

             android:hint="@string/shuru" />

         <EditText

             android:id="@+id/output"

             android:layout_width="fill_parent"

             android:layout_height="wrap_content"

             android:layout_gravity="center"

             android:editable="true"

             android:gravity="right"

             android:hint="@string/shuchu" />

         <RelativeLayout

             android:layout_width="fill_parent"

             android:layout_height="wrap_content" >

             <Button

                 android:id="@+id/seven"

                 android:layout_width="80dp"

                 android:layout_height="70dp"

                 android:layout_alignParentLeft="true"

                 android:text="@string/seven"

                 android:textSize="40sp" />

             <Button

                 android:id="@+id/eight"

                 android:layout_width="80dp"

                 android:layout_height="70dp"

                 android:layout_toRightOf="@id/seven"

                 android:text="@string/eight"

                 android:textSize="40sp" />

             <Button

                 android:id="@+id/nine"

                 android:layout_width="80dp"

                 android:layout_height="70dp"

                 android:layout_toRightOf="@id/eight"

                 android:text="@string/nine"

                 android:textSize="40sp" />

             <Button

                 android:id="@+id/add"

                 android:layout_width="80dp"

                 android:layout_height="70dp"

                 android:layout_alignParentRight="true"

                 android:layout_toRightOf="@id/nine"

                 android:text="@string/add"

                 android:textSize="40sp" />

             <Button

                 android:id="@+id/four"

                 android:layout_width="80dp"

                 android:layout_height="70dp"

                 android:layout_alignParentLeft="true"

                 android:layout_below="@id/seven"

                 android:text="@string/four"

                 android:textSize="40sp" />

             <Button

                 android:id="@+id/five"

                 android:layout_width="80dp"

                 android:layout_height="70dp"

                 android:layout_below="@id/eight"

                 android:layout_toRightOf="@id/four"

                 android:text="@string/five"

                 android:textSize="40sp" />

             <Button

                 android:id="@+id/six"

                 android:layout_width="80dp"

                 android:layout_height="70dp"

                 android:layout_below="@id/nine"

                 android:layout_toRightOf="@id/five"

                 android:text="@string/six"

                 android:textSize="40sp" />

             <Button

                 android:id="@+id/subtract"

                 android:layout_width="80dp"

                 android:layout_height="70dp"

                 android:layout_alignParentRight="true"

                 android:layout_below="@id/add"

                 android:layout_toRightOf="@id/six"

                 android:text="@string/subtract"

                 android:textSize="40sp" />

             <Button

                 android:id="@+id/one"

                 android:layout_width="80dp"

                 android:layout_height="70dp"

                 android:layout_alignParentLeft="true"

                 android:layout_below="@id/four"

                 android:text="@string/one"

                 android:textSize="40sp" />

             <Button

                 android:id="@+id/two"

                 android:layout_width="80dp"

                 android:layout_height="70dp"

                 android:layout_below="@id/five"

                 android:layout_toRightOf="@id/one"

                 android:text="@string/two"

                 android:textSize="40sp" />

             <Button

                 android:id="@+id/three"

                 android:layout_width="80dp"

                 android:layout_height="70dp"

                 android:layout_below="@id/six"

                 android:layout_toRightOf="@id/two"

                 android:text="@string/three"

                 android:textSize="40sp" />

             <Button

                 android:id="@+id/multiply"

                 android:layout_width="80dp"

                 android:layout_height="70dp"

                 android:layout_alignParentRight="true"

                 android:layout_below="@id/subtract"

                 android:layout_toRightOf="@id/three"

                 android:text="@string/multiply"

                 android:textSize="40sp" />

             <Button

                 android:id="@+id/zero"

                 android:layout_width="80dp"

                 android:layout_height="70dp"

                 android:layout_alignParentLeft="true"

                 android:layout_below="@id/one"

                 android:text="@string/zero"

                 android:textSize="40sp" />

             <Button

                 android:id="@+id/clear"

                 android:layout_width="80dp"

                 android:layout_height="70dp"

                 android:layout_below="@id/two"

                 android:layout_toRightOf="@id/zero"

                 android:text="@string/clear"

                 android:textSize="40sp" />

             <Button

                 android:id="@+id/result"

                 android:layout_width="80dp"

                 android:layout_height="70dp"

                 android:layout_below="@id/three"

                 android:layout_toRightOf="@id/clear"

                 android:text="@string/result"

                 android:textSize="40sp" />

             <Button

                 android:id="@+id/divide"

                 android:layout_width="80dp"

                 android:layout_height="70dp"

                 android:layout_alignParentRight="true"

                 android:layout_below="@id/multiply"

                 android:layout_toRightOf="@id/result"

                 android:text="@string/divide"

                 android:textSize="40sp" />

             <Button

                 android:id="@+id/dot"

                 android:layout_width="80dp"

                 android:layout_height="70dp"

                 android:layout_alignParentLeft="true"

                 android:layout_below="@id/zero"

                 android:text="@string/dot"

                 android:textSize="40sp" />

             <Button

                 android:id="@+id/writeButton"

                 android:layout_width="wrap_content"

                 android:layout_height="wrap_content"

                 android:layout_alignParentLeft="true"

                 android:layout_below="@id/dot"

                 android:text="@string/write"

                 android:textSize="40sp" />

             <Button

                 android:id="@+id/readButton"

                 android:layout_width="wrap_content"

                 android:layout_height="wrap_content"

                 android:layout_alignParentRight="true"

                 android:layout_below="@id/dot"

                 android:text="@string/read"

                 android:textSize="40sp" />

             <CheckBox

                 android:id="@+id/appendBox"

                 android:text="@string/appendBox"

                 android:layout_width="wrap_content"

                 android:layout_height="wrap_content"

                 android:layout_alignParentBottom="true"

                 android:layout_toLeftOf="@+id/divide"

                 android:layout_toStartOf="@+id/divide"

                 android:layout_marginBottom="12dp"

                 />

         </RelativeLayout>

         <EditText

             android:layout_width="match_parent"

             android:layout_height="wrap_content"

             android:id="@+id/textView" />

         <EditText

             android:layout_width="match_parent"

             android:layout_height="wrap_content"

             android:id="@+id/displayView" />

         <EditText

             android:id="@+id/errorzero"

             android:layout_width="fill_parent"

             android:layout_height="wrap_content"

             android:layout_gravity="center"

             android:editable="false"

             android:gravity="center"

             />

         <EditText

             android:id="@+id/resultText"

             android:layout_width="fill_parent"

             android:layout_height="wrap_content"

             android:layout_gravity="center"

             android:editable="false"

             android:gravity="left"

             android:text="@string/resultText"

             />

     </LinearLayout>

 </ScrollView>
- 事件监听和实现计算代码(写在MainActivity.java文件里)
 package com.example.lenovo.calculator;

         import android.app.Activity;

         import android.content.Context;

         import android.os.Bundle;

         import android.view.View;

         import android.view.View.OnClickListener;

         import android.widget.Button;

         import android.widget.CheckBox;

         import android.widget.EditText;

         import java.io.FileInputStream;

         import java.io.FileNotFoundException;

         import java.io.FileOutputStream;

         import java.io.IOException;

 public class MainActivity extends Activity {

     /**

      * Called when the activity is first created.

      */

     private EditText output = null;

     private EditText input = null;

     private Button btn0 = null;

     private Button btn1 = null;

     private Button btn2 = null;

     private Button btn3 = null;

     private Button btn4 = null;

     private Button btn5 = null;

     private Button btn6 = null;

     private Button btn7 = null;

     private Button btn8 = null;

     private Button btn9 = null;

     private Button btnadd = null;

     private Button btnsubtract = null;

     private Button btnmultiply = null;

     private Button btndivide = null;

     private Button btnclear = null;

     private Button btnresult = null;

     private Button btndot = null;

     private EditText errorzero = null;

     private EditText resultText = null;

     private Button writeButton = null;

     private Button readButton = null;

     private CheckBox appendBox = null;

     private EditText textView = null;

     private EditText displayView = null;

     public String FILE_NAME = "fileDemo.txt";

     private String str = "";//保存数字

     private String strold = "";//原数字

     private char act = ' ';//记录“加减乘除等于”符号

     private int count = 0;//判断要计算的次数,如果超过一个符号,先算出来一部分

     private Float result = null;//计算的输出结果

     private Boolean errBoolean = false;//有错误的时候为true,无错为false

     private Boolean flagBoolean = false;//一个标志,如果为true,可以响应运算消息,如果为false,不响应运算消息,只有前面是数字才可以响应运算消息

     private Boolean flagDot = false; //小数点标志位

     @Override

     public void onCreate(Bundle savedInstanceState) {

         super.onCreate(savedInstanceState);

         setContentView(R.layout.activity_main);

         output = (EditText) findViewById(R.id.output);

         input = (EditText) findViewById(R.id.input);

         errorzero = (EditText) findViewById(R.id.errorzero);

         resultText = (EditText) findViewById(R.id.resultText);

         writeButton = (Button) findViewById(R.id.writeButton);

         readButton = (Button) findViewById(R.id.readButton);

         textView = (EditText) findViewById(R.id.textView);

         displayView = (EditText) findViewById(R.id.displayView);

         appendBox = (CheckBox) findViewById(R.id.appendBox);

         btn0 = (Button) findViewById(R.id.zero);

         btn1 = (Button) findViewById(R.id.one);

         btn2 = (Button) findViewById(R.id.two);

         btn3 = (Button) findViewById(R.id.three);

         btn4 = (Button) findViewById(R.id.four);

         btn5 = (Button) findViewById(R.id.five);

         btn6 = (Button) findViewById(R.id.six);

         btn7 = (Button) findViewById(R.id.seven);

         btn8 = (Button) findViewById(R.id.eight);

         btn9 = (Button) findViewById(R.id.nine);

         btnadd = (Button) findViewById(R.id.add);

         btnsubtract = (Button) findViewById(R.id.subtract);

         btnmultiply = (Button) findViewById(R.id.multiply);

         btndivide = (Button) findViewById(R.id.divide);

         btnclear = (Button) findViewById(R.id.clear);

         btnresult = (Button) findViewById(R.id.result);

         btndot = (Button) findViewById(R.id.dot);

         //设置按钮侦听事件

         btn0.setOnClickListener(listener);

         btn1.setOnClickListener(listener);

         btn2.setOnClickListener(listener);

         btn3.setOnClickListener(listener);

         btn4.setOnClickListener(listener);

         btn5.setOnClickListener(listener);

         btn6.setOnClickListener(listener);

         btn7.setOnClickListener(listener);

         btn8.setOnClickListener(listener);

         btn9.setOnClickListener(listener);

         //执行运算

         btnadd.setOnClickListener(listener);

         btnsubtract.setOnClickListener(listener);

         btnmultiply.setOnClickListener(listener);

         btndivide.setOnClickListener(listener);

         btnclear.setOnClickListener(listener);

         btnresult.setOnClickListener(listener);

         btndot.setOnClickListener(listener);

         writeButton.setOnClickListener(writelistener);

         readButton.setOnClickListener(readlistener);

         // ATTENTION: This was auto-generated to implement the App Indexing API.

         // See https://g.co/AppIndexing/AndroidStudio for more information.

     }

     private OnClickListener listener = new OnClickListener() {

         public void onClick(View v) {

             // TODO Auto-generated method stub

             switch (v.getId()) {

                 //输入数字

                 case R.id.zero:

                     num(0);

                     break;

                 case R.id.one:

                     num(1);

                     break;

                 case R.id.two:

                     num(2);

                     break;

                 case R.id.three:

                     num(3);

                     break;

                 case R.id.four:

                     num(4);

                     break;

                 case R.id.five:

                     num(5);

                     break;

                 case R.id.six:

                     num(6);

                     break;

                 case R.id.seven:

                     num(7);

                     break;

                 case R.id.eight:

                     num(8);

                     break;

                 case R.id.nine:

                     num(9);

                     break;

                 case R.id.dot:

                     dot();

                     break;

                 //执行运算

                 case R.id.add:

                     add();

                     break;

                 case R.id.subtract:

                     sub();

                     break;

                 case R.id.multiply:

                     multiply();

                     break;

                 case R.id.divide:

                     divide();

                     break;

                 case R.id.clear:

                     clear();

                     break;

                 //计算结果

                 case R.id.result:

                     result();

                     if (!errBoolean && flagBoolean) {

                         output.setText(String.valueOf(result));

                     }

                     resultText.setText(strold + act + str + "=" + result+"                          ");

                     break;

                 default:

                     break;

             }

             input.setText(strold + act + str);

             output.setText(String.valueOf(result));

         }

     };

     private OnClickListener writelistener = new OnClickListener() {

         @Override

         public void onClick(View view) {

             //textView.setText("");

             FileOutputStream fos = null;

             try {

                 if (appendBox.isChecked()) {

                     fos = openFileOutput(FILE_NAME, Context.MODE_APPEND);

                 } else {

                     fos = openFileOutput(FILE_NAME, Context.MODE_PRIVATE);

                 }

                 String text = resultText.getText().toString();

                 fos.write(text.getBytes());

                 textView.setText("文件写入成功,写入长度:" + text.length());

                 //resultText.setText("");

             } catch (FileNotFoundException e) {

                 e.printStackTrace();

             } catch (IOException e) {

                 e.printStackTrace();

             }

             finally {

                 if (fos != null)

                     try {

                         fos.flush();

                         fos.close();

                     } catch (IOException e) {

                         e.printStackTrace();

                     }

             }

         }

     };

     private OnClickListener readlistener = new OnClickListener() {

         @Override

         public void onClick(View view) {

             displayView.setText("");

             FileInputStream fis = null;

             try {

                 fis = openFileInput(FILE_NAME);

                 if (fis.available() == 0) {

                     return;

                 }

                 byte[] readBytes = new byte[fis.available()];

                 while (fis.read(readBytes) != -1) {

                 }

                 String text = new String(readBytes);

                 displayView.setText(text);

                 textView.setText("文件读取成功,写入长度:" + text.length());

             } catch (FileNotFoundException e) {

                 e.printStackTrace();

             } catch (IOException e) {

                 e.printStackTrace();

             }

         }

     };

     private void dot() {

         // TODO Auto-generated method stub

         if (!flagDot) {

             str = str + ".";

             flagBoolean = false;

             flagDot = true;

         }

     }

     private void clear() {

         // TODO Auto-generated method stub

         str = strold = "";

         count = 0;

         act = ' ';

         result = null;

         flagBoolean = false;

         flagDot = false;

         input.setText(strold + act + str);

         output.setText("");

         errorzero.setText("");

         displayView.setText("");

         textView.setText("");

         resultText.setText("");

     }

     private void divide() {

         // TODO Auto-generated method stub

         if (flagBoolean) {

             check();

             act = '/';

             flagBoolean = false;

         }

     }

     private void multiply() {

         // TODO Auto-generated method stub

         if (flagBoolean) {

             check();

             act = '*';

             flagBoolean = false;

         }

     }

     private void sub() {

         // TODO Auto-generated method stub

         if (flagBoolean) {

             check();

             act = '-';

             flagBoolean = false;

         }

     }

     private void add() {

         // TODO Auto-generated method stub

         if (flagBoolean) {

             check();

             act = '+';

             flagBoolean = false;

         }

     }

     private void check() {

         // TODO Auto-generated method stub

         if (count >= 1) {

             result();

             str = String.valueOf(result);

         }

         strold = str;

         str = "";

         count++;

         flagDot = false;

         errorzero.setText("");

     }

     //计算输出结果

     private void result() {

         // TODO Auto-generated method stub

         if (flagBoolean) {

             Float a, b;

             a = Float.parseFloat(strold);

             b = Float.parseFloat(str);

             if (b == 0 && act == '/') {

                 clear();

                 errorzero.setText("除数不能为零!");

                 //output.setText("除数不能为零!");

                 //errBoolean=true;

             }

             if (!errBoolean) {

                 switch (act) {

                     case '+':

                         result = a + b;

                         break;

                     case '-':

                         result = a - b;

                         break;

                     case '*':

                         result = a * b;

                         break;

                     case '/':

                         result = a / b;

                         break;

                     default:

                         break;

                 }

             }

         }

     }

     private void num(int i) {

         // TODO Auto-generated method stub

         str = str + String.valueOf(i);

         flagBoolean = true;

         errorzero.setText("");

     }

 }
二、细节
仅仅将主干部分代码copy下来并不能运行程序,因为主干代码调用了一些文件的代码,这些文件就是我们所说的细节。
1. 字符串资源
- 文件位置:Calculator/app/src/main/res/values/strings.xml
- 代码部分:
 <resources>

     <string name="app_name">Calculator</string>

     <string name="action_settings">Settings</string>

         <string name="zero">0</string>

         <string name="one">1</string>

         <string name="two">2</string>

         <string name="three">3</string>

         <string name="four">4</string>

         <string name="five">5</string>

         <string name="six">6</string>

         <string name="seven">7</string>

         <string name="eight">8</string>

         <string name="nine">9</string>

         <string name="add">+</string>

         <string name="subtract">-</string>

         <string name="multiply">*</string>

         <string name="divide">/</string>

         <string name="clear">CE</string>

         <string name="result">=</string>

         <string name="shuru">请按数字键盘输入数字</string>

         <string name="shuchu">计算器输出结果</string>

         <string name="dot">.</string>

         <string name="write">写入</string>

         <string name="read">读取</string>

         <string name="resultText">计算式</string>

         <string name="appendBox">追加模式</string>

 </resources>
2. 其他可能要改的文件
- Calculator/app/src/main/res/drawable:设置相关的背景颜色、按钮特效
- Calculator/app/src/main/AndroidManifest.xml:设置这个项目的整体配置
三、备注
- 本文提供的简易计算器仅需要修改前三个文件(布局文件、监听实现文件、字符串资源文件)
- 纯复制粘贴是一定会报错的,留意一点将有些地方改动一下
制作一个简易计算器——基于Android Studio实现的更多相关文章
- 基于Android Studio搭建hello world工程
基于Android Studio搭建hello world工程 版本:ANDROID STUDIO V0.4.6 This download includes: · Android St ...
- 《ArcGIS Runtime SDK for Android开发笔记》——(5)、基于Android Studio构建ArcGIS Android开发环境(离线部署)(转)
1.前言 在上一篇的内容里我们介绍了基于Android Studio构建ArcGIS Runtime SDK for Android开发环境的基本流程,流程中我们采用的是基于Gradle的构建方式,在 ...
- 《ArcGIS Runtime SDK for Android开发笔记》——(6)、基于Android Studio的ArcGIS Android工程结构解析
1.前言 Android Studio 是第一个Google官方的 Android 开发环境.其他工具,例如 Eclipse,在 Android Studio 发布之前已经有了大规模的使用.为了帮助开 ...
- 如何使用Java AWT 创建一个简易计算器
摘要:手把手教你使用 Java AWT 创建一个简易计算器. 本文分享自华为云社区<手把手教你使用 Java AWT 创建一个简易计算器>,作者:海拥 . 关于AWT AWT (抽象窗口工 ...
- 用XMLHttpRequest制作一个简易ajax
概述 jquery退出历史舞台之后,我们怎么来发送ajax请求呢?可以用相关的库,也可以自己制作一个简易的ajax. 需要说明的是,我们使用的是XMLHttpRequest 2,它几乎兼容所有主流浏览 ...
- 前端 JavaScript 实现一个简易计算器
前端使用 JavaScript 实现一个简易计算器,没有难度,但是里面有些小知识还是需要注意的,算是一次基础知识回顾吧. 题目 实现一个简易版的计算器,需求如下: 1.除法操作时,如果被除数为0,则结 ...
- 使用 history 对象和 location 对象中的属性和方法制作一个简易的网页浏览工具
查看本章节 查看作业目录 需求说明: 使用 history 对象和 location 对象中的属性和方法制作一个简易的网页浏览工具 实现思路: 使用history对象中的 forward() 方法和 ...
- iOS:制作一个简易的计算器
初步接触视图,制作了一个简易的计算器,基本上简单的计算是没有问题的,不是很完美,可能还有一些bug,再接再厉. // // ViewController.m // 计算器 // // Created ...
- 《ArcGIS Runtime SDK for Android开发笔记》——(4)、基于Android Studio构建ArcGIS Android开发环境
1.前言 2015年1月15日,发布ArcGIS Runtime SDK for Android v10.2.5版本.从该版本开始默认支持android studio开发环境,示例代码的默认开发环境也 ...
随机推荐
- 论坛数据转换discuz论坛?
http://www.bbstobbs.com/thread-397-1-1.html
- antd不想写那么多option怎么办
做项目的时候发现如果下拉列表选项多的时候会写很多的 Option ,但是用到下拉列表的地方又超级多.所以自己写了一个方法,哪需要就放到哪. 记录一下方法.留待以后用 selectStreetIdCha ...
- Spring知识点总结(六)之Spring事务
**************************************************************************************************** ...
- 7.Vue-Quill-Editor图片插入自定义
Vue-Quill-Editor图片插入自定义 前言: 因为在项目中前端采用了Vue来实现,正好用到了富文本编辑器这一块,于是,经过技术上的选择,决定使用Vue-Quill-Editor. 使用的过程 ...
- SpringBoot非官方教程 | 第十九篇: 验证表单信息
转载请标明出处: 原文首发于:https://www.fangzhipeng.com/springboot/2017/07/11/springboot19/ 本文出自方志朋的博客 这篇文篇主要简述如何 ...
- HIbernate jar包
密码nbbk https://pan.baidu.com/share/init?surl=nYNO1f20FWMQiZ7iN11DIA
- datagrid中设置编辑,删除列是否可以访问
foreach (RepeaterItem Item in rpt_Result.Items) { LinkButton edit = (LinkButton)Item.FindControl(&qu ...
- 利用pt-query-digest分析MySQL慢查询
1.用法与参数说明 pt-query-digest [OPTIONS] [FILES] [DSN] --create-review-table ##当使用--review参数把分析结果输出到表中时,如 ...
- 手机浏览器页面点击不跳转(Android手机部分浏览器) 浏览器双击放大网页 解决
手机端web网页项目(angluar js 1.4.6) 1,网页项目开发过程中,使用PC浏览器能正常访问,IOS设备浏览器也能正常访问,但是使用Android部分浏览器进行访问的时候,链接偶尔不跳转 ...
- DISTINCT 去重仍有重复的分析
logger日志报错 插入数据时违反主键唯一约束 org.springframework.dao.DuplicateKeyException: ### Error updating database. ...