Spring Boot☞ 使用Thymeleaf模板引擎渲染web视图
静态资源访问
在我们开发Web应用的时候,需要引用大量的js、css、图片等静态资源。
默认配置
Spring Boot默认提供静态资源目录位置需置于classpath下,目录名需符合如下规则:
- /static
- /public
- /resources
- /META-INF/resources
举例:我们可以在src/main/resources/目录下创建static,在该位置放置一个图片文件。启动程序后,尝试访问http://localhost:8080/D.jpg。如能显示图片,配置成功。
渲染Web页面
在之前的示例中,我们都是通过@RestController来处理请求,所以返回的内容为json对象。那么如果需要渲染html页面的时候,要如何实现呢?
模板引擎
在动态HTML实现上Spring Boot依然可以完美胜任,并且提供了多种模板引擎的默认配置支持,所以在推荐的模板引擎下,我们可以很快的上手开发动态网站。
Spring Boot提供了默认配置的模板引擎主要有以下几种:
- Thymeleaf
- FreeMarker
- Velocity
- Groovy
- Mustache
Spring Boot建议使用这些模板引擎,避免使用JSP,若一定要使用JSP将无法实现Spring Boot的多种特性,具体可见后文:支持JSP的配置
当你使用上述模板引擎中的任何一个,它们默认的模板配置路径为:src/main/resources/templates。当然也可以修改这个路径,具体如何修改,可在后续各模板引擎的配置属性中查询并修改。
Thymeleaf
Thymeleaf是一个XML/XHTML/HTML5模板引擎,可用于Web与非Web环境中的应用开发。它是一个开源的Java库,基于Apache License 2.0许可,由Daniel Fernández创建,该作者还是Java加密库Jasypt的作者。
Thymeleaf提供了一个用于整合Spring MVC的可选模块,在应用开发中,你可以使用Thymeleaf来完全代替JSP或其他模板引擎,如Velocity、FreeMarker等。Thymeleaf的主要目标在于提供一种可被浏览器正确显示的、格式良好的模板创建方式,因此也可以用作静态建模。你可以使用它创建经过验证的XML与HTML模板。相对于编写逻辑或代码,开发者只需将标签属性添加到模板中即可。接下来,这些标签属性就会在DOM(文档对象模型)上执行预先制定好的逻辑。
示例模板:
<table>

  <thead>

    <tr>

      <th th:text="#{msgs.headers.name}">Name</td>

      <th th:text="#{msgs.headers.price}">Price</td>

    </tr>

  </thead>

  <tbody>

    <tr th:each="prod : ${allProducts}">

      <td th:text="${prod.name}">Oranges</td>

      <td th:text="${#numbers.formatDecimal(prod.price,1,2)}">0.99</td>

    </tr>

  </tbody>

</table>
可以看到Thymeleaf主要以属性的方式加入到html标签中,浏览器在解析html时,当检查到没有的属性时候会忽略,所以Thymeleaf的模板可以通过浏览器直接打开展现,这样非常有利于前后端的分离。
在Spring Boot中使用Thymeleaf,只需要引入下面依赖,并在默认的模板路径src/main/resources/templates下编写模板文件即可完成。
<dependency>

	<groupId>org.springframework.boot</groupId>

	<artifactId>spring-boot-starter-thymeleaf</artifactId>

</dependency>
效果图:
POM.xml
<?xml version="1.0" encoding="UTF-8"?>

<project xmlns="http://maven.apache.org/POM/4.0.0" xmlns:xsi="http://www.w3.org/2001/XMLSchema-instance"

         xsi:schemaLocation="http://maven.apache.org/POM/4.0.0 http://maven.apache.org/xsd/maven-4.0.0.xsd">

    <modelVersion>4.0.0</modelVersion>

    <groupId>com.wls</groupId>

    <artifactId>project</artifactId>

    <version>0.0.1-SNAPSHOT</version>

    <packaging>jar</packaging>

    <name>project</name>

    <description>project</description>

    <parent>

        <groupId>org.springframework.boot</groupId>

        <artifactId>spring-boot-starter-parent</artifactId>

        <version>1.5.6.RELEASE</version>

        <relativePath/> <!-- lookup parent from repository -->

    </parent>

    <properties>

        <project.build.sourceEncoding>UTF-8</project.build.sourceEncoding>

        <project.reporting.outputEncoding>UTF-8</project.reporting.outputEncoding>

        <java.version>1.8</java.version>

    </properties>

    <dependencies>

        <dependency>

            <groupId>org.springframework.boot</groupId>

            <artifactId>spring-boot-starter</artifactId>

        </dependency>

        <dependency>

            <groupId>org.springframework.boot</groupId>

            <artifactId>spring-boot-starter-web</artifactId>

        </dependency>

        <dependency>

            <groupId>org.springframework.boot</groupId>

            <artifactId>spring-boot-starter-test</artifactId>

            <scope>test</scope>

        </dependency>

        <!-- mybatis依赖 -->

        <dependency>

            <groupId>org.mybatis.spring.boot</groupId>

            <artifactId>mybatis-spring-boot-starter</artifactId>

            <version>1.1.1</version>

        </dependency>

        <!-- MySql驱动 -->

        <dependency>

            <groupId>org.springframework.boot</groupId>

            <artifactId>spring-boot-starter-jdbc</artifactId>

        </dependency>

        <dependency>

            <groupId>org.apache.tomcat</groupId>

            <artifactId>tomcat-jdbc</artifactId>

        </dependency>

        <dependency>

            <groupId>mysql</groupId>

            <artifactId>mysql-connector-java</artifactId>

            <!--<version>5.1.21</version>-->

        </dependency>

        <!--Json库的依赖 -->

        <dependency>

            <groupId>com.alibaba</groupId>

            <artifactId>fastjson</artifactId>

            <version>1.1.43</version>

        </dependency>

        <!--    jpa     -->

        <dependency>

            <groupId>org.springframework.boot</groupId>

            <artifactId>spring-boot-starter-data-jpa</artifactId>

        </dependency>

        <dependency>

            <groupId>com.alibaba</groupId>

            <artifactId>druid</artifactId>

            <version>1.1.2</version>

        </dependency>

        <!--    devtools        -->

        <dependency>

            <groupId>org.springframework.boot</groupId>

            <artifactId>spring-boot-devtools</artifactId>

            <optional>true</optional>

        </dependency>

        <!--    mysql        -->

        <dependency>

            <groupId>mysql</groupId>

            <artifactId>mysql-connector-java</artifactId>

        </dependency>

        <!--    aop        -->

        <dependency>

            <groupId>org.springframework.boot</groupId>

            <artifactId>spring-boot-starter-aop</artifactId>

        </dependency>

        <!--    redis       -->

        <!--<dependency>

            <groupId>org.springframework.boot</groupId>

            <artifactId>spring-boot-starter-data-redis</artifactId>

        </dependency>-->

        <dependency>

            <groupId>org.springframework.boot</groupId>

            <artifactId>spring-boot-starter-redis</artifactId>

            <version>1.4.7.RELEASE</version>

        </dependency>

        <dependency>

            <groupId>org.springframework.session</groupId>

            <artifactId>spring-session-data-redis</artifactId>

        </dependency>

        <!--        activemq        -->

        <dependency>

            <groupId>org.springframework.boot</groupId>

            <artifactId>spring-boot-starter-activemq</artifactId>

        </dependency>

        <!--        thymeleaf       -->

        <dependency>

            <groupId>org.springframework.boot</groupId>

            <artifactId>spring-boot-starter-thymeleaf</artifactId>

        </dependency>

        <!--        mail        -->

        <dependency>

            <groupId>org.springframework.boot</groupId>

            <artifactId>spring-boot-starter-mail</artifactId>

        </dependency>

        <!--       swagger2     -->

        <dependency>

            <groupId>io.springfox</groupId>

            <artifactId>springfox-swagger2</artifactId>

            <version>2.7.0</version>

        </dependency>

        <dependency>

            <groupId>io.springfox</groupId>

            <artifactId>springfox-swagger-ui</artifactId>

            <version>2.7.0</version>

        </dependency>

        <dependency>

            <groupId>org.springframework.boot</groupId>

            <artifactId>spring-boot-test</artifactId>

        </dependency>

        <dependency>

            <groupId>junit</groupId>

            <artifactId>junit</artifactId>

        </dependency>

        <dependency>

            <groupId>org.springframework</groupId>

            <artifactId>spring-test</artifactId>

            <version>4.3.10.RELEASE</version>

        </dependency>

    </dependencies>

    <build>

        <plugins>

            <plugin>

                <groupId>org.springframework.boot</groupId>

                <artifactId>spring-boot-maven-plugin</artifactId>

            </plugin>

            <plugin>

                <groupId>org.mybatis.generator</groupId>

                <artifactId>mybatis-generator-maven-plugin</artifactId>

                <version>1.3.2</version>

                <configuration>

                    <verbose>true</verbose>

                    <overwrite>true</overwrite>

                </configuration>

            </plugin>

        </plugins>

    </build>

</project>
Controller
package com.wls.integrateplugs.hello.controller;

/**

 * Created by wls on 2017/8/24.

 */

import java.util.Locale;

import java.util.UUID;

import javax.servlet.http.HttpSession;

import com.sun.org.apache.regexp.internal.RE;

import org.springframework.ui.Model;

import org.springframework.ui.ModelMap;

import org.springframework.web.bind.annotation.RequestMapping;

import org.springframework.web.bind.annotation.RequestMethod;

import org.springframework.web.bind.annotation.RestController;

import org.springframework.web.servlet.ModelAndView;

import springfox.documentation.annotations.ApiIgnore;

@RestController

public class HelloController {

    @RequestMapping(value = "/hello",method = RequestMethod.GET)

    public String hello(Locale locale, Model model) {

        return "hello world";

    }

    @RequestMapping("/helloWorld")

    public String index() {

        return "Hello World";

    }

    /**

     * 使用@RestController时,则使用ModelAndView显示页面

     * @param map

     * @return

     */

    @ApiIgnore

    @RequestMapping(value = "/helloThymeleaf",method = RequestMethod.GET)

    public ModelAndView index(ModelMap map) {

        ModelAndView mv = new ModelAndView("index");

        map.addAttribute("name","王老师");

        map.addAttribute("host", "http://blog.didispace.com");

        return mv;

    }

    /**

     * 共享session

     * @param session

     * @return

     */

    @RequestMapping(value = "/uid",method = RequestMethod.GET)

    String uid(HttpSession session) {

        UUID uid = (UUID) session.getAttribute("uid");

        if (uid == null) {

            uid = UUID.randomUUID();

        }

        session.setAttribute("uid", uid);

        return session.getId();

    }

}
html
<!DOCTYPE HTML>
<html xmlns:th="http://www.thymeleaf.org">
<head lang="en">
<title>hello</title>
<meta http-equiv="Content-Type" content="text/html; charset=UTF-8" />
</head>
<body>
<!--/*@thymesVar id="name" type="java.lang.String"*/-->
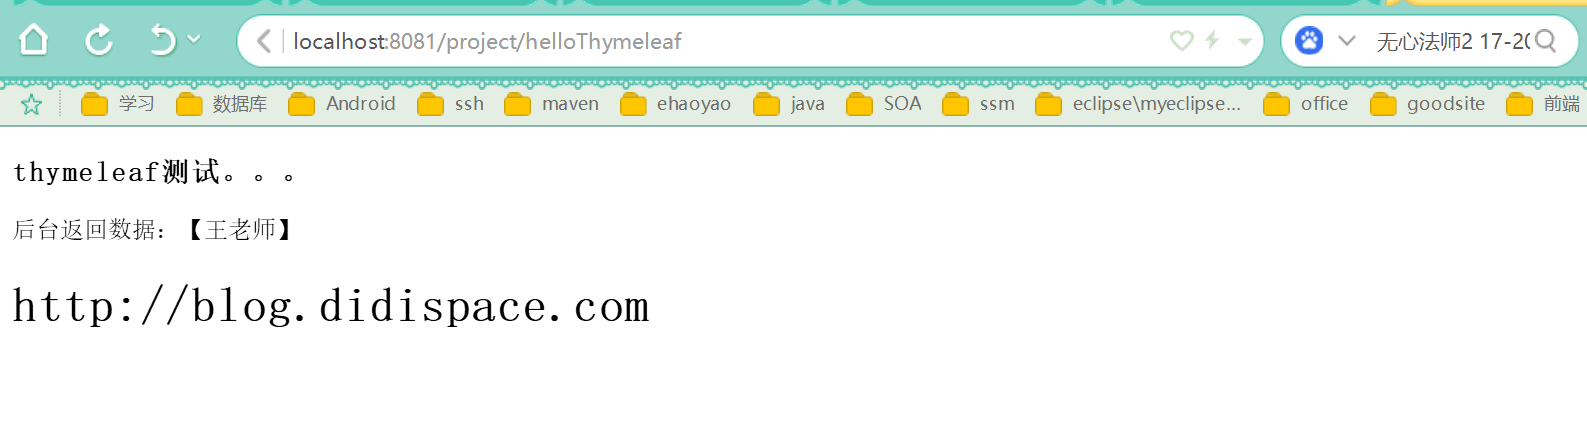
<h3>thymeleaf测试。。。</h3>
<p th:text="'后台返回数据:【' + ${name} + '】'" ></p>
<!--/*@thymesVar id="host" type="java.lang.Object"*/-->
<h1 th:text="${host}">Hello World</h1>
</body>
</html>
如上页面,直接打开html页面展现Hello World,但是启动程序后,访问http://localhost:8081/project/helloThymeleaf,则是展示Controller中host的值:http://blog.didispace.com,做到了不破坏HTML自身内容的数据逻辑分离。
更多Thymeleaf的页面语法,还请访问Thymeleaf的官方文档查询使用。
Thymeleaf的默认参数配置
如有需要修改默认配置的时候,只需复制下面要修改的属性到application.properties中,并修改成需要的值,如修改模板文件的扩展名,修改默认的模板路径等。
application-dev.yml
spring:

  datasource:

    primary:

      driver-class-name: com.mysql.jdbc.Driver

  #    url: jdbc:mysql://192.168.159.128:3306/mydb

      url: jdbc:mysql://192.168.223.128:3306/db1

      username: wls

      password: Wls141215!

    secondary:

      driver-class-name: com.mysql.jdbc.Driver

  #    url: jdbc:mysql://192.168.159.128:3306/mydb

      url: jdbc:mysql://192.168.223.128:3306/db2

      username: wls

      password: Wls141215!

  jpa:

    hibernate:

      ddl-auto: update

    show-sql: true

  thymeleaf:

    mode: HTML5

    encoding: utf-8

    content-type: text/html

    cache: false

    prefix: classpath:/templates/

    suffix: .html

    check-template-location: true

  output:

    ansi:

      enabled: always

  mvc:

    view:

      prefix: /templates/

      suffix: .*

  mail:

    host: smtp.qq.com

    username: 158822436@qq.com

    password: Wls141215sxj

    properties:

      mail:

        smtp:

          auth: true

          starttls:

            enable: true

            required: true

  redis:

    database: 0

#    host: 192.168.159.128

    host: 192.168.223.128

    port: 6379

    password: Wls141215!

    pool:

      # 连接池最大连接数(使用负值表示没有限制)

      max-active: 8

      # 连接池最大阻塞等待时间(使用负值表示没有限制)

      max-wait: -1

      # 连接池中的最大空闲连接

      max-idle: 8

      # 连接池中的最小空闲连接

      min-idle: 0

    # 连接超时时间(毫秒)

    timeout: 0

mybatis:

  type-aliases-package: com.wls.integrateplugs.mybatis.model

  mapper-locations: classpath:static/sqlmapper/*.xml

  check-config-location: true

#  config-location: classpath:mybatis/mybatis-config.xml

logging:

  level:

    com.wls.shopmall: debug

age:  18

name: 张三

content: "name: ${name}, age: ${age}"

cron: 0/3 * * * * ?

com.diy.title: 纯洁的微笑

com.diy.description: 分享生活和技术

orderInfo:

  orderNumber: 1245

  receiver: wls

  province: 北京

  city: 北京

  area: 大兴区

  street: 广平大街9号

  addressDetail:  九州通医药有限公司

  orderStatus:  1

  invoiceInfo:

      invoiceTitle: 北京好药师大药房连锁有限公司

      invoiceType: 1

  details:

    - orderDetail:

        productId:  1

        productCode:  BC001

        productName:  商品1

        unitPrice:  10.01

        count:  1

#   - orderDetail:

#        productId:  2

#        productCode:  BC002

#        productName:  商品2

#        unitPrice:  10.01

#        count:  1

com.didispace.blog:

  name: 程序猿DD

  title: Spring Boot教程

  desc: ${com.didispace.blog.name}正在努力写《${com.didispace.blog.title}》

# 随机字符串

  value: ${random.value}

# 随机int

  number: ${random.int}

# 随机long

  bignumber: ${random.long}

# 10以内的随机数

  test1: ${random.int(10)}

# 10-20的随机数

  test2: ${random.int[10,20]}
application.yml
server:

  port: 8081

  context-path: /project

spring:

  profiles:

    active: dev

#spring.jpa.hibernate.naming.physical-strategy: org.hibernate.boot.model.naming.PhysicalNamingStrategyStandardImpl
支持JSP的配置
Spring Boot并不建议使用,但如果一定要使用,可以参考此工程作为脚手架:JSP支持
Spring Boot☞ 使用Thymeleaf模板引擎渲染web视图的更多相关文章
- Spring Boot☞ 使用freemarker模板引擎渲染web视图
效果图 代码 package com.wls.integrateplugs.hello.controller; /** * Created by wls on 2017/8/24. */ import ...
- SpringBoot:2.SpringBoot整合Thymeleaf模板引擎渲染web视图
在Web开发过程中,Spring Boot可以通过@RestController来返回json数据,那如何渲染Web页面?Spring Boot提供了多种默认渲染html的模板引擎,主要有以下几种: ...
- Spring Boot整合 Thymeleaf 模板引擎
什么是Thymeleaf Thymeleaf是一款用于渲染XML.XHTML.HTML5内容的模板引擎.类似Velocity,FreeMaker模板引擎,它也可以轻易的与Spring MVC等Web框 ...
- Spring Boot2(五):使用Spring Boot结合Thymeleaf模板引擎使用总结
一.Thymeleaf概述 一般来说,常用的模板引擎有JSP.Velocity.Freemarker.Thymeleaf . SpringBoot推荐的 Thymeleaf – 语法更简单,功能更强大 ...
- Spring Boot整合Thymeleaf模板引擎
什么是Thymeleaf Thymeleaf是一款用于渲染XML.XHTML.HTML5内容的模板引擎.类似Velocity,FreeMaker模板引擎,它也可以轻易的与Spring MVC等Web框 ...
- Spring Boot实战:模板引擎
虽然现在很多开发,都采用了前后端完全分离的模式,即后端只提供数据接口,前端通过AJAX请求获取数据,完全不需要用的模板引擎.这种方式的优点在于前后端完全分离,并且随着近几年前端工程化工具和MVC框架的 ...
- Spring Boot中使用模板引擎Thymeleaf
一.Thymeleaf简介 Thymeleaf[taɪm lif],百里香叶,是一个流行的模板引擎,该模板引擎采用Java语言开发.Java中常见的模板引擎有Velocity.Freemaker.Th ...
- spring boot 整合Thymeleaf模板
SpringBoot 是为了简化 Spring 应用的创建.运行.调试.部署等一系列问题而诞生的产物,自动装配的特性让我们可以更好的关注业务本身而不是外部的XML配置,我们只需遵循规范,引入相关的依赖 ...
- Spring 学习笔记(十)渲染 Web 视图 (Apache Tilesa 和 Thymeleaf)
使用Apache Tiles视图定义布局 为了在Spring中使用Tiles,需要配置几个bean.我们需要一个TilesConfigurer bean,它会负责定位和加载Tile定义并协调生成Til ...
随机推荐
- Timesten 日常管理命令合集
Timesten 日常管理命令合集 以下所有操作都是基于TT 11 版,早前版本本人没用过,命令是否适用我不清楚啊! 各类服务管理 一.TT的启停 停服务: 1.停止复制与cache 进程: ...
- 013:Rank、视图、触发器、MySQL内建函数
一. Rank 给出不同的用户的分数,然后根据分数计算排名 (gcdb@localhost) 09:34:47 [mytest]> create table t_rank(id int,scor ...
- 使用wifi网卡笔记4---工具dhcp及全自动使用wifi
dhcp : 使得WIFI网卡动态获取IP ·1.源码获取 输入dh看有哪些应用程序,输入dhclient -v查看一下相关信息,源码获取的网址 2.开发环境配置 解压 tar xzf dhcp-4. ...
- jQuery笔记——UI
jQuery UI 的官网网站为:http://jqueryui.com/,我们下载最新版本的即可,使用JQueryUI中的样式比我们使用原生的HTML要好看,还会有一些封装好的特效,JQueryUI ...
- 【学习笔记】Markdown入门
Markdown入门 最近把博客园的编辑器换成了Markdown. 语法入门 Markdown确实好用,本来我想总结一下常用Markdown的语法,但有下面这篇文章在,我实在是不敢画蛇添足了. 基 ...
- Java四舍五入 保留小数
java 四舍五入保留小数 // 方式一: double f = 3.1516; BigDecimal b = new BigDecimal(f); double f1 = b.setScale( ...
- .NET自带IOC容器MEF之初体验(转)
本文主要把MEF作为一种IOC容器进行讲解,.net中可用的IOC容器非常多,如 CastleWindsor,Unity,Autofac,ObjectBuilder,StructureMap,Spri ...
- OD 实验(一) - 修改程序标题
需要修改的程序 把 I love fishc.com 修改为 hello world sch01ar 用 OD 打开程序 在程序入口处开始一直按 F8 运行程序,看看在哪里弹出对话框 运行到该地址的时 ...
- html中的一些常用的样式标签
html中的一些常用的样式标签 <p>这里是文本,<mark>高亮</mark></p> <strong>加粗,加重语气</stron ...
- 跟我一起学kafka(一)
从昨天下午接到新任务,要采集一个法院网站得所有公告,大概是需要采集这个网站得所有公告列表里得所有txt内容,txt文件里边是一件件赤裸裸得案件,记录这案由,原告被告等相关属性(不知道该叫什么就称之为属 ...